


What is DNS cache? DNS cache is the temporary name-to-address memory kept by your browser, operating system, router, or recursive resolver so a site like example.com can load without repeating the whole lookup every time. To clear it, you flush the cache layer that is holding the wrong answer, then retest the domain against a known resolver. We at 1Byte treat DNS cache like a helpful shortcut with a short fuse: it is useful when it is fresh, and maddening when it keeps pointing to an old server. This tutorial shows you how to check, clear, and retest DNS cache on Windows, macOS, Linux, major browsers, and public resolvers.
What Is DNS Cache and How to Check and Clear It

DNS cache is a temporary store of recent DNS answers, and the practical fix is to identify the cache layer, view the answer if possible, flush the right layer, and retest the domain. Start with the closest cache first: browser, operating system, hosts file, router, then public or ISP resolver. If you recently moved a website from 203.0.113.10 to 198.51.100.25, your goal is simple: make every layer stop returning the old address. We prefer this order because it avoids needless router resets and avoids blaming a hosting provider before the local machine has been checked.
| Cache layer | Where to check first | Typical sign of trouble | Best first action |
|---|---|---|---|
| Browser | Chrome, Edge, Firefox, ChromeOS | One browser fails, another works | Clear browser host entries |
| Operating system | Windows, macOS, Ubuntu, Linux | Most apps resolve the old address | Flush the local resolver |
| Hosts file | System hosts file path | Only one device is wrong | Remove the override line |
| Recursive resolver | Google Public DNS, ISP DNS, office DNS | Many users on one resolver are wrong | Flush resolver cache or wait for TTL |
FURTHER READING: |
| 1. What Is Internet Control Message Protocol (ICMP) and How Does It Work? |
| 2. What Is IPsec VPN? How It Works and Main Uses |
| 3. What Is an Internet Exchange Point and How It Works |
1. Identify Which Cache Layer May Be Holding the Wrong DNS Answer
Compare the failing app, device, and network before you flush anything. Open the same domain in another browser, another device, and another network, using a realistic test such as https://www.{your-domain.com}. If Chrome on your laptop fails but Safari on the same laptop works, start with Chrome or Edge host entries. If every app on the laptop fails but your phone on mobile data works, start with the operating system or the local network.
Use this quick pattern. One browser means browser cache. One device means local resolver or hosts file. One Wi-Fi network means router, office resolver, or ISP resolver. Everyone on every network means the authoritative DNS record may still be wrong, or its TTL has not expired. In our hosting work, the most common real-world case is a site migration where the domain’s A record changed, but one local machine keeps an old answer long after the control panel shows the new value.
2. View the Cached Record Before You Clear Anything
Check the cached answer before clearing it so you know whether DNS cache is truly the problem. Use www.{your-domain.com} as the test name and compare the result with the address you expect, such as 198.51.100.25. If the cache already shows the correct answer, flushing that layer will probably not fix the issue. We like saving the “before” result because it turns a vague complaint, such as “the site is broken,” into a precise finding.
Check Windows in Command Prompt or PowerShell
Run ipconfig /displaydns in Command Prompt or PowerShell to view the Windows DNS client resolver cache. Microsoft documents /displaydns as the option that displays the resolver cache, including hosts-file entries and recently obtained records, in its Windows command reference. Open Start, type Command Prompt, select Open, and run:
ipconfig /displaydnsTo narrow the output, run this in PowerShell:
ipconfig /displaydns | Select-String "www.{your-domain.com}" -Context 0,6You should see the record name, record type, TTL, and IP address if Windows has that entry cached. The common failure point is running the command after the cache has already expired, which means the domain may not appear even though it was cached earlier.
Check macOS in Console and the System Log
Inspect macOS name resolution with dscacheutil, scutil, and Console rather than expecting a simple Windows-style cache list. Apple’s open source notes describe mDNSResponder as the daemon macOS uses for DNS resolution and Bonjour-related discovery, which explains why macOS checks feel different from Windows checks Apple source notes. Open Applications > Utilities > Terminal, then query the name:
dscacheutil -q host -a name www.{your-domain.com}scutil --dnsFor live inspection, open Applications > Utilities > Console, type mDNSResponder in the search field, then retry the site. In Terminal, you can also run:
log stream --predicate 'process == "mDNSResponder"' --infoYou should see resolver activity when you retry the domain, although modern macOS may hide some values for privacy. The common failure point is expecting macOS to print a clean table of cached names, which it usually does not provide on recent releases.
Check Chrome or Edge for Browser-Level Entries
Open the browser networking page and test whether the browser layer is holding a different answer. In Chrome or Edge, type this into the address bar:
chrome://net-internals/#dnsFor Microsoft Edge, this also works:
edge://net-internals/#dnsUse the DNS lookup field if it appears, enter www.{your-domain.com}, and compare the answer with your expected IP address. On newer Chromium builds, this page is more useful for clearing host entries than for listing every cached record, so do not panic if you do not see a full cache table. You should at least see the Clear host cache button, which confirms you are in the right place.
3. Flush the Local Cache on Your Device or Browser
Flush the cache layer that showed the wrong answer, then retry the same domain. Use the official command where the platform provides one. If you are not sure which layer is wrong, flush the browser first, then the operating system. This order is safer than changing DNS records repeatedly, which can make troubleshooting muddy.
Flush Windows From an Administrator Command Window
Run ipconfig /flushdns from an Administrator Command Prompt or Administrator PowerShell window. Open Start, type Command Prompt, choose Run as administrator, select Yes in User Account Control, and run:
ipconfig /flushdnsYou should see this success message:
Successfully flushed the DNS Resolver Cache.Now run:
Resolve-DnsName -Name www.{your-domain.com} -Type AYou should see the new A record, such as 198.51.100.25. The common failure point is opening a normal command window instead of an Administrator window, especially on locked-down office laptops.
Flush macOS From Terminal
Run sudo dscacheutil -flushcache; sudo killall -HUP mDNSResponder in Terminal. Open Applications > Utilities > Terminal, then run:
sudo dscacheutil -flushcache; sudo killall -HUP mDNSResponderEnter your Mac password when prompted. The dscacheutil utility includes a documented -flushcache option in the macOS manual page system manual entry. You usually will not see a success message, so retest with:
dscacheutil -q host -a name www.{your-domain.com}You should see the current address, or the command should query again instead of reusing the old result. The common failure point is thinking the command failed because Terminal stayed quiet.
Flush Ubuntu or Linux With the Active DNS Service
Run sudo resolvectl flush-caches if your Linux system uses systemd-resolved. On Ubuntu and many systemd-based distributions, open Terminal and run:
resolvectl statussudo resolvectl flush-cachesThe Ubuntu manual explains that resolvectl flush-caches flushes the DNS resource record caches maintained by the local service Ubuntu manual page. To check whether the service is active, run:
systemctl is-active systemd-resolvedYou should see active if that service is handling local resolution. If your system uses nscd or dnsmasq instead, restart the active service:
sudo systemctl restart nscdsudo systemctl restart dnsmasqYou should be able to resolve www.{your-domain.com} again with the expected answer. The common failure point is copying old commands such as systemd-resolve --flush-caches on systems where the newer resolvectl command is installed instead.
Clear Chrome, Edge, Firefox, or ChromeOS Host Entries
Open the browser’s internal networking page and click the exact cache-clearing button. In Chrome or ChromeOS, enter:
chrome://net-internals/#dnsClick Clear host cache. Then open:
chrome://net-internals/#socketsClick Flush socket pools. In Edge, use:
edge://net-internals/#dnsedge://net-internals/#socketsFor Firefox, enter:
about:networking#dnsClick Clear DNS Cache. Mozilla support identifies about:networking#dns as the place to access Firefox’s in-memory entries support forum answer. You should see the problem domain resolve again after a reload, especially if only that browser was wrong.
4. Remove Stale Hosts File Entries That Override DNS
Open the hosts file and delete any line that maps your domain to an old IP address. On Windows, open Start, type Notepad, choose Run as administrator, then open this file from File > Open:
C:\Windows\System32\drivers\etc\hostsChange the file type filter from Text Documents (*.txt) to All Files (*.*). Remove a stale line such as:
203.0.113.10 www.{your-domain.com}On macOS or Linux, open Terminal and run:
sudo nano /etc/hostsDelete the stale mapping, press Control + O to save in nano, press Enter, then press Control + X to exit. Microsoft describes the Windows hosts file as a plain-text system file that maps hostnames to IP addresses support article. You should no longer see the old IP returned after you flush the operating system cache again.
5. Clear Resolver or Public DNS Caches When Record Changes Still Have Not Landed
Flush the public resolver only after your local machine and hosts file are clean. Open the Google Public DNS flush page, enter {your-domain.com} in Domain Name, choose a record type such as A, AAAA, or CNAME, then click Flush Cache. Google provides this public form for refreshing entries in Google Public DNS. Use this when a lookup against 8.8.8.8 still returns the old answer.
On Windows, test Google Public DNS with:
Resolve-DnsName -Name www.{your-domain.com} -Type A -Server 8.8.8.8On macOS or Linux, test with:
dig @8.8.8.8 www.{your-domain.com} AYou should see the updated record after the resolver refreshes. The common failure point is flushing the public resolver while the authoritative DNS record is still wrong, which only makes the resolver fetch the wrong answer again.
Flush the Main Domain Before Subdomains in Google Public DNS
Flush {your-domain.com} before www.{your-domain.com} when nameservers or DNS hosting changed recently. Enter {your-domain.com}, choose NS or the affected record type, and click Flush Cache. Then enter www.{your-domain.com}, choose A or CNAME, and click Flush Cache again.
Google’s developer guidance says to flush the registered domain before subdomains when the registrar or DNS hosting changed recently developer guidance. You should see subdomain lookups start following the new delegation after the parent domain is refreshed. The common failure point is flushing only www while Google still has old nameserver information for the parent domain.
6. Reset Windows Networking Components If the DNS Cache Error Persists
Run the Windows networking reset commands only after normal DNS flushing fails. Open Start, type Command Prompt, choose Run as administrator, then run these commands one at a time:
netsh winsock resetnetsh int ip resetipconfig /releaseipconfig /renewipconfig /flushdnsRestart the computer after the commands finish. Microsoft’s Windows guidance lists Winsock reset, TCP/IP reset, IP release and renew, and resolver flushing as commands for connection troubleshooting network repair steps. You should reconnect to the network and resolve www.{your-domain.com} without the stale address.
The common failure point is running these commands remotely on a machine you cannot physically reach. A network reset can temporarily disconnect the session, so use it carefully on servers and remote workstations.
7. Retest the Domain and Allow Time for Propagation if DNS Records Recently Changed
Retest the domain against your local resolver, a public resolver, and the authoritative result before declaring the issue fixed. On Windows, run:
Resolve-DnsName -Name www.{your-domain.com} -Type AResolve-DnsName -Name www.{your-domain.com} -Type A -Server 8.8.8.8Resolve-DnsName -Name www.{your-domain.com} -Type A -Server 1.1.1.1On macOS or Linux, run:
dig www.{your-domain.com} Adig @8.8.8.8 www.{your-domain.com} Adig @1.1.1.1 www.{your-domain.com} AYou should see the expected IP address, such as 198.51.100.25, in all results. If one resolver still shows the old answer, check the TTL on that answer and wait for it to expire. If every resolver still shows the old answer, the authoritative DNS record is probably still wrong.
How DNS Cache Turns Domain Names Into Faster Connections
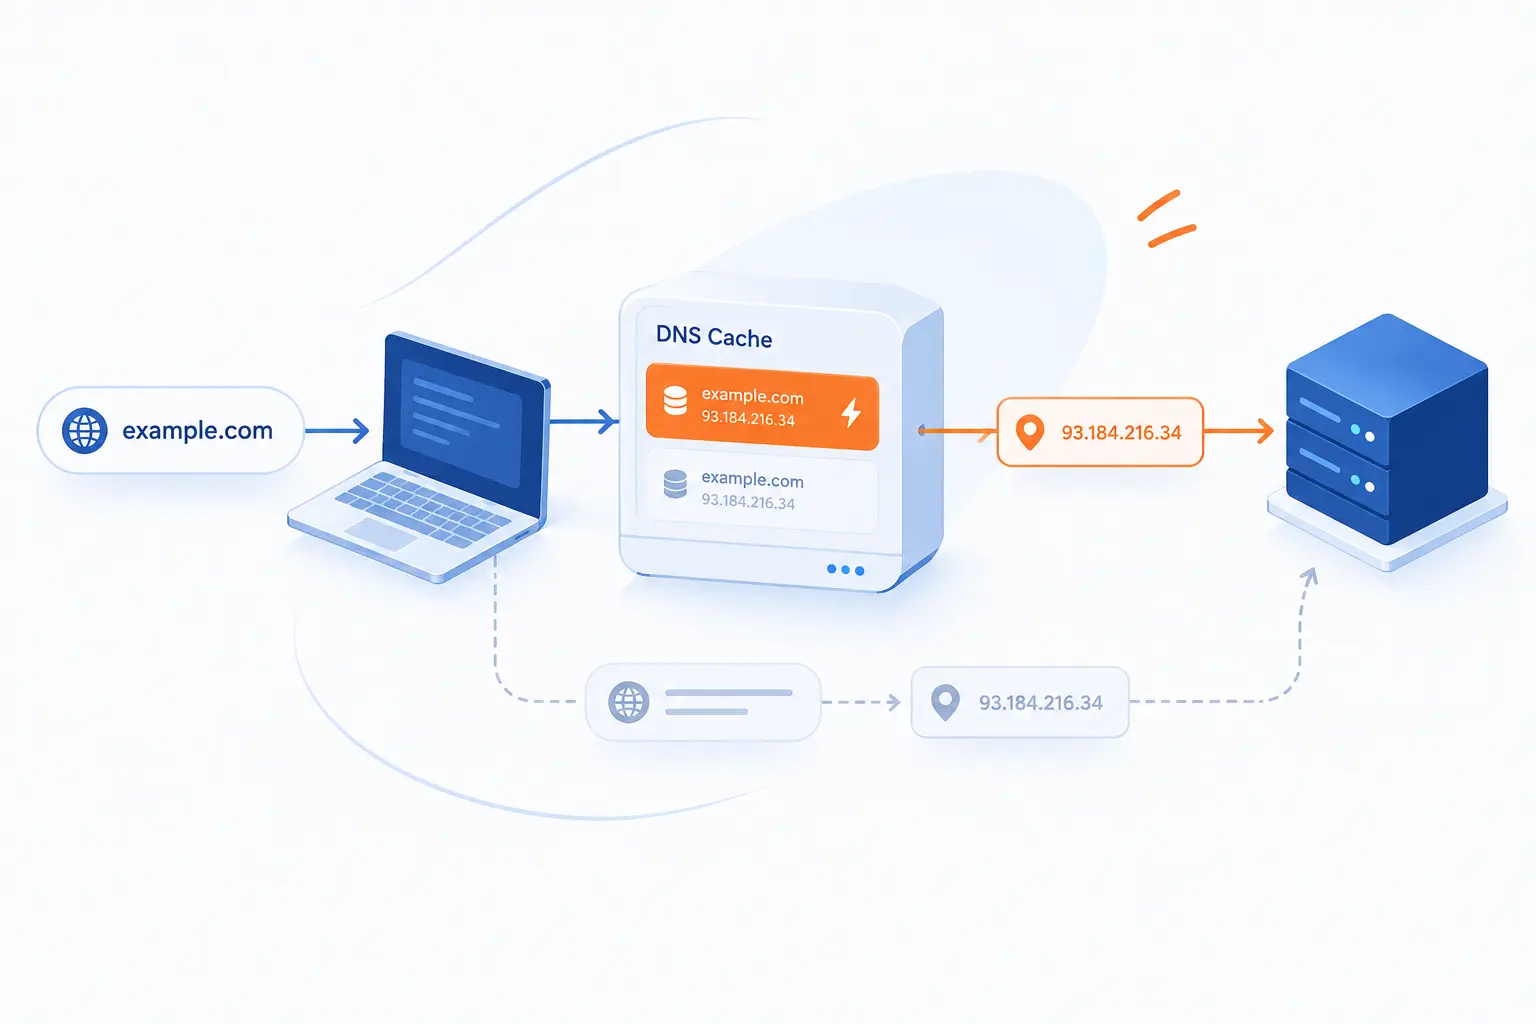
DNS cache speeds up browsing by reusing recent answers instead of repeating a full lookup every time you visit a site. When you type a domain, your device needs an IP address before it can connect. Cache lets that answer come from memory when it is still valid. The trick is that cached answers exist in several places, so the answer you get may depend on your browser, your operating system, your router, or your configured resolver.
Match Domain Names to IP Addresses Without Repeating Every Lookup
DNS cache stores a recent domain answer so the same lookup can be reused. If www.{your-domain.com} resolves to 198.51.100.25, your computer can keep that answer briefly instead of asking upstream servers again. That saves a round trip before the browser opens the TCP or QUIC connection.
We think of it as a sticky note on the desk. It is not the original source of truth. It is just a remembered answer. When the sticky note is fresh, it helps. When the website moves to a new server, that same note can send you to the wrong building.
Store DNS Records in Browsers, Operating Systems, and Recursive Resolvers
DNS answers can be cached by the browser, the operating system, and the recursive resolver. A browser may keep its own host entries. Windows, macOS, and Linux may also keep local resolver state. Your ISP, office DNS server, or public resolver may keep another copy.
This layered design is why one person sees the new website and another person sees the old one. Both people may be using the same domain, but not the same cached answer. In hosting migrations, we always ask: “Which layer is answering?” That question cuts through a lot of noise.
Use TTL Values to Control How Long Cached Answers Stay Valid
Set and read TTL values to understand how long a resolver may keep an answer. The DNS standards describe TTL as the time a resource record can be kept before the source should be consulted again original specification. A lower TTL before a planned migration usually helps changes land sooner. A higher TTL can reduce repeated lookups, but it can also make old answers linger.
For example, before moving www.{your-domain.com} to a new cloud server, we would lower the TTL ahead of the move, wait for old caches to age out, then change the A record. After the new address is stable, we would raise the TTL again if that fits the site’s operating pattern. This is boring work, but boring DNS work is often good DNS work.
Why Cached Data Helps Until It Starts Causing Problems

Cached DNS data is useful because it reduces repeated lookups, but it becomes a problem when the cached answer is stale, corrupted, poisoned, or overridden locally. The same shortcut that makes repeat visits faster can also keep sending a user to an old server. Most DNS cache problems are not dramatic security incidents. They are ordinary timing mismatches after a record change, a bad hosts file line, or a browser holding onto a result longer than expected.
Speed Up Repeat Visits and Reduce Load on DNS Infrastructure
DNS cache speeds up repeat visits by answering locally or nearby instead of asking the full DNS chain again. Recursive resolvers also reduce load on authoritative infrastructure because they can answer repeated questions from cache. ICANN’s root server FAQ explains that recursive resolvers use cached information and only contact root servers when they lack unexpired information root server FAQ.
That matters at scale. A busy site may receive many visits from the same office, campus, or mobile network. Without caching, resolvers would ask the same upstream questions again and again. With caching, the first lookup does the work and later users benefit.
Run Into Stale IP Addresses After a Server Move or Record Update
Expect stale answers when a DNS record changed before old TTLs expired. A classic example is moving a WordPress site from shared hosting to a cloud server. The control panel may show the new A record, but a resolver that cached the old record can keep returning the previous IP until the TTL runs out.
This is why we do not recommend changing the same DNS record over and over while troubleshooting. Each change can create a new timeline. Instead, confirm the authoritative record, flush what can be flushed, then wait out the remaining caches. DNS rewards patience more often than button-mashing.
Connect Bad Cache Entries to Site Failures and Network Connectivity Errors
Link the symptom to the cached answer before rebuilding the whole site. A stale A record can produce connection timeouts, old website content, SSL certificate warnings, or “server not found” errors. A stale CNAME can send a subdomain to the wrong service. A stale negative answer can make a domain look nonexistent even after it has been created.
Here is our practical test: compare a failing lookup with a working resolver. If Resolve-DnsName -Name www.{your-domain.com} returns 203.0.113.10, but Resolve-DnsName -Name www.{your-domain.com} -Server 8.8.8.8 returns 198.51.100.25, your local path is likely the issue. If both return the old address, look higher in the chain.
Watch for Cache Poisoning, Corruption, and Other Wrong Answers
Treat unexpected DNS answers as a security signal, not just a nuisance. DNS cache poisoning happens when a resolver accepts a forged or malicious answer and serves it to users. Local corruption is less sinister, but it can still cause wrong addresses, broken applications, or failed certificate checks.
When the answer points to an IP you do not control, stop and verify. Check the authoritative DNS zone, scan the hosts file, inspect browser secure DNS settings, and test from a trusted network. If the result looks suspicious, do not enter passwords on the affected site until you know the address is legitimate.
FAQ
DNS cache questions usually come down to safety, visibility, privacy, timing, and troubleshooting. The short answer is that clearing DNS cache is normally safe and reversible because the device can fetch fresh answers. It does not delete the website itself or change your domain records. Still, it helps to know what each command does before you run it.
Is It Safe to Clear DNS Cache?
Yes, it is safe to clear DNS cache on a normal personal device. Your computer or browser will request fresh DNS answers the next time you visit a site. The first load after clearing may feel slightly slower because the lookup has to happen again.
How Do I Check My DNS Cache?
On Windows, run ipconfig /displaydns in Command Prompt or PowerShell. On macOS, use dscacheutil -q host -a name www.{your-domain.com} and inspect mDNSResponder activity in Console. In Chrome or Edge, use chrome://net-internals/#dns or edge://net-internals/#dns to test or clear browser-level entries.
Does Clearing DNS Cache Delete History?
No, clearing DNS cache does not delete your browser history. It removes temporary name-resolution answers, not the list of pages you visited. If you want to remove browsing history, use the browser’s history or privacy controls separately.
What Does It Mean When There Is a Problem With the DNS Cache?
It means your device, browser, or resolver may be returning an incorrect, expired, or unwanted DNS answer. The result can be an old website, a failed connection, or a domain that appears unavailable. The fix is to compare the cached answer with the correct record, flush the bad layer, and retest.
How Long Does DNS Cache Last?
DNS cache usually lasts until the record’s TTL expires or until the cache is cleared. The exact time depends on the record owner’s TTL setting and the resolver’s behavior. If you just changed hosting, check the TTL and expect some users to update faster than others.
How 1Byte Helps With DNS, Security, and Hosting
1Byte helps by giving domain and hosting customers the practical building blocks that DNS cache troubleshooting depends on: domain registration, SSL certificates, WordPress hosting, shared hosting, cloud hosting, and cloud servers. We are also an AWS Partner, which matters when customers want cloud infrastructure behind their DNS records. DNS cache itself is temporary, but the records behind it need a stable destination. Our view is simple: good DNS work starts with clear ownership of the domain, the certificate, and the server the record points to.
| Need | Relevant 1Byte service | How it connects to DNS cache |
|---|---|---|
| Point a name to a site | Domain registration | The domain’s DNS records become the source caches copy |
| Secure the hostname | SSL certificates | The certificate must match the domain users reach |
| Host a website | WordPress hosting, shared hosting, cloud hosting | A, AAAA, or CNAME records send visitors to the hosting target |
| Control the server | Cloud servers | DNS can point directly to the server address you manage |
Register Domains and Manage DNS Changes With Less Friction
Register the domain first, then keep DNS ownership clear before making record changes. When a customer asks us why one user sees an old site, we first want to know where the domain is registered and where its DNS zone is managed. If those are split across vendors, troubleshooting takes longer. A clean setup makes it easier to confirm whether www.{your-domain.com} should point to a shared hosting address, a WordPress hosting target, or a cloud server IP.
Our practical advice is to document each change. Write down the old value, the new value, the record type, and the TTL. That small habit makes cache troubleshooting calmer, especially when multiple people are touching the domain.
Protect WordPress, Shared Hosting, and Cloud Hosting With SSL Certificates
Install the SSL certificate for the exact hostname users will reach after DNS resolves. If DNS cache sends a visitor to an old server, the browser may show a certificate mismatch even when the new hosting account is configured correctly. That does not always mean the certificate is bad. It may mean the user is still reaching the wrong destination.
For WordPress hosting, shared hosting, and cloud hosting, we look at DNS and SSL together. The domain should resolve to the intended hosting target, and the certificate should cover that same hostname. When those two pieces agree, browser errors become much easier to isolate.
Scale to Cloud Servers When You Need More Control, Flexibility, and Performance
Move to cloud servers when you need direct control over the server address your DNS records point to. With a cloud server, the A record commonly points to a specific IP address, such as 198.51.100.25. That makes cache testing straightforward because you can compare the returned address with the server address you expect.
As an AWS Partner, 1Byte can connect the DNS conversation to cloud infrastructure planning without turning a simple record change into a mystery. Our preference is to plan DNS TTLs before a migration, verify the new server, update the record once, and then monitor propagation. That is less exciting than guessing, and far more reliable.







Conclusion
DNS cache is the temporary memory that helps domains resolve faster, and clearing it is often the quickest way to fix stale website routing after a DNS change. Start close to the user: browser cache, operating system cache, hosts file, then resolver cache. Check the answer before and after each change so you know what actually moved. If the authoritative record is correct but one layer still returns the old address, flush that layer or wait for its TTL to expire.
Our final 1Byte advice is simple: do not troubleshoot DNS by guesswork. Write down the expected record, run the commands in this guide, and compare each result. If you are preparing a hosting move, lower TTLs ahead of time and verify SSL after the record changes land. Ready for the next step? Pick one domain you manage and run the Windows, macOS, or Linux check now so you know what your device is really resolving.