

Experiencing difficulties logging into Roundcube Webmail within cPanel? This article is here to help you troubleshoot. RoundCube webmail is a web-based, multilingual IMAP client that has an interface similar to that of a desktop application. It has all the features you would expect from an email client, such as an address book, folder manager, message search, and spell checker (among others). Horde IMP can be replaced by RoundCube Webmail, a web-based email system interface, for users of Postfix mail servers instead of Horde. It offers every feature you might anticipate from a contemporary email client, including an address book, folder management, message searching, and spell-checking. The RoundCube Webmail client offers a light and straightforward design and is quick and simple to use.
In this guide, I’ll walk you through the steps of configuring domain-based email in RoundCube using cPanel on 1Byte’s shared hosting.
The 4 Steps to Setup Mail Server Roundcube Webmail On Cpanel

1. Prerequisites
- A Shared Hosting along with Domain Name
- If you don’t have none of them. You can purchase them from 1Byte’s site
2. Switch Your Nameserver to Basic DNS
- Go to User Dashboard
- Select Domain on the left menu bar
- Choose the Manage button at the domain where you want to set up email
- At the Nameserver area, switch to Basic DNS

3. Add DNS Records
For example, my domain is 1byte-demo.uk, and I would like to have an email [email protected] based on this domain
First of all, you need to add A Record for your website
#Add A Record for your site
Type: A Record
Host: @
Value: 220.158.232.16
TTL: 30 min
Type: A Record
Host: @
Value: 220.158.232.16
TTL: 30 min
#Add A Record for your mail
Type: A Record
Host: mail
Value: 220.158.232.16
TTL: 30 min
#Add TXT Record for your mail
Type: TXT Record
Host: default._domainkey
Value: v=DKIM1; k=rsa; p=MIIBIjANBgkqhkiG9w0BAQEFAAOCAQ8AMIIBCgKCAQEAsmZJ6TO/BmM43TGeIUUgK5g4z+UuayjZheE2Cxjr7Ib5cYy/8NTkiqHMoHrkVuNEX96qb9VR1yVOm2fqJxm/bBpsbCA9KQpQrlbnmJQ6cI5BwOylEjnKYtgnEIFiR63fS4R3Xxkdi9mn73CaElAoVGJce1ixzR4rdnx/gKr43B52yaCBeOG6GkUU/hqMp3sMsVNceZ139PwKFqN7EQ85PK8cWcy8oLFn7tG/qzxaxR3pwZKeecj2SBanWzHly4tvScqCPMTc5M7YbEC/L5TQZX7L7nda8fvjehkGYQ0rdkZC7vFuHPMDDOPl27CMhhB+LnnWUQU1cXToxcK5ngrjVQIDAQAB;
TTL: 30 min
Type: TXT Record
Host: @
Value: v=spf1 +mx +a +ip4:220.158.232.16 ~all
TTL: 30 min
With the above record and its value added. The end outcome will be similar to the picture below

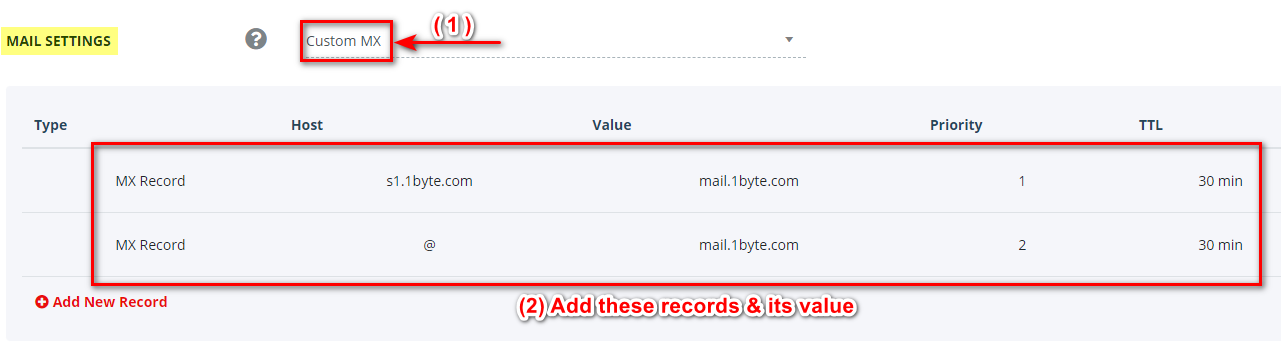
In the Mail Settings section please choose Custom MX and add two MX records for your email
#Add MX Record for your mail
Type: MX Record
Host: @
Value: mail.1byte.com
TTL: 30 min
Type: MX Record
Host: s1.1byte.com
Value: mail.1byte.com
TTL: 30 min
After adding Custom MX the result will look like the image below
BIG NOTE:
As you can see in the 1Byte’s YouTube, I set TTL = 1 minute for testing purposes only, since I want the DNS system to clear the cache and update the current settings every 1 minute. However, for production sites, this value will be ineffective since you are abusing the DNS System, causing it to become overcrowded and unstable.
→ The time to live (TTL) is often set to 30 or 60 minutes. Because of this, I advise changing the TTL for all DNS Records to 30 or 60 minutes.
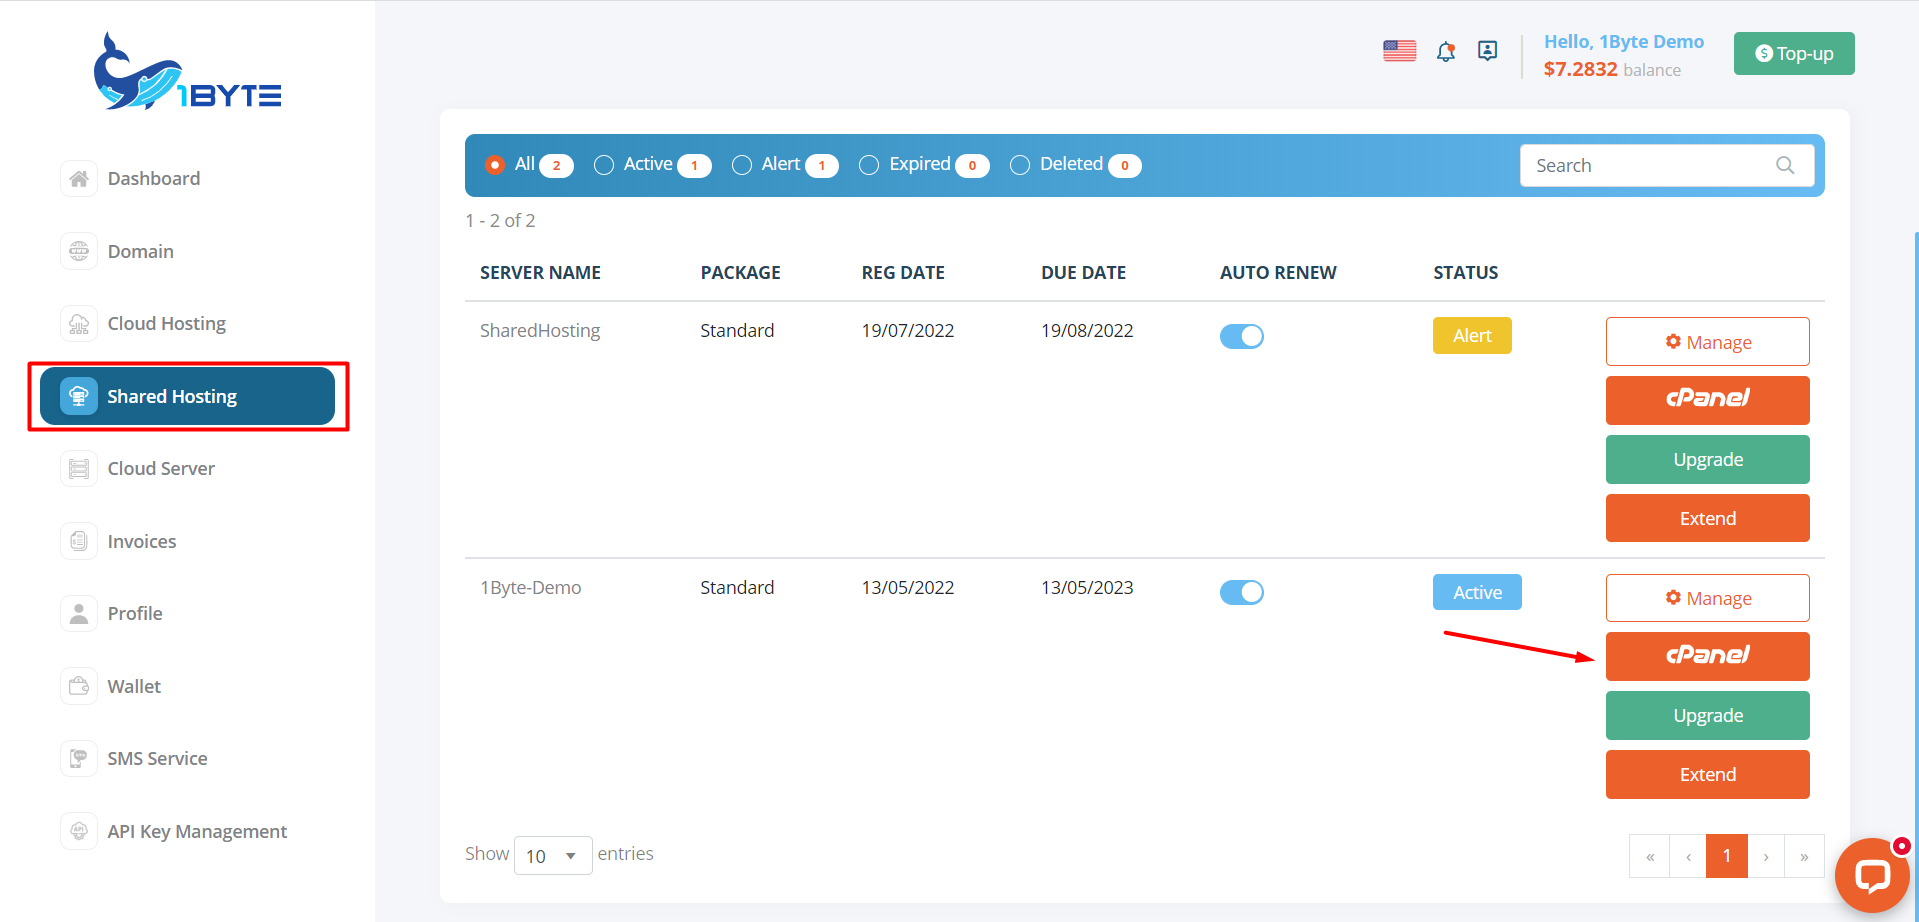
4. Create A New Email Account
- Go to User Dashboard
- Select Share Hosting at the left menu bar
- Select the cPanel button at the Shared Hosting server where you want to set up email
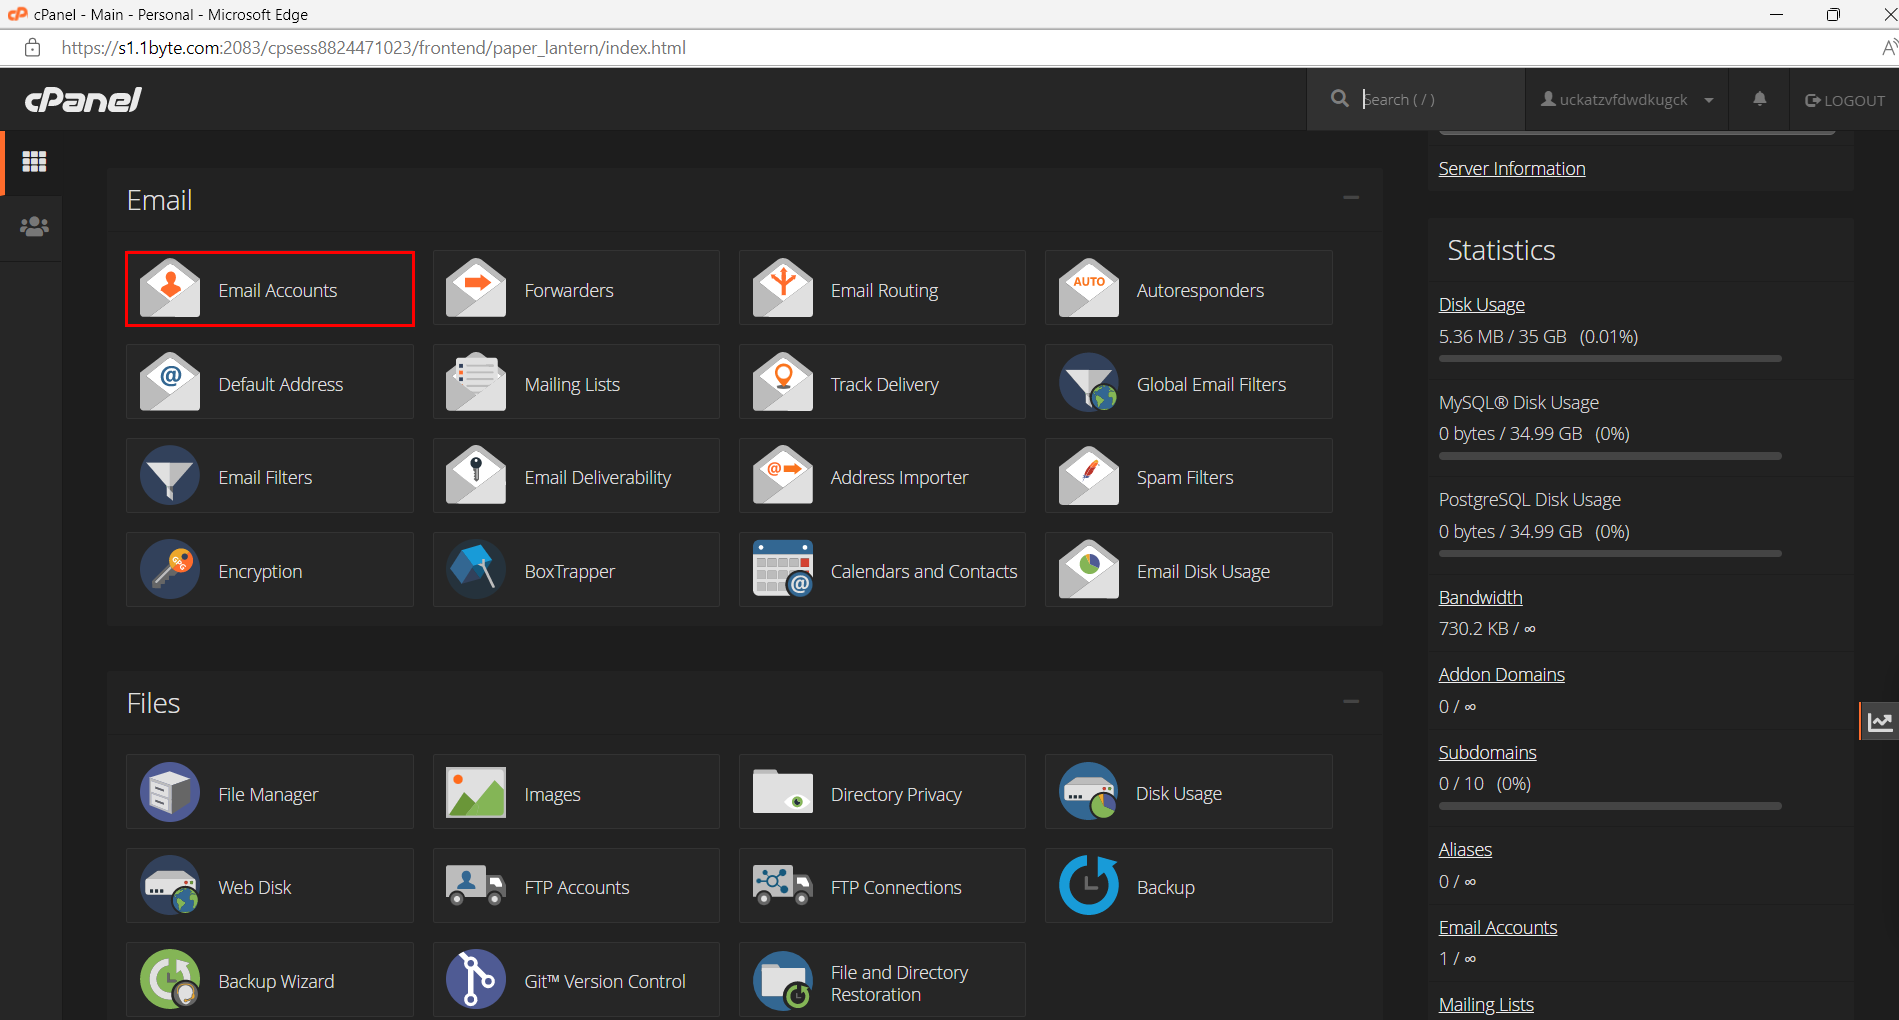
Go to Email Accounts
Click on Create button to create a new email account
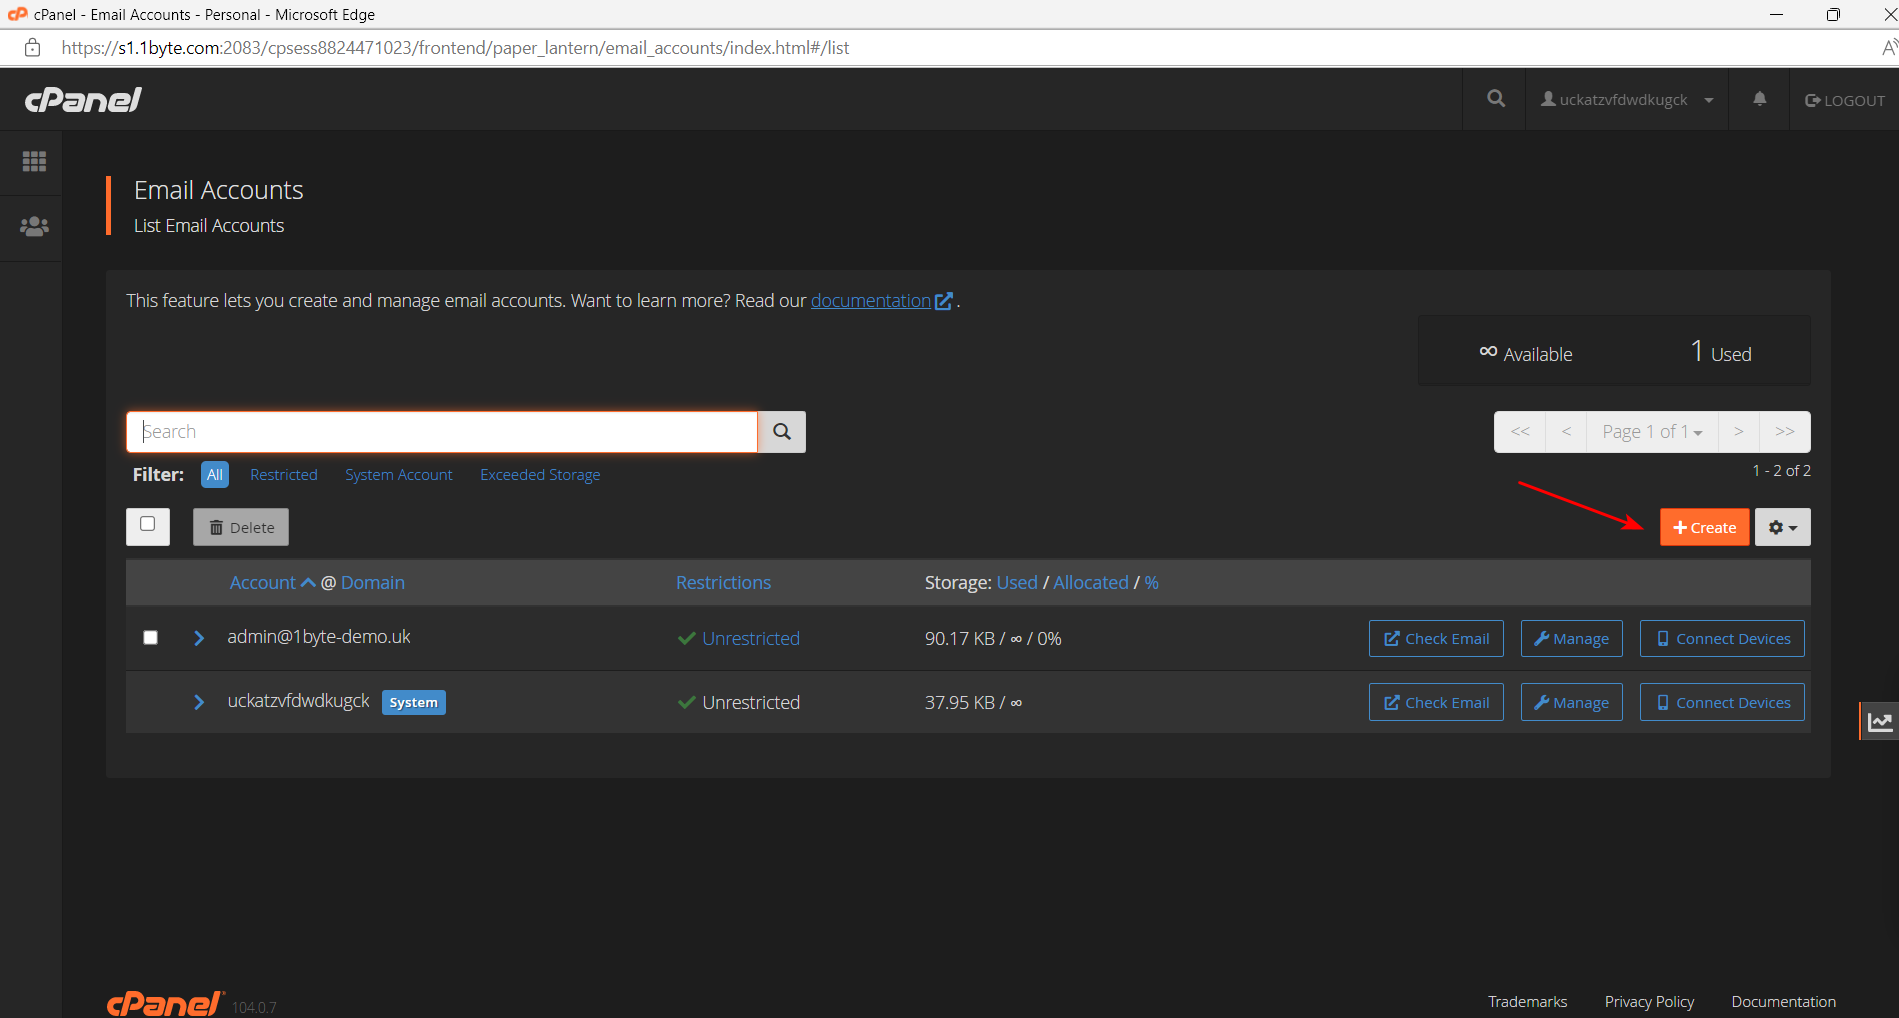
Input a new email user account and password then click create button

5. Start Testing Sending & Receiving Mails
- After you have completed all of the above instructions, ensure that your new email can send and receive messages. Let’s go check it out together.
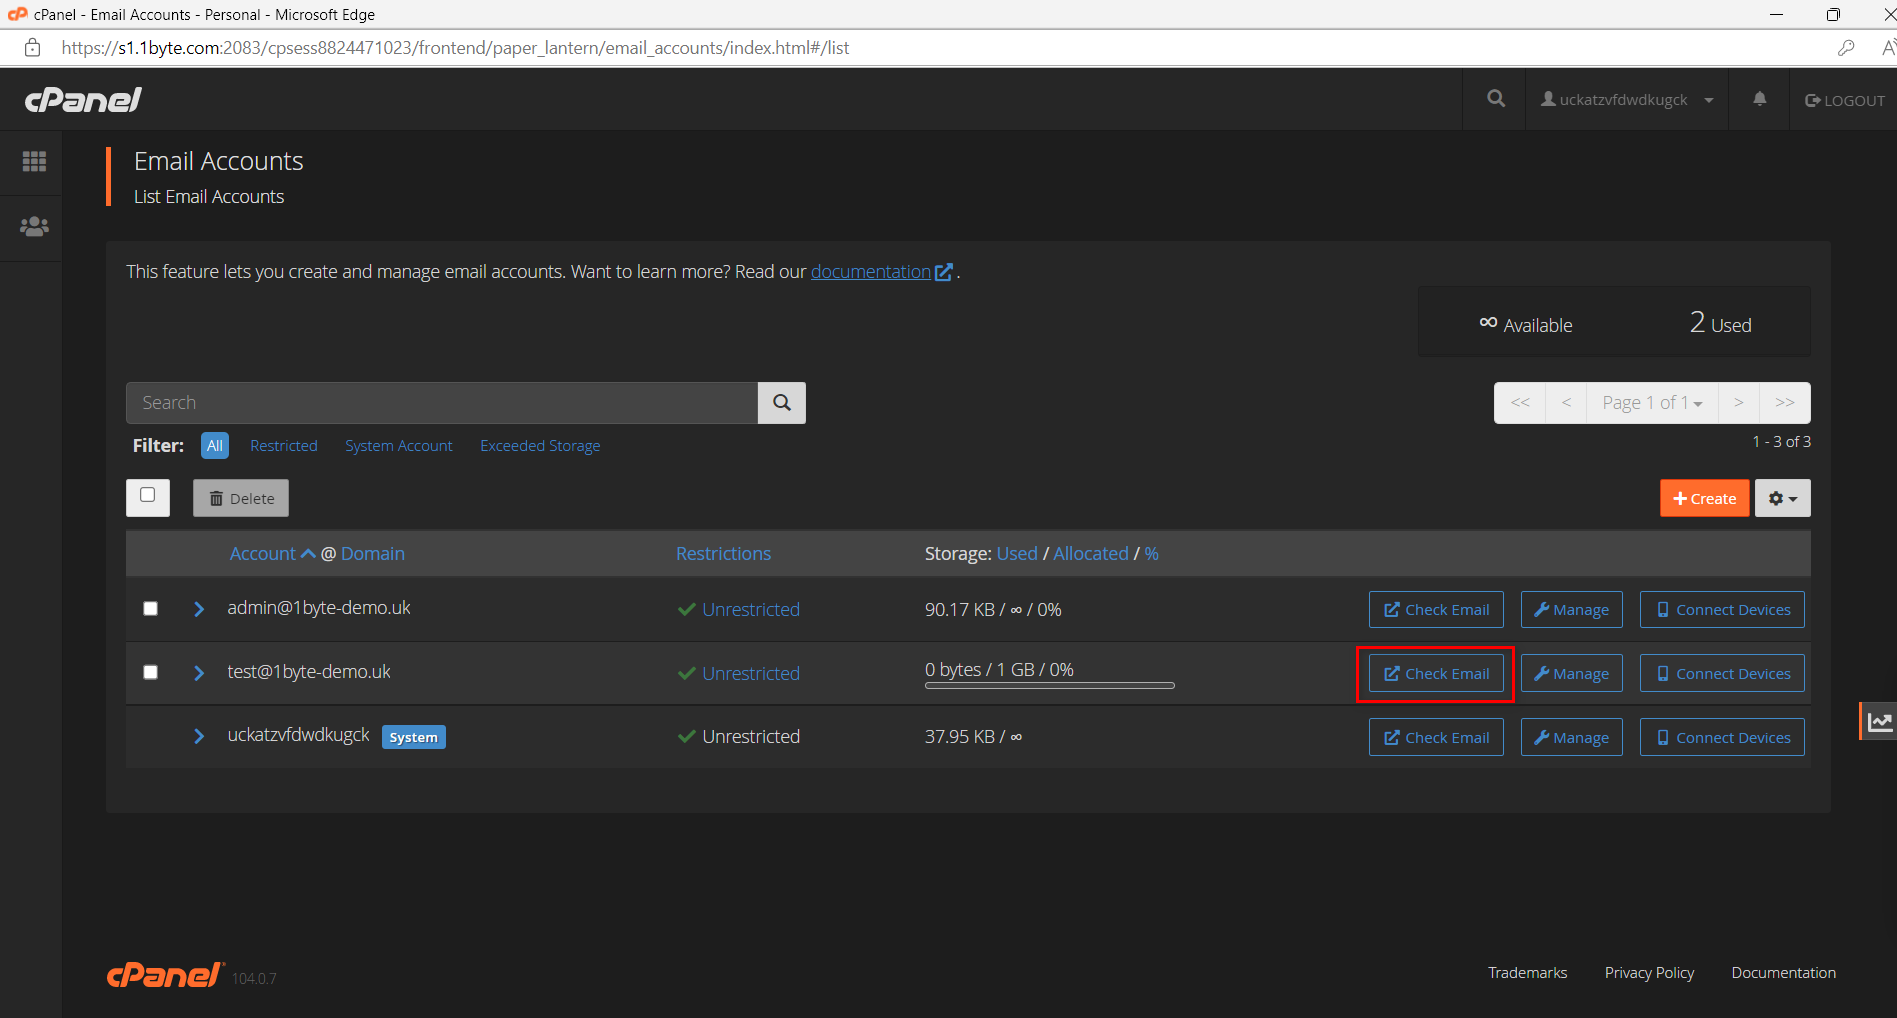
- Click the Check Email button
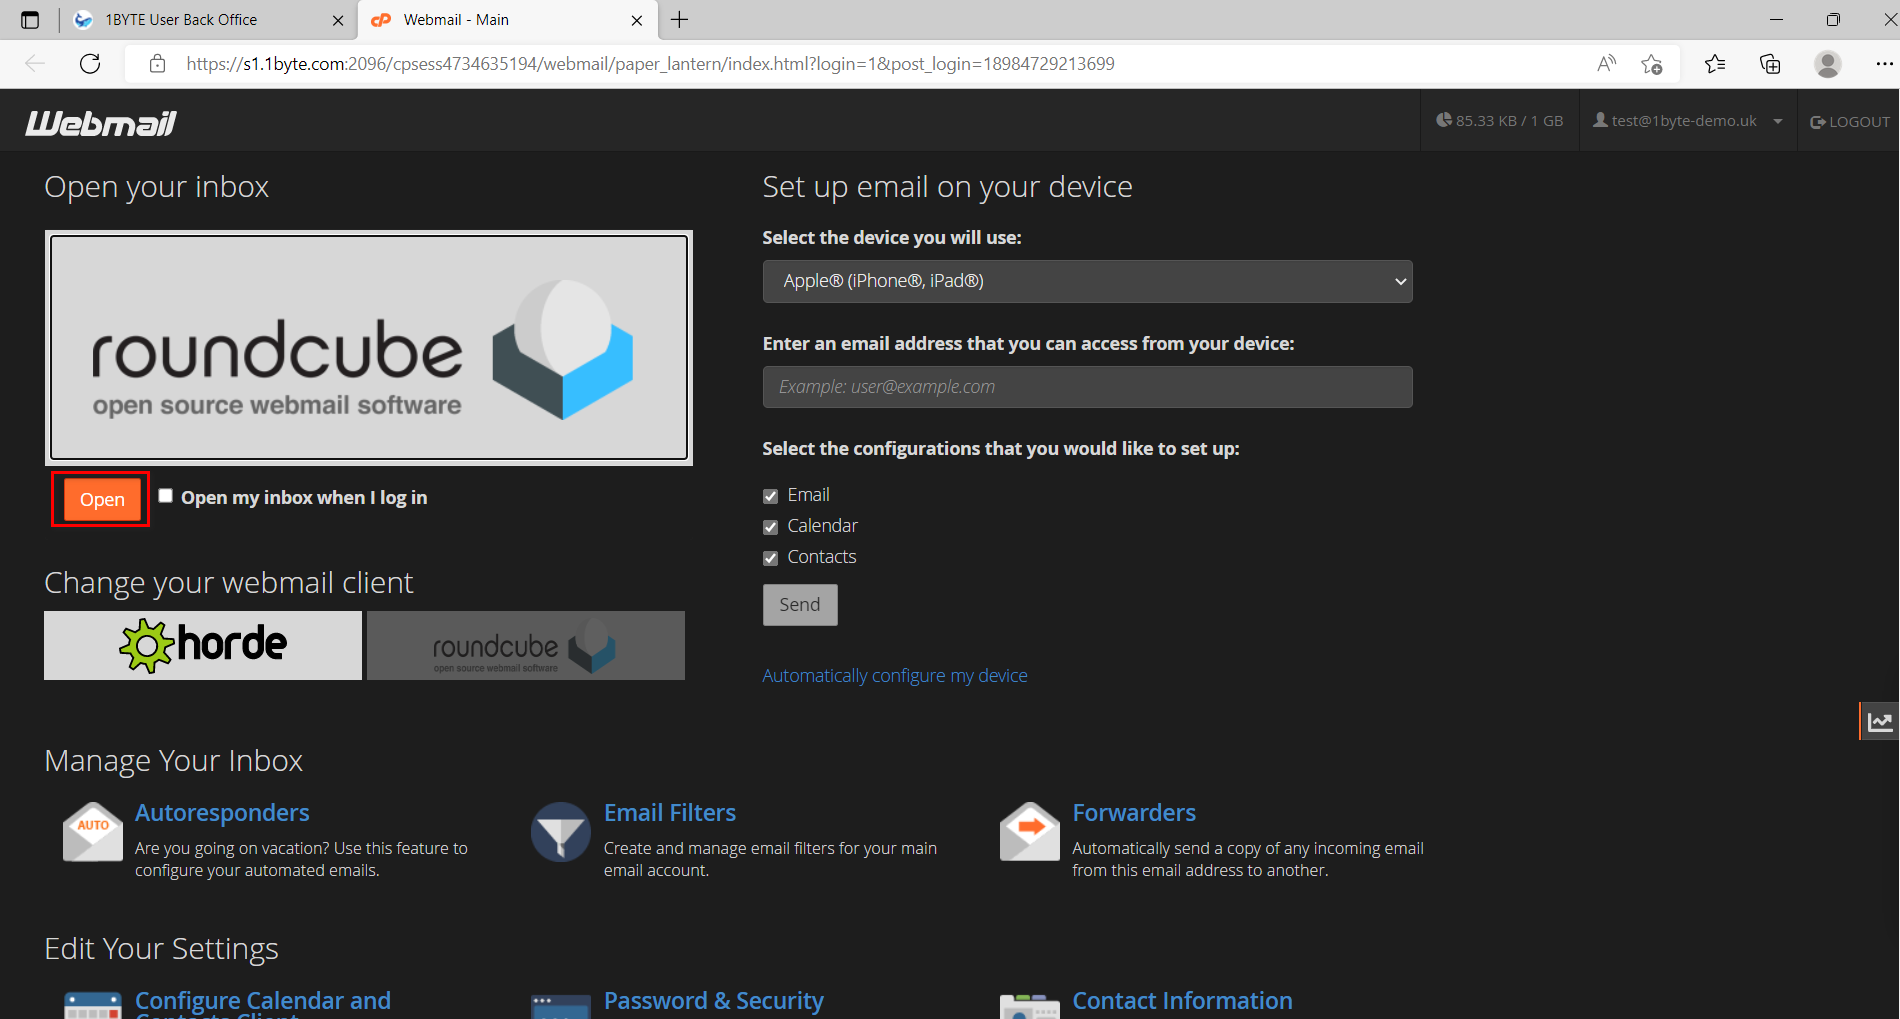
Click open Roundcude webmail
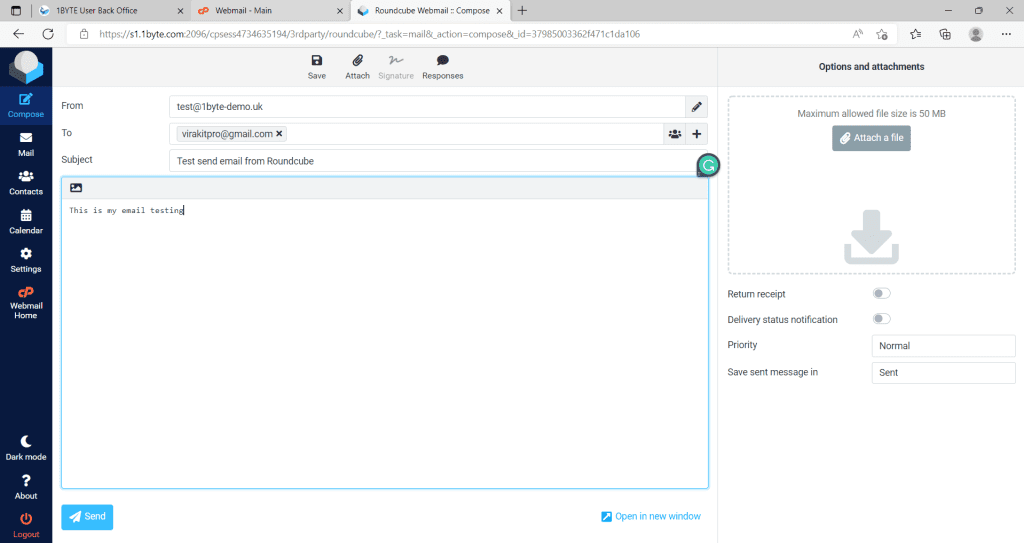
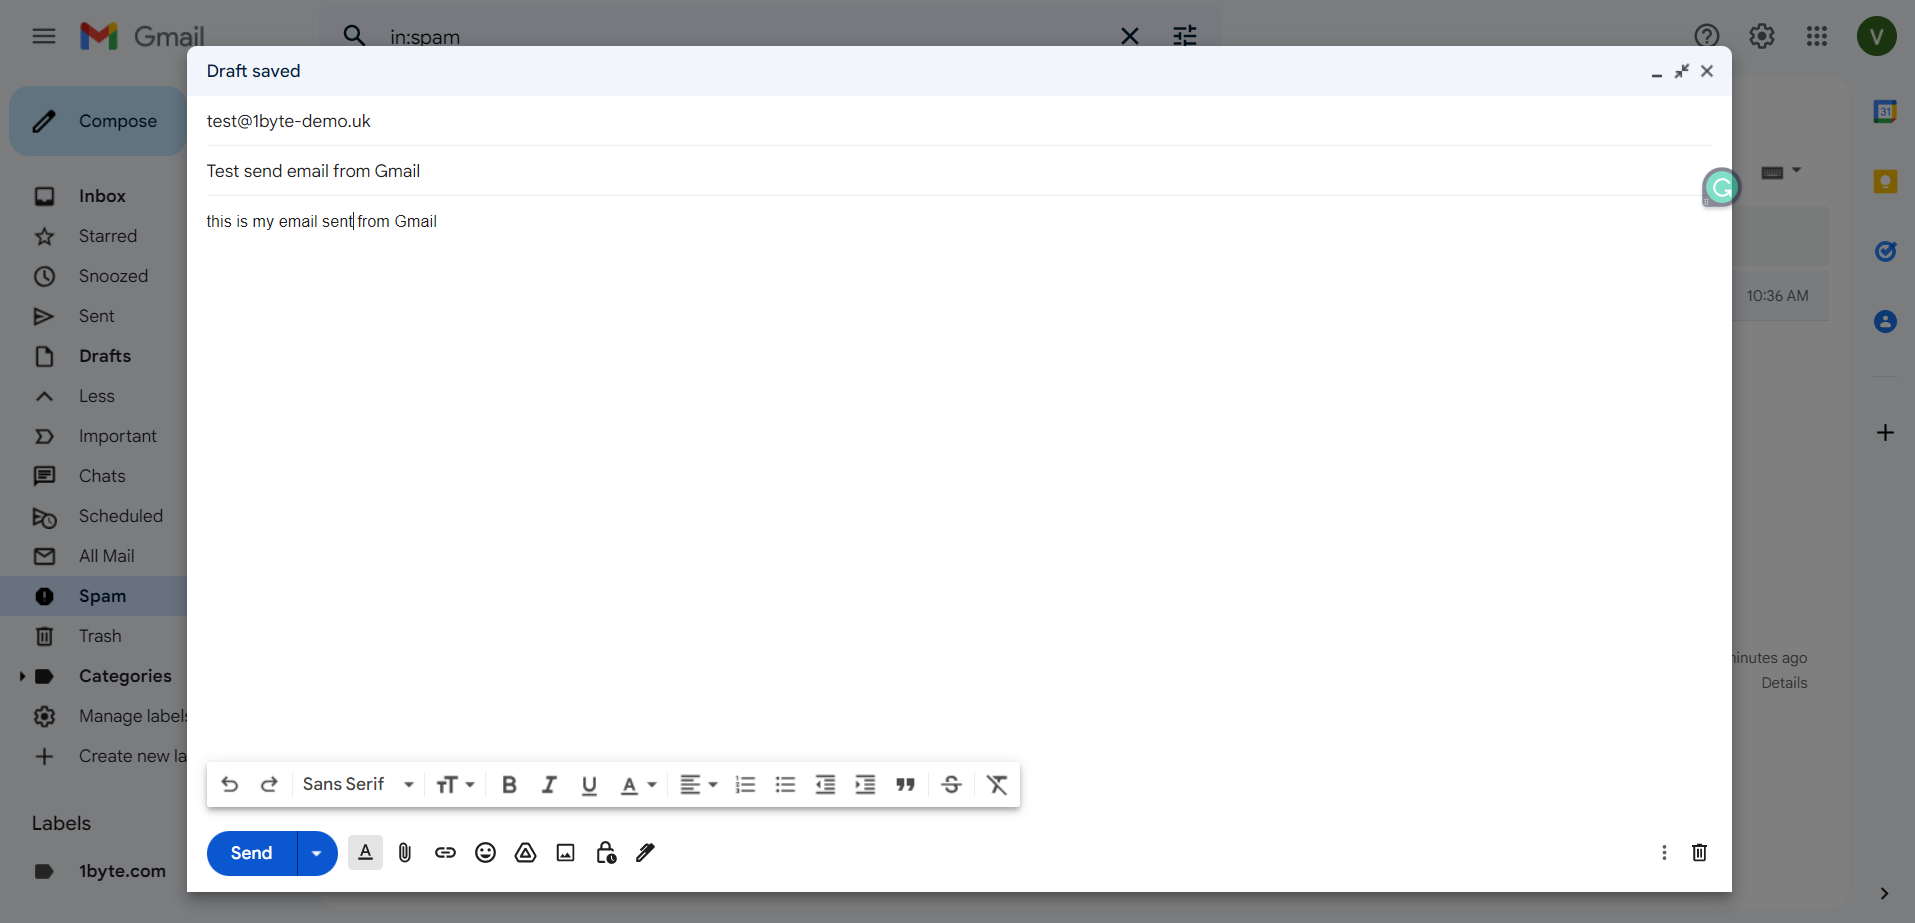
1. Send the email test to another Gmail account
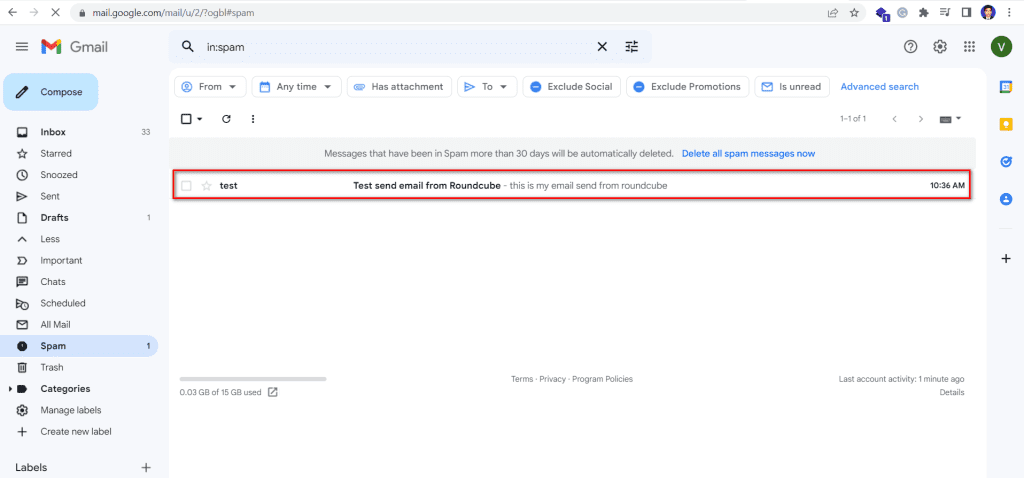
When you send it to Gmail, the mail will be sent to the Spam box
Tell Gmail that the sent email is not SPAM
2 . Send email test from Gmail back
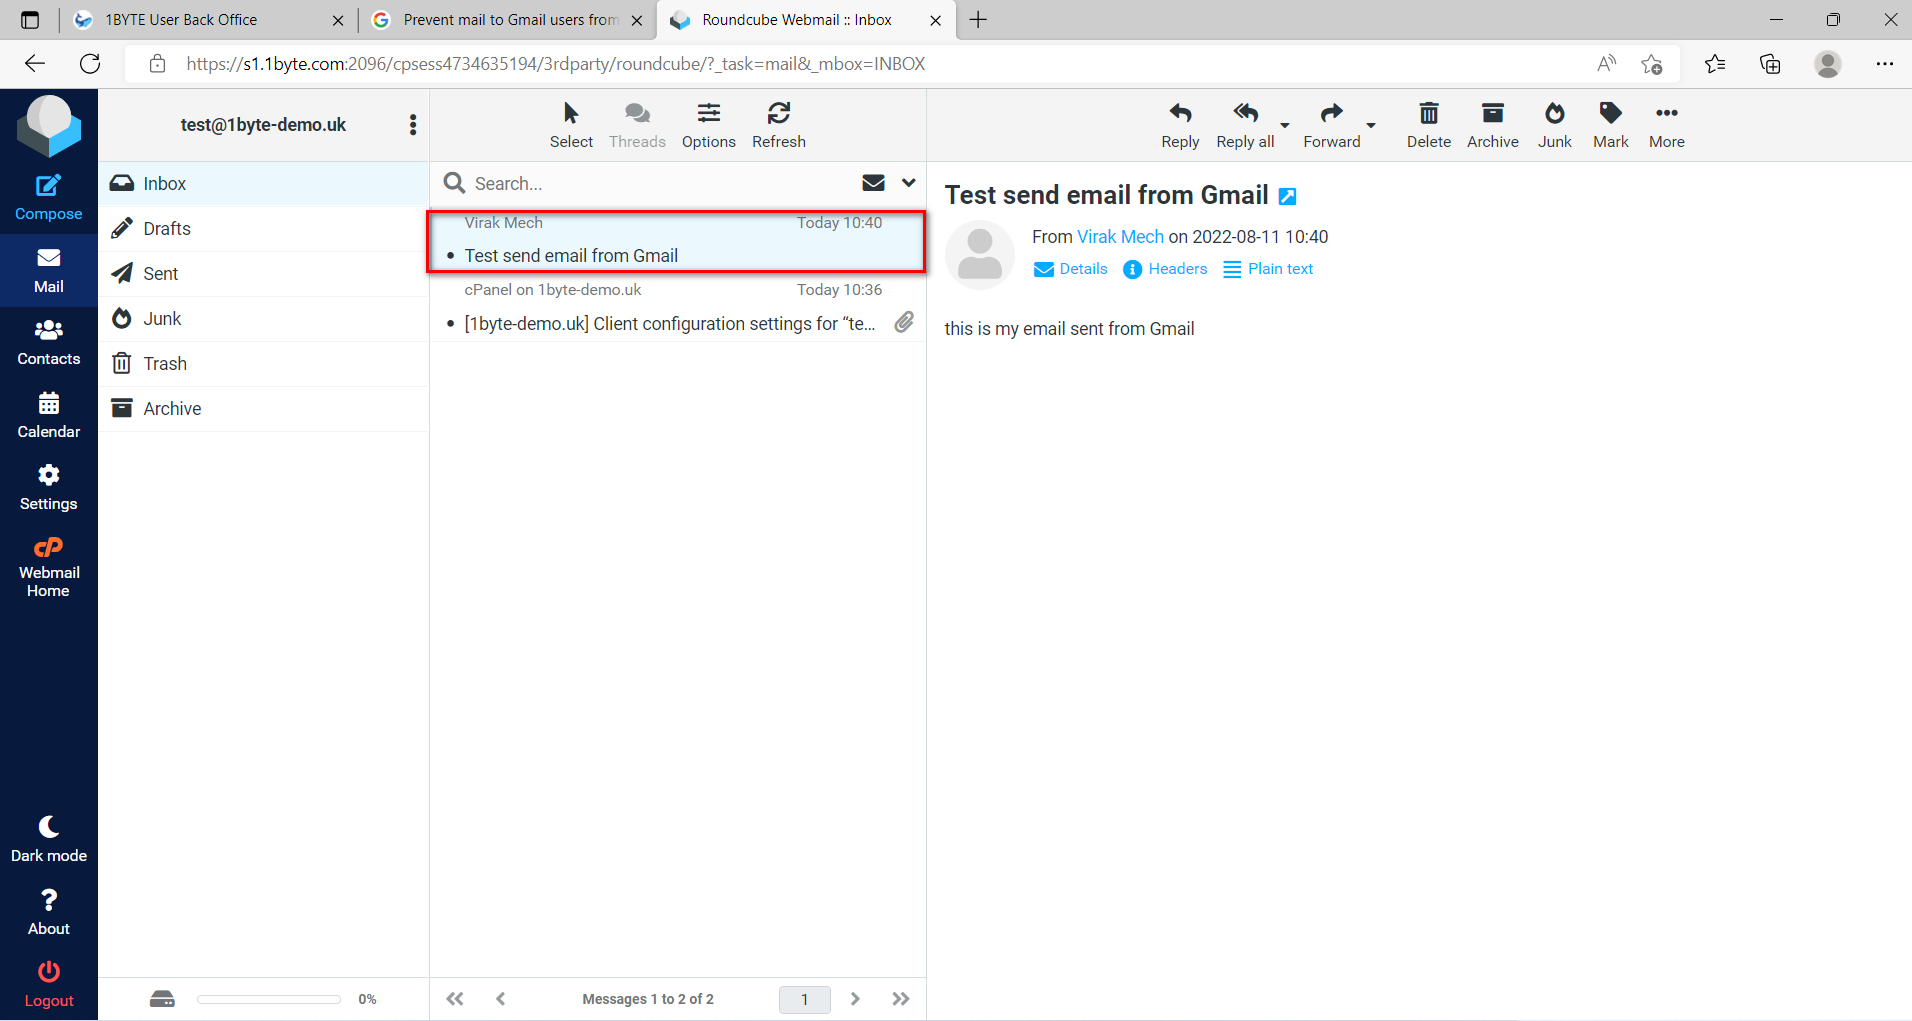
Congratulation we are successfully set up email on ROUNDCUBE
Video Walk Though Roundcube Webmail login cPanel
BIG NOTE:
As you can see in the Video Walkthrough, I set TTL = 1 minute for testing purposes only, since I want the DNS system to clear the cache and update the current settings every 1 minute. However, for production sites, this value will be ineffective since you are abusing the DNS System, causing it to become overcrowded and unstable.
→ The time to live (TTL) is often set to 30 or 60 minutes. Because of this, I advise changing the TTL for all DNS Records to 30 or 60 minutes.
Conclusion
You should use your professional email address to convey confidence in your brand, company, or organization. Once you’ve decided on a domain name that reflects your company or profession. So, if you haven’t already, go ahead and buy now!