
cPanel is a popular web hosting control panel that provides an easy-to-use interface for managing various aspects of your website. Updating your preferences in cPanel is a simple process that can help you customize your experience and make it more efficient. Here’s a step-by-step guide to help you update your preferences in cPanel. Before discovering it let’s 1Byte show you what does a cPanel do?

What Does a cPanel Do?
A control panel built on Linux called cPanel is used to manage your web hosting easily. The system functions much like a desktop program. With cPanel, you may carry out tasks from a simple dashboard as opposed to using complicated commands.
The 3 Steps to Update Your Preference in cPanel
1Byte explains how to update your cPanel password in this post. As you know, when you choose to use our web hosting service. 1Byte will provide you with credentials by default, and of course, you don’t want anyone else to know what those credentials are. You can also check this article about how you can easily upload your website via cPanel.
Check out the “PREFERENCES” area on your initial cPanel log-in and adjust your contact information and password.
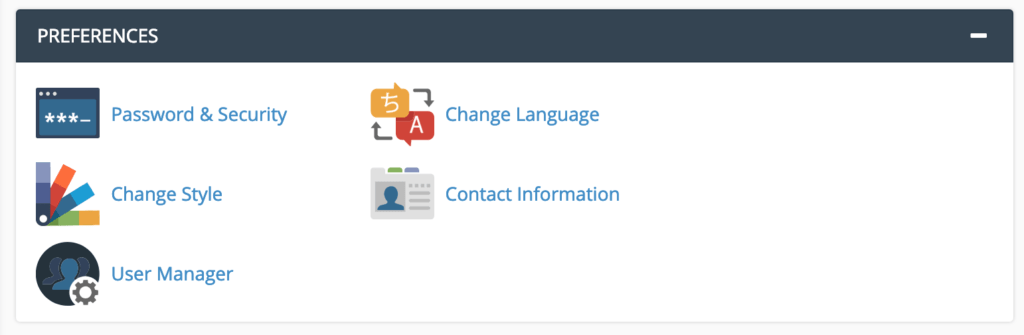 Here’s how to do this step by step:
1. Changing Your Password
We highly advise you to change your password immediately upon logging into cPanel for the first time. “Password & Security” should be selected. You will be sent to the following screen:
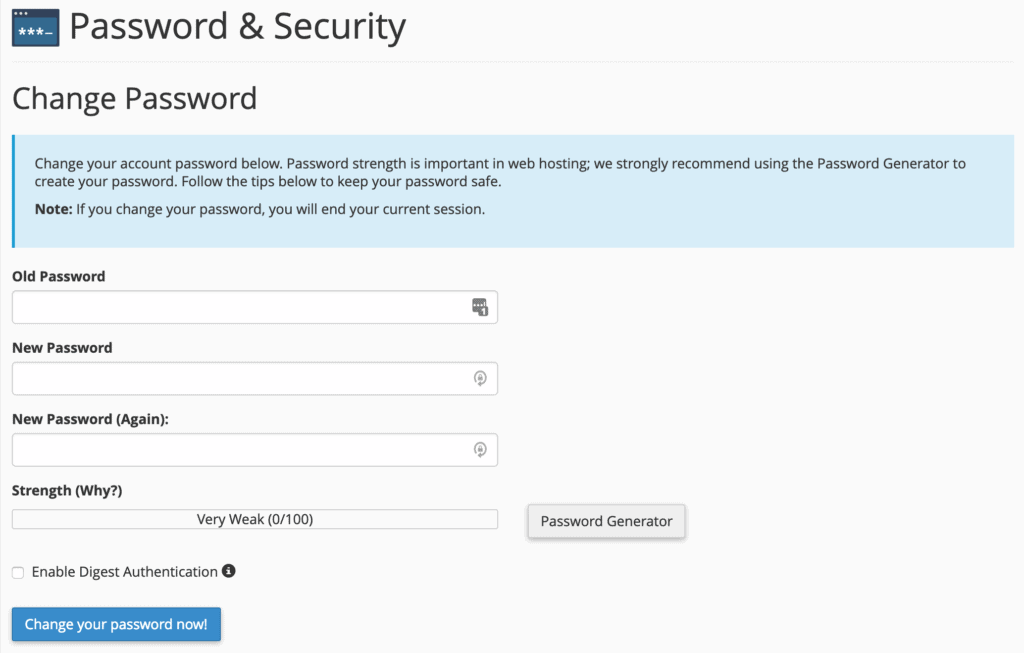
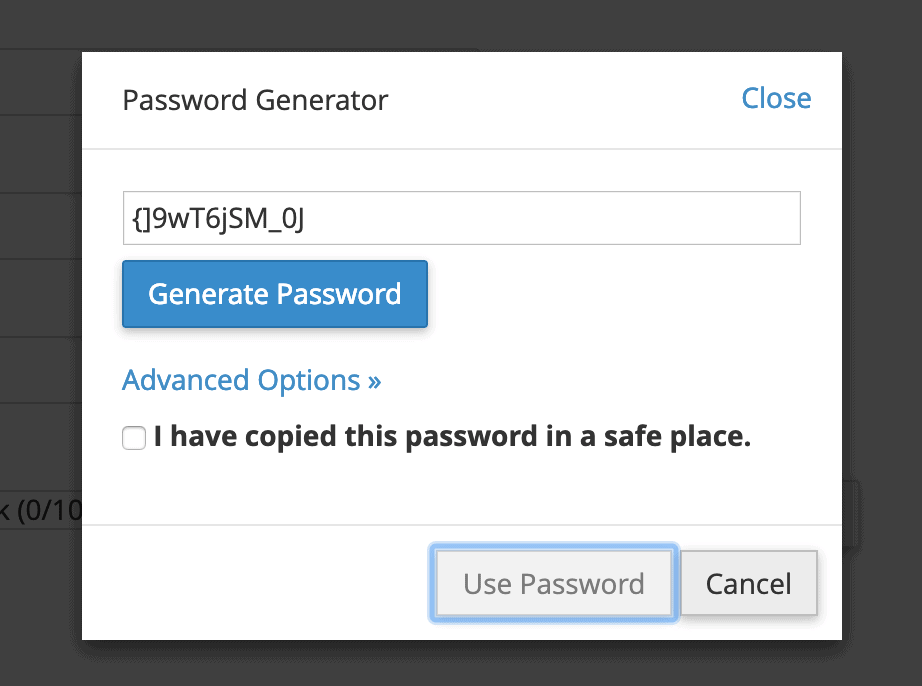
You will be prompted to enter your previous password (default credentials) before selecting a new one. When creating a new password, you may either use the Password Generator or create one on your own. Using the Password Generator is almost certainly the best option since it will generate a strong and secure password for you. Simply click the button and the generator will handle the rest.
2. Updating Your Contact Information
One of the most critical things you must do with cPanel is given an email address to which you may get updates.
Why is this step critical:
- Without a valid email address specified in this part, cPanel will be unable to contact you if anything serious happens to your websites and configurations.
- Additionally, you must configure the email address to one that is not associated with any domain name hosted in this cPanel; otherwise, if something goes wrong with your configuration, that domain may be hacked as well, rendering communication with you impossible.
To access these options, click on “Contact Information” and then on “Contact Information” again to get the following screen:
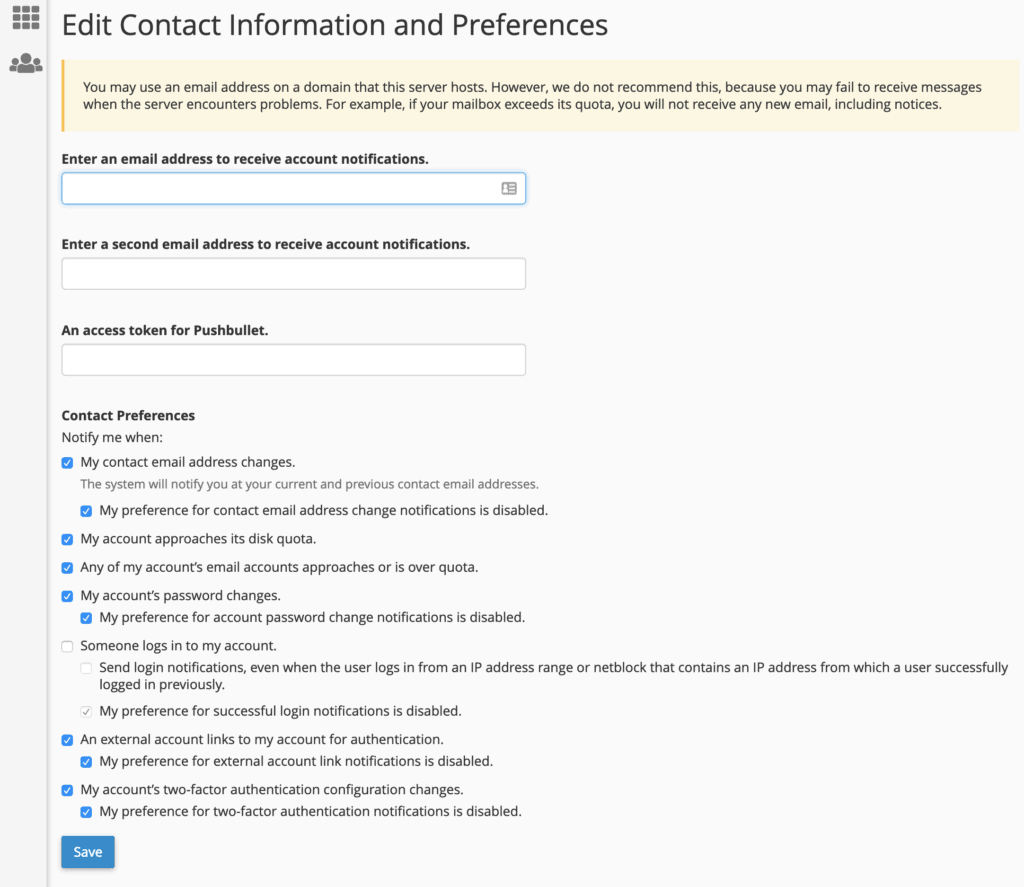
We recommend that you select all of the boxes under “Contact Preferences,” since these are all updates that may notify you of suspicious activity (e.g., another user changing your password) or a hosting issue (e.g disk space being used up).
3. Adding a New User
Consider the following scenario: you wish to work with someone to administer your websites, or you have a trustworthy business partner that needs access to the hosting setup as well. That individual will require their own cPanel user profile. To do so, navigate to the same “PREFERENCES” area and click on the “User Manager” icon.


That section contains a list of all accounts presently configured in your cPanel. Each account has three icons (as seen in the image above):
- The envelope icon indicates if the person has an email account set up in the system – if the icon is colored then there is an email account set up; if it’s grayed out, then there are none
- The truck icon indicates if the person has an FTP account – again, colored for yes, and grayed out for no
- The disk icon indicates if the user can use the web disk services that are part of cPanel
You may quickly update, alter, or remove any user there using the choices shown underneath the account name.
To create a new user, click the “Add User” button in the top right corner of the screen:
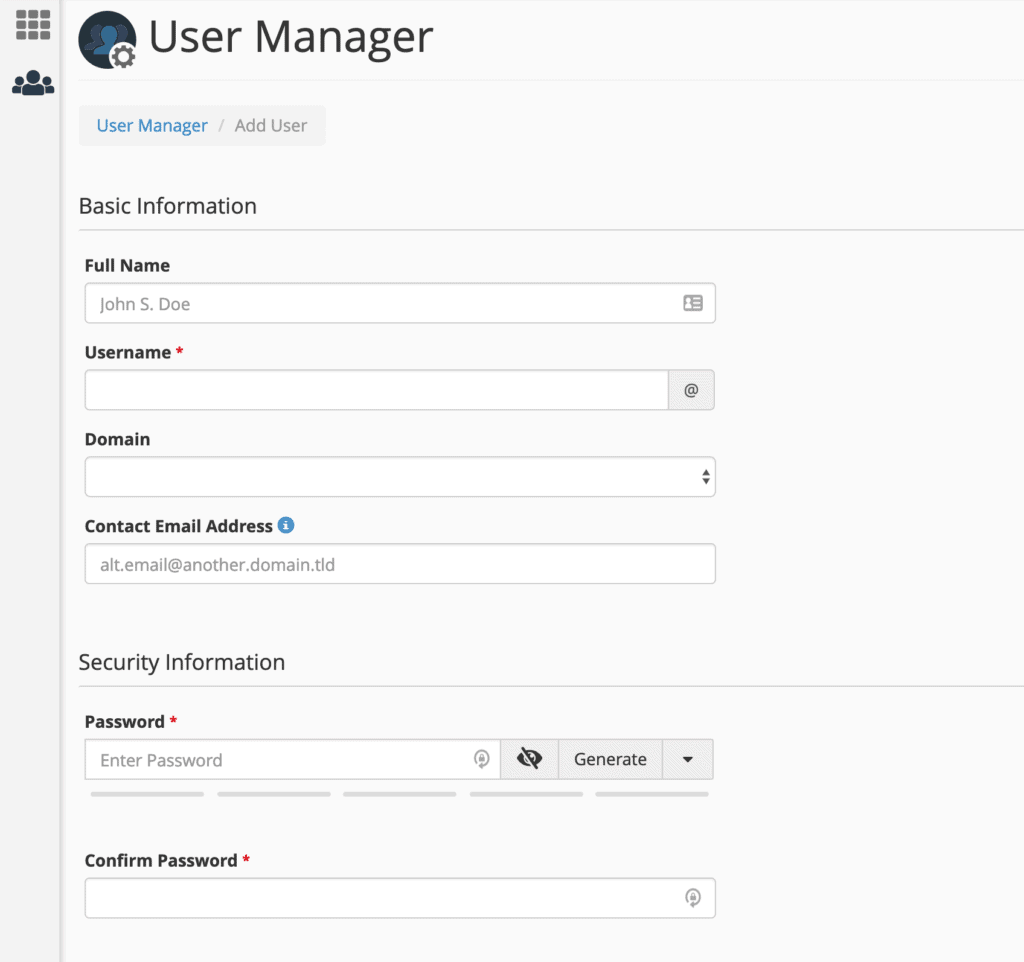
You’ll provide the user’s complete name, username, the domain with which the new user should be affiliated, and if desired, an alternate email address for the user. Additionally, you’ll be prompted to create a password for the user.
Just below these fields is a section titled “Services” where you may manage a few important settings. They, interestingly, match the three symbols stated a few lines above:
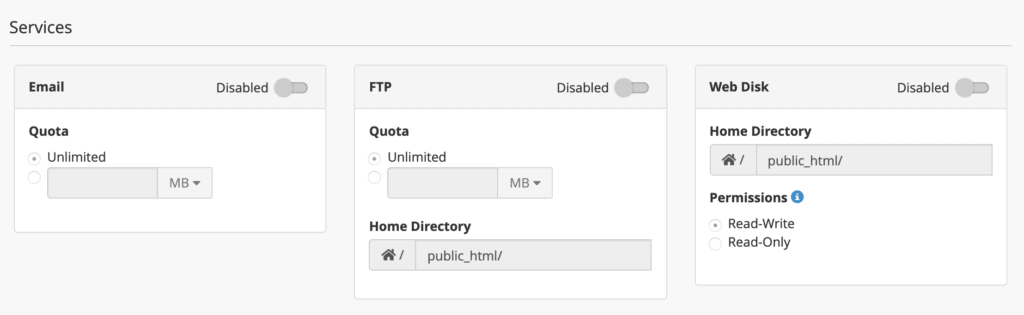
- Email allows you to enable/disable email accounts for the new user and also set a limit for how much space each account can have.
- FTP allows you to enable/disable accounts from being able to access your hosting setup via FTP. FTP can be used to upload files to your website. You can choose what directory the new user will have access to, and limit the space they can use.
- Web Disk permissions should be reserved for your top-level admin accounts only. “Read-Write” level access gives the user full permissions to do pretty much whatever they wish within the specified directory (including deleting files)! “Read-Only” only permits reading, downloading, and listing files.
Once these options are complete, click “Create” or “Create and Add Another User” at the bottom of the settings page. Voila! You are already familiar with how to administer your cPanel account.