
Note: If you are a user of VM (virtual machine) instances, please refer to these SSL installation instructions. You may also want to consult the official documentation for VM instances for further information.
How to Install SSL Certificate on Google App Engine
To install an SSL certificate for Google App Engine, you need to meet the following requirements:
- have a registered domain name that will be used for the web application
- point the domain name to your App Engine Web Application. The instructions on the matter can be found in the Adding a custom domain for your application section of this article from Google
- obtain SSL certificate files from the Certificate Authority
- locate the Private Key created during the CSR generation
Step 1
Once a ZIP archive with the certificate files is received via email or downloaded from your 1Byte account, you can proceed with the installation as follows:
- Log into your Google Cloud account at https://cloud.google.com/
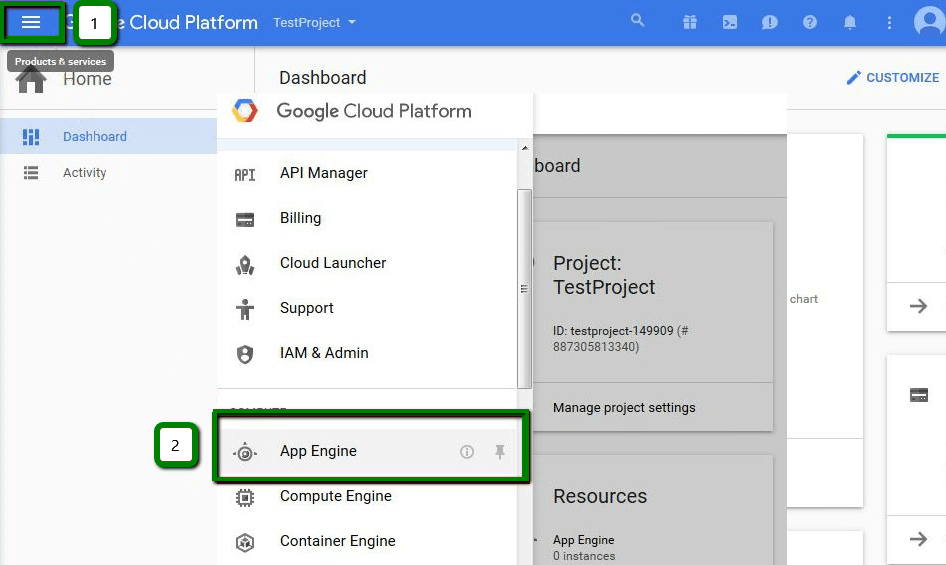
- Locate Products & services >> App Engine:
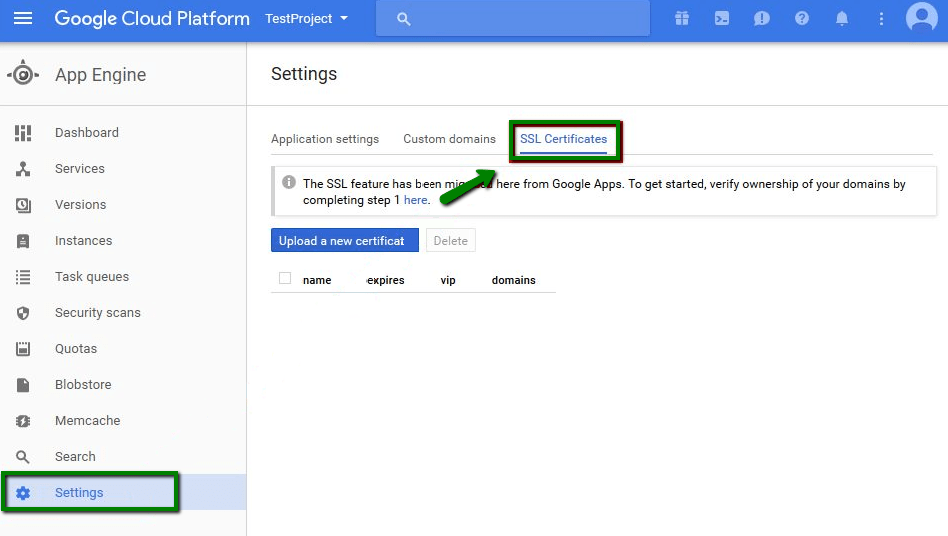
– From the App Engine menu, go to Settings >> SSL certificates:
Step 2
On the SSL certificates screen, press Upload a new certificate – you will see Add a new SSL certificate window:
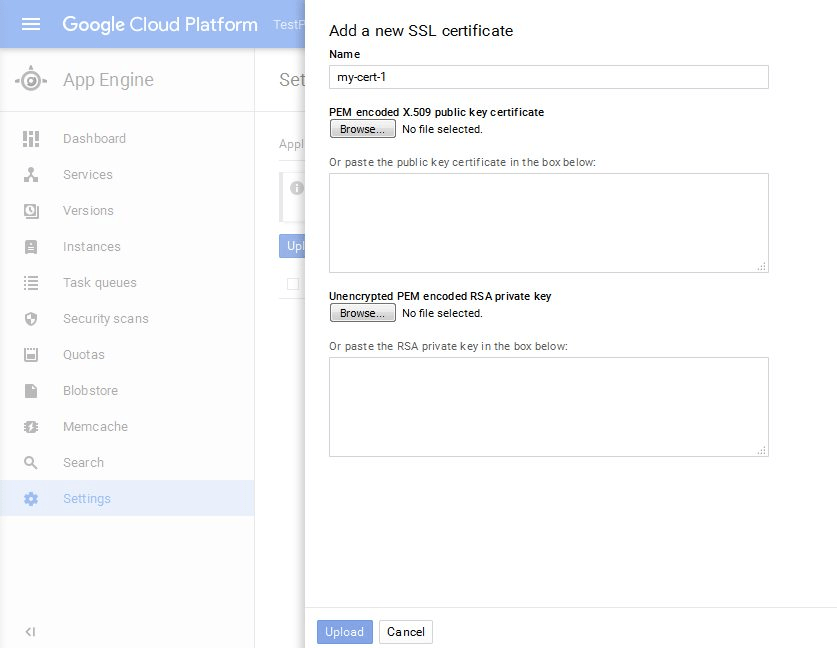
At this step, it is necessary to locate the certificate files and the Private Key code which were generated along with the CSR.
There are two ways to proceed with it: copy/paste the codes or upload the files containing the code. We will describe both methods below.
File uploading.
It is necessary to prepare the files before uploading them. The certificate file (yourdomain.crt) should be concatenated (combined) with the corresponding CA-bundle file (yourdomain.ca-bundle file with the Intermediate and Root certificates from the Certificate Authority). This can be done by inserting the content of yourdomain.ca-bundle below the certificate code in yourdomain.crt file. Simply paste the whole code from the CA-bundle file right after the —–END CERTIFICATE—— tag in the yourdomain.crt file. The created file should look as follows:
—–BEGIN CERTIFICATE—–
…(yourdomain.crt code here)
—–END CERTIFICATE—–
—–BEGIN CERTIFICATE—–
…(Intermediate certificate code)
—–END CERTIFICATE—–
—–BEGIN CERTIFICATE—–
…(Additional intermediate certificate code)
—–END CERTIFICATE—–
The certificate file is ready to be uploaded now. One more step is to save your Private Key code (from —–BEGIN RSA PRIVATE KEY—– to END RSA PRIVATE KEY—–) to a TXT file (for example, mykey.txt). Once you have two files, the concatenated yourdomain.crt and mykey.txt, click on the “Browse” button and upload them accordingly.
Note: If you receive “The private key you’ve selected does not appear to be valid” error, the Private Key you have might be missing ‘RSA’ keyword in —–BEGIN RSA PRIVATE KEY—– and —–END RSA PRIVATE KEY—– tags. Simply add ‘RSA’ to your —–BEGIN PRIVATE KEY—– and —–END PRIVATE KEY—– tags to proceed.
Copy/paste the codes.
Certificate/Private Key codes can be pasted directly into the corresponding boxes. However, PEM encoded X.509 public key certificate field should be filled out with the full certificate chain: certificate for your domain, Intermediate and Root certificates. The code from yourdomain.crt should be pasted first, and the code from the yourdomain.ca-bundle file should be pasted below into the same box. The Private Key code you have is to be pasted into Unencrypted PEM encoded RSA private key box.
When the Certificate and Private Key are in place, hit Upload to complete the installation. You will see the page containing SSL installation details. It is necessary to choose the domains you wish to secure under Enable SSL for the following custom domains:
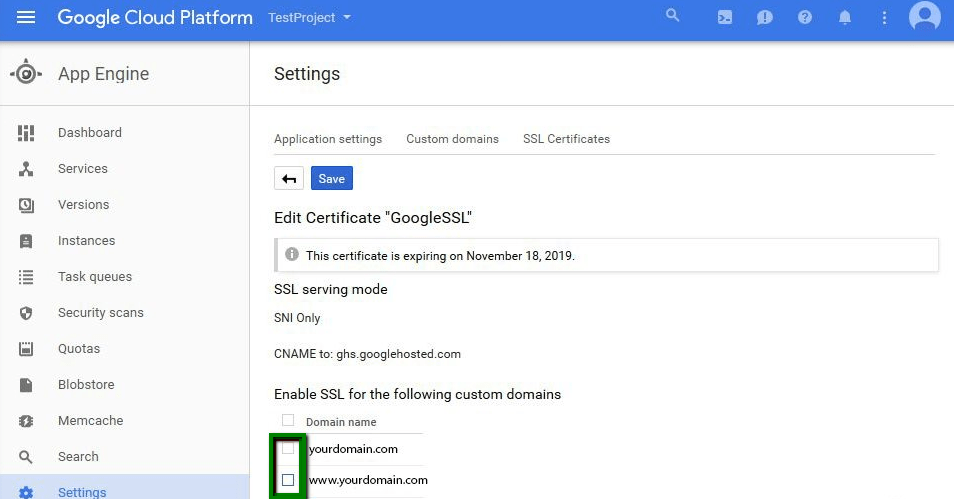
Once done, click Save at the top of the Settings screen. That’s it!
You can check the SSL installation using our online tool: https://ssl-checker.1byte.com/.