
Please note: This guide assumes you possess an activated certificate obtained through a CSR originating from the Mac OS Server application. Refer to our associated article for the detailed process.
Once your certificate is activated, validated, and issued (accessible via email or download), follow the steps below to install it with its CA bundle on your server. This process is essential for assigning the certificate to various services like Mail (IMAP, POP, SMTP), File Sharing (iOS), Messages, and Websites.
CA Bundle Installation:
The CA bundle file contains root and intermediate certificates, enhancing compatibility with web browsers. Without it, your certificate may be labeled “signed by an unknown authority.”

If you’ve previously installed the CA bundle for a similar certificate type, there’s no need to repeat the entire procedure.
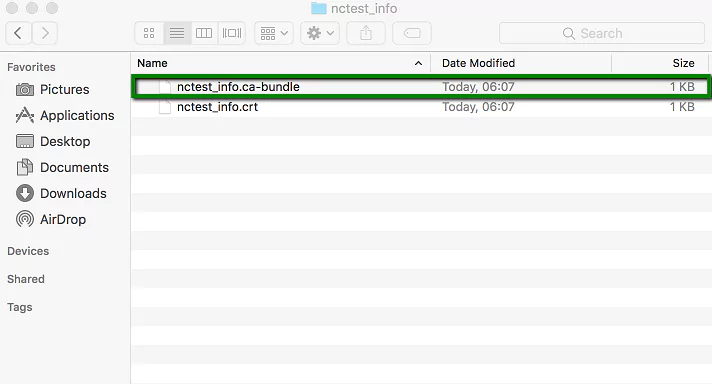
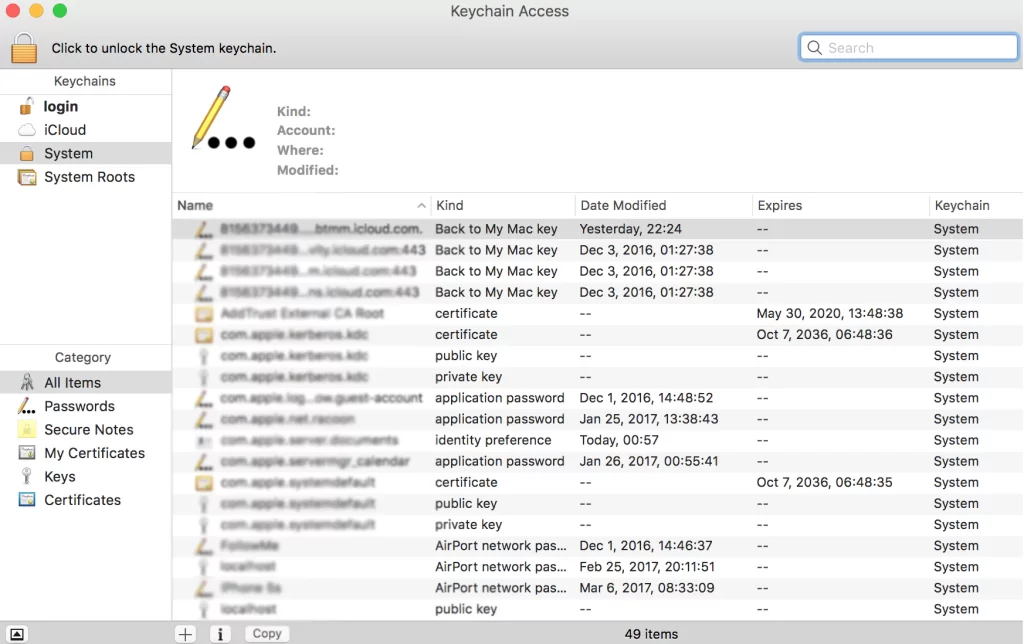
1. Add the CA bundle (.ca-bundle file) to the “keychain” for trust verification. Locate the .ca-bundle file received with your certificate, drag it into Keychain Access, and check for blue icons indicating intermediate certificates.


Certificate Installation:
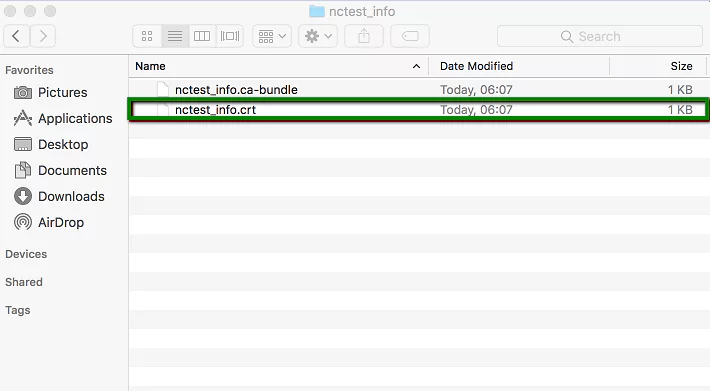
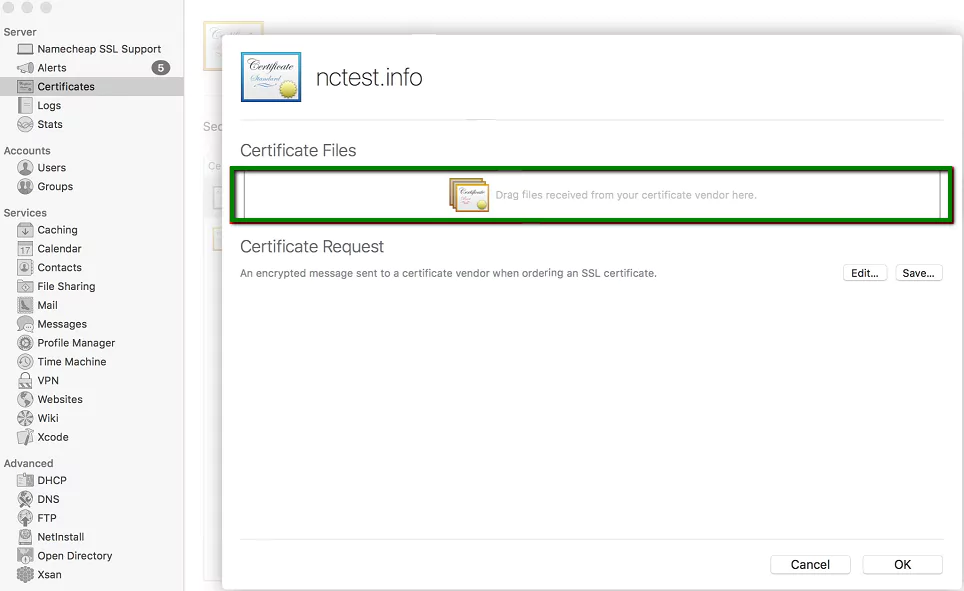
1. Find the .crt file from the Certificate Authority or your account download.
2. In the Certificates section under Server, locate your “pending” certificate associated with the CSR code.

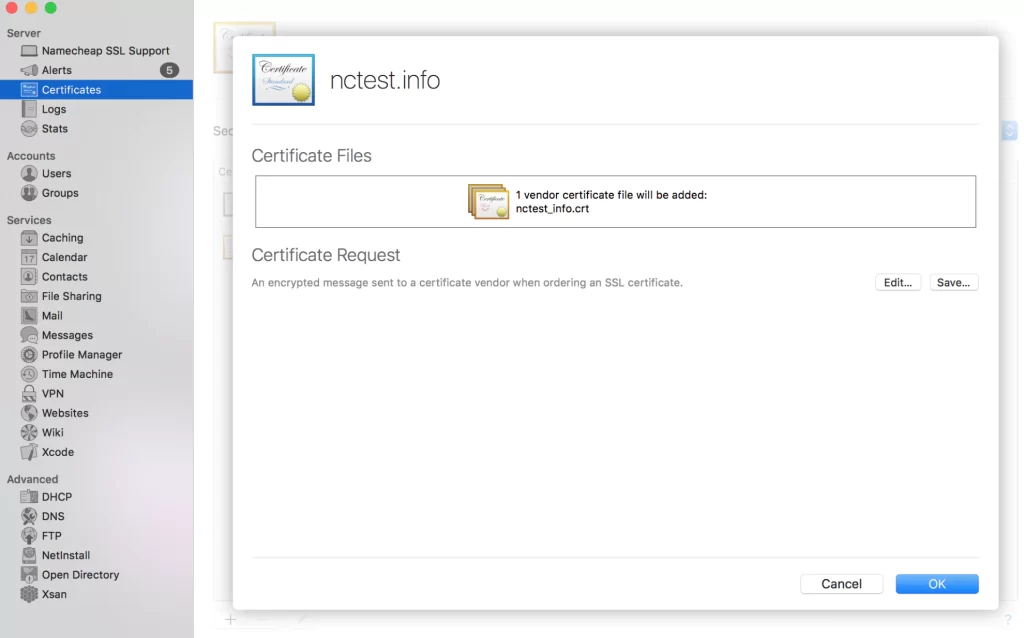
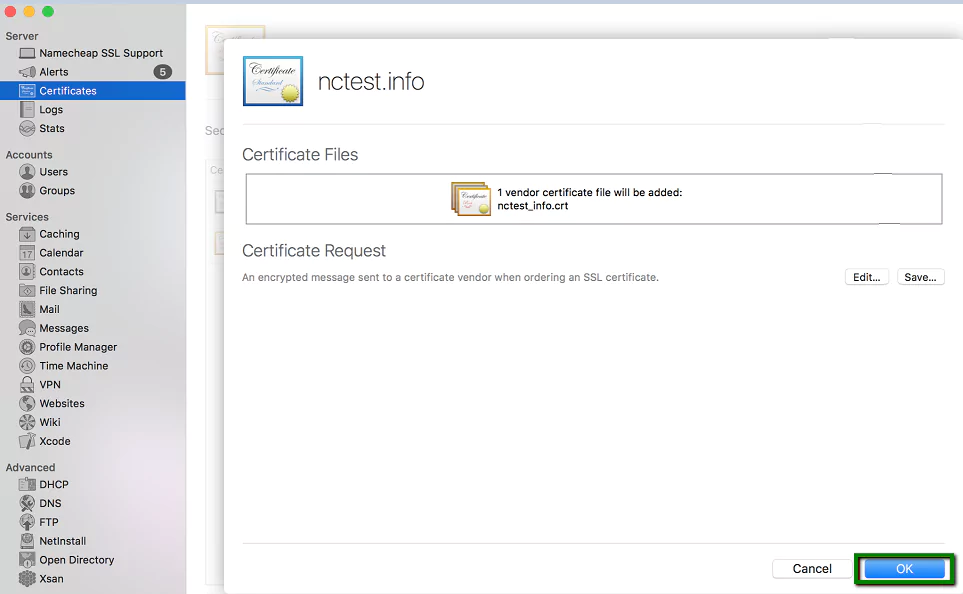
3. Double-click the certificate, drag and drop the yourdomain_tld.crt file, and click OK to complete the installation.

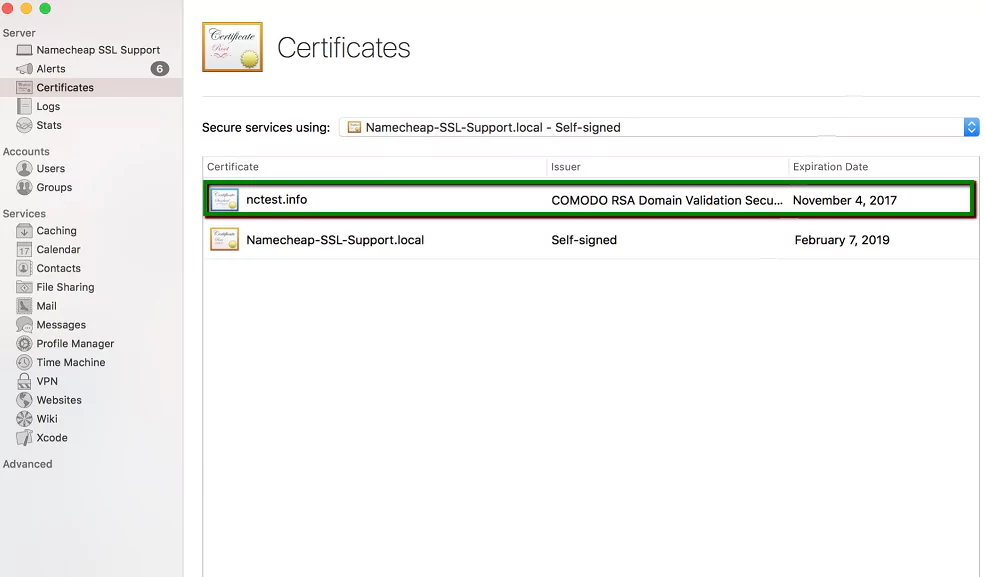
4. Your valid certificate will appear in the list of installed certificates on your server.
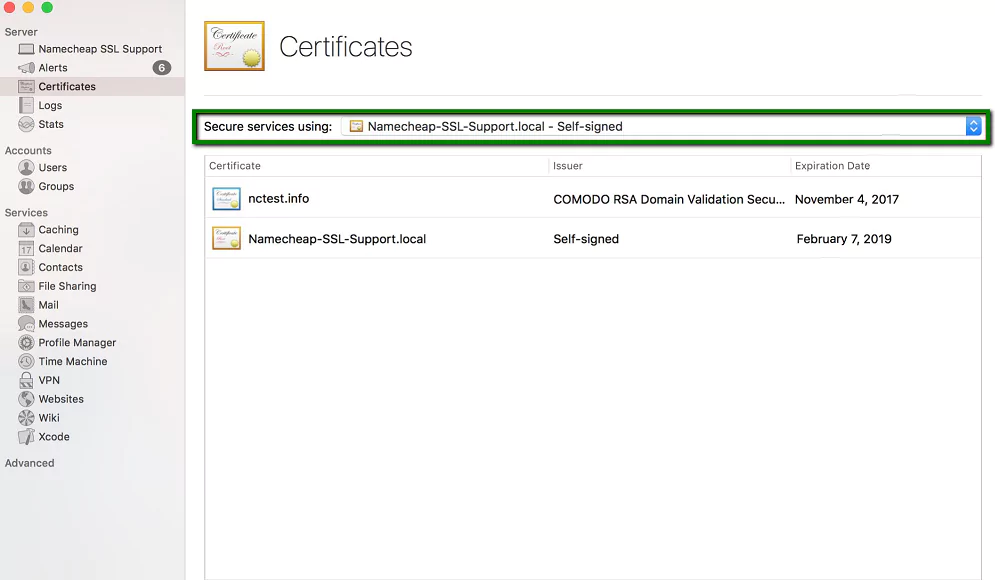
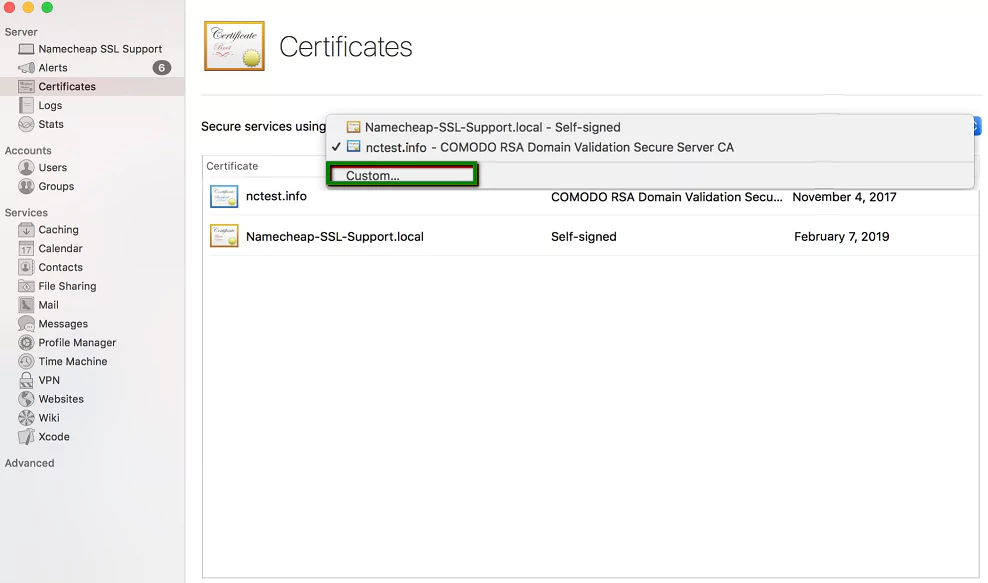
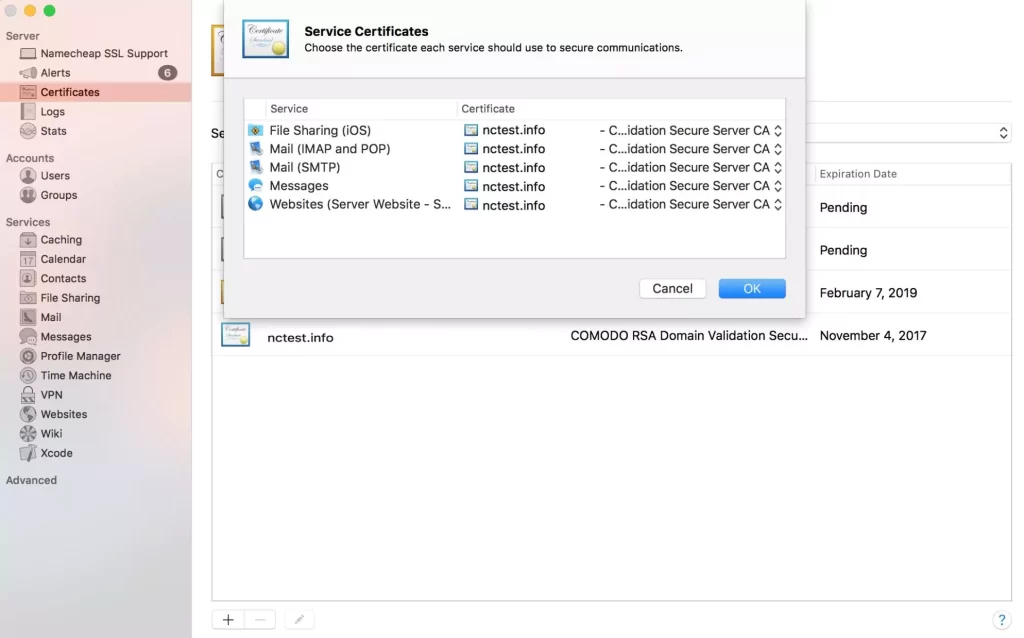
Service Assignment:
1. Select your certificate under “Secure services using.”
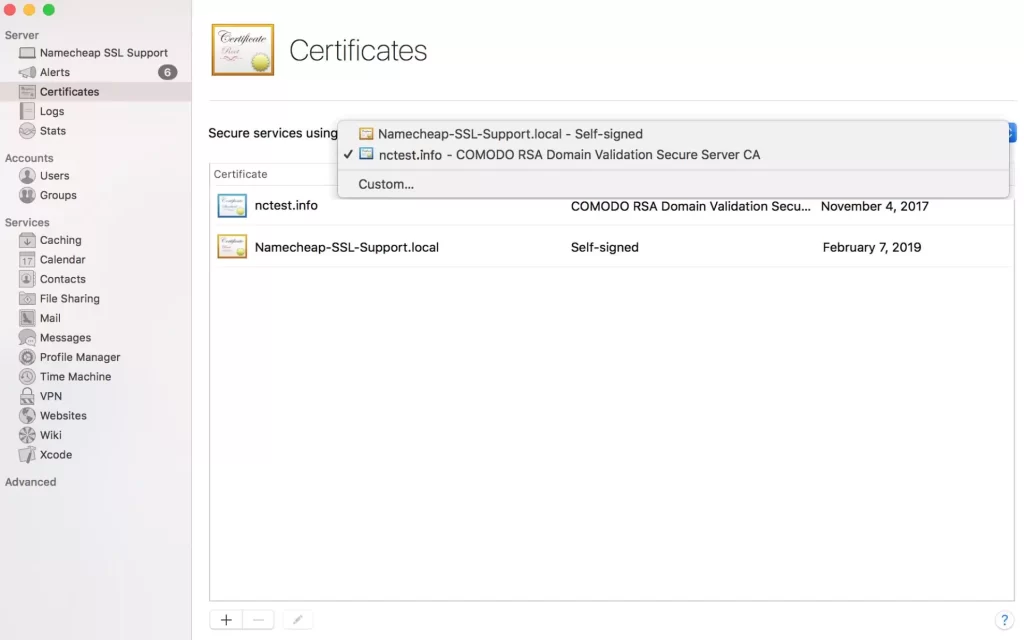
2. For custom services (Mail, file sharing, etc.), click the corresponding button, make selections, and click OK.
3. The certificate is now installed on the server. Verify the installation using our ssl checker tool.
If you encounter challenges or need assistance, contact our Support team, available 24/7.