
Once the SSL certificate is validated and issued, you can retrieve it from your mailbox or download it from your 1Byte account.
How to Install SSL Certificate on Citrix NetScaler VPX
Step 1
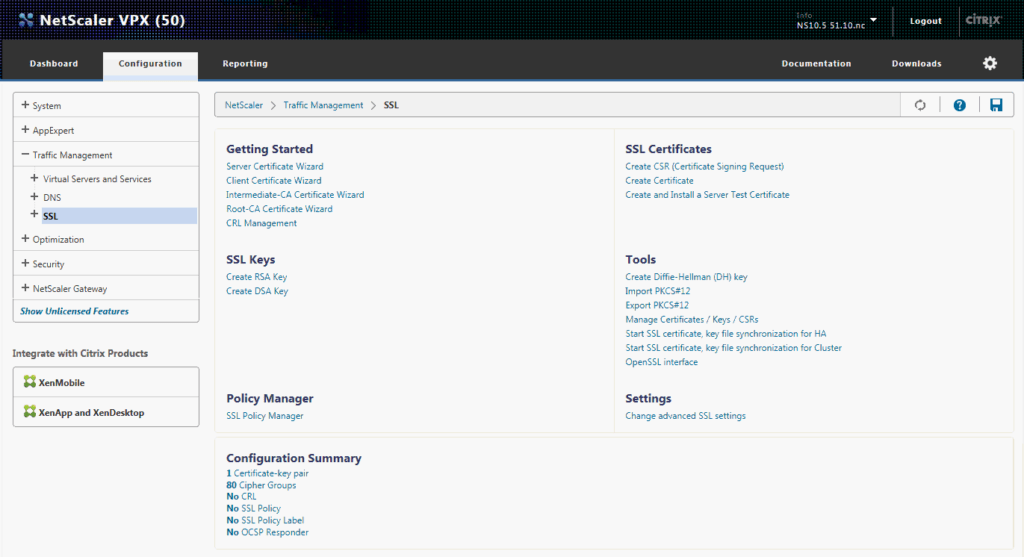
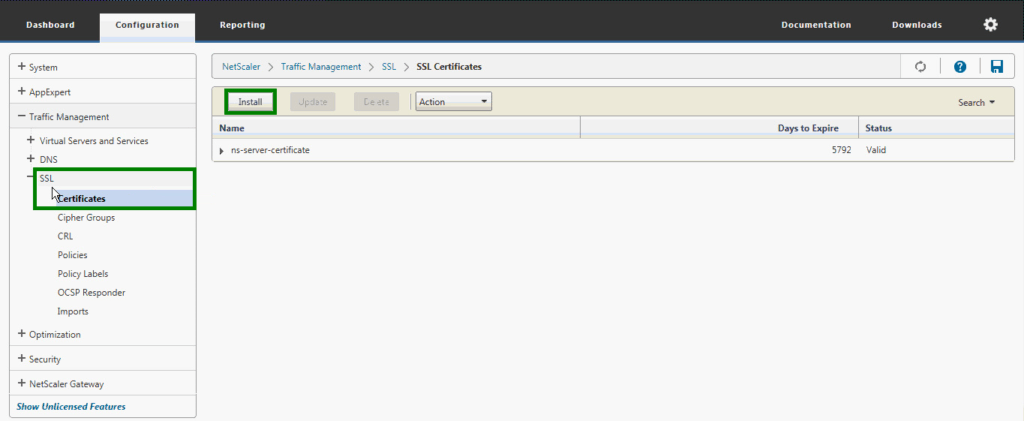
To install the SSL certificate on Citrix NetScaler VPX, log in to your console, select Configuration, expand the Traffic Management left-side menu, and click on SSL.
Step 2
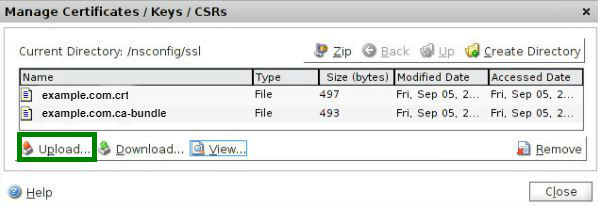
In the Tools section, click Manage Certificates / Keys / CSRs/. In the appeared window, click Upload to import the issued certificate (the .crt file) and the certificate chain or CA Bundle (the .ca-bundle file). The bundle file was emailed to you along with the end-entity certificate, however, you can also download it here.
Step 3
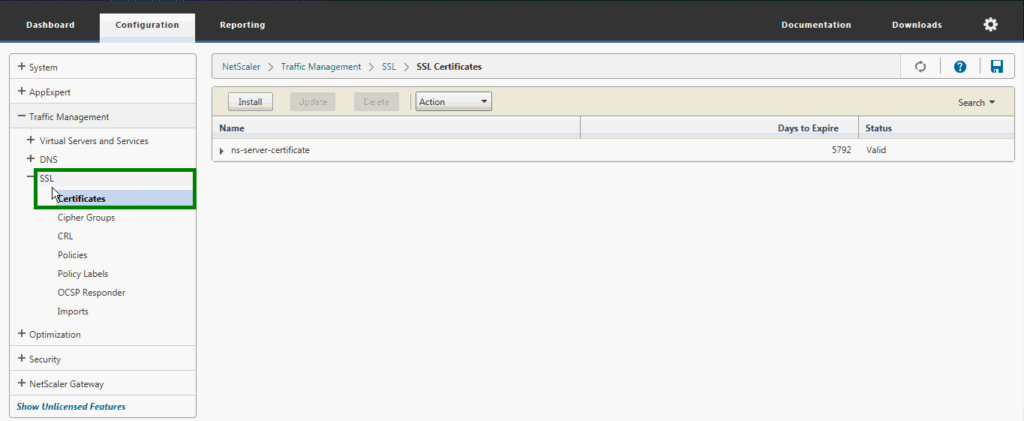
After this, get back to the homepage of the console, select the Configuration tab, expand the Traffic Management tree menu, click on + next to the SSL section and choose Certificates.
Step 4
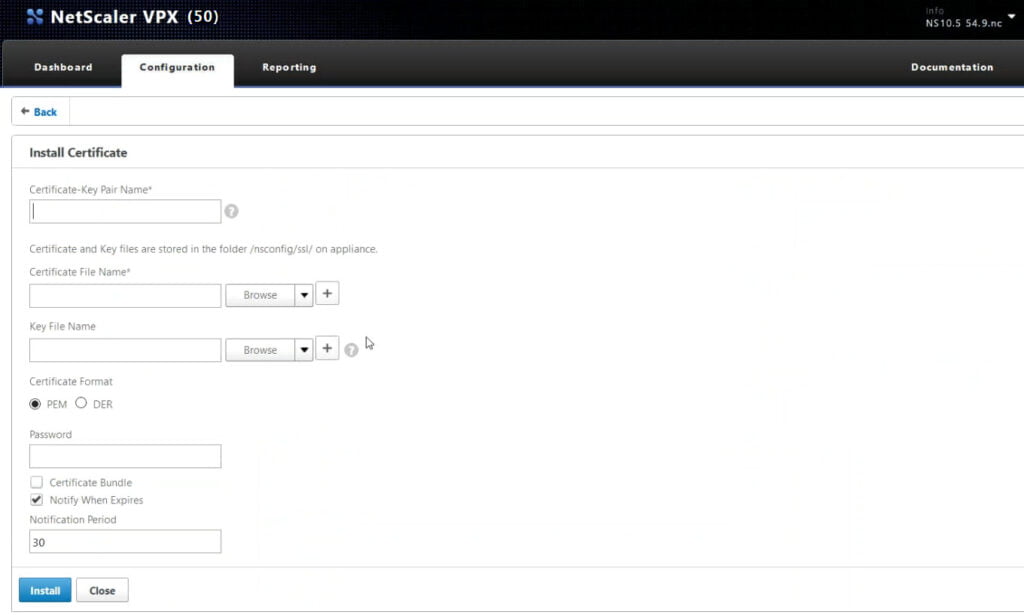
At this point, it is necessary to click Install and fill in the form:
- Certificate-Key Pair Name – make up a name for your SSL certificate in order to differentiate it from other certificate files stored on the server.
- Certificate File Name – click Browse and choose the .crt file you just uploaded.
- Key File Name – click Browse and choose the Private Key that was generated along with the CSR code (the .key file).
- Certificate Format – select PEM since this format is supported by NetScaler VPX.
- Password – leave this field blank if no passphrase was assigned to the Private Key during its generation.
The Certificate Bundle checkbox should not be checked as the bundle should be installed separately.
The Notify When Expires box can be checked if you wish to receive a reminder to renew your SSL certificate. In addition, you can specify the number of days in the Notification Period field. Thus, if you enter 30, you will be reminded to renew your SSL certificate 30 days prior to its expiration date.
After all the necessary fields are filled in, click Install.
Now, your SSL certificate is installed. However, it is still necessary to install the CA Bundle in order for the certificate to be trusted by browsers.
Step 5
Get back to the Certificates section of the SSL left-side menu and click Install.
In case with the CA Bundle, it is only necessary to fill in two fields:
- Certificate-Key Pair Name – make up a name for your intermediate (CA Bundle) certificate.
- Certificate File Name – click Browse and select the .ca-bundle file you uploaded along with the end-entity certificate (the .crt file) before.
Once the fields are filled in, click Install.
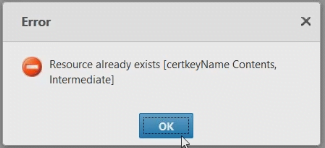
Note: If you receive the following error message: Resource already exists {certkeyName Contents, Intermediate], it means that the CA Bundle is already installed on the server. You can disregard this alert and proceed with SSL configuration.
After the intermediate certificate is installed, you can find it in the certificate list of the Certificates section of the SSL tree menu.
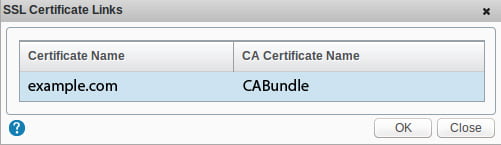
At this point, it is required to link the end-entity certificate and the CA Bundle. Select the end-entity certificate in the certificate list, click on Action and choose Link from the drop-down menu.
On the Link Server Certificates page, locate the name of the CA Bundle file in the CA Certificate Name section and click OK to connect the end entity certificate to the CA Bundle.
Step 6
Now, your SSL certificate is prepared to be linked with the Virtual Host for successful configuration. By binding the certificate to the Virtual Host, the SSL is assigned to a certain port and website on the server.
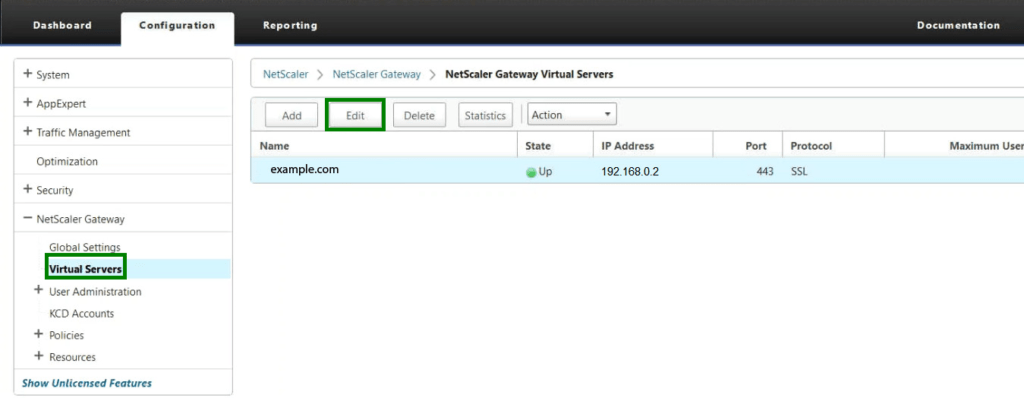
Expand the NetScaler Gateway left-side menu and click on Virtual Servers. On the next page, choose your website from the list of servers and click Edit.
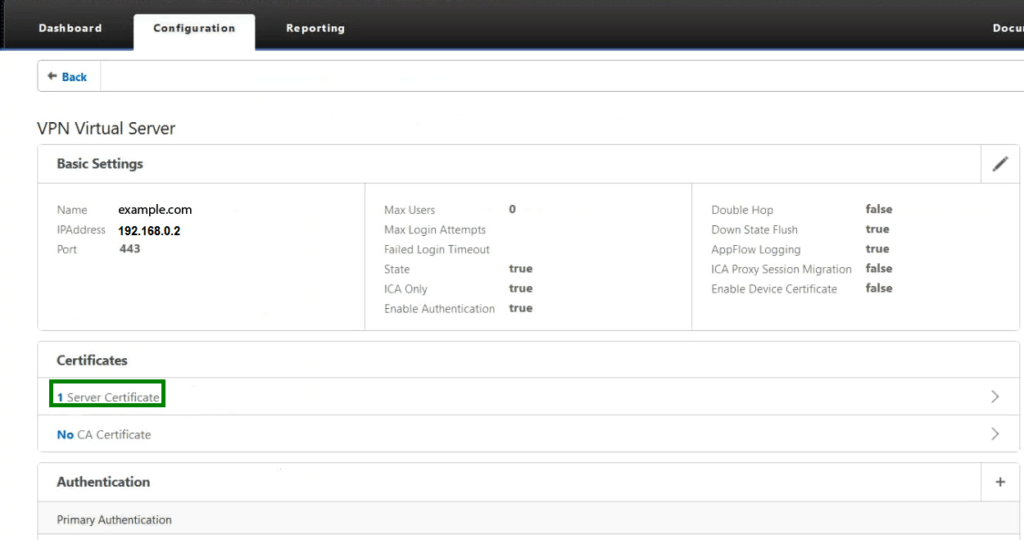
Now, it is necessary to click on Server Certificate to configure binding for the uploaded SSL.
In the pop-up page, click Add Binding.
Note: It is possible that an old certificate is already bound to the virtual server. In this case, you will receive a confirmation to unbind the previous SSL. Click Yes and proceed with configuration.
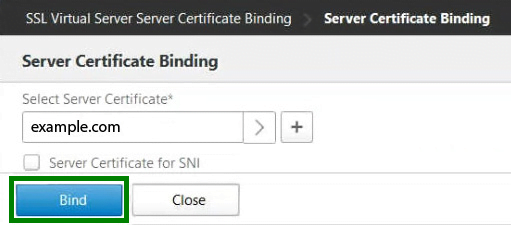
On the Add Binding section, it is necessary to click on the Select Server Certificate field and select the newly installed SSL. After this, click Bind to finalize SSL configuration on Citrix NetScaler VPX.
Now the SSL certificate should work properly and your website can be accessed via secure HTTPS protocol. You can always check the correctness of SSL installation using SSL checker tool.
You might also wish to force a secure connection so that your website is automatically accessed via HTTPS. You can find guidelines on the HTTP>HTTPS redirection here.
If you are experiencing any difficulties throughout the process, please contact our Live Chat Support.