
An SSL certificate needs to be activated, validated, and installed on the server. For Azure, you will need to upload it to the Azure portal. The SSL certificate can be downloaded from the 1Byte account or email; it must be converted into PKCS#12 (PFX) format, which includes a private key.
How to Install SSL Certificate on Microsoft Azure Web App
If you generated a CSR code for the certificate activation on your Windows server, it is necessary to take the following steps to receive a PFX file:
- Complete the certificate request through the IIS management console.
- Export the PFX file using either the MMC or IIS management console. Both options are described here.
In case you have an SSL certificate, a private key and CA bundle in separate files in PEM format, it can be converted into PFX using SSL converter tool.
Step 1
Alternatively, an SSL certificate can be converted into the necessary format using the following OpenSSL command if you have a Linux-based terminal:
openssl pkcs12 -export -out certificate.pfx -inkey privatekey.key -in certificate.crt -certfile CA_bundle.crt
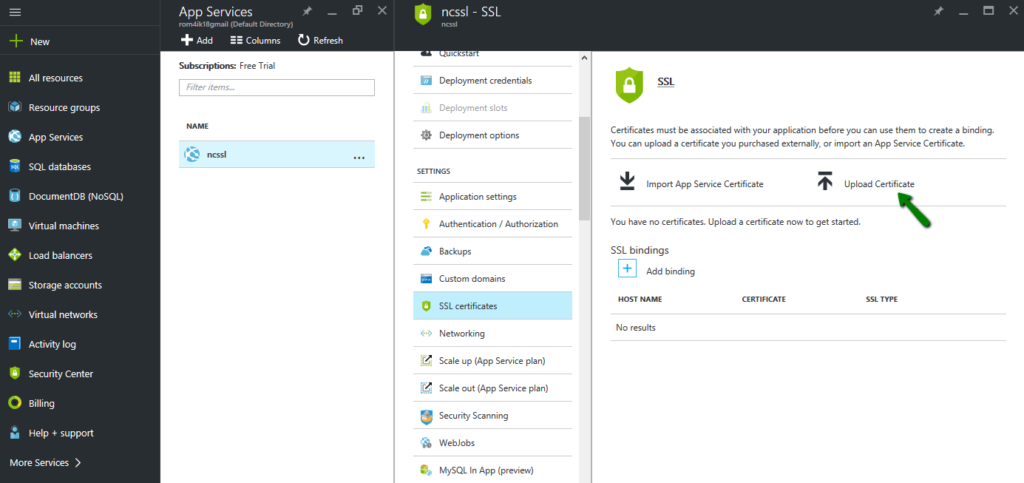
Once you have the PFX file, you can upload it to the Azure portal in order to assign it to your Web App:
Once uploaded, the following steps should be taken to configure a secure HTTPS connection.
Step 2
Go to App Services, select the name of your App and click SSL certificates under the Settings section:
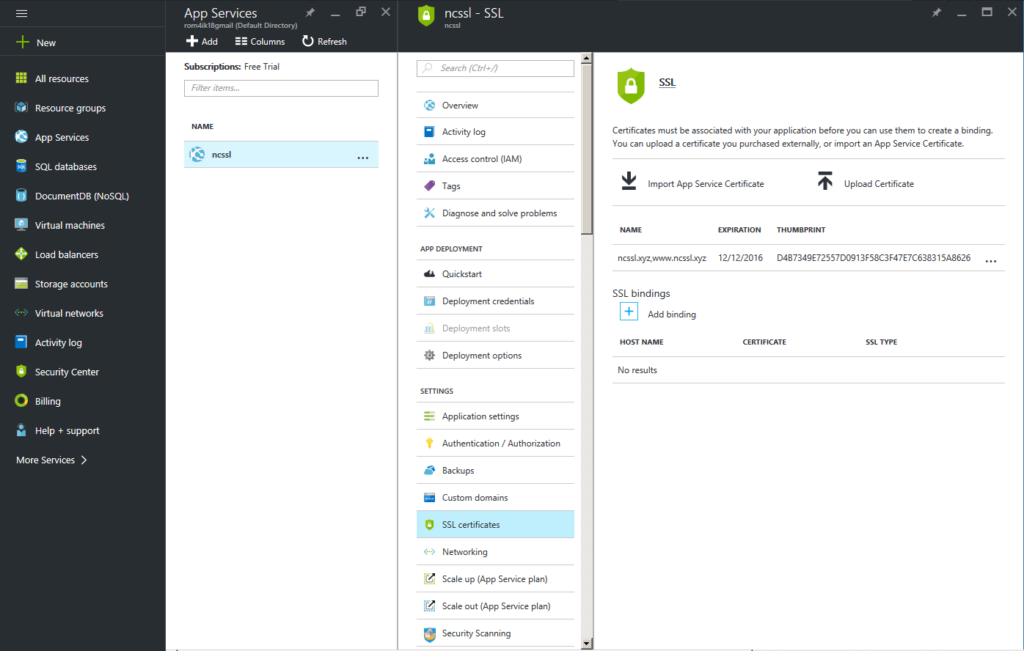
Step 3
You should see your SSL on the list. The next step is to set binding for the domain you would like to secure with the SSL certificate. Click on Add binding to proceed:
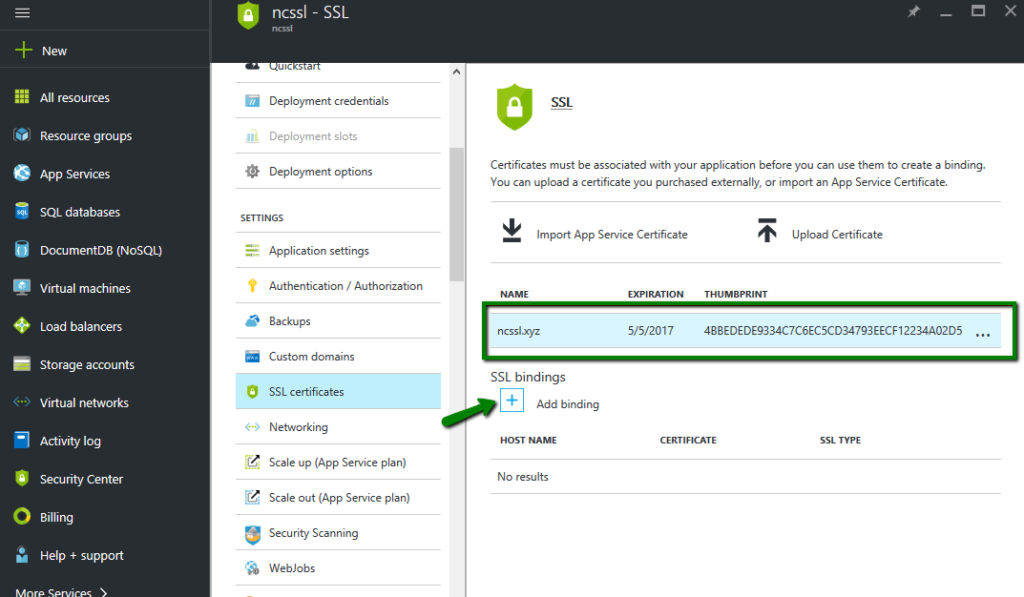
Step 4
On the Add Binding panel, select the domain name you would like to secure. You may also select whether to use Server Name Indication (SNI) or an IP-based SSL. Click Add binding to complete the certificate installation:
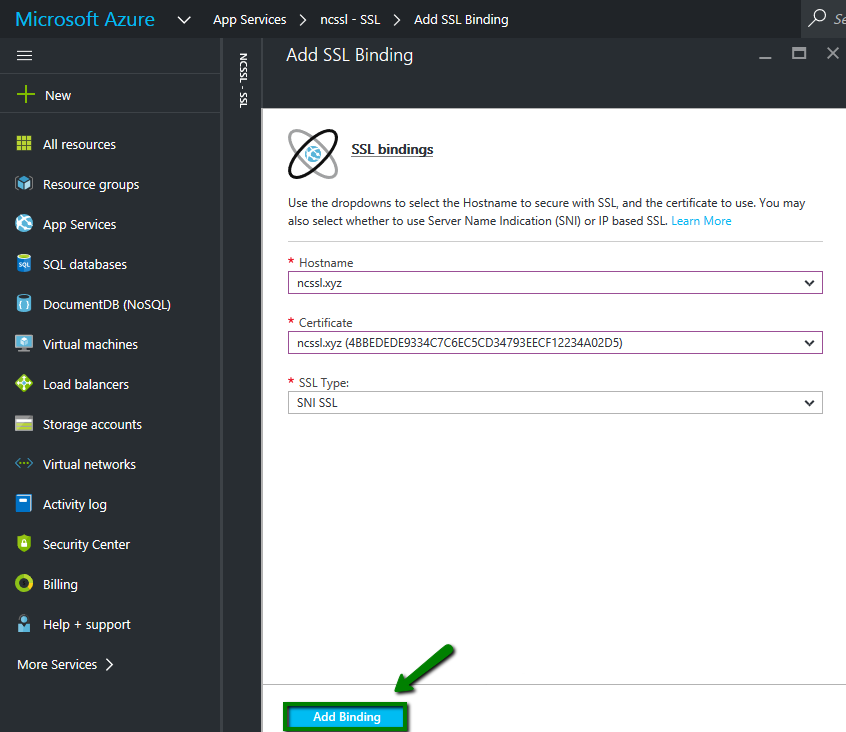
Note: An IP-based SSL assigns your server’s public IP address to the domain name. This options requires each domain to have a dedicated IP.
SNI SSL allows multiple domains to share the same IP address with a separate certificate used for each domain name. Most modern browsers (including Internet Explorer, Chrome, Firefox and Opera) support SNI; however, older browsers like Internet Explorer 6, Mozilla Firefox 2.0 or earlier may not support it.
If you use the SNI SSL option, there is no need to take any other steps. However, if you created an IP-based SSL binding, App Service will create a dedicated IP address for the binding as an IP-based SSL requires one.
If you used an A record to point your custom domain to your Azure app, and you just added an IP-based SSL binding, you will need to update the existing A record in the domain DNS settings with the new IP address that was assigned to the domain.
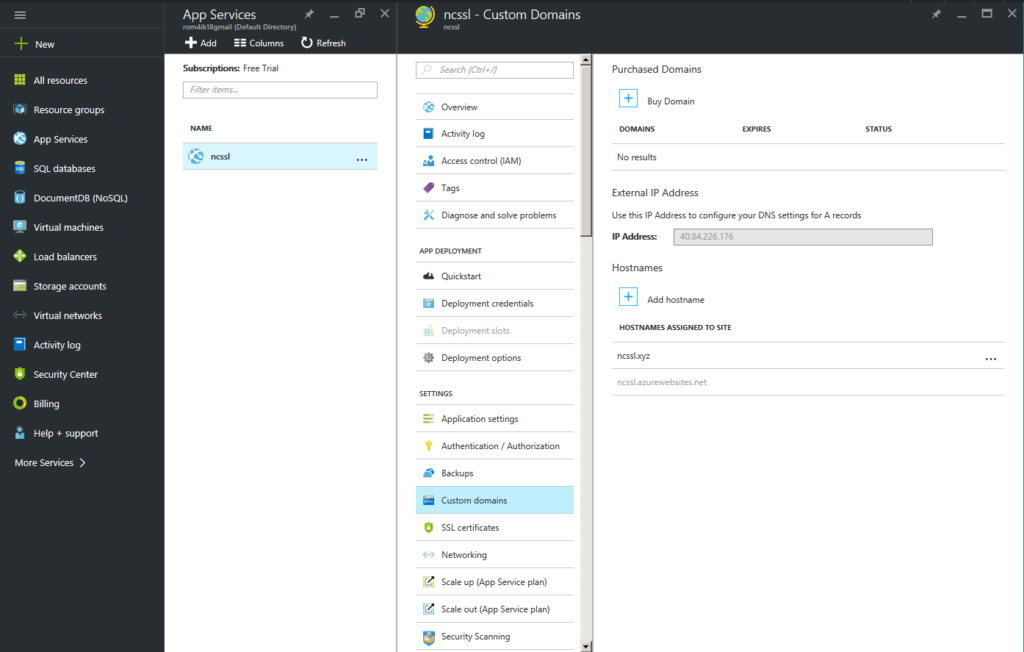
Step 5
You can find this IP address on the Custom domain page under settings of your app, right above the Hostnames section. It will be listed as External IP Address:
The certificate is now installed on the server. You may check it by opening the domain name in the browser and specifying the secure protocol: https://<your_domain>.
Certificate installation can also be verified with the help of the OpenSSL command:
openssl s_client -showcerts -connect <your_domain>:443 -servername <your_domain> -showcerts
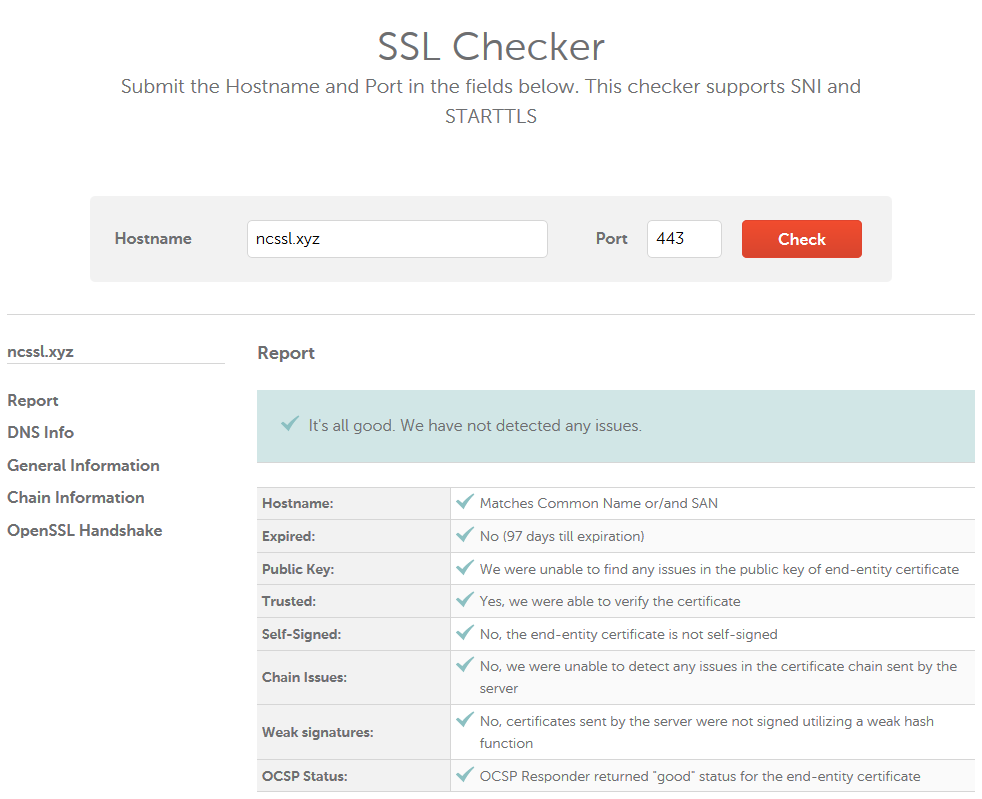
Alternatively, feel free to use this online SSL checker. If the certificate is installed correctly, the result will be shown as follows:
Enforcing HTTPS for Azure Web App
In order to set an automatic HTTPS redirect for a secure connection, one needs to add a special redirect rule to the .web.config file. By default, it is located in the following folder D:\home\site\wwwroot The file can be modified through the Kudu debug console for your app located at https://<appname>.scm.azurewebsites.net/DebugConsole.
The rewrite rule should be added between <rules> </rules> tags:
<rule name=”Force HTTPS” enabled=”true”>
<match url=”(.*)” ignoreCase=”false” />
<conditions>
<add input=”{HTTPS}” pattern=”off” />
</conditions>
<action type=”Redirect” url=”https://{HTTP_HOST}/{R:1}”
appendQueryString=”true” redirectType=”Permanent” />
</rule>
After the redirect is applied, anyone who enters example.com or www.example.com in a browser will be automatically redirected to https://example.com.