

To activate an SSL certificate, you need to submit a CSR (Certificate Signing Request) on our website. The CSR contains encrypted information about your company and domain name.
How to Generating a CSR using WHM
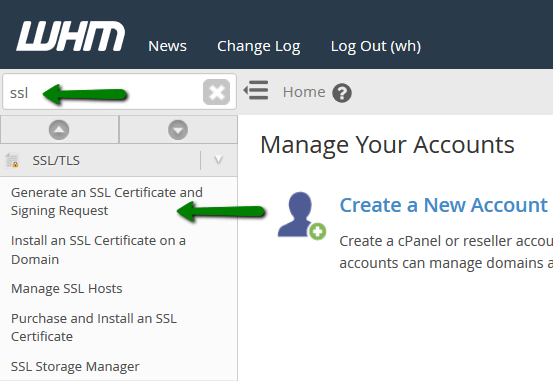
Step 1
To generate the CSR in WHM you need to:
- Log in to your WHM account.
- Find option Generate an SSL Certificate and Signing Request.
- On the new page you will be requested to provide the information required for CSR generation.
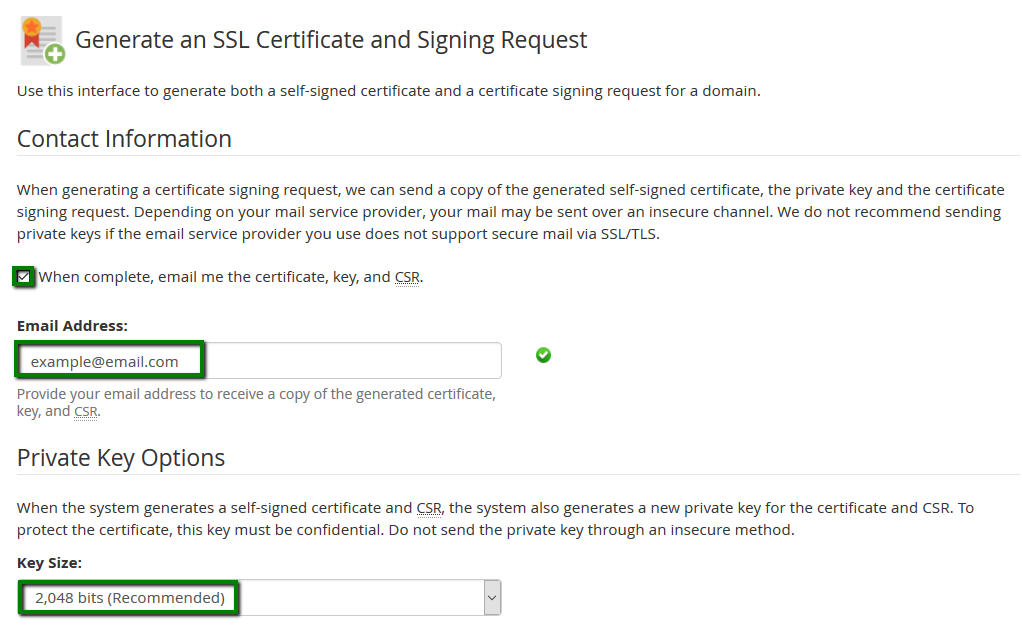
Note: If you check the first box and enter your email address, the keys will be sent to the provided address after generation.
Step 2
- Key Size. Usually there are two options: 2048 and 4096. You can choose any of them. 2048 key size is considered secure nowadays, but if you wish to have a higher security level, 4096 key size is preferable. However, every doubling of key size slows down establishment of SSL/TLS session by 6-7 times. Additionally, a bigger key size increases load on your server’s CPU.
Important: It is mandatory to use only alphanumeric characters. Otherwise, there is a possibility that a Certificate Authority will reject the CSR and certificate activation will fail.
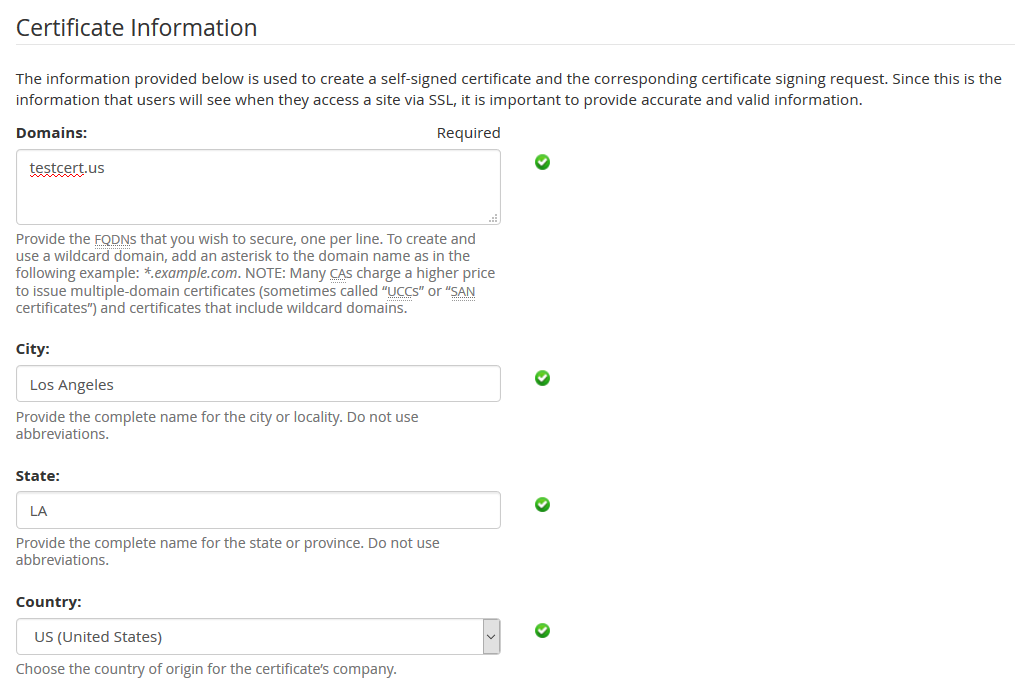
Step 3
All the fields (except for the Passphrase) must be filled in.
- Domains. Here, put the domain name you wish to secure. In case SSL should be issued for a subdomain, it is required to specify a domain’s subdomain as ‘sub1.yourdomain.com’. If you have a wildcard certificate, please put an asterisk with a dot in front of the domain name as ‘*.yourdomain.com’. If the CSR is generated for a Multi Domain certificate, you should specify the domain names one per line.
If you have a certificate with domain validation, it is not mandatory to specify Company Name and Company Division fields. However, do not leave the fields blank, just put there ‘NA’ instead.
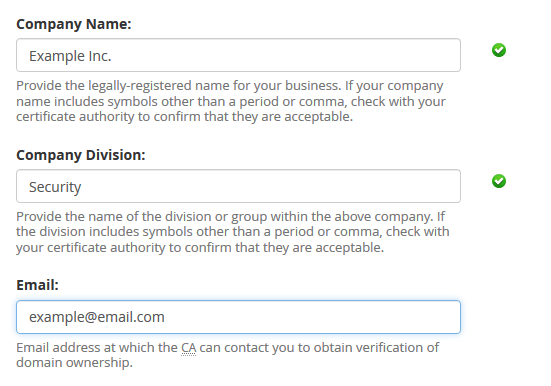
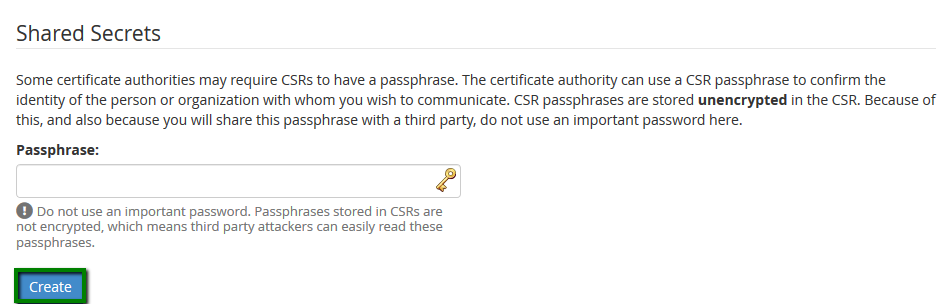
It is not mandatory to specify the Passphrase. In fact it is not with the passphrase your Private Key will be encrypted, but with a challenge password. The Challenge password used to be a shared secret between a certificate applicant and a Certificate Authority. Nowadays challenge password is not required to have an SSL issued and can be considered as an obsolete feature.
- Once you fill the required information in, click Create.
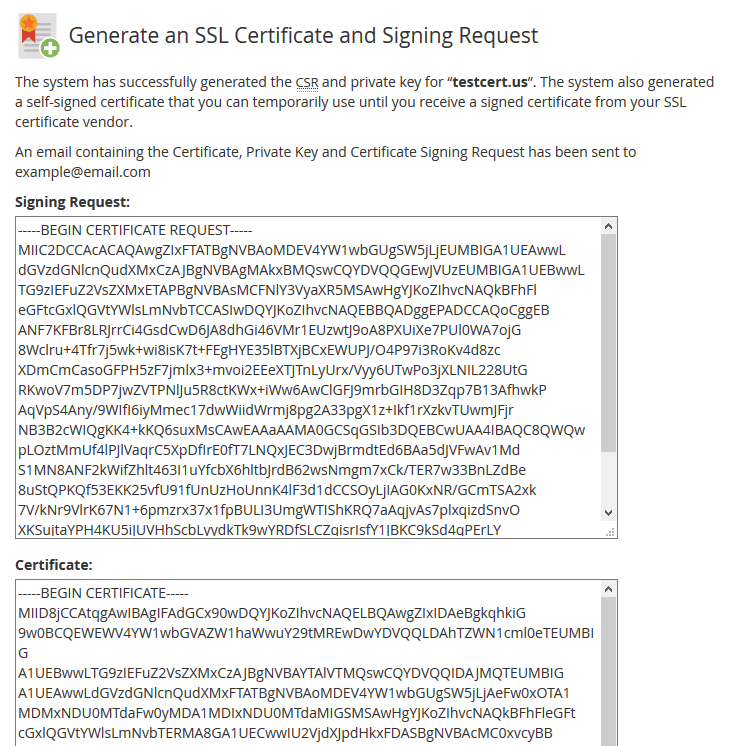
Step 3
On the prompted page you will see three blocks of code.
- Signing Request. Actually it is your CSR that you should submit during SSL activation on our website.
- Certificate. It’s a self-signed certificate issued for your domain name which will be not used further. Eventually you will receive a trusted certificate issued for your domain name.
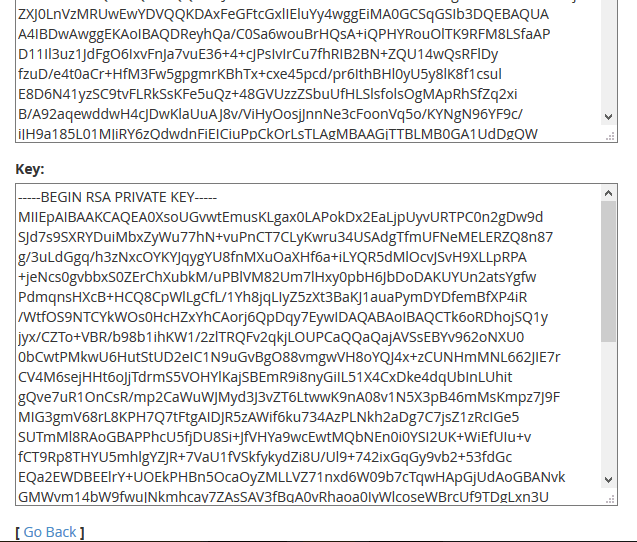
- Private Key. The key that will be used for decoding during SSL/TLS handshake once the certificate is installed. Make sure that you save it properly as the Private Key will be required for installation of the certificate on the server.
That’s all, now you can proceed with SSL activation on our website.