
Welcome to 1Byte, your trusted partner in the digital world. We are here to help you in the process of how to register your .kh, .com.kh, . net.kh, . org. kh, and .edu.kh domains on domain.gov.kh, and how to get your IP address and nameservers from us.
Being one of the leading cloud & hosting providers in Cambodia, we know how crucial it is to have a reliable online presence. That is why we strive to equip you with the necessary knowledge and materials to thrive in the digital world.
In this article, we will guide you on how to buy a hosting plan from 1Byte to get your IP address and nameservers. We will also give you detailed procedures with illustrations from our development team to make the process as easy and painless as possible.
Finally, we will assist you on how to go about registering the preferred .kh, .com.kh, .net.kh, .org.kh, and .edu.kh domains on domain.gov.kh.
How to Get IP Address & Nameservers through 1Byte’s Shared & Cloud Hosting
In this section, we’ll guide you on how to get your IP address and nameservers through our shared and cloud hosting services.
Shared Hosting
Step 1
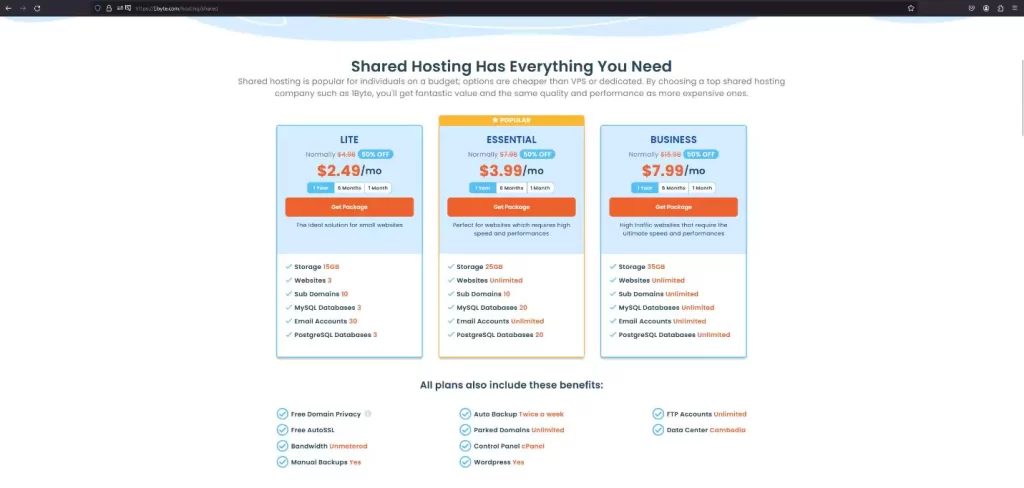
Going to the Shared Hosting service page is the first step you take in the process of creating your online presence. It is an affordable method that offers you the tools you need to start your website and establish an online presence. At 1Byte, you are presented with different Shared Hosting plans to suit your needs as follows.
Step 2
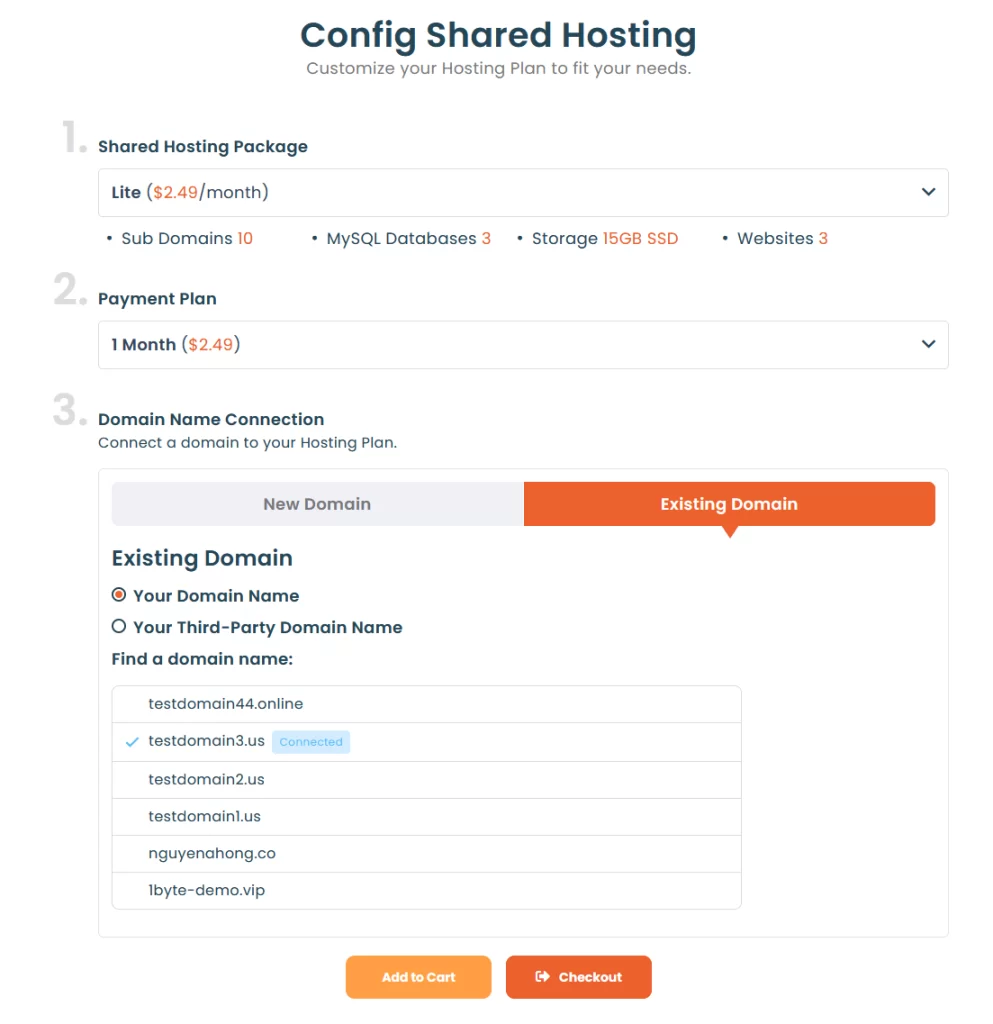
Let’s say you’re going for the Lite package. If you go for the Lite package, you’re choosing a solution that is cost-effective and effective at the same time. This package is suitable for anyone who already possesses a domain. There are two options available:
Your Domain: This refers to a domain that you have bought from 1byte. com. It is quite easy, as all these activities are coordinated by the same company.
Your Third-Party Domain: However, if you have bought a domain from another provider, you can still associate it with the 1Byte hosting. This will enable you to select the most appropriate domain provider in the market and at the same time benefit from the hosting services offered by 1Byte.
Step 3
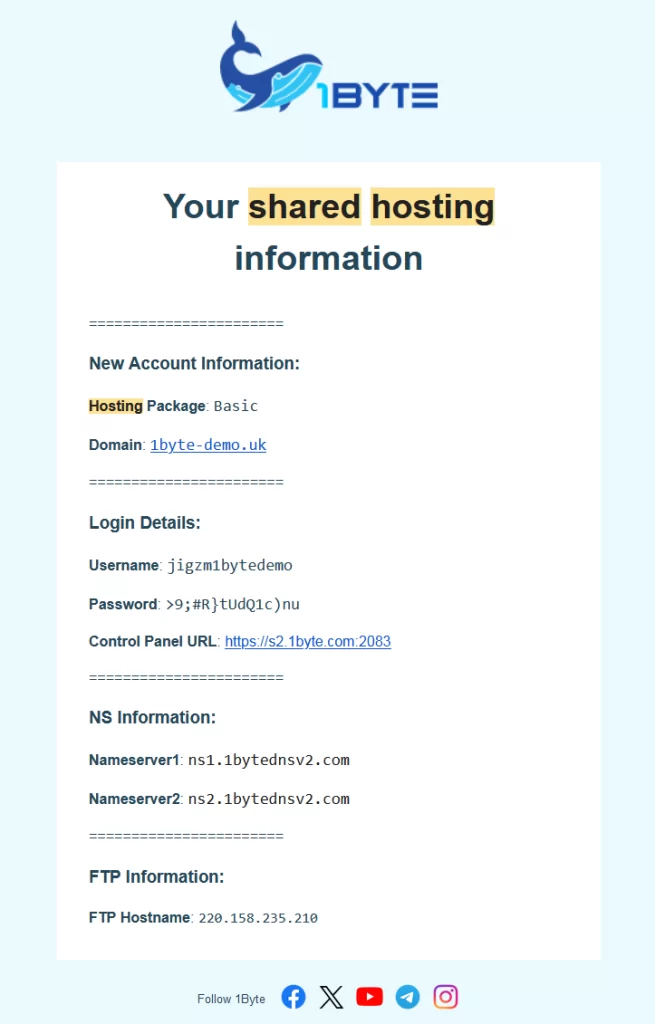
After a successful purchase of your preferred package, 1Byte will then send the necessary credentials to the email address you provided. This includes the Nameserver & IP Address that you need to register with domain. gov. kh. It is quite easy and enables the user to take full charge of their online persona.
Cloud Hosting
Step 1
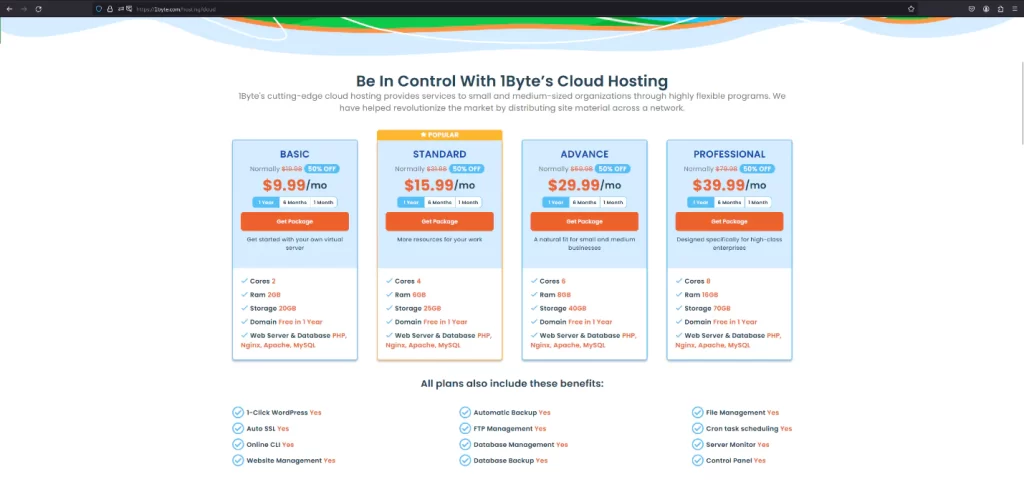
Cloud Hosting is a robust and scalable solution for those who require more resources and control over their online presence. With 1Byte, you can choose from a range of Cloud Hosting packages, each designed to cater to different needs, all featured on our Cloud Hosting service page.
Step 2
Say, if you opt for the Basic package, you’re choosing a solution that offers a balance between cost and performance. This package is perfect for those who are just starting their online journey or have moderate traffic on their website.
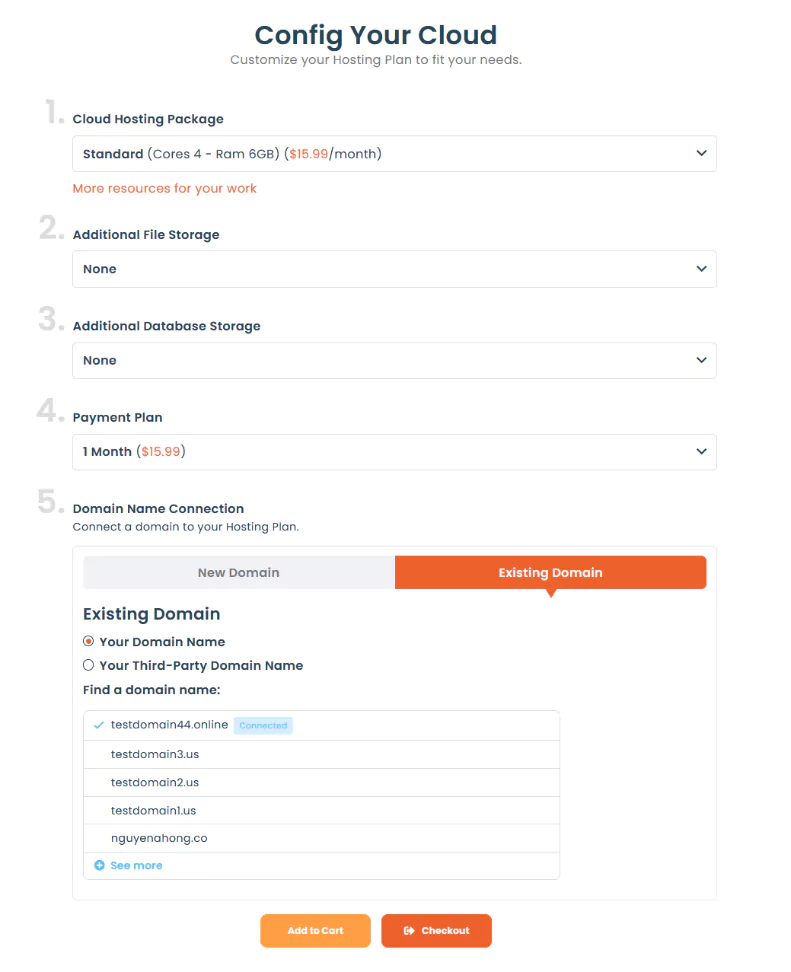
There are two options available when it comes to domain names:
- Your Domain: If you’ve purchased a domain through 1byte.com, you can easily connect it with your Cloud Hosting package. This makes the process seamless and efficient.
- Your Third-Party Domain: If you’ve purchased a domain from another provider, you can still connect it with 1Byte’s Cloud Hosting. This gives you the flexibility to choose the best domain provider for your needs.
Step 3
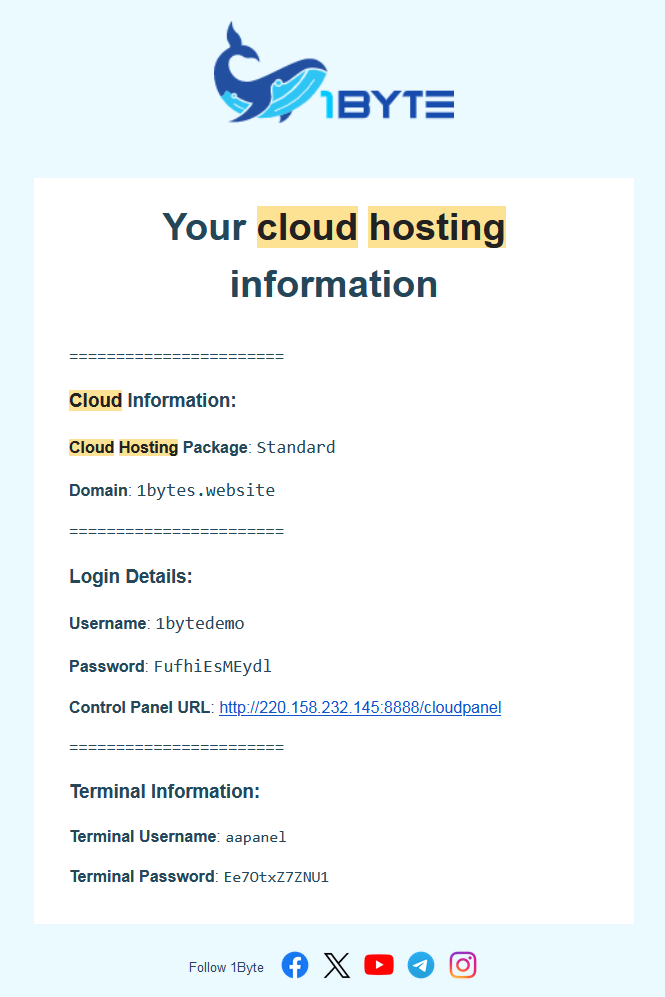
Once you’ve successfully purchased your chosen package, 1Byte will send the necessary credentials, including the IP Address, to your email. To create a Nameserver, you’ll need to access the Domain Management section in the 1Byte Dashboard.
Step 4
Here’s how you can create a Nameserver:
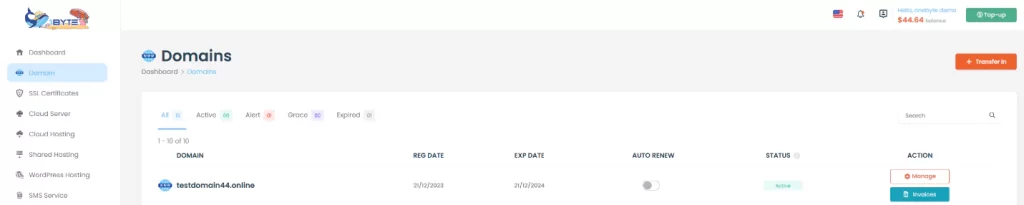
Go to the 1Byte Dashboard and click on ‘Domain’. Click on ‘Manage’ to view the Nameserver options.
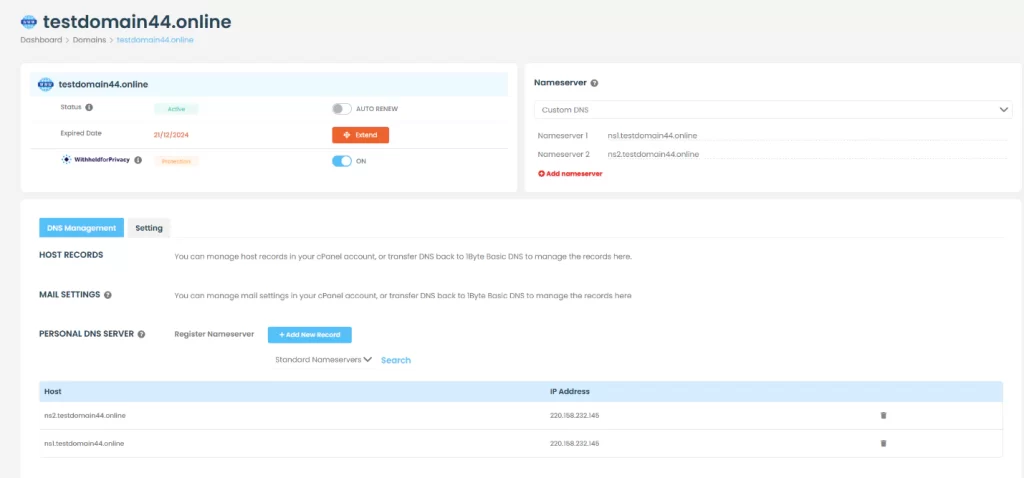
Choose ‘Custom DNS’ to create a new Nameserver. Click on ‘Add New Record’.
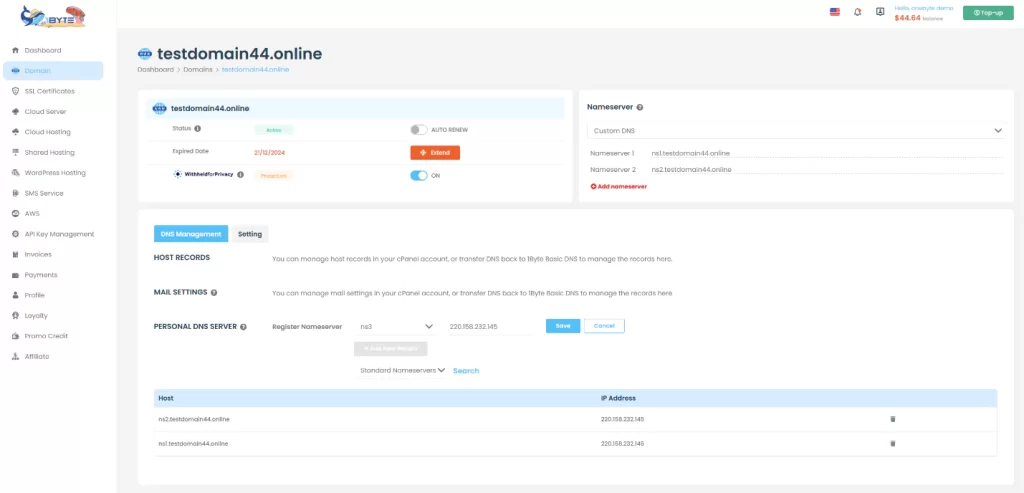
Click ‘Register Nameserver’. Choose ‘ns1’ or ‘ns2’, fill in your Cloud Hosting IP, and click ‘Save’. Once you’ve created the Nameserver, you can copy it to fill in ‘Nameserver1’ & ‘Nameserver2’.
Click on ‘Save Change’ to finalize the process.
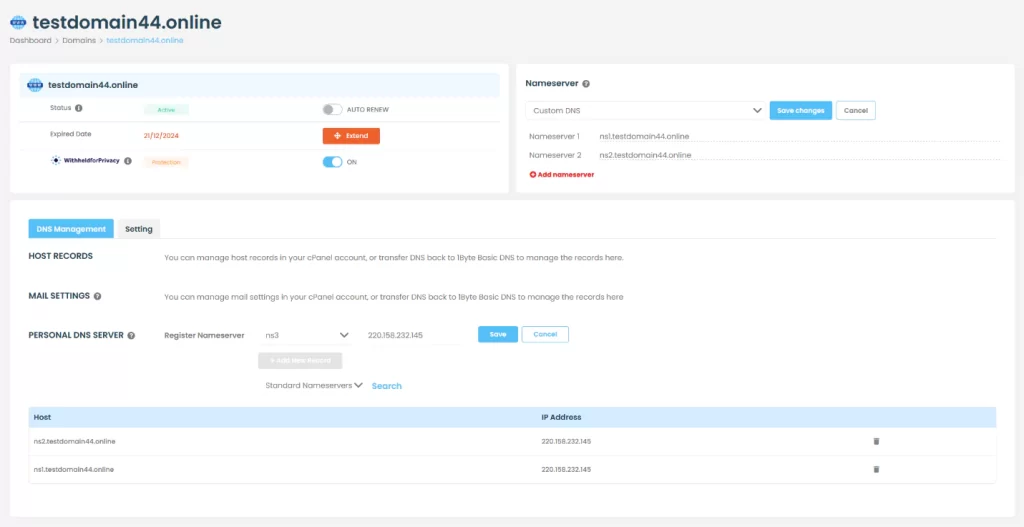
Now, your Nameserver is ready to use.
How to Register Domains .kh, .com.kh, .net.kh, org.kh, .edu.kh, Through domain.gov.kh.
Registering a domain with domain.gov.kh is a straightforward process that involves several steps. Here’s a step-by-step guide to help you navigate through the process:
Step 1
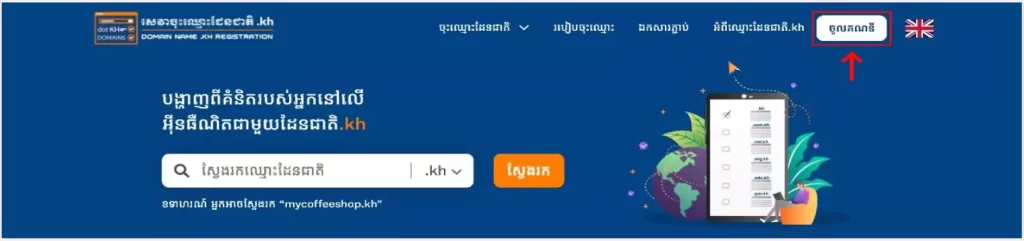
Start by visiting the website: Enter https://domain.gov.kh into your address bar. Click on the button labeled “ចូលគណនី” to log in.
Step 2
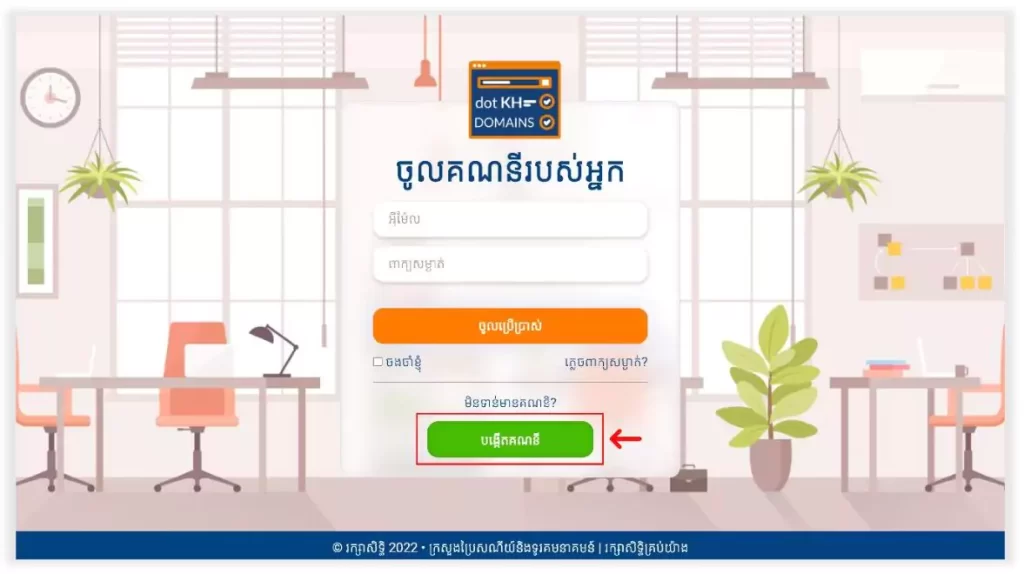
Create an account: Click on the button labeled “បង្កើតគណនី”.
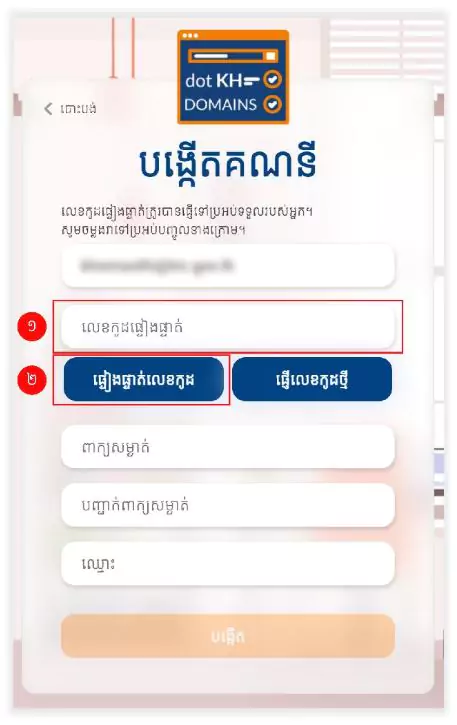
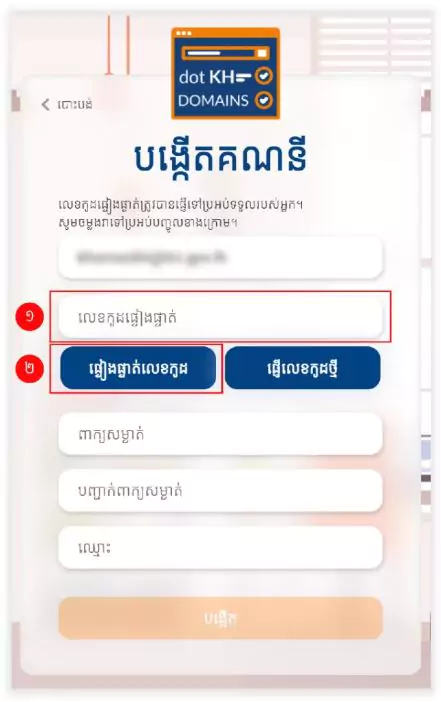
Enter your official email and click the button labeled “ផ្ញើលេខកូដផ្ទៀងផ្ទាត់”. An automatic code will be sent to your official email.
Type that code into the box to confirm your official email.
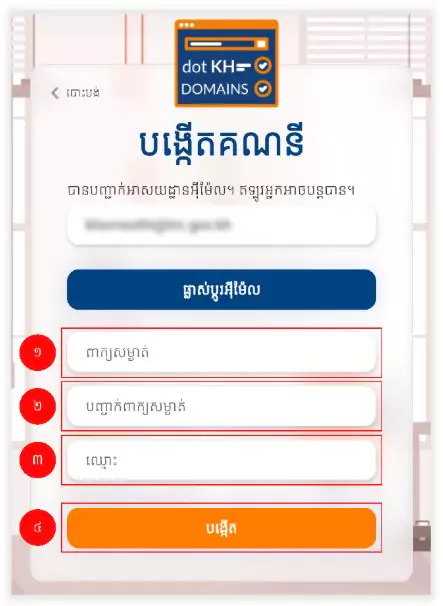
Then, enter your password and name and click the button to create your account.
Step 3
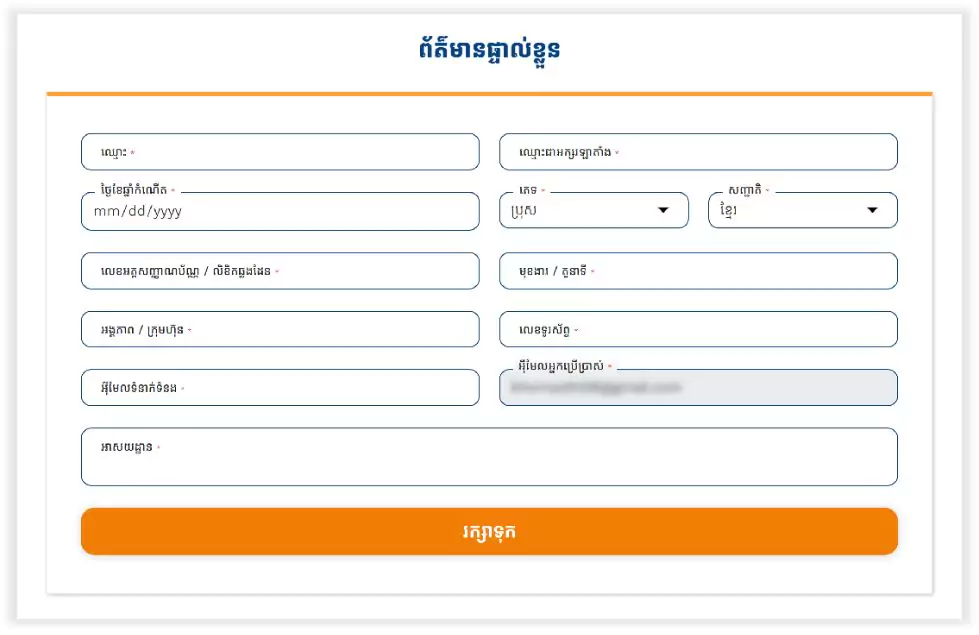
Enter personal information: After your account has been created, a tab will pop up. Enter the required personal information and click the button labeled “រក្សាទុក”.
Step 4
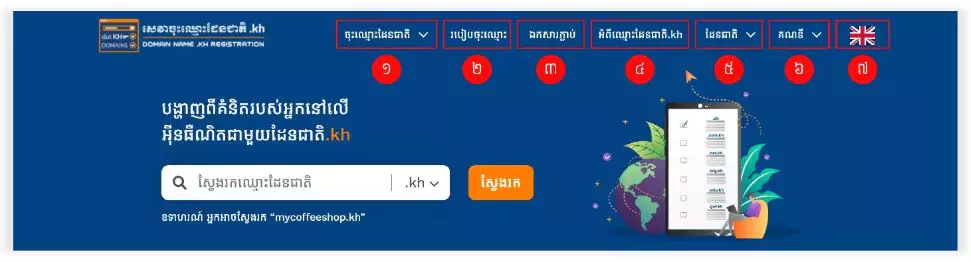
Explore the menu: The national registration application system offers several domain options including .kh, .com.kh, .net.kh, .org.kh, and .edu.kh.
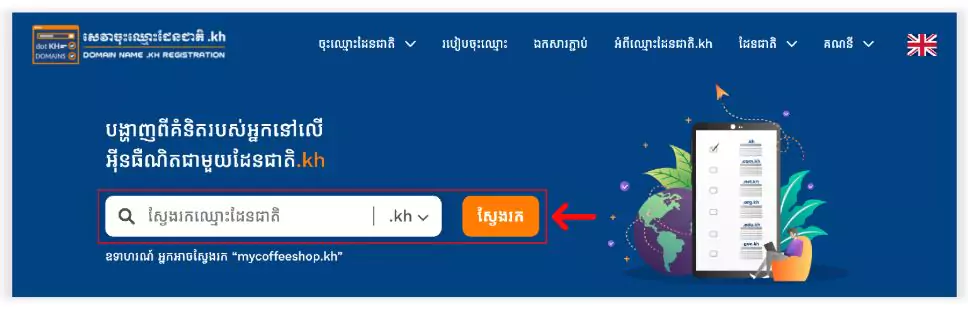
Enter and find the domain name you want to buy and click the button labeled “ស្វែងរក”.
Step 5
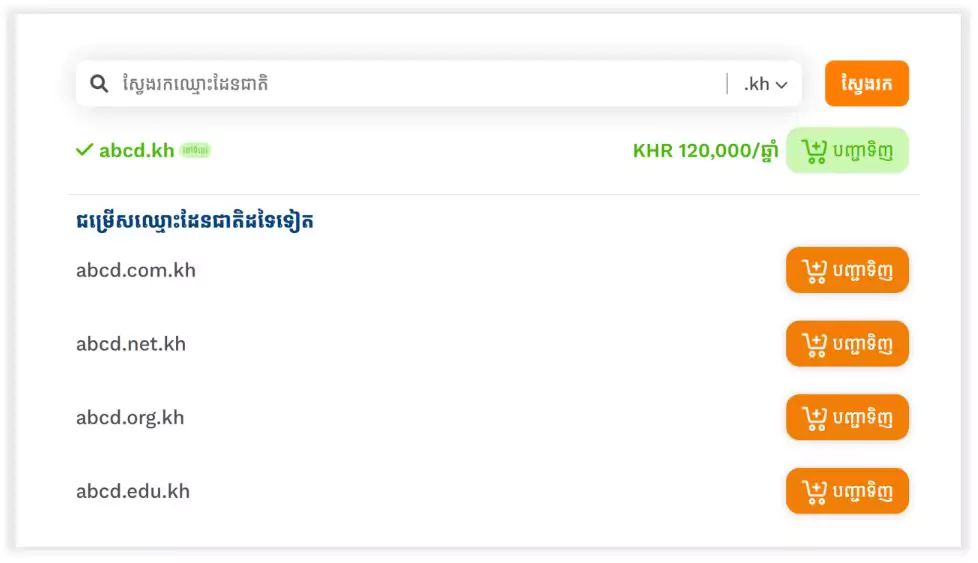
Select the domain type: Select the type of national domain you want to buy and click the button labeled “បញ្ជាទិញ”.
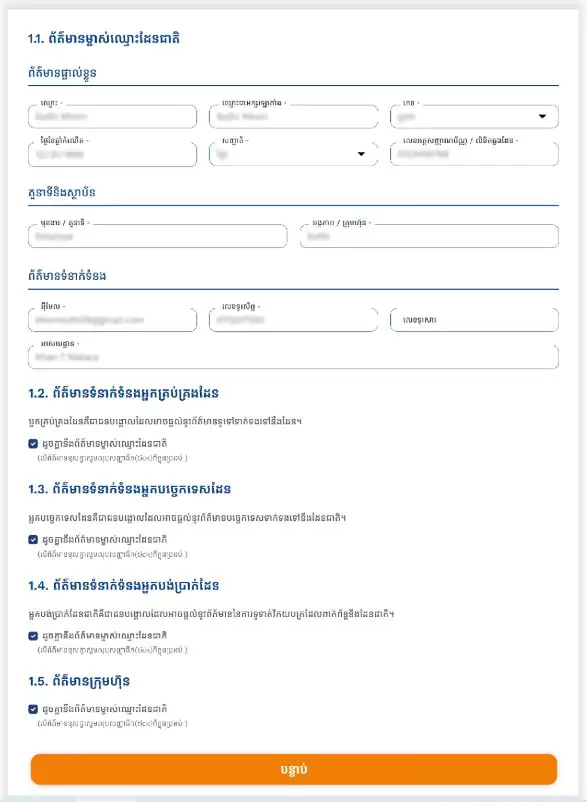
Fill in the national domain name information and click the button labeled “បន្ទាប់”.
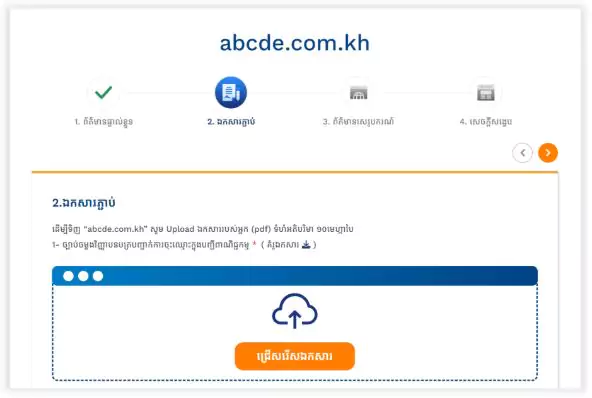
Attach the required file and click the button labeled “បន្ទាប់”.
Step 6
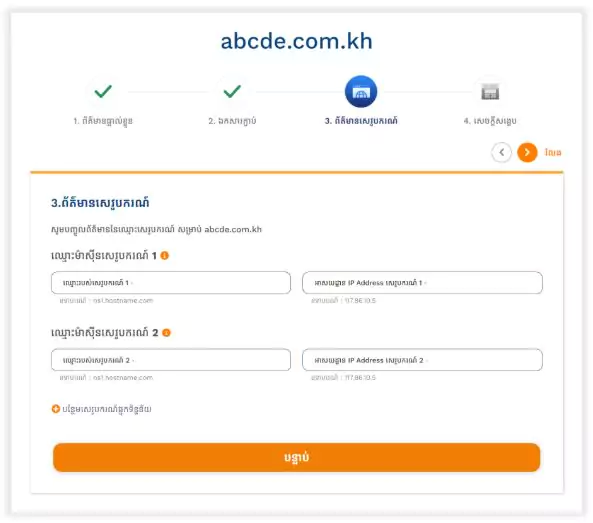
Fill in the application information: Fill in the application information of the nameservers and IP address.
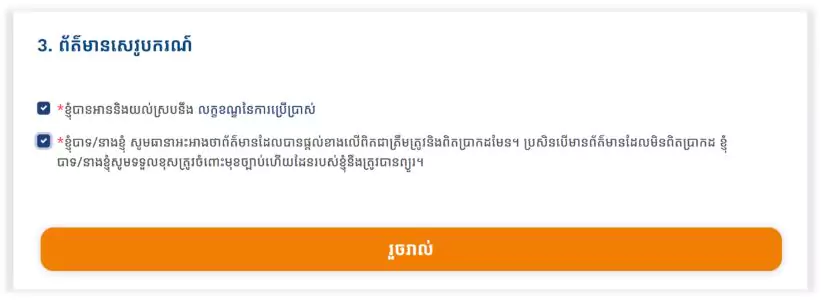
Click on both checkboxes and click the button labeled “រួចរាល់” to complete the national registration application process.
Step 7
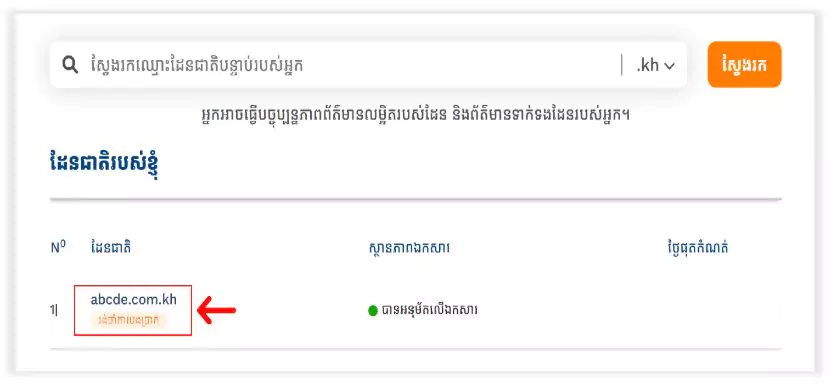
Complete the payment process: Click “តំំណភ្ជាប់” in your email or go to domain.gov.kh and go “ដែនជាតិរបស់ខ្ញុំ” and click on the national domain name that shows “រងចាំការបង់ប្រាក់”.
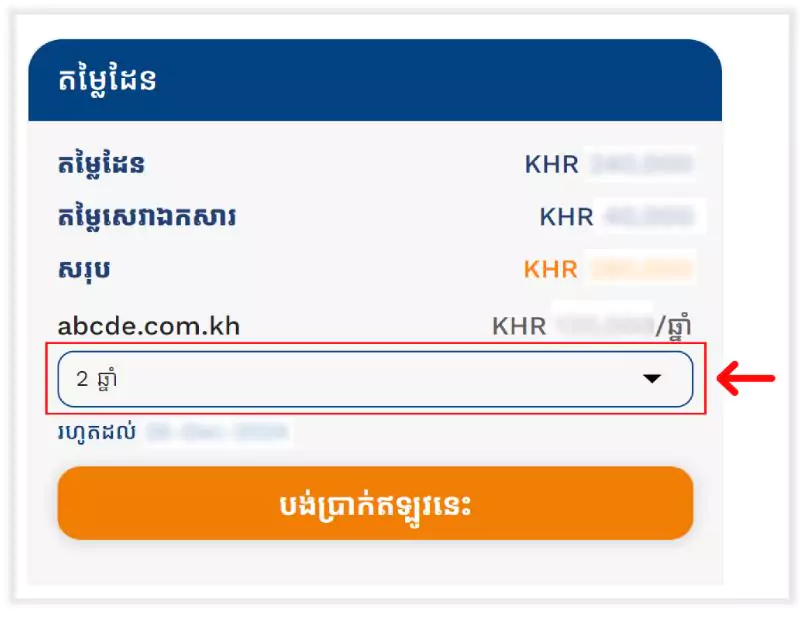
Select the number of years you want to pay and click the button labeled “បង់ប្រាក់ឥឡូវនេះ”.
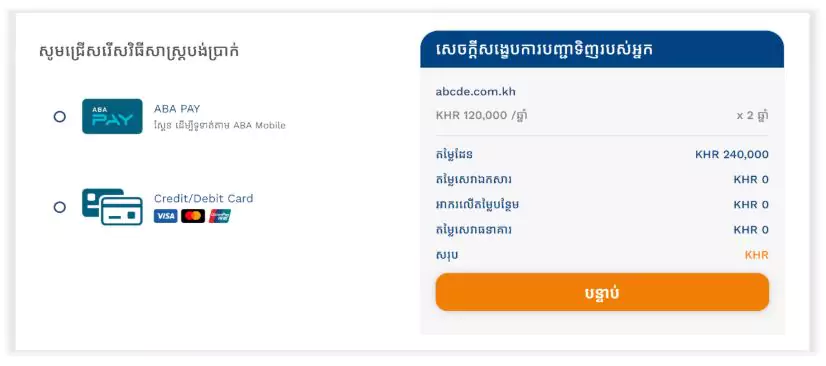
Choose a payment method and click the button labeled “បន្ទាប់”. Enter the required information. Once you have paid, you will receive an email confirming your payment. Your national domain name will be available after you make your payment.
Remember, before you can get Nameservers & IP Address, you must have Cloud Hosting first. 1Byte offers a variety of Shared Hosting Package Plans. For instance, you could choose the cloud hosting Basic package. After your successful purchase, 1Byte will send credentials to your email. Now you get only IP Address for Nameserver you will need to go to create in Domain Management which will be available in the 1Byte Dashboard.