SSL Certificate Installation on IIS 7

SSL Certificate Installation on IIS 7

For both SSL Certificate installation and CSR code generation on IIS 7, it is recommended to utilize the Internet Information Services Manager.

4 Steps to install SSL Certificate on IIS 7

For this you need to go to:
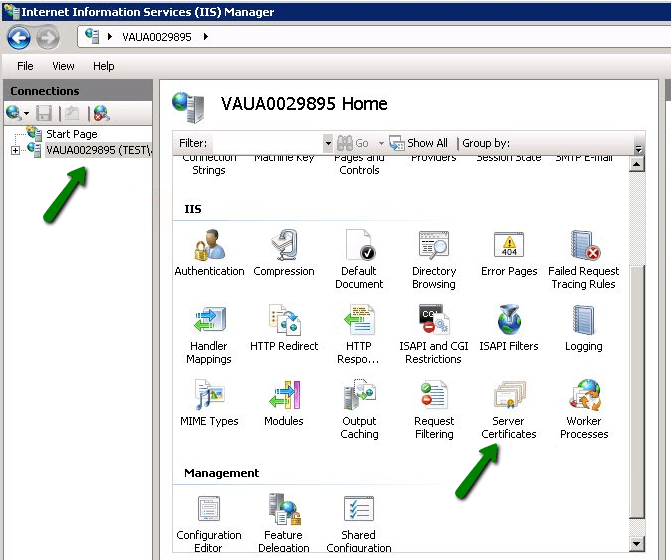
Secure Your Site Instantly
1Byte offers trusted SSL certificates to protect your website and ensure secure data transmission for your customers.
FURTHER READING:
1. SSL Certificate Installation on apache2 (Debian, Ubuntu)
2. SSL Certificate Installation on httpd (CentOS)
3. Apache SSL Certificate Installation

Step 1

Start >> Administrative Tools >> Internet Information Services (IIS) Manager >> Server Name >> double-click on the Server Certificates option.
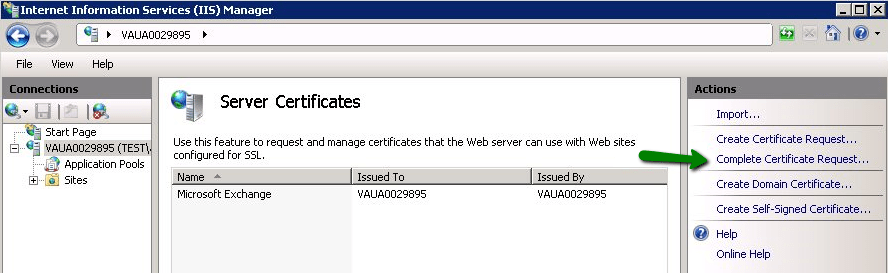
Step 2

Open the Complete Certificate Request Wizard.
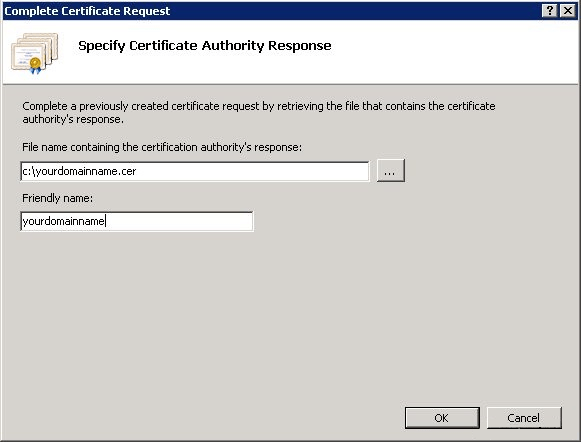
Step 3

Specify the Validated Certificate file location and Friendly name in the Complete Certificate Request Wizard. The Friendly Name is not part of the certificate itself, but it can be used by the server administrator to easily distinguish the certificate.

If, upon importing the certificate into the IIS7 server, you receive the error “Cannot find the certificate request associated with this certificate file. A certificate request must be completed on the computer where it was created” or “ASN1 bad tag value met”.

Discover Our Services​

Leverage 1Byte’s strong cloud computing expertise to boost your business in a big way

Domains

1Byte provides complete domain registration services that include dedicated support staff, educated customer care, reasonable costs, as well as a domain price search tool.

SSL Certificates

Elevate your online security with 1Byte's SSL Service. Unparalleled protection, seamless integration, and peace of mind for your digital journey.

Cloud Server

No matter the cloud server package you pick, you can rely on 1Byte for dependability, privacy, security, and a stress-free experience that is essential for successful businesses.

Shared Hosting

Choosing us as your shared hosting provider allows you to get excellent value for your money while enjoying the same level of quality and functionality as more expensive options.

Cloud Hosting

Through highly flexible programs, 1Byte's cutting-edge cloud hosting gives great solutions to small and medium-sized businesses faster, more securely, and at reduced costs.

WordPress Hosting

Stay ahead of the competition with 1Byte's innovative WordPress hosting services. Our feature-rich plans and unmatched reliability ensure your website stands out and delivers an unforgettable user experience.

AWS Partner

As an official AWS Partner, one of our primary responsibilities is to assist businesses in modernizing their operations and make the most of their journeys to the cloud with AWS.

Step 4

Once the certificate upload is complete, you need to bind Certificate to the web site:

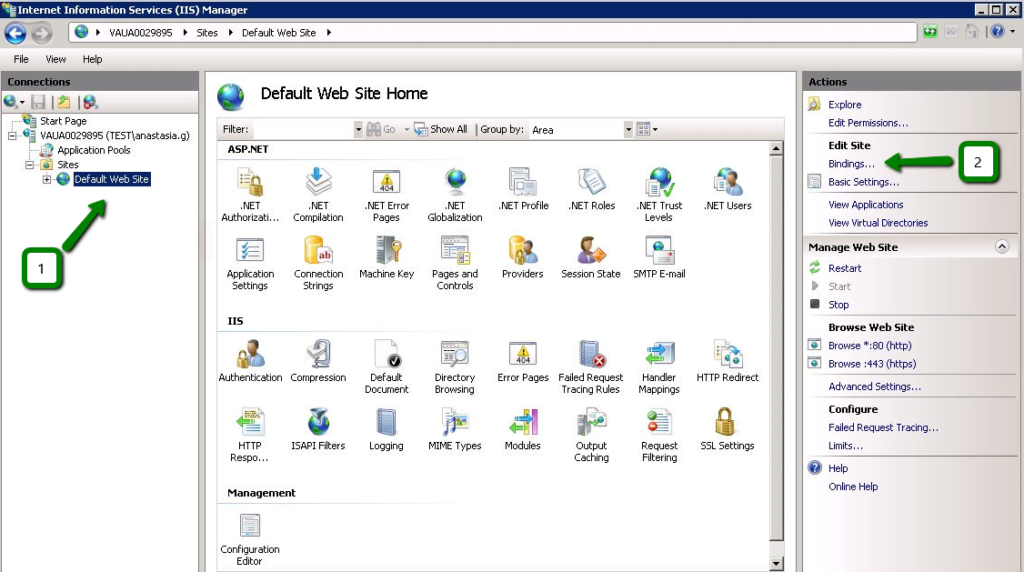
Select the website you want to apply the certificate to from the left-side Connections menu.

Select Bindings from the Edit Site sub menu:

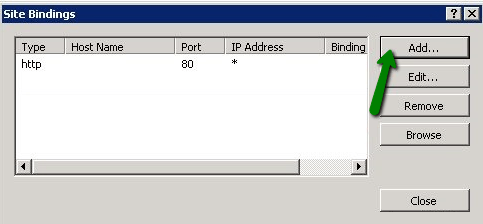
In the Site Bindings window, click Add. This will open the Add Site Binding window.

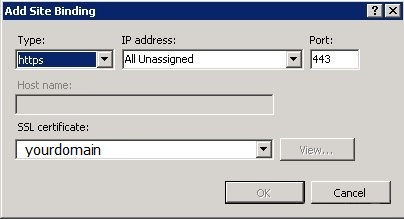
‘Type’ = https; ‘IP address’ = should be the IP address of the site or All Unassigned;
‘Port’ = 443; ‘SSL Certificate’ field should specify the certificate that was installed using the above steps.

Click OK to save changes.

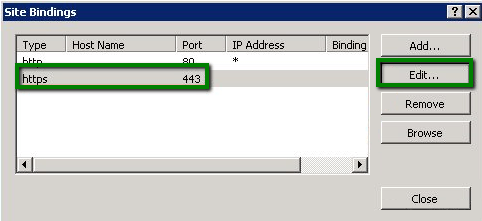
(!) Important If the ‘https’ entry is already enabled, and visible in this area, then you need to click on ‘https’ in order to highlight it. Then, click Edit and, in the SSL certificate area, select the friendly name that was generated earlier. Click OK to save changes.

Click OK in the Web Site Bindings window to complete the installation.

That is it!