Before starting, ensure that you have completed the prerequisites: setting up the Domain & CSR code setup for Synology NAS, backing up the Private key file, completing the SSL activation process, and downloading the certificate files.
Installation process
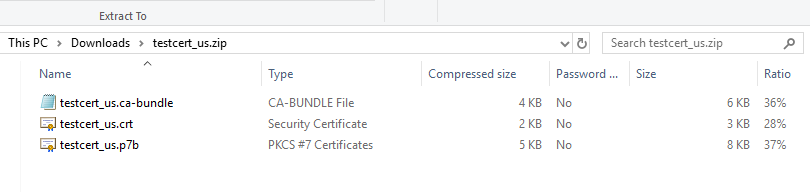
You’ll need those files to proceed with your SSL Certificate installation.
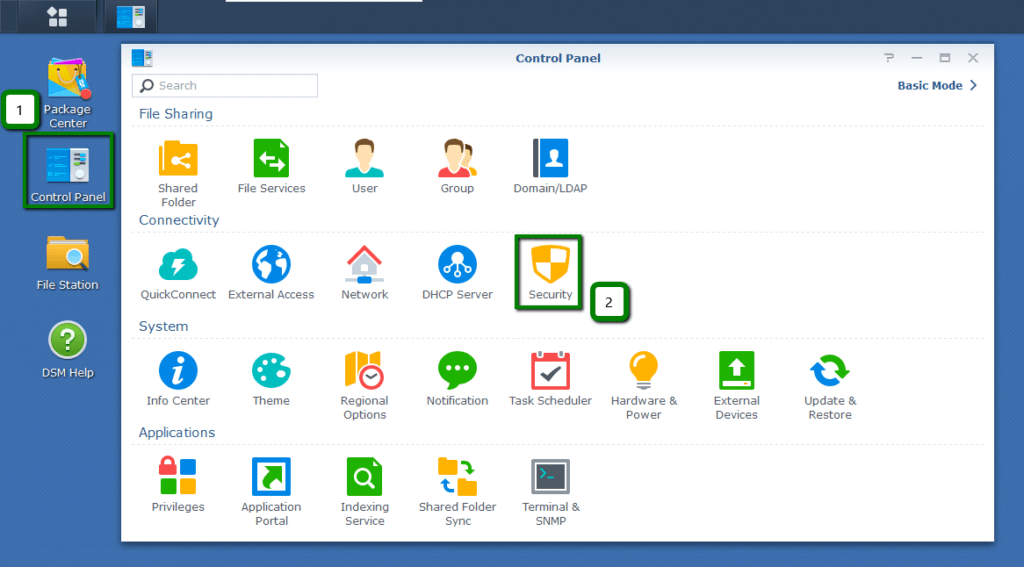
Step 1: Synology NAS Control Panel
Log into Synology NAS and select Security in the Control Panel menu.
Step 2: Certificate tab
Open the Add drop-down menu, and select Add.

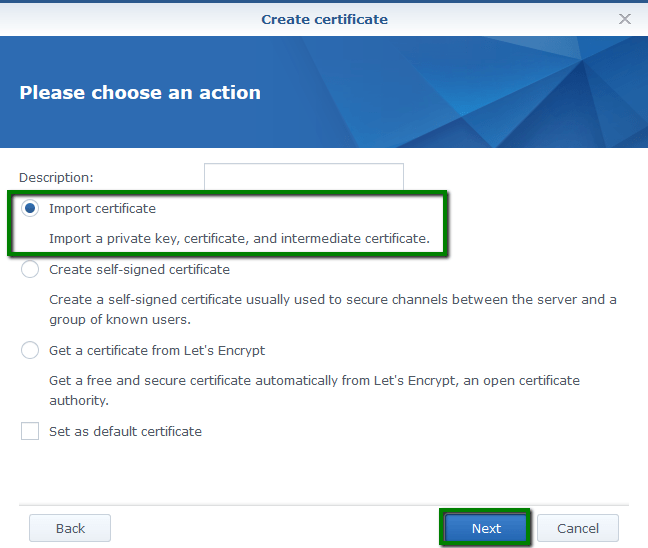
Step 3: Add a new certificate
Check this box. Then click Next.
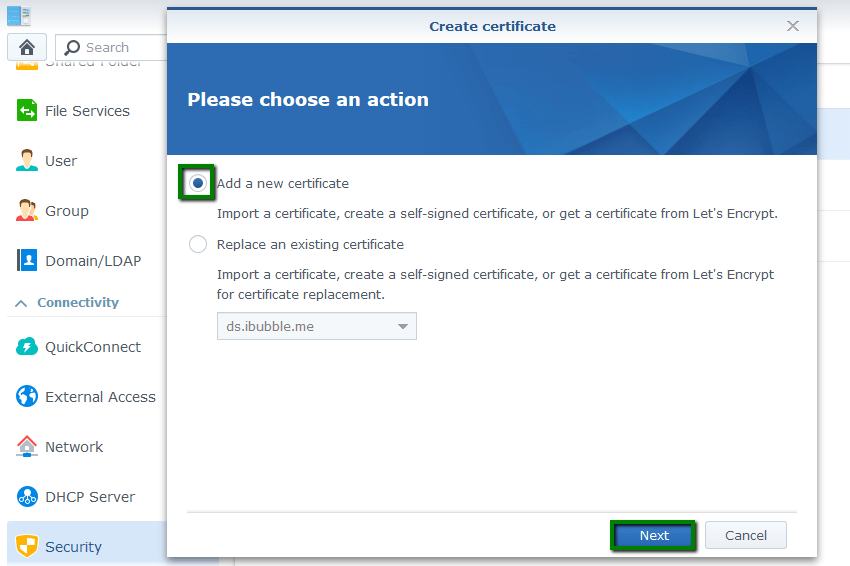
Note: alternatively, you can use the Replace an existing certificate option if you need to reinstall a reissue, install a renewal, or import a new SSL. Select the corresponding Certificate you want to replace. Then click Next.
Step 4: Import certificate
In the next window, check this box, then click Next.
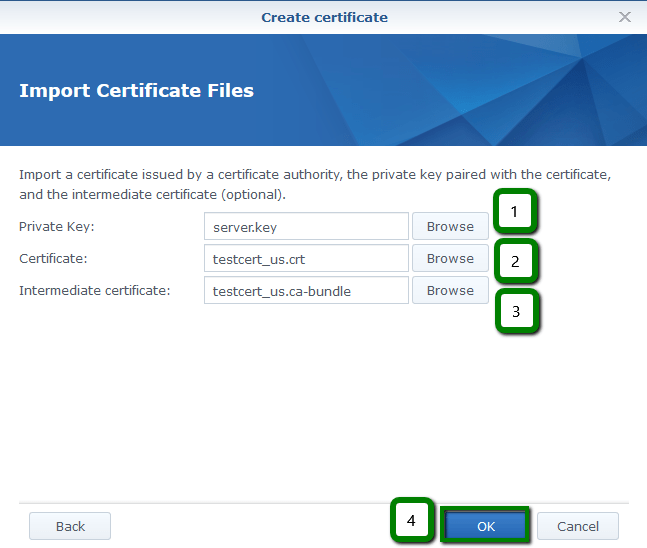
Step 5: Insert saved files
Click Browse to locate and the related Private key (.key), Certificate (.crt) and Intermediate certificate (.ca-bundle) files in your computer. Then click OK.
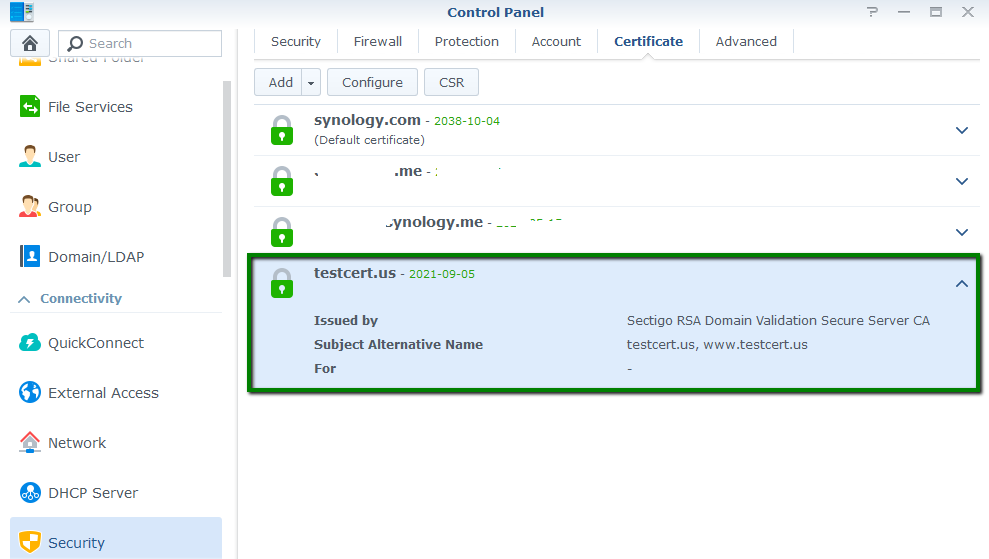
Good job! Now your SSL Certificate is installed, you can see it in the list:
Configure services
Choose the services you want for your SSL Certificate in the Configure menu, using the following image as your guide:
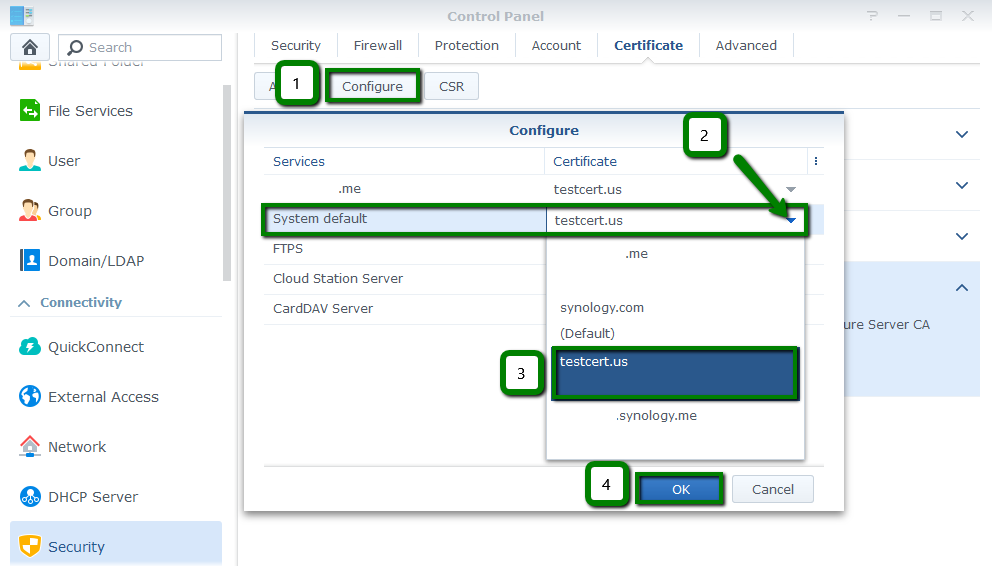
And then you’ll see the corresponding service specified under the certificate in the list.

Setting up https:// redirect
The secure https:// let’s Google and customers know your site is secured. Make this the default setting for your website using https:// redirect.
Step 1: DSM Settings
Navigate to the Network section of the Control panel and open the DSM Settings tab.
Tick the Automatically redirect HTTP connections to HTTPS option and click Apply.
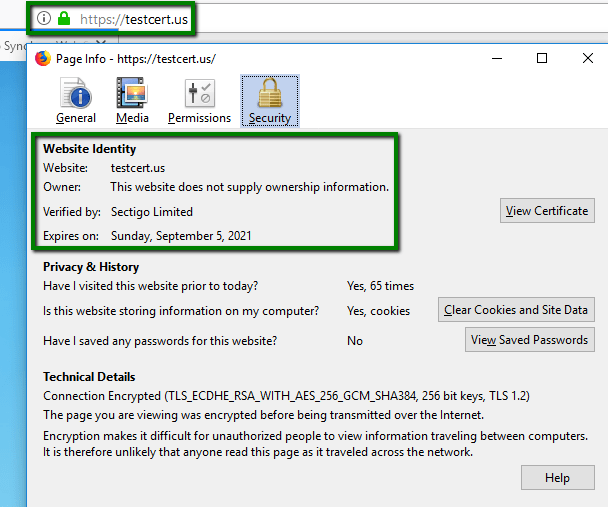
You can confirm your SSL Certificate is active using https://ssl-checker.1byte.com/, make sure to specify the correct HTTPS Port – 5001 by default. Else, simply type your domain name into a browser using https:// at the beginning e.g. https://mydomain.com
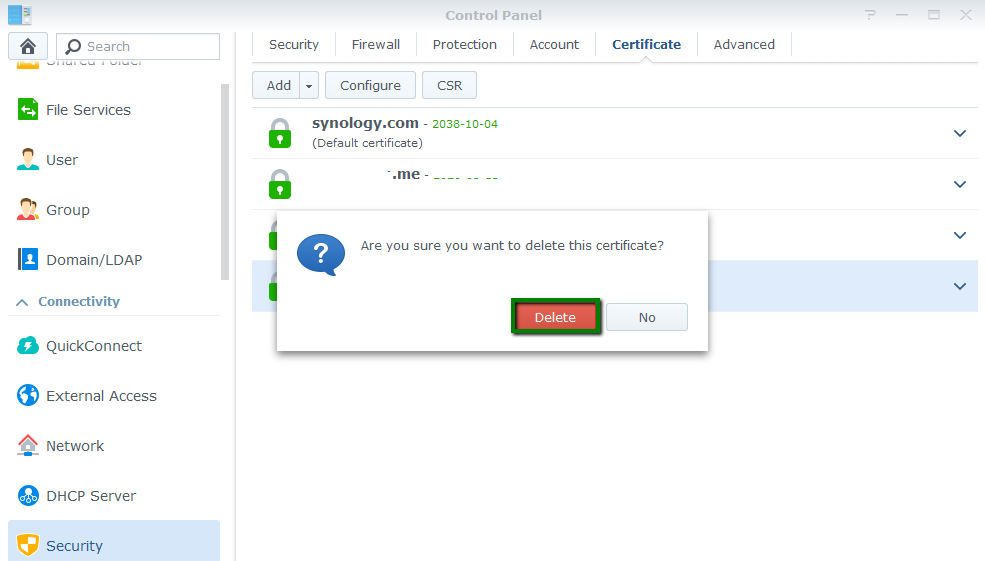
Removing a Certificate
If you need to remove an SSL Certificate, go to Security >> Certificate >> Add drop-down menu >> select Delete.
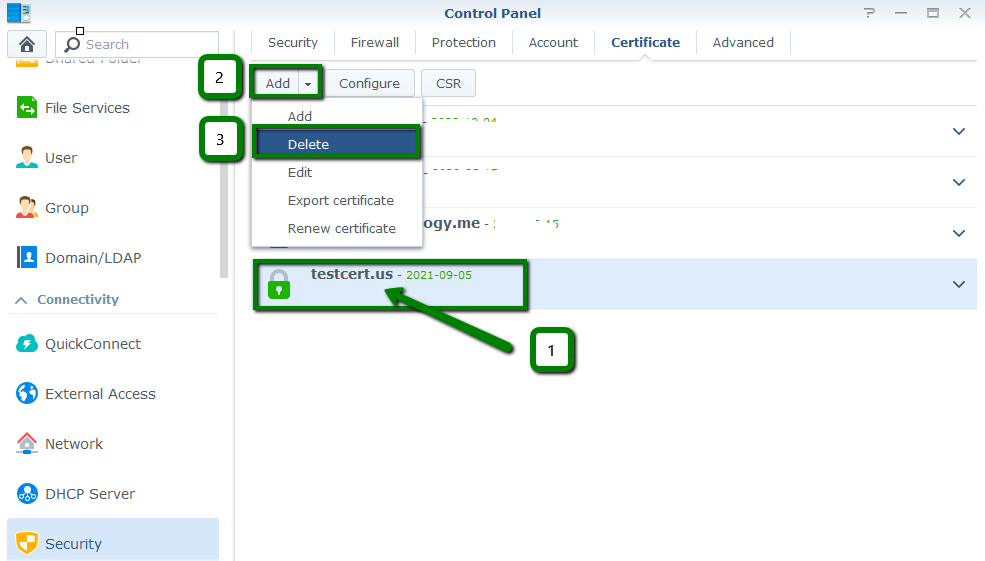
Confirm you want to delete the cert in the popup window: