
Once you’ve generated the CSR code, activated the certificate, and had it validated by the Certificate Authority, the final step is to install your SSL certificate on the hosting server to enable the secure connection.
How to Install SSL Certificate on ISPConfig
The certificate files required are typically emailed by the Certificate Authority (CA) to the administrative email address you provided during SSL activation. Alternatively, you can download the files from your 1Byte account.
Follow these steps in the ISPConfig control panel:
Step 1
Go to the main page and click Sites.
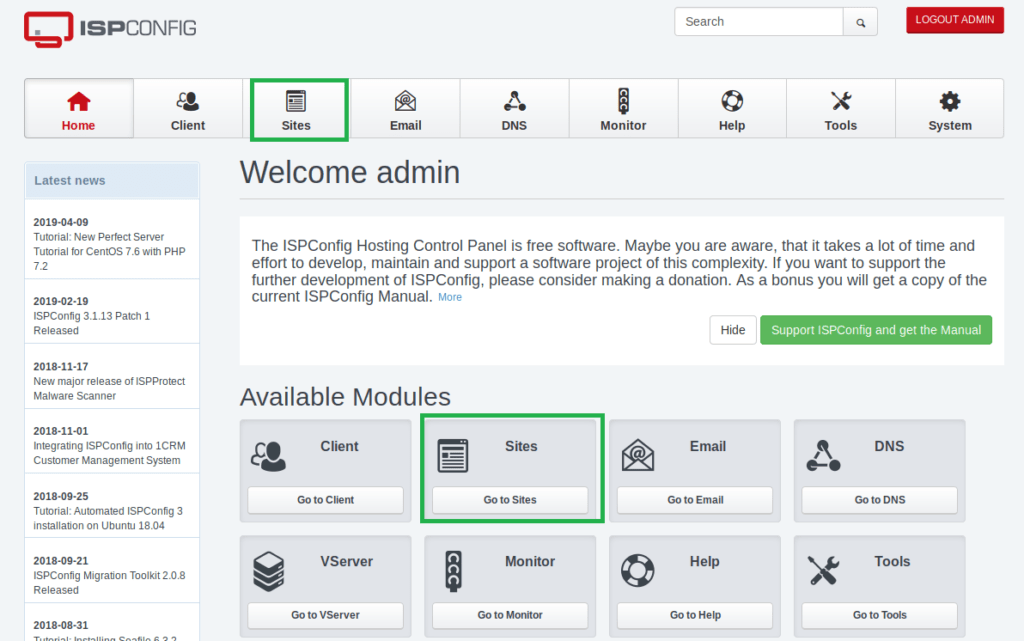
Step 2
Click on the domain name you want to install the certificate for.
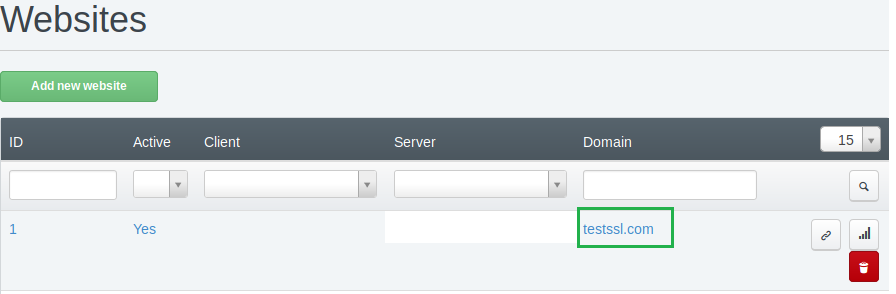
Step 3
Select the SSL tab. There is no need to fill in the top bit you see here, as those details were only needed for the CSR generation step.
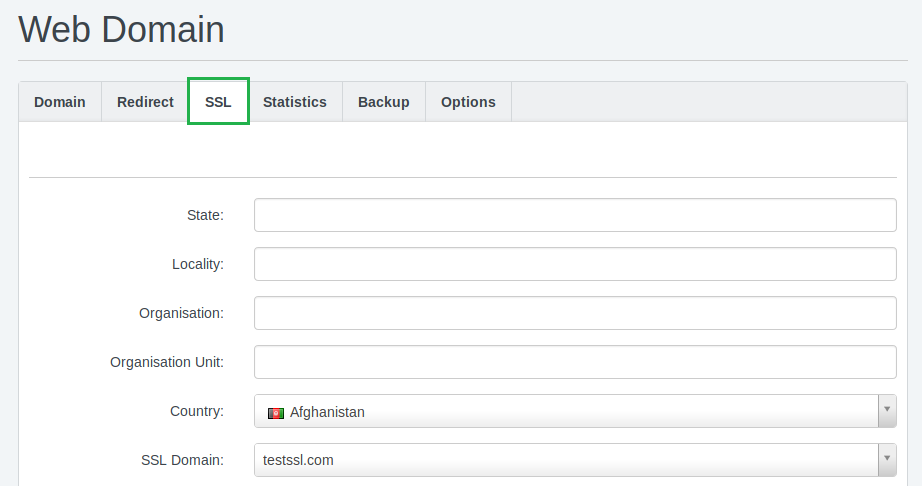
Step 4
For the next fields (picture below), fill in the codes using this guidance:
SSL Certificate field:
- Erase the code that is already pre-filled in this SSL Certificate box. It is the self-signed certificate info generated along with CSR code(LINK TO CSR GUIDE), it’s not needed for the installation of the trusted certificate.
- Paste the certificate code in. You’ll find this in zip folder you received from Certificate Authority. Open the .crt file with your computer text editor. For example in Windows 10, you’d right-click on the file, select Open with and choose Notepad.
SSL Bundle field:
- Using your text editor as explained, paste in the code from the .ca-bundle file. The code is long, but it’s important you copy all of it i.e. the information starting and ending with these tags: —–BEGIN CERTIFICATE—– and —–END CERTIFICATE—–).
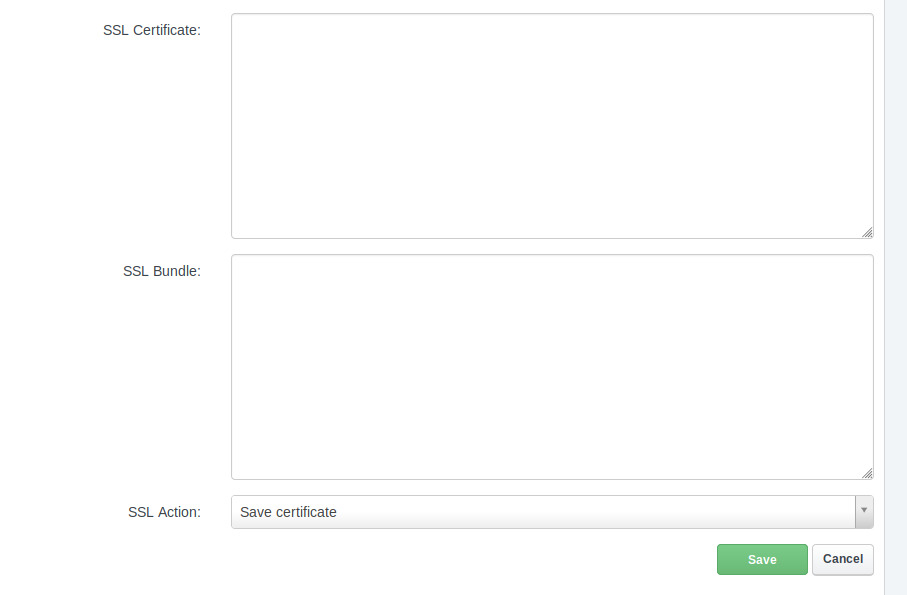
Step 5
In the SSL Action field, select Save certificate from the dropdown menu and click the green Save button.
All done, you did it!
You can confirm the installation status using this SSL Checker tool to make sure it’s working right.
One last thing – if you’d like to enable secure (HTTPS) connection by default, see HTTPS redirect setup process on Apache.