

Once you have received the issued SSL certificate from the Certificate Authority or have downloaded it from the account area, you can proceed to install it on the server. Let’s go over how the SSL certificate installation is done using Webmin. This guide outlines the process of setting up an SSL/TLS connection as if it had never been performed on a specific server before. Therefore, depending on the circumstances, some of the steps described below may be omitted.
How to Install SSL Certificate on Webmin
Step 1
Here is the complete sequence of required actions:
Log in to Webmin interface in a web browser. Usually, it can be done via the following URL: https://example.com:10000, where example.com stands for the hostname of the server and 10000 is a default port number.
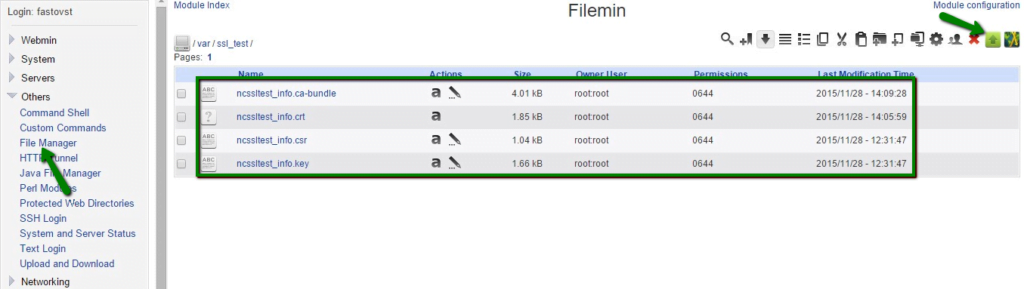
Hover the mouse over the left panel on the main page and click Others > File Manager. Then navigate to the folder, where the CSR and Private key were previously generated, and use Upload button in the upper right corner to upload the certificate (your_domain_com.crt) and CA bundle (your_domain_com.ca-bundle) files to the server.
Step 2
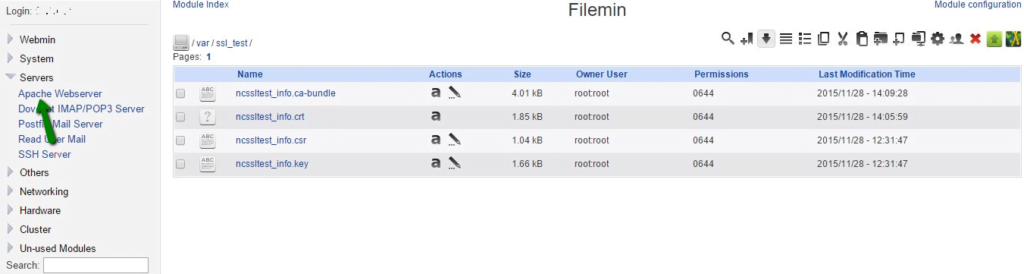
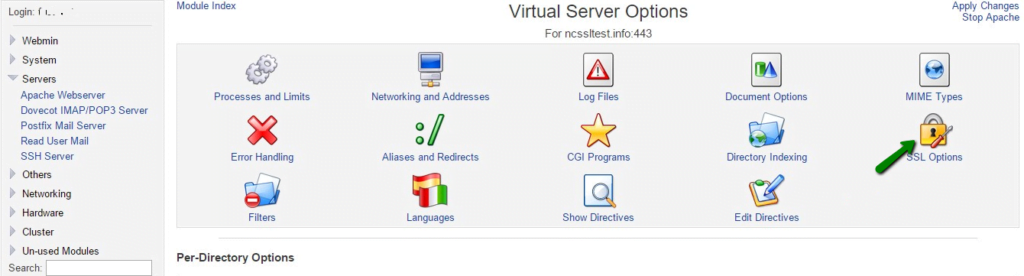
Once the necessary files are successfully uploaded, click Apache Webserver in the expanded Servers subcategory on the left panel of the interface.
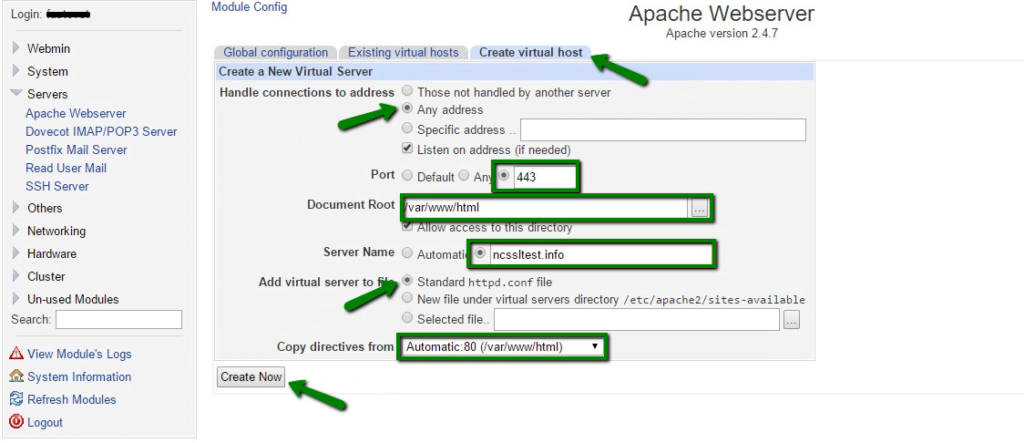
Click Create Virtual Host tab, then select Any address radio button, set a custom port number with the value 443 and specify the correct path to the website content in the DocumentRoot field. In the Server Name field, type in the domain name of the website for which the SSL certificate is being set up.
Tick Standard .httpd conf file option for Add virtual server to file and select Automatic from the drop-down menu for Copy directives from.
Once all set, click Create Now button.
Step 3
If everything is done correctly, a new Virtual server assigned to port 443 should appear on Apache Webserver page.
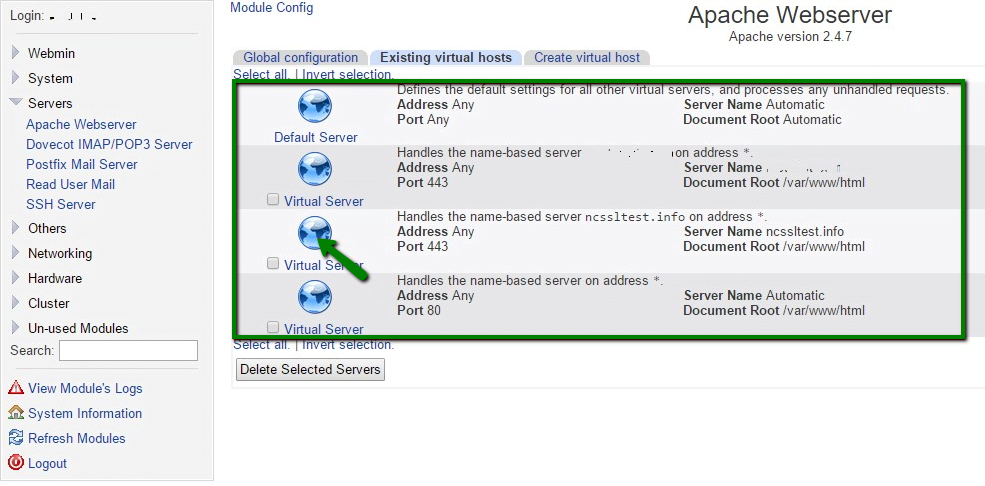
Click on the icon of the newly created Virtual server to open its settings, locate and open SSL Options.
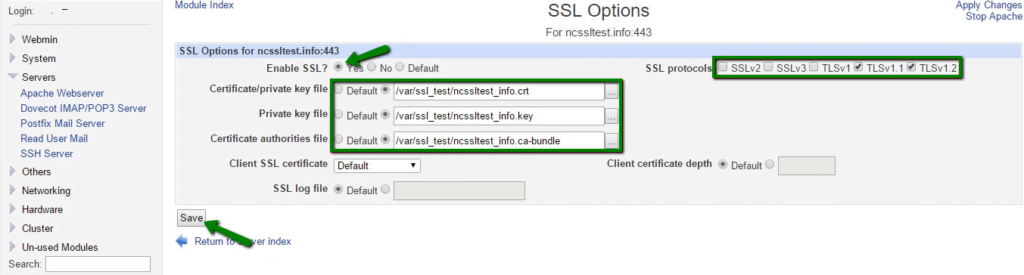
Note: If the SSL Options button did not appear in the Virtual Host Options menu, most probably the SSL module is not enabled on the server. Depending on the operating system, the SSL module can be enabled from the command shell with either of the following commands: ‘a2enmod ssl’; ‘yum install mod_ssl’.On the opened page, choose Yes for Enable SSL? and tick/untick the necessary SSL/TLS protocols on the right side of the page. Then specify the paths to the domain certificate, private key and CA bundle files in the appropriate fields and tick the corresponding radio buttons so that the system can find those files. Click Save button.
NOTE: SSL 2.0, SSL 3.0 and TLS 1.0 protocols have been recognized by experts in web security as vulnerable ones. Therefore, enabling those protocols on the server can drive to the opportunity for an attacker to use the weak security settings for decrypting the information encrypted with any of the abovementioned protocols. They should be enabled only in cases when the server or client side does not support TLS 1.1 and TLS 1.2 or there is an objective necessity to have these vulnerable protocols enabled.
If there are no error messages after the performed actions, then the SSL certificate is successfully installed.
Any online SSL installation checker, for example ssl checker, would come in handy if you would like to make sure that the certificate is installed correctly.