LiteSpeed is a popular web server software that is known for its fast and efficient performance. If you’re using shared hosting, you may be wondering how to enable LiteSpeed on your account. Here’s a step-by-step guide to help you enable LiteSpeed on shared hosting.
What Is LiteSpeed Used For?
A direct Apache replacement is LiteSpeed. It’s incredibly simple to increase performance with the LiteSpeed web server if you have Apache running on your web servers. It can easily replace Apache and is fully compatible with the well-liked hosting service.
How to Enable LiteSpeed Enterprise Edition?
All of our Shared Hosting packages come pre-installed with LiteSpeed Enterprise Edition (not the free version), so you won’t have to worry about paying a license fee to enjoy blazing-fast website performance. Furthermore, 1Byte’s web hosting rental pricing is extremely competitive in the ASIAN market. Let’s invest smartly!

Exactly Which Web Server Am I Using?
There are a variety of ways to find out which Web Server your site is using. Let’s learn these ways with 1Byte
Method 1: Using the terminal console
#Using curl command to findout the Web Server info
curl -I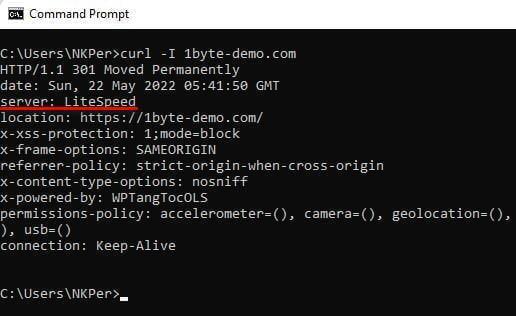
Method 2: Using Chrome or Firefox DevTools
- Access to your website
- Open DevTools by pressing Control+Shift+J or Command+Option+J (Mac)
- Navigate to the Network tab.
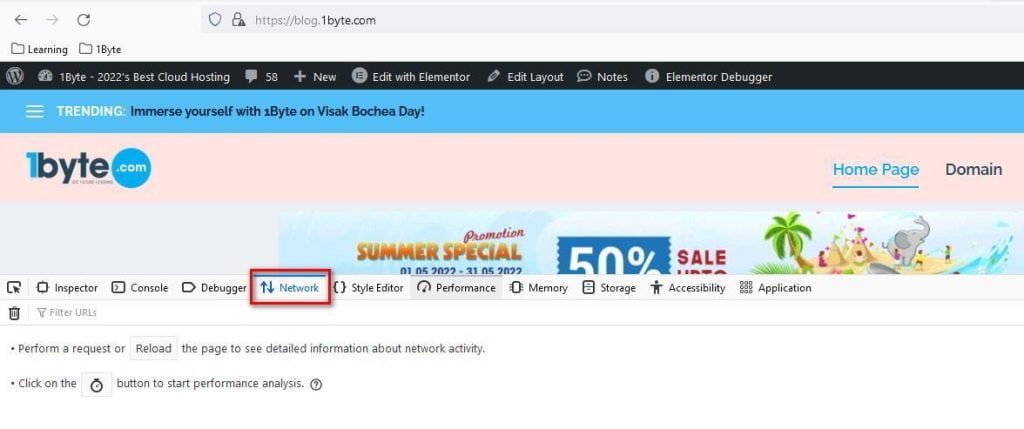
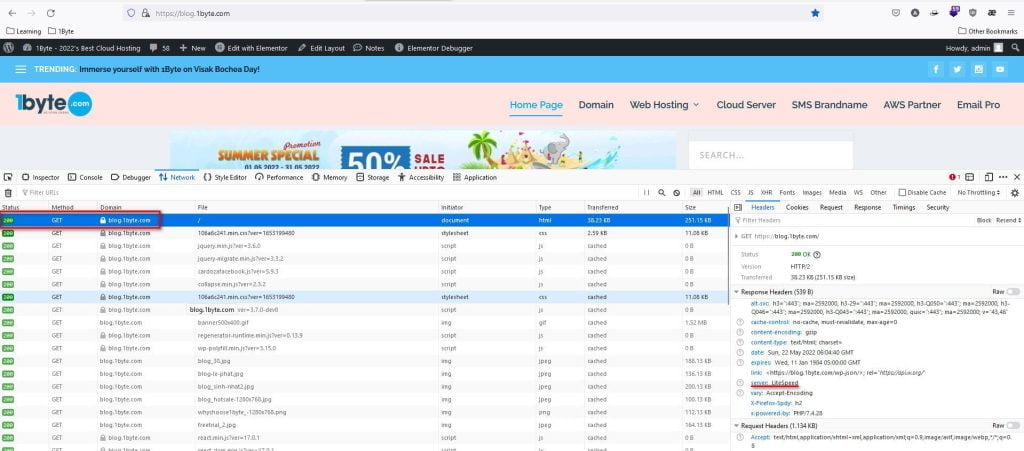
- Reload the page. The Network panel logs all network activity in the Network LogNetwork tab.
- Click on the first row, and observe the value of the server parameter in the Response Header section
How to Enable the LiteSpeed Cache Plugin?
LiteSpeed Cache for WordPress is an all-in-one site acceleration plugin, featuring an exclusive server-level cache and a collection of optimization features
On cPanel, you can install the LiteSpeed Cache plugin completely by following these steps
- Login 1Byte account
- Go to the Shared Hosting Management section in User Dashboard
- Click on the cPanel button in the domain name you want to install it on
- Input your credential to login cPanel Dashboard (if needed)
- Scroll down to the Advanced section, and you will see the LiteSpeed Web Cache Manager
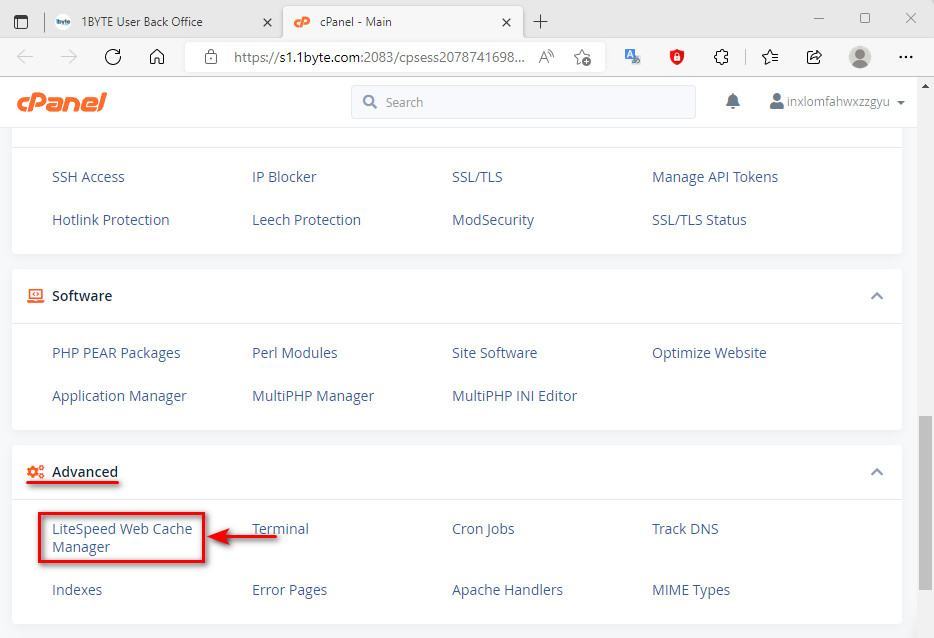
6. Go inside LiteSpeed Web Cache Manager by clicking on it
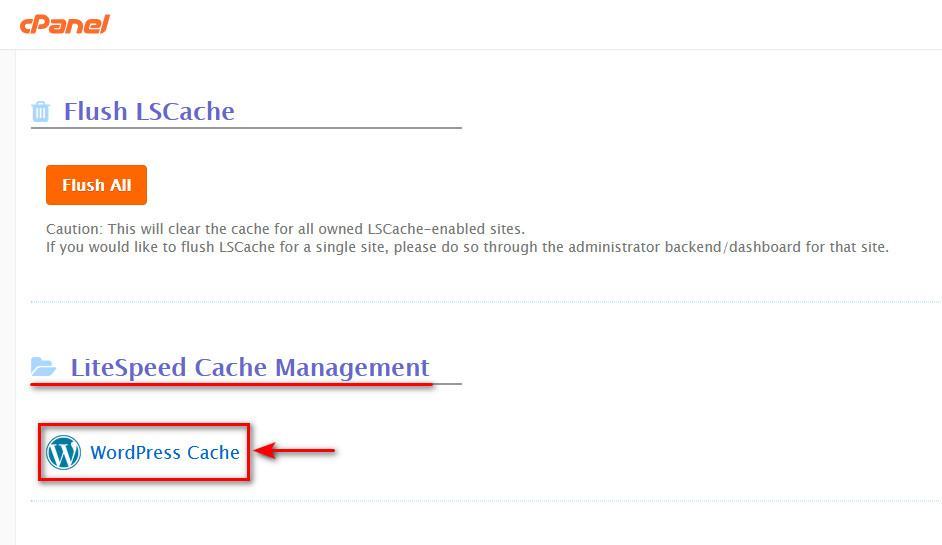
7. Scroll down to LiteSpeed Cache Management, click on WordPress Cache
8. Select the domain name for which you wish to make changes (1), and then select the setting you wish to implement (2)
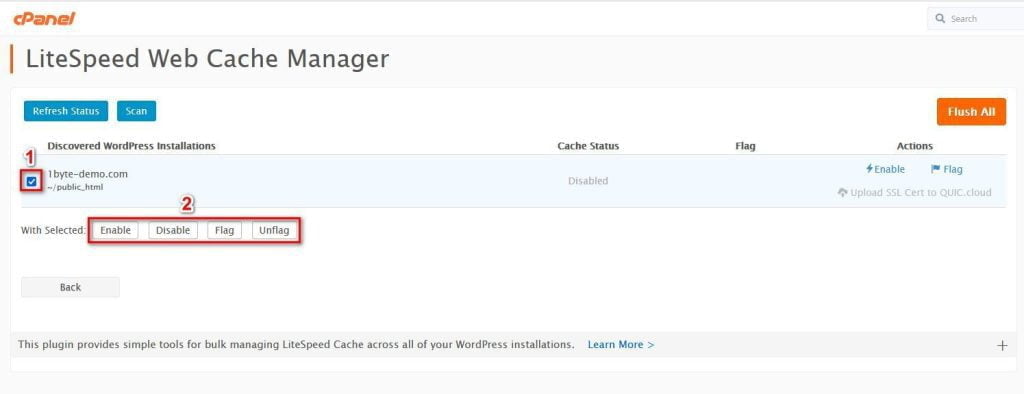
Flag Selected & Unflag Selected: These buttons allow you to set or unset the flag field for the selected WordPress Installations.
9. You can verify the change by looking at the Status column’s information. Alternatively, you can access your WordPress site’s administration panel. LiteSpeed Cache should now be enabled by default.
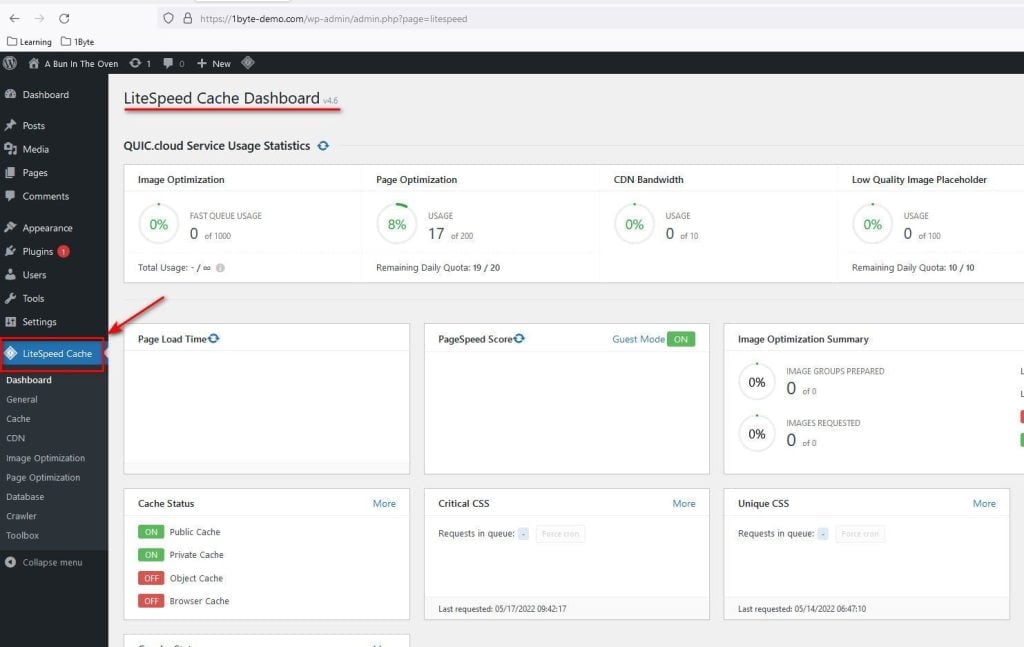
10. Finally, tweak the features and options inside LiteSpeed Cache Dashboard.
Final Thought
Each website has its own operating style, theme, and the web server. Each website has its own set of optimum settings. As a result, there is no one-setting-fits-all solution for optimizing all websites to the best level. 1Byte recommended that you thoroughly study the LiteSpeed Cache plugin’s options and features. When to use it and when not, or what value setting will bring the most benefits? It will take some time to learn, but it will be worthwhile.

