

Before, you may have had problems using email on Cpanel shared hosting to send emails, and the recipients may have received your emails in the spam folder. Now we will teach you how to avoid this problem, and your email recipients will have to feel confident that receiving your email is safe.
Prerequisite
- You need to register an account with SendGrid with the plan you need.
- Shared hosting and domain name with any package if you don’t have please go to buy one on 1Byte
6 Steps to Keep Your Email Out of the Spam Folder
Step 1. Set up Domain Authentication
Sign in to SendGrid. We already have registered the account at this point. Please register your account first if you haven’t yet.

Go to settings and click Sender Authentication then click “Get Started”

On the question 1 DNS host please select “Other Host (Not Listed)” and on Which “DNS Host” put 1Byte’s nameserver ns1.1bytedns.com or ns2.1bytedns.com
On the second question choose “No” and then click Next
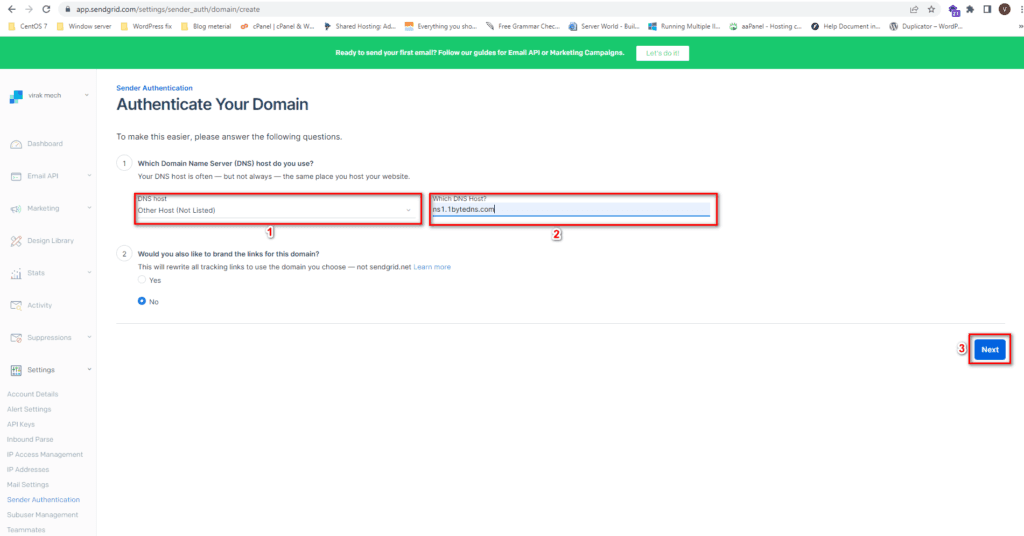
Input your domain name and click “Next

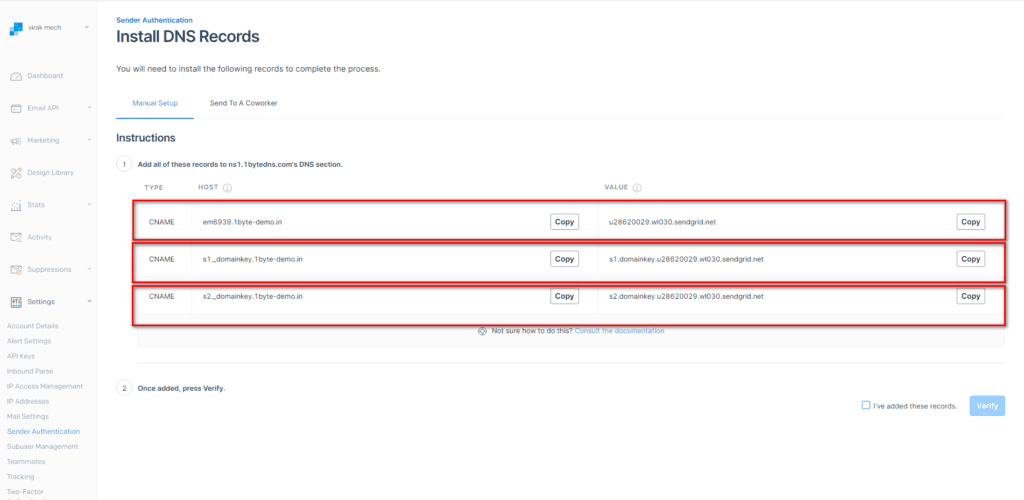
So in this step, SendGrid will need you to add all of the records to ns1.1bytedns.com’s DNS section. So hold on to this step and go to step 2 to add the record before you click Verify
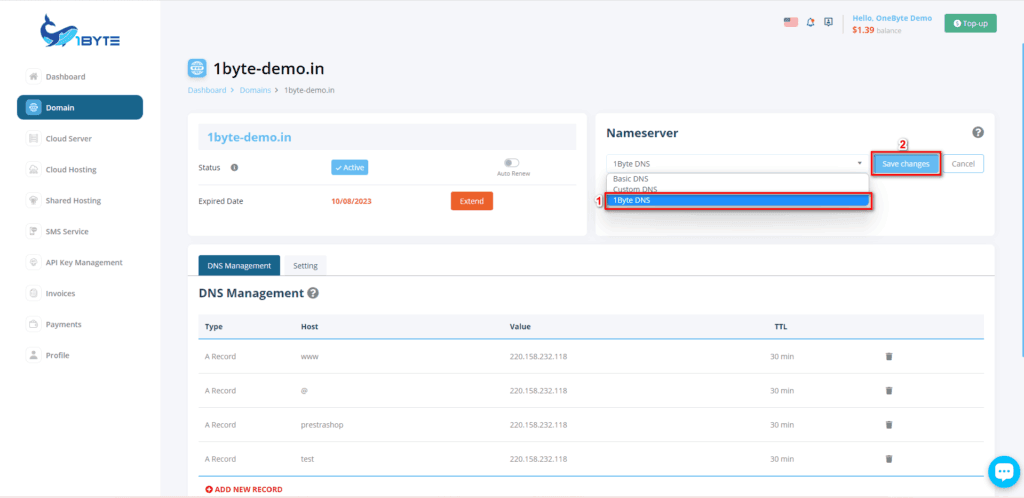
Step 2. Switch Nameserver to 1Byte’s Nameserver
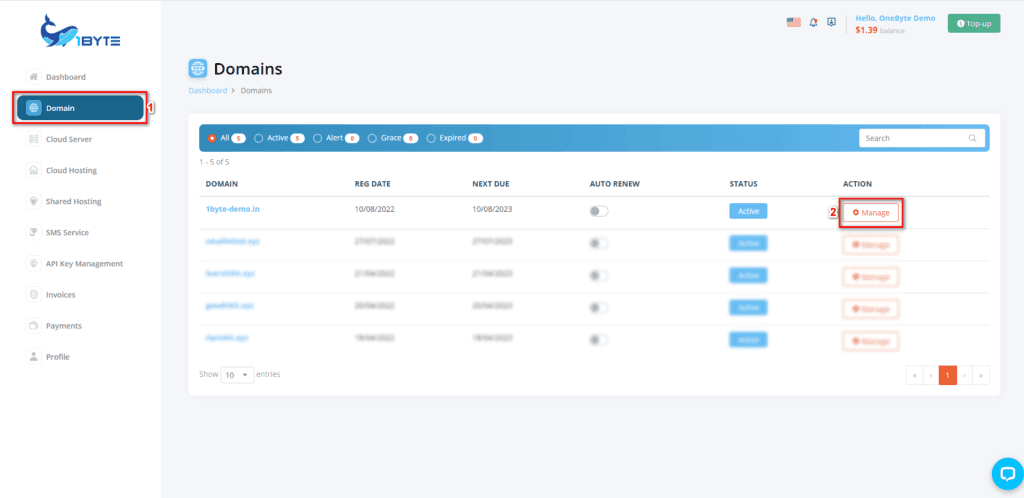
Log in to 1byte account and go to the domain then click “Manage”
Change to “1Byte DNS” and Click “Save”
Step 3. Add CNAME Record for Cpanel
Go to Shared Hosting and click Manage

Go to Zone Editor
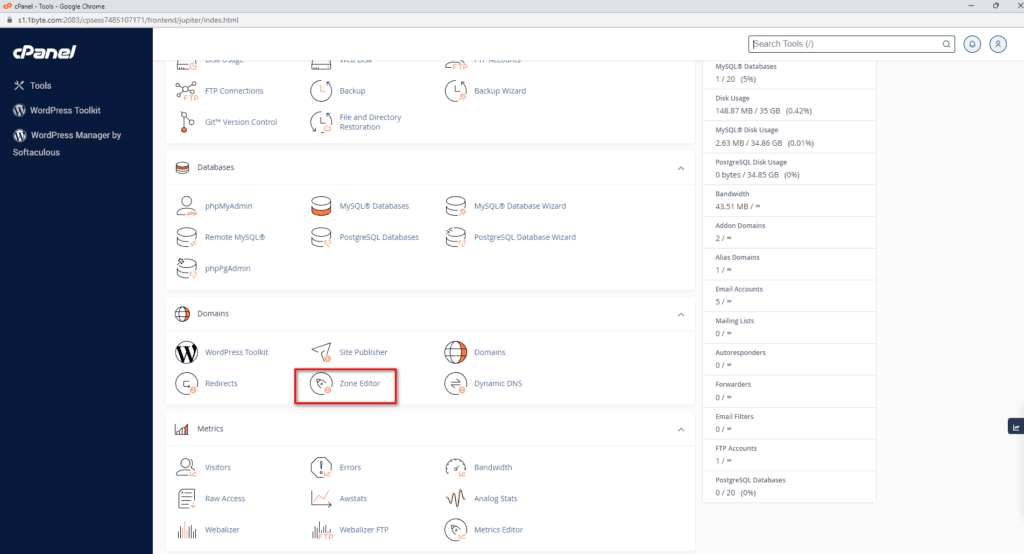
Click on the “Manage button” on the domain that you are already setting up on step 1

Click Add Record and Copy Host and value record from step 1 and set the type of record to CNAME then click the “Save” button

After adding 3 records, your record will look like the image below

Step 4. Go back to verify the domain name on SendGride
After you have done adding your DNS record please go back to step 1 then tick on “I’ve added these records” and click “Verify
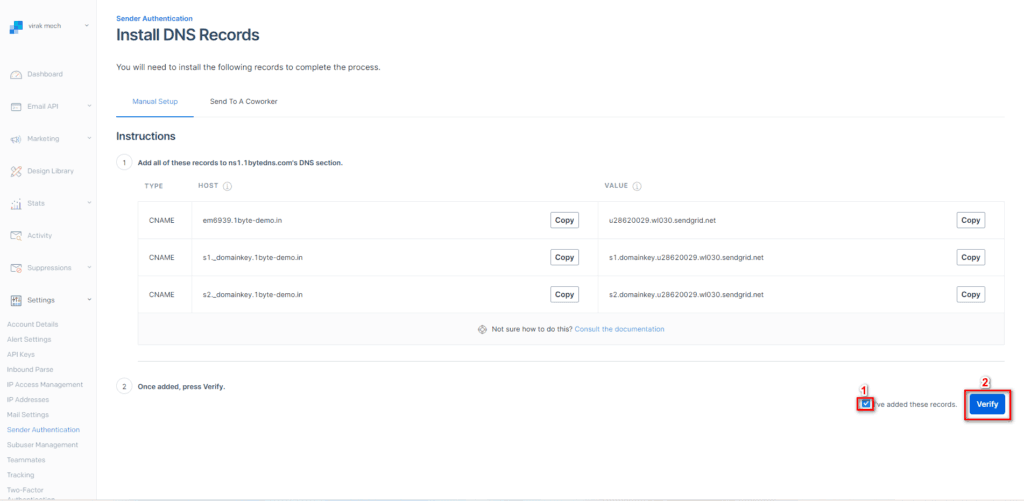
So if you get the message “It worked” it means you are successfully verified and can create an email to send

So let’s go to create an email and send a test
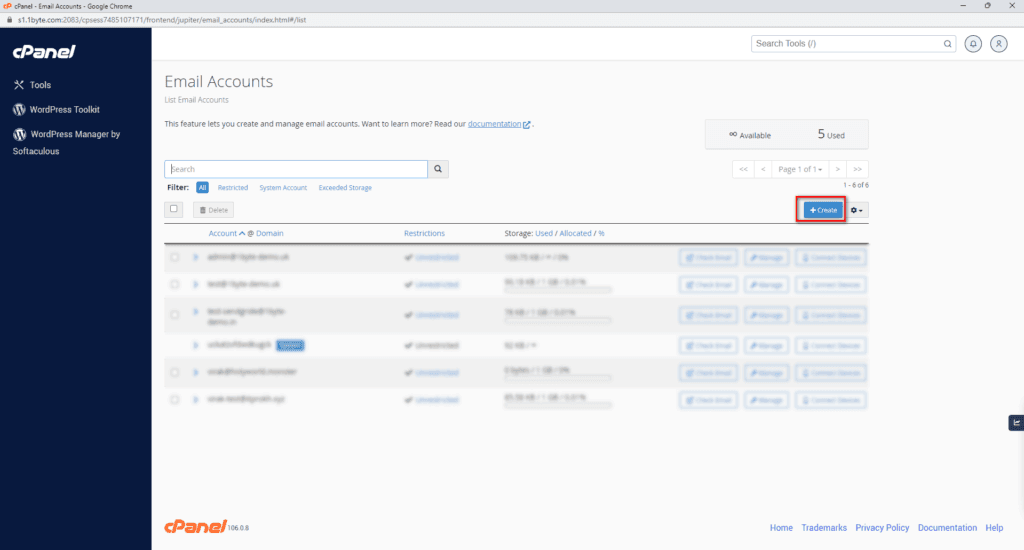
Step 5. Create an email to send a test
Go to Cpanel again go to the Email section click “Email Account”
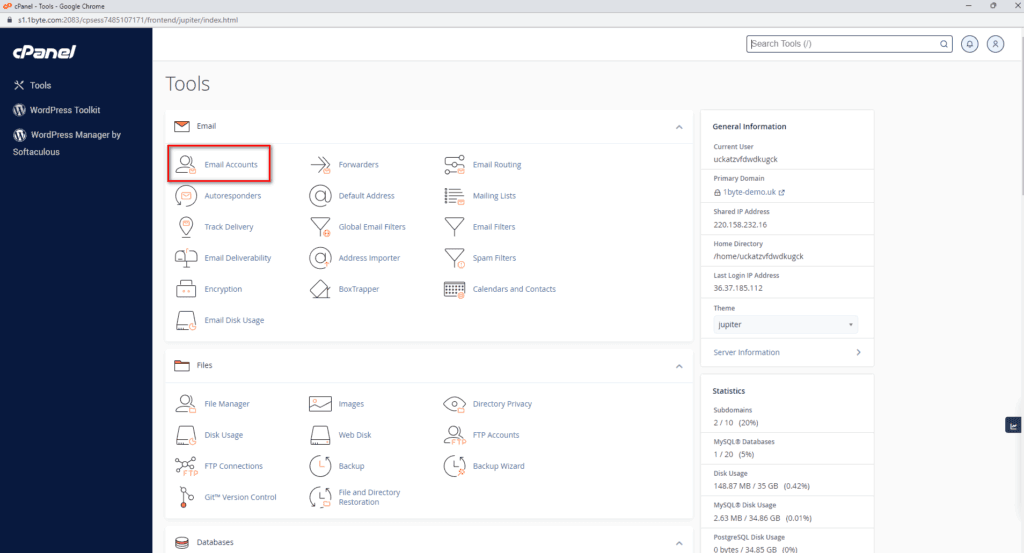
Click on the “Create button”
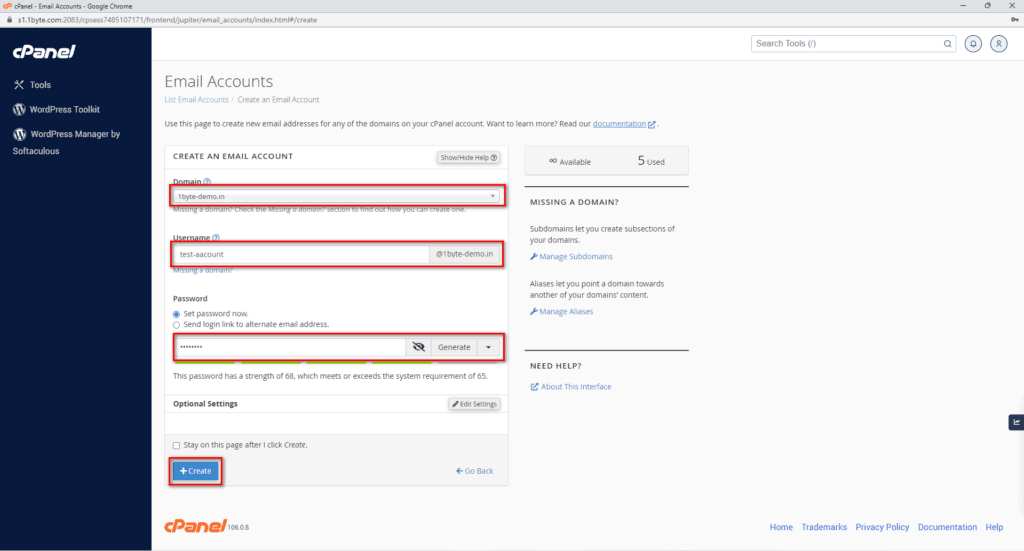
Choose your domain name and input your email username and password then click the “Create” button
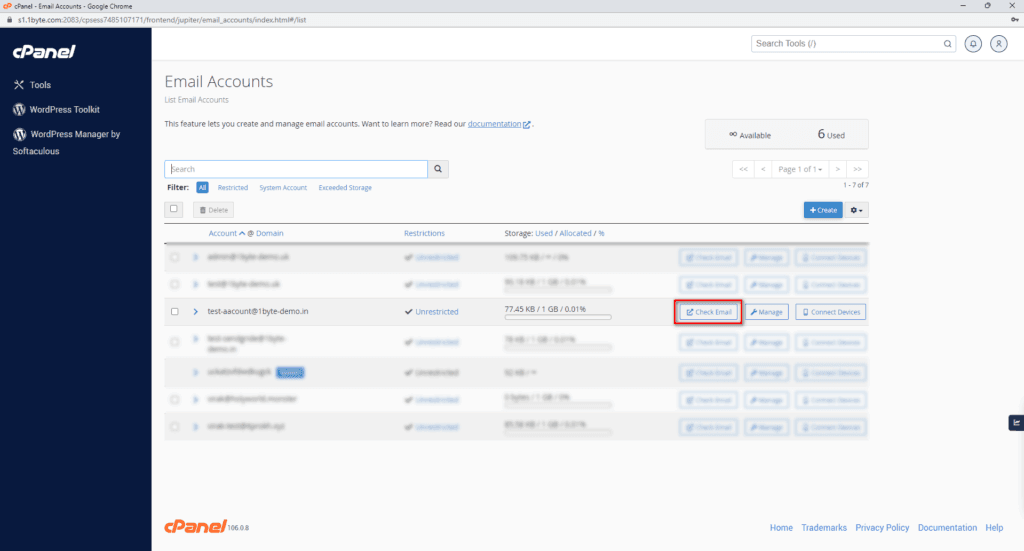
Step 6. Send Test Email
After you create an email now go to send email test by clicking on the “Check Email” button
Open RoundCube webmail to send a test email

You can try to send your email to other email domains like Gmail

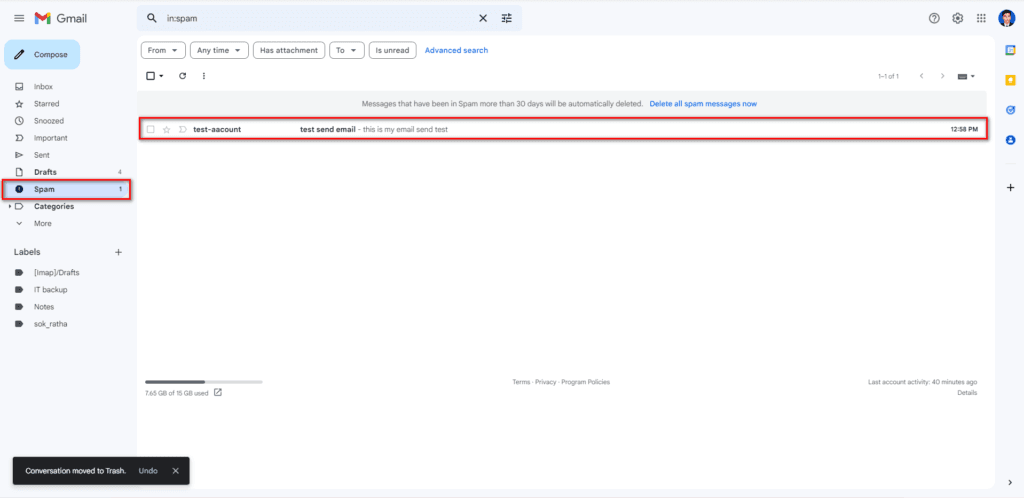
Step 7. Checking the result
Go to the email that you send to
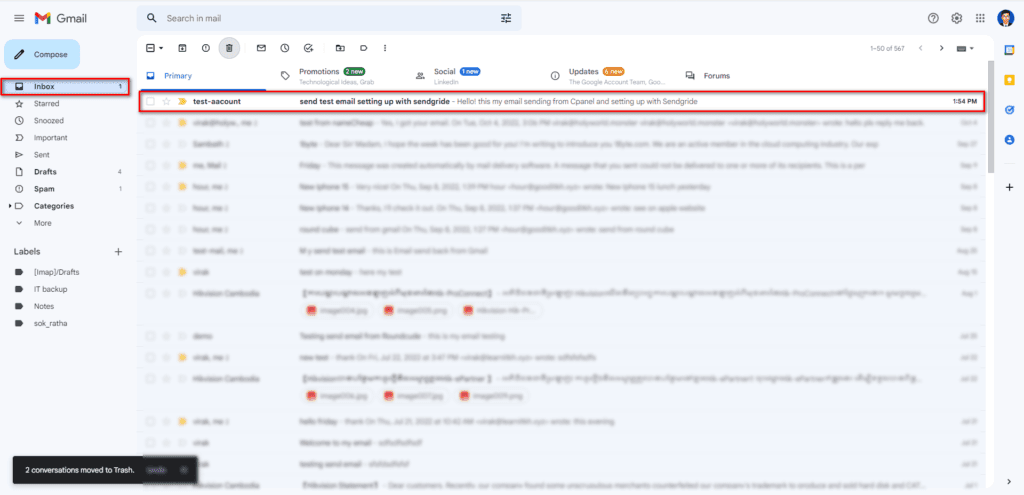
Congratulation your email not going to the spam folder anymore.