
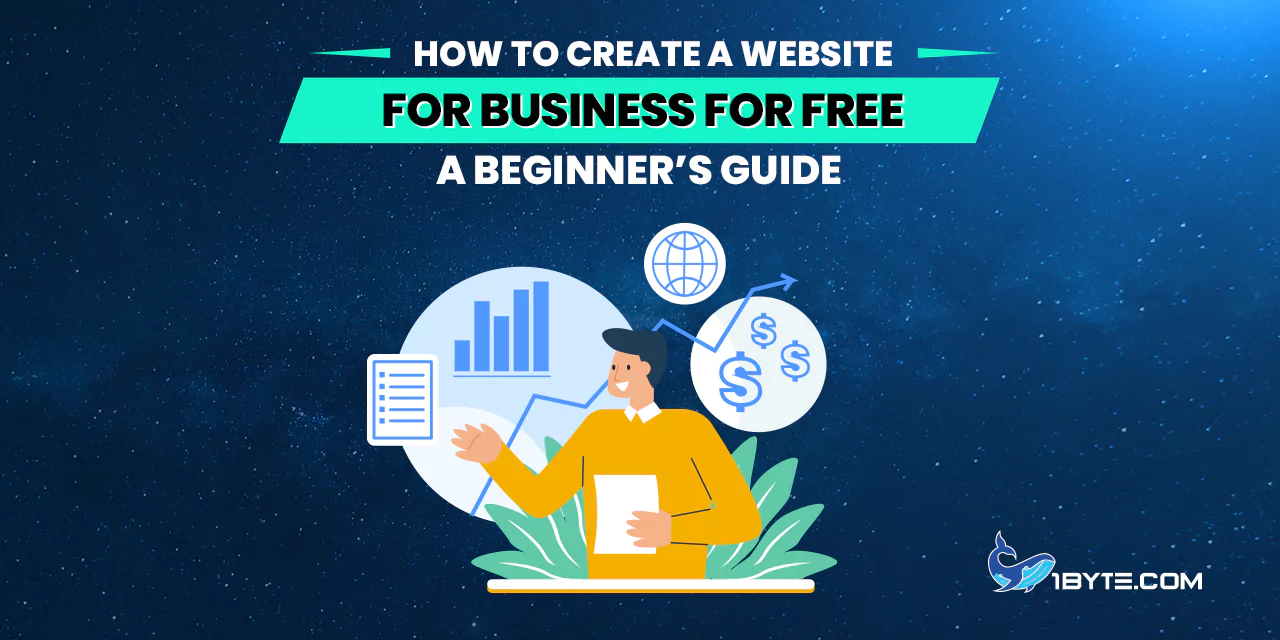
Creating a business website no longer requires a big budget or advanced tech skills. Many new entrepreneurs wonder how to create a website for business for free without hiring a developer. The good news is that it’s entirely possible – and even easy – thanks to modern tools. A website is now an essential asset for any business. In fact, 73% of small businesses in the U.S. have a website as of 2023. A web presence helps customers find and trust a business. Over 80% of shoppers research online before making a purchase, so appearing in search results can directly drive more sales. Yet, about one in four small businesses still have no website. Cost and technical know-how are often the barriers – 26% cite expense and 15% cite lack of tech knowledge as reasons for not having a site. This guide from 1Byte will show that cost and complexity don’t have to hold you back. We’ll walk through step by step how to build a free business website, with up-to-date tips, statistics, and examples to back it up.

Why a Website Is Important for Your Business
Every business – big or small, local or global – benefits from having its own website. A website serves as your digital storefront and 24/7 marketing tool. It allows potential customers to learn about your products or services at any time. In 2025, an estimated 71% of small businesses have a website, reflecting how critical online presence has become. Those without a site risk losing credibility and visibility. Half of consumers say a company’s website design influences their impression of the business. Simply put, a professional website signals to people that your business is legitimate and trustworthy.
Having your own site also gives you control over your brand’s story and information. You’re not limited to the constraints of a social media page. Plus, you can optimize your site for search engines so that people searching for what you offer can find you on Google. Notably, around 32% of small businesses create their websites using DIY website builders – showing that even without technical staff, many owners take the initiative to establish a web presence. This is a wise move because a website can directly contribute to business success. For example, 81% of shoppers conduct online research before buying something. If your business doesn’t show up online, you miss those opportunities. On the other hand, if you have an informative, user-friendly site, you can capture those leads.
A website can also improve customer service. You can provide FAQs, contact forms, and up-to-date announcements on your site. This reduces the workload on your staff by answering common questions automatically. Moreover, a site expands your reach beyond your immediate locale – anyone in the world can find and contact you. In summary, a website is vital in today’s digital age for marketing, credibility, and growth. The next sections will demonstrate that you can gain these benefits without spending a penny on web development.
Benefits and Challenges of Free Websites
Before diving into the how-to, it’s important to understand what you get (and don’t get) with a free business website. Free website builders are services that allow you to create and host a site at no cost. They provide easy drag-and-drop design tools, templates, and a subdomain (a web address that includes the provider’s name, e.g., yourbusiness.platform.com). This means you don’t pay for hosting or coding – an obvious advantage for a small business on a tight budget. It also means you can get online quickly. Many free site platforms are designed for beginners, so you can build a basic site in a matter of hours.
However, free plans do come with limitations. Typically, you won’t get a custom .com domain name unless you upgrade to a paid plan. Your site’s URL will include the builder’s name, which might look less professional. Free plans also often display the provider’s branding or ads on your site (for example, a small banner like “Made with Wix” or “Powered by WordPress” might appear). Storage and bandwidth might be limited – though for a new site with modest traffic, this is usually not an immediate problem. More critically, advanced functionality is often restricted. For instance, e-commerce (online store) features, if offered at all on free plans, are very basic. You might be able to list a few products, but processing payments could require an upgrade. Weebly, one popular builder, does allow selling unlimited physical products on its free plan, but with some feature caps like 500 MB storage. Other platforms like Wix or WordPress.com offer great design tools on free plans but no online payments until you pay for a business plan.
It’s also worth noting that free websites lack a personalized domain. Using a custom domain (like mybusiness.com) is an extra expense (domains typically cost $10–$15/year, sometimes more). Some platforms (e.g., HubSpot’s free CMS) uniquely allow connecting a custom domain on a free tier, but that’s an exception rather than the rule. Generally, if having a branded domain is crucial from day one, fully free might not meet that need. But you can always start free and then attach a custom domain later when you’re ready to invest a bit.
Despite these trade-offs, free website builders are extremely popular for small businesses and startups. They lower the barrier to entry dramatically. Hiring a professional web designer can cost $2,000 to $9,000 on average for a small business website – an investment not every new business can afford. By contrast, using a free DIY site builder costs nothing but your time. It’s no surprise then that one-third of small businesses use DIY builders to create their websites. This approach lets you test your business idea online with minimal risk. You can always upgrade to a paid plan or a custom-built site once your business grows and has steady revenue to justify it.
Bottom line: A free website is a great starting point to establish an online presence. You get the core benefits of a website – visibility, credibility, customer reach – without a financial hurdle. Just be aware of the constraints (like the subdomain and limited features). Many businesses begin with a free site and later scale up to a custom domain or advanced features when needed. Next, we’ll go through the concrete steps of how to create a website for your business for free, from planning to publishing.

Step-by-Step Guide: How to Create a Website for Business for Free
Building your first website might feel intimidating, but it’s quite straightforward with today’s tools. We will break the process into clear steps. Follow along, and you’ll have a functional business website up and running without spending any money.
Step 1: Define Your Website’s Purpose and Goals
Before jumping into design, take a moment to plan what you need. Ask yourself: What is the main goal of my website? Common goals for a small business website include: providing information (who you are, what you offer, how to contact you), showcasing products or services, capturing leads (through a contact form or newsletter sign-up), or even selling products online. By clarifying the purpose, you can make better decisions in the following steps. For example, if your goal is simply to have an online brochure for your local bakery, a single-page site with your menu, hours, and location might suffice. If you’re a consultant wanting to generate inquiries, you’ll need a contact form and maybe a blog for thought leadership.
List the essential features you want. This could include: a photo gallery, a booking form, customer testimonials, or a map integration. Knowing these requirements helps in choosing the right free platform (since some offer certain features for free while others might not). For instance, if you absolutely need a scheduling/appointment system, you might lean toward a platform that includes that in the free version (like Square/Weebly for basic appointment booking, or consider simply linking to a free Calendly widget). If an online store is your goal, note that most free plans don’t support full e-commerce, but Weebly’s free tier can handle a simple store for physical goods.
Also consider your target audience and what information they will be looking for. Put yourself in your customer’s shoes: what would you want to see on the site? This ensures your content will meet visitors’ needs. For example, a potential client visiting your site will likely want to quickly know what you offer and how to contact you. In fact, studies show 86% of visitors want to see information about a company’s products or services right on the homepage. So you might plan to feature your key offerings prominently on the front page. Taking a bit of time to outline your pages and content (even just on paper) will make the building process smoother and result in a more effective website.
Step 2: Choose a Free Website Builder Platform
Now that you know what you need, it’s time to pick the platform that will power your free website. There are several reputable free website builders available. The “best” choice depends on your specific needs and comfort level, but here are a few of the top options:
- Wix: A very popular, beginner-friendly website builder with drag-and-drop editing. Wix offers a vast selection of templates and design elements. As of early 2024, around 8 million live websites have been built on Wix, which accounts for nearly 45% of the website builder market share. This means many users trust it for creating sites. Wix’s free plan includes hundreds of templates and the ability to use all basic features (blog, galleries, etc.), but your site will have a Wix subdomain (yourname.wixsite.com/yourwebsite) and Wix ads. It’s great for design flexibility – you can customize layouts freely.
- WordPress.com: The hosted version of WordPress offers a free plan where your site is on a WordPress.com subdomain. WordPress is the platform behind ~43% of all websites worldwide (when including self-hosted sites), making it a powerful and widely supported option. On the free plan, WordPress.com gives you a selection of themes (design templates) and basic features like blog posting and contact forms. It’s a bit less drag-and-drop; instead, you customize within set theme structures. But it’s robust and good for blogging and content-heavy sites. Keep in mind e-commerce and plugins are not available on the free tier.
- Weebly: Another user-friendly builder, now operated by Square. Weebly’s standout feature is that you can actually run a small online store for free, including inventory management for physical goods. Your site gets a Weebly (or Square) subdomain. Design-wise, Weebly uses a section-based editor (not full drag-and-drop), which is slightly more rigid than Wix but still easy to use. If your main need is a simple store or you prefer a structured editor, Weebly is worth a look. Weebly’s free plan has a 500MB storage limit and shows Square ads, but it includes important features like free SSL security and SEO settings.
- GoDaddy Website Builder: GoDaddy provides a free tier of its website builder, which is quite straightforward and includes handy features for service businesses, like appointment scheduling and even chatbots on the free plan. It’s designed for quick setup – good if you want to get a basic site live in minutes. The customization is more limited, but if you value speed and built-in business tools (appointments, etc.), GoDaddy’s free plan might suit you.
- Google Sites or Google Business Profile: Google offers simple free website options as well. Google Sites is a free website builder as part of Google’s workspace tools – it’s very basic in design flexibility but extremely easy to use (great for a simple informational site or internal site). More interestingly for local businesses, Google Business Profile (formerly Google My Business) lets you auto-generate a free one-page website from your business listing. If you’ve claimed your Google business listing, you can create a very simple site that pulls in your business info (address, hours, etc.). It’s not fancy, but it can be enough for a basic web presence and is also free. The URL will be like business.google.com/website/YourBusinessName. This option is best for local service providers who just need a quick page online.
- Other niche builders: There are many others – Ucraft, Site123, Webflow (has a free stage but more complex), Carrd (great for one-page sites), and even MailerLite (known for email marketing, but offers a free website builder integrated with its platform). Each has its pros and cons. For instance, Webflow offers powerful design tools and is free for up to 2 projects on a Webflow subdomain, but it’s more oriented to design professionals. Carrd is excellent for one-page websites and very cost-effective (many sites free, premium plans are cheap). If you just need a single landing page (for example, a coming-soon page or a simple info page), Carrd could be an easy solution.
For most beginners, starting with one of the big names like Wix, WordPress.com, or Weebly is a safe bet because they have lots of community support, tutorials, and templates. They’re also continuously updated for security and features. As evidence of their popularity, consider that 32% of small businesses use DIY site builders (like the ones above) to create their websites – you’ll be in good company, and these platforms are well-tested.
Take a quick tour of a couple of platforms’ websites and see which interface you like. Many have demo videos. Ease of use is key: if the builder’s editor feels intuitive to you, that’s a good choice. Also, check if the free plan covers your must-have features from Step 1. If not, try another platform. The beauty is you can try them out for free and switch if you don’t like one, since you haven’t invested money yet.
Step 3: Sign Up and Secure a Domain Name (Free Subdomain)
Once you’ve chosen a platform, the next step is to create an account on that platform’s website. Signing up is usually as simple as providing an email address and a password (or using a Google/Facebook login). After registration, you’ll be guided to start your first website. The builder will ask for your site name and will assign you a web address under its domain.
For example, if you chose Wix, your free site’s address will look like username.wixsite.com/sitename. With WordPress.com, it will be sitename.wordpress.com. On Weebly, sitename.weebly.com. Pick a site name (and account/username) that is related to your business name, so the resulting URL is as neat as possible. While it won’t be a custom domain, you still want it to be recognizable and easy to remember. If your business is “Sunny Lawn Care”, for instance, try to get sunnylawncare.weebly.com or sunnylawn.wordpress.com etc., rather than something unrelated.
The platform will check if that name is available. If the exact name is taken by someone else (common for popular words), you might need to add a slight variation. Often, adding your city or a keyword can help (e.g., sunnylawncarechicago.wordpress.com if Sunny Lawn Care is taken, and you operate in Chicago). Keep it reasonably short and avoid numbers or hyphens if possible, as those can be confusing when sharing the link verbally.
At this stage, some builders might also prompt you with an offer to use a custom domain (like sunnylawncare.com). You can skip that for now to stay on the free path. Remember, the goal here is no-cost setup. You can always add a custom domain later if you decide to purchase one. Many platforms offer domain purchase and connection as an upgrade, or you can buy a domain from a registrar and map it to your site when you’re ready (usually a paid feature on the site builder). But again, this is optional – you do not need it to launch a functional website.
After setting your site name and domain, your site is technically created on the platform. It likely isn’t public yet (often, it’s in an “unpublished” state until you deliberately publish). Now you’re ready to build out the pages and design.
Step 4: Choose a Design Template (Layout for Your Site)
Here’s where the fun begins – designing the look of your website. Fortunately, you don’t have to start from a blank canvas. All major website builders come with a library of pre-designed templates or themes that you can apply to your site. These templates are a huge time-saver and ensure your site looks professionally designed, even if you have no design experience.
When you start a new website, the platform will usually prompt you to pick a template. Templates are often categorized by industry or site type (e.g., “Business & Services”, “Portfolio”, “Restaurant”, “Blog”, etc.). You can browse through and find one that fits your business’s vibe. Don’t worry if the example content in the template doesn’t match your business (like images of a cafe when you run a plumbing service) – you’ll be changing all that. Focus on the overall layout and style: the structure of the pages, the menu design, and the general feel (clean, modern, playful, classic?). You’ll want something that aligns with your brand. For instance, if you’re a creative agency, a sleek modern template with bold imagery might work; if you’re a non-profit, perhaps a warm and inviting template with clear calls-to-action.
To give an idea of the variety available: Wix offers over 800 free designer-made templates to choose from, covering practically every kind of business and project. Other builders also have hundreds of templates in their galleries. Browse the options and select one that you like. If the platform allows a preview, use it – you can often click a template to see a full-page preview of how it looks on desktop and mobile.
When you select a template, the builder will apply that design to your site. You’ll get the template’s pages (filled with placeholder text and images) as a starting point. One tip: Choose a template that is mobile-responsive. Most are, nowadays, but double-check. With more than 40% of website traffic coming from mobile devices, a responsive design (one that automatically adapts to mobile screen size) is crucial. If a template has a preview for mobile, take a look. It’s important because nearly 57% of users won’t recommend a business with a poorly designed mobile site. So you want a template that looks good on phones out of the box.
Keep in mind that the template is just a foundation. You will be customizing it in the next step, so it doesn’t have to be perfect. The key is to pick a structure that’s close to what you need. For example, if you planned to have a one-page site, maybe choose a one-page style template. If you need multiple sections (about, services, contact), pick a template that already has those sections laid out. This will make editing much easier.
Some platforms also offer AI-assisted design – for instance, Wix has an ADI (Artificial Design Intelligence) mode where you answer a few questions and it generates a site design for you. This can be a quick way to get a starting point, though you might have less control over initial layout choices. You could try such a feature if offered, and if you don’t love the result, you can usually switch to a manual template selection.
Step 5: Customize Your Website’s Content and Pages
Now it’s time to make the website truly yours by replacing the template content with your own. This step involves editing text, swapping in your images or logos, and creating the pages you mapped out in Step 1.
Start with your homepage, the most important page. The homepage should immediately communicate what your business is and what value you offer. Craft a clear headline or tagline that sums up your business. For example: “Award-Winning Landscape Services in Springfield” or “Delicious Custom Cakes Baked Fresh Daily”. This helps visitors understand your offering within seconds. (It’s often said you have less than 5 seconds to orient a new visitor – indeed, 61% of users will leave if they don’t find what they’re looking for quickly.) Make sure your homepage also includes key details like your business name (if not obvious from the logo), and a call-to-action (CTA). A CTA could be “Contact Us for a Free Quote”, “Browse Our Catalog”, “Book an Appointment”, etc., depending on your goal. It directs visitors to the next step you want them to take.
Next, fill in or set up your other essential pages. Typically, a small business site will have:
- About Us: Tell your story briefly – who you are, your mission, years of experience, team members, or anything that builds credibility and connection. People often check the About page to trust the business.
- Products/Services: A page (or pages) describing what you offer. Break it down into categories if needed. Include clear descriptions and highlight what makes your offerings unique. If possible, add quality photos of your products or work – visuals help engagement.
- Contact Us: Very important – provide users a way to reach you. This page should have your preferred contact methods: business phone number, email, address if you have a physical location, and perhaps a contact form for convenience. Also, include your business hours if relevant. A Google Map embed is great for brick-and-mortar businesses so customers can easily get directions. Most site builders let you embed a Google Map by dragging a map widget or using an iframe.
- Testimonials/Reviews: If you have any customer testimonials, dedicate a section or page to those. Social proof increases trust.
- Gallery or Portfolio: If your business is visual (e.g., a cake bakery, photographer, interior designer), include a gallery of your work.
- Blog/News: Not required, but having a blog section can improve your SEO and give visitors useful info. Even occasional updates like “What’s new” or tips related to your business niche can be valuable. It shows that your site is active and can position you as an expert. (Note: Some free plans limit blogging features – for instance, MailerLite’s free plan required an upgrade for blog functionality, while Wix and WordPress free plans fully support blogging.)
As you customize, maintain consistent branding. Use your business’s color scheme if you have one. Most builders allow you to set the colors for text, buttons, and backgrounds easily. Similarly, upload your logo to the site header (most templates have a placeholder logo you can replace). If you don’t have a logo yet, you could just use a plain text site title for now, or use a free logo maker tool. Many website builders (like Wix) even have free logo generators.
Ensure the text is concise and clear. Use simple language (since this is a beginner’s guide, we’re keeping things straightforward – apply that to your site copy too!). Break text into sections with headings, bullet points, or short paragraphs. This improves readability. Internet users skim a lot. Also, using some transition words (like “Moreover, …”, “For example, …”, “In addition, …”) in your content can guide readers through your message smoothly.
One critical piece: always double-check contact information for accuracy. A beautiful website won’t help if your phone number or address is wrong. It sounds obvious, but it’s a common mistake. Make it a habit to test the contact form (fill it out and see if you receive the message).
Another tip for content: emphasize benefits and call-to-action elements. For instance, instead of just saying “We offer plumbing services”, your site could say “Leaky pipes or clogged drains? Our expert plumbers fix it fast – book a free consultation now.” The latter both identifies a customer problem and invites them to take action (the underlined part being a CTA button perhaps). As a guide, try to have a call-to-action on every significant page (even if it’s just a “Contact us for more info” button at the bottom). This helps convert visitors into leads or customers.
Lastly, keep user experience in mind. Navigation menus should be simple and clear – usually across the top of the site or a burger menu on mobile. Use page names that make sense (e.g., “Home, About, Services, Contact” are standard; avoid cute but unclear labels). A visitor should never feel lost on your site. If you followed a template, the navigation is likely already well-structured. Just update the menu if you added or removed pages. Also, consider adding links to your social media profiles (many templates have social icon placeholders you can link to your Facebook, Instagram, LinkedIn, etc.). This connects your website with your broader online presence.
Step 6: Optimize for Mobile and User Experience
With your content in place, it’s crucial to check how your website looks and performs on different devices. As noted earlier, a huge portion of traffic comes from smartphones – in 2023, about 43% of small business website traffic came from mobile phones. So, you want to ensure your free website is mobile-friendly. Most website builders automatically create a mobile version of your site, but you should still review it. Many platforms have a toggle or preview mode for mobile view; use that to see if any text is too large/small, if images are displaying properly, and if the navigation is easy to use on a smaller screen.
Pay attention to load times as well. Free hosting sometimes can be a tad slower than premium, so optimize what you can: use appropriately sized images (large images can slow a page – you can compress them without visible quality loss using free tools like TinyPNG or the builder’s built-in image optimization). A fast site keeps visitors happy; research shows a lot of users will abandon a site if it’s slow or hard to navigate – for instance, 61% of users will leave if they don’t find what they need in a few seconds. While that stat is about finding info, it ties to speed because if a page is slow, users get impatient.
Also test all the links and forms on your site. Click every menu item and button to make sure they go to the right page or section. Submit a test message through your contact form to confirm it’s working. If you added an email link, ensure it’s spelled correctly. Broken links or non-functional forms can frustrate visitors and cost you business.
Think about accessibility too: are your font sizes readable? Is there sufficient color contrast for text vs background? Don’t let a fancy template’s style sacrifice readability. Short sentences and paragraphs (as we’re using in this article) improve readability on all devices. Use headings to create a logical hierarchy of information – this not only helps readers but also search engines (SEO).
Speaking of SEO (Search Engine Optimization): even on a free site, you should utilize basic SEO settings typically provided. Many builders let you edit page titles and meta descriptions. Write a concise, relevant title and description for each page incorporating your business name and some keywords about what you do. For example, your homepage title could be “Sunny Lawn Care – Affordable Lawn Maintenance | Springfield, IL”. The meta description might be “Sunny Lawn Care offers affordable lawn mowing, landscaping, and garden care services in Springfield, IL. Get a greener lawn with our expert team. Free estimates available.” This helps Google understand and display your site properly in search results. On free plans, SEO tools are usually somewhat limited but at least allow these basics. Wix, for instance, has built-in SEO prompts even in free sites, and will guide you to add those titles/descriptions.
Make sure to also set up any necessary analytics or tracking if you want to monitor visitors. Some platforms let you connect Google Analytics even on free plans; others might require an upgrade for external scripts. But a simple built-in stats dashboard is usually provided (e.g., WordPress.com and Wix free sites will show you basic visitor counts). Tracking isn’t mandatory to launch, but it’s nice to know later how your site is doing.
Finally, do a round of proofreading. Ensure there are no typos or placeholder texts left (nothing screams “unfinished website” like Lorem ipsum text lingering somewhere). It can help to have someone else review the site, because fresh eyes catch things you might miss. Many small businesses skip this step, but it’s part of quality control – first impressions count. Since 50% of consumers judge a company by its website design, you want to put your best foot forward with a polished, error-free site.
Step 7: Publish Your Website and Spread the Word
You’ve done the work of building your free business website – now it’s time to take it live! Hitting the “Publish” button in your website builder will make the site accessible to the public at the free domain you were given. On most platforms, this is instantaneous or within a minute. Once published, test your site by visiting its URL in a private/incognito browser window (this simulates a first-time visitor experience and ensures you’re seeing the live version, not a cached or editor view).
Congratulations, your business now has an online home! But don’t stop there. A website won’t automatically attract visitors – you need to promote it. Here are some effective, free ways to get the word out:
- Share on social media: Post your website link on your business’s Facebook page, Instagram profile, LinkedIn, Twitter, and any other platform you use. Encourage friends and family to share it as well, especially if you are just starting out. Social media can drive initial traffic and also helps with SEO if people start visiting and engaging.
- Update business listings: If you have a Google Business Profile (Google My Business), make sure your website URL is added to your listing. That way, when people find you on Google Maps or search, they can click through to your website. Similarly, update any Yelp, Bing Places, TripAdvisor, or industry-specific directory listings with your new website address. Consistency is key – ensure phone/address info matches your site.
- Email your contacts: Send an email announcement to your client list (if you have one) introducing your new website. Even a simple “We’re excited to announce our new website: [link]. Check it out and let us know what you think!” can drive interested traffic and reconnect you with leads.
- Leverage SEO: Over time, you’ll want your site to rank on search engines for relevant keywords (e.g., “lawn care in Springfield” or “custom cakes free delivery [your city]”). On a free site, you can still do a lot: use relevant keywords naturally in your page titles and content (for example, if location matters, mention your city name in copy). Register your site with Google Search Console – it’s free – which allows you to submit your site for indexing and see search performance. (Even Google’s one-page sites or free Wix sites can be submitted to Search Console by verifying ownership; instructions for verification are provided by these platforms, often via adding a meta tag or file which some builders enable). This helps Google crawl your site faster. Remember, SEO is a longer game, but starting early with good content and proper info on your site will yield results in the months to come.
- Get backlinks: A quick SEO win is getting other sites to link to yours. You could list your business on local chamber of commerce pages, or if you write a guest blog or have partners, ask if they can link to your site. Each link is like a vote of confidence that can boost your search visibility.
- Add fresh content periodically: A website is not a one-and-done brochure – updating it keeps it relevant. That could be as simple as adding a new customer testimonial, uploading a recent project to your gallery, or writing a short blog post with tips related to your business. Websites that add content tend to rank better and give repeat visitors something new to see. If you have a blog section, consider posting articles or news occasionally (say, monthly or bi-monthly). They don’t have to be long; just useful or interesting to your audience. For example, a pet grooming business might blog “5 Tips to Keep Your Dog’s Coat Shiny Between Grooming Sessions” – content like that can attract visitors searching those questions, and shows expertise.
When to Consider Upgrading or Expanding
Since this guide focuses on free solutions, we’ll keep this brief – but it’s useful to know when you might outgrow the free plan. As your business grows, you may reach a point where the limitations of the free site start to hold you back. For example, if your site traffic increases substantially, you might want a custom domain to look more professional, or need more bandwidth. Perhaps you want to remove the platform’s ads/logos for a cleaner look. Or you need to add an online store or a plugin (like an advanced form, booking system, or chat widget) that isn’t available on the free plan.
A few signs it’s time to upgrade:
- You want a custom domain: Branding with your own .com (or .net, etc.) is a natural next step to build credibility.
- The platform ads bother you or your visitors: Removing those usually requires a paid plan.
- You need more functionality: e.g., accept online payments, have member logins, advanced SEO control, etc.
- Heavy traffic or content: if you need more storage for images/videos or more bandwidth for visitors (though many free plans offer unlimited bandwidth for basic usage, check your platform’s terms).
- Professional email: Some paid plans come with professional email (like [email protected]), which can be convenient.
Upgrading doesn’t mean you have to spend a fortune. Many site builders have entry-level plans ranging from $5 to $15 per month that include a free domain for the first year and extra features. For instance, Weebly’s paid plans start at $10/month for additional features, and Wix’s at around $17/month for removing Wix ads and connecting a domain. There are also alternative paths, like moving to a self-hosted WordPress.org site if you need total control – but that involves getting separate hosting. When you reach these crossroads, evaluate the ROI: if your website is bringing in business, investing in it further often makes sense.
A smart approach is what one guide called a “pro tip”: start free, then upgrade only when your business earnings can justify the cost. In other words, use the free site to validate your business online. Once you see results (traffic, inquiries, sales), you can channel some of that revenue back into a better web presence.
Conclusion
Creating a business website for free is not only possible – it’s become increasingly common and easier than ever. With a clear plan, the right platform, and a bit of your time, you can have a professional-looking site up and running without spending a dime. This empowers even the smallest businesses or solo entrepreneurs to stake their claim on the internet. Remember that your website is a living tool: keep it updated, listen to customer feedback, and continue improving it. Even a free website can significantly boost your credibility and reach. In today’s digital-first world, customers expect to find you online – and now they can. By following this beginner’s guide on how to create a website for business for free, you’ve taken the first step to growing your business’s online presence.
Your free website can serve as the foundation for your brand’s online growth. As you attract more visitors and customers, you’ll be part of the majority of businesses leveraging the web – joining those 70%+ of small businesses that have a website and are tapping into the global market of billions of internet users. So go ahead and publish that site with confidence. It might be free, but its impact on your business could be priceless.