
The cPanel control panel is probably recognizable to everyone who has ever signed up for a new web hosting account. This would be a fair estimate: 90% of all web hosting providers utilize cPanel. This is where the cPanel lesson below comes in.
So what’s the point of going through this cPanel guide?
At 1Byte, we evaluate several hosting systems on a daily basis. We are well-versed in this material. This cPanel lesson was written with the beginner in mind, so we’ve tried to keep things as easy as possible. So there’s no need to be concerned about it being overly complicated. Ready? Let’s start.

What Is cPanel?
cPanel is a software program that provides you with a graphical interface to manage your website. It’s one of the most popular tools for managing a website, but it’s not without its flaws. In this post, we’ll explore the pros and cons of cPanel, as well as how to use it. We’ll also provide some alternatives if you decide that cPanel isn’t right for you. So, what is cPanel? Let’s find out!
cPanel is a Linux-based web hosting control panel that provides a graphical interface and automation tools designed to simplify the process of hosting a website. cPanel is typically used by web hosts to manage their customers’ websites, and it is also available for installation on personal servers. cPanel is designed to work with many differences
In a nutshell, it’s a place where you may handle every aspect of your web hosting account. cPanel is popular among web hosting providers because it is easy to use and well-maintained, with frequent upgrades, enhancements, and security precautions.
FURTHER READING: |
| 1. 8 Best Cpanel Alternatives Free & Paid [2025] |
| 2. How Easily Upload Your Website Via cPanel? |
| 3. How to Manage Your Files on cPanel? |
What Is cPanel Hosting?
cPanel hosting is a type of Linux-based web hosting that uses the cPanel control panel. This hosting plan provides you with a cPanel account to manage your web hosting elements. cPanel can be used in different types of hosting, including shared, dedicated, and managed WordPress hosting.

cPanel is a good choice for beginners looking for a straightforward control panel solution. However, just like other hosting control panels, cPanel has its benefits and drawbacks. Some of the benefits of cPanel include its user-friendly interface, ability to manage multiple websites at once, and wide range of features. Some of the drawbacks of cPanel have its complexity for advanced users and the potential for abuse by novice users.
Why Is It Called cPanel?
Its first purpose was to serve as the control panel for Speed Hosting, a now-defunct web hosting business, in 1996. John Nick Koston, the first author of cPanel, owned an interest in Speed Hosting. Following their merger with Speed Hosting, Webking started using cPanel right away.
What Can I Do in cPanel?
A great deal…This is where you’ll find cPanel:
- Connect domain names to your hosting
- Set up emails for your site
- Install WordPress (or another content management system)
- Back up your website
- Upload files to your server
- Check your bandwidth and other usage stats
- Change various security settings
- Install add-on apps on your server
- Create new databases/manage existing ones
- Set up various optimizations …and so on
We’ve just scratched the surface here; there’s so much more to learn. Do not, however, allow yourself to be intimidated. Even while cPanel comes with a slew of features and customizations, you don’t need to know about them all to keep your website running well. This manual will provide comprehensive coverage of all topics.
A Quick Intro to the cPanel Interface
My cPanel Interface Looks Different! Now What?
Don’t freak out. If you want to change the look of your cPanel, go to the “PREFERENCES” section and select “Change Style.”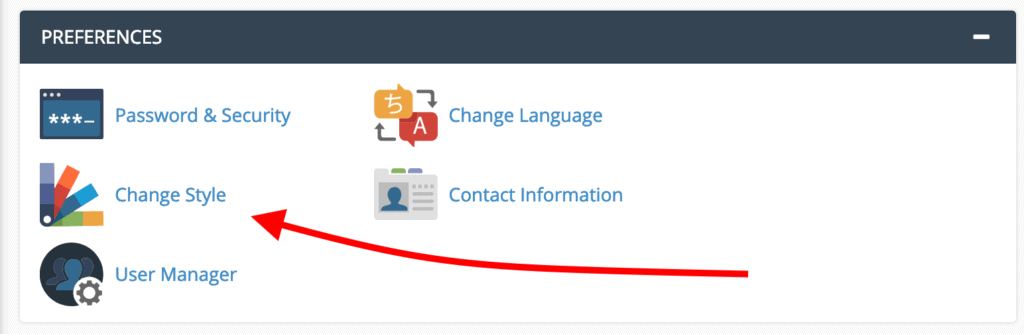
You’ll be able to choose from a variety of options depending on what your host has to offer. In our instance, you may choose from the Basic, Dark, Light, and Retro design categories to best suit your needs.
The “Apply” button in the upper right corner adjacent to the style may be used to apply the same theme we’re currently working on. It will take some time for cPanel to reload with the new layout.
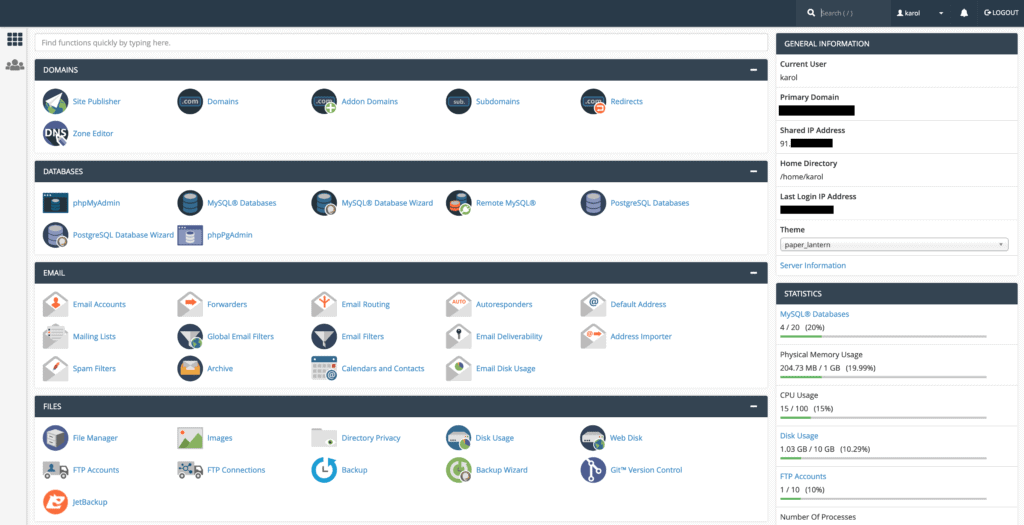
Getting Around the cPanel Interface
1. Navigation Bar
In the upper right corner of the screen, you’ll find the navigation bar. All of these features may be found in one place on the page: a simple search form, a notification bell, and a link to your user settings.

The search field helps you to locate the most important settings within cPanel. Actually, utilizing the search field is a lot faster method to travel through cPanel than manually browsing around and getting to a certain feature. As you write, the search field begins to populate with results.
You may modify your password, language, and contact information by clicking on the user preferences link, and you can also reset the page settings with a single click.
The notifications bell is exactly what it sounds like – a location where you may view important updates regarding your hosting configuration or cPanel itself. Notifications are often used by cPanel to notify you of breaking news, crucial upgrades, security problems, or other important information.
The logout link is self-explanatory; use it after you’ve done working with cPanel.
2. Search Bar
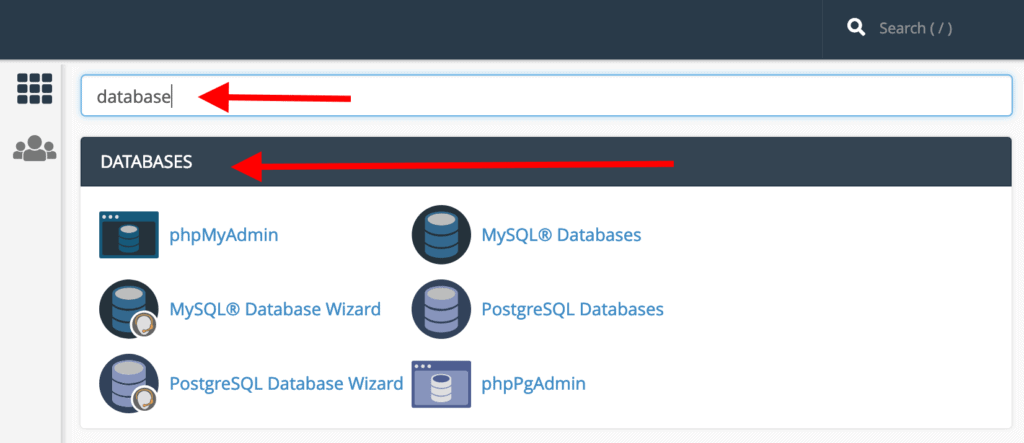
Aside from the one in the navigation bar, there is another search form accessible at the very top of the page, immediately below the navigation bar.
This one works similarly, except instead of displaying results in a drop-down, it will filter off the middle section of cPanel. Simply type in what you’re looking for, and cPanel will find it for you.
3. Side Bar
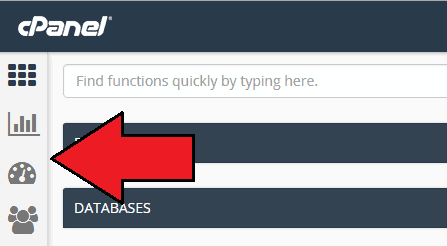
A sidebar with a few of icons will appear on the left side of your screen — the precise number depends on what your host makes available to you. In our instance, these stand for Home, Statistics, Dashboard, and User Management, in that order.
- Home is the primary page of cPanel where you can access most of the functions.
- Statistics show you a range of important numbers – how many email accounts, file transfer protocol (FTP) accounts, and domain names you have, as well as how much bandwidth and disk space you’re using.
- The dashboard is a quick reference page where you’ll find links to some of the most commonly used links, as well as at-a-glance, look at your bandwidth and disk space usage, mail statistics, and more.
- User Management is where you can add or remove users from your cPanel account. You can also see which email accounts you’ve set up, as well as who has access to your FTP and web disk in case you’re sharing an account with other users or admins.
Now you have the look and feel of cPanel. More in-depth blogs are to come.
How to Use cPanel?
Now that you know the basics about cPanel, it’s time to learn how to use it. This section will show you how to navigate cPanel, add domains and users, change your Password, and more.
To get started, log into your cPanel account. You can do this by adding :2082 to the end of your site’s URL (for HTTP sites) or :2083 for HTTPS sites. Then, type in your username and Password and click on the login button.
Once you’re inside the dashboard, you will see a variety of tabs across the top of the page. These tabs are divided into domains, Emails, Files, and so on. Click on each tab to view the corresponding options.
For example, if you want to add a new domain name to your account, go to the Domains tab and click on the Add Domain button. cPanel will then ask for some information about the new domain name, such as the name servers and contact information.
You can also manage users and passwords under the Accounts tab. To change your cPanel password, go to Preferences > Change Password. Enter your current Password and then create a new one. Be sure to make a note of it somewhere safe!
1. Files
When you’re working with files on your server, it’s essential to be aware of the potential consequences of your actions. For example, if you remove a file from your server that is required by your website, your site will no longer function.
Similarly, if you make changes to a file used by your website, those changes may not be reflected when you visit your site. It’s always best to make changes to copies of files rather than the originals and to test any changes you make on a development or staging environment before pushing them live.
If you’re unsure what a particular file does or if it’s safe to modify it, reach out to your web hosting provider for help.
2. Preferences
The Preferences area in cPanel allows you to customize the way your cPanel account works. You can change your language, theme, and user information here.
To change your language, navigate to Preferences > Language and select your desired language from the list.
To change your theme, navigate to Preferences > Theme and select a new theme from the list or the personal theme you uploaded.
To change your user information, navigate to Preferences > User Manager. Here you can update your contact information, Password and make other changes to your user settings.
3. Databases
Databases play a significant role in web hosting, as they store all the important data and information for websites. In cPanel, there are two ways to manage databases: MySQL Databases and phpMyAdmin.
MySQL Databases can be used to create, delete, and manage databases. To create a MySQL Database, click on the MySQL Databases icon under the Databases section in cPanel. You will then be taken to the MySQL Database Manager, where you can create new databases by entering a name and clicking Add Database.
phpMyAdmin can be used to manage database users, passwords, and tables. To access phpMyAdmin, click on the phpMyAdmin icon under the Databases section in cPanel. phpMyAdmin will open in a new browser window, and you can manage your databases from there.
Create Databases and Manage MySQL Users
Creating a new database in cPanel is a simple process. First, log in to your cPanel account and click on the MySQL Databases icon.
On the next screen, enter the desired database name into the New Database field and click Create Database.
Next, scroll down to the MySQL Users section and enter the desired username and Password. Click Create User to create a new user.
When you’re done, navigate to the Add User To Database section. Select the new user and database from the dropdown menus and click Add. This will grant the user access to the selected database.
You can now start importing your files into this new database via phpMyAdmin.
4. Softaculous Apps Installer
Softaculous is a script library that automates the installation processes of various applications. The most popular software includes WordPress, phpBB, Joomla, and Drupal.
Thanks to the seamless integration with cPanel, you can directly install any software right from the dashboard. Softaculous makes it easy to find and install software with just a few clicks – no need to search for downloads or manually configure settings.
Install Software With Softaculous
With Softaculous, you can install a wide range of software with just a few clicks. Select the script you want to install and click on the Install Now button to get started.
You will then be prompted to configure the software setup and site settings. Choose the installation URL and specify the options for your WordPress website. Additionally, you can create an admin account, select a free WordPress theme, and pre-install multiple plugins.
Once you’re done, click Install to start the WordPress installation process.
5. Software
The Software section in cPanel is where you can find various scripts and applications to help you with your website. This includes the Softaculous Apps Installer, which you can use to install popular applications like WordPress, Drupal, and Joomla.
You can also find other programming languages here, such as PHP, Ruby, and Perl. Advanced users mainly use this section, but if you have a Cloudflare account, you can sign up and enable it here.
Setting Up Cloudflare
Cloudflare can be set up in cPanel by following these simple steps:
1. Log into cPanel and click on the Cloudflare icon.
2. Enter your Cloudflare credentials to sign in.
3. Click on the Domains tab, and you will see a list of active websites with their DNS details.
4. The easiest way to set up Cloudflare is by adding the CNAME records. This will point a subdomain to your primary domain. Go ahead and click on the Add CNAME Record button.
5. In the Name field, enter the subdomain you want to use for Cloudflare (e.g., www). In the Destination field, enter your main domain name (e.g., example.com). Click on the Add Record button to save your changes.
6. Domains

The Domains section in Cpanel manages all aspects of your domain names, such as adding new domains, setting up redirects, and managing DNS records. In the Domains section, you can also add addon domains, which are new domain names that are added to an existing hosting account. Additionally, you can create parked domains, which are domains that are automatically redirected to another domain.
Using the DNS Zone Editor
cPanel contains Zone Editor to create, edit, and manage DNS (Domain Name System) records. This feature performs multiple actions, from adding an MX record to managing domain configurations.
To create an MX record, click on the respective button. This will open a new page – enter the priority value in the Priority box and a fully qualified domain name in the Destination field.
Finally, click Add An MX Record to save the changes. cPanel is a great way to manage your DNS records and keep your website running smoothly. Thanks, cPanel!
7. Metrics
One of these features is the ability to track website statistics. cPanel can track the number of visitors to your site, the resources used by your site, and the performance of your site. This information can be used to help you make decisions about how to improve your website. cPanel also offers a variety of other features, such as email hosting, domain management, and file sharing. With cPanel, you can easily manage all aspects of your website from one convenient platform.
Viewing Traffic Statistics in cPanel
To view your website’s traffic statistics, log in to cPanel and click the Awstats icon. This will open a report of your website’s traffic statistics.
The report includes your website’s traffic volume, unique visitors, and most popular pages. It also contains data on the browsers and operating systems used by your visitors and their location.
This information can help you determine which aspects of your website are most popular with your visitors and make changes to improve them.
8. Security
Security is a big concern for every site owner, especially if you store sensitive information such as credit card details. This module helps you keep an eye on key security settings on your hosting account.
Multiple features to optimize your site security include SSH Access to connect to your server via SSH and SSL/TLS to enable SSL certificates for extra security. Another essential feature is Hotlink Protection which prevents other sites from stealing your site resources.
Configure Hotlink Protection
Configuring Hotlink Protection in cPanel is an easy way to prevent other websites from using your files and bandwidth. This can be done by filling out a few fields in the Hotlink Protection feature.
To start, open the Hotlink Protection feature and write down the file formats you would like to restrict access to. These could be images, videos, or any other types of files. Next, add the URLs of the websites you would like to allow access to your files in the URLs to allow access section. Finally, if you have any specific content you would like to redirect, add those URLs in the provided field.
Once all the fields are filled out, click Submit to save your changes. By doing this, you can protect your website’s bandwidth and prevent others from using your files without permission.
8. Advanced
If you’re an experienced user who wants more control over their website, cPanel’s Advanced section is for you. In this section, you can manage your server, track your network information, and clear your WordPress site cache with LiteSpeed.
One handy feature in this section is Cron Jobs. It automates commands or scripts on your site, like setting up a scheduled backup or deleting files after a certain period.
Create a Cron Job
To create a cron job in cPanel, first, log into your account. Next, click on the Cronjobs icon and then Add New Cron Job. In the Command box, enter the command you wish to automate and then click Add New Cron Job.
Be sure to test your cron job before activating it by running it manually from the command line. If everything works correctly, you should see the results of the command displayed in the output window.
9. Email
Email is an important aspect of communication for both personal and business use. When you have a web hosting plan that includes cPanel, you can manage your email through that platform. cPanel provides various features to make managing your email easier, including the ability to set auto-responders, create custom email accounts, and more.
If you’re looking for a web hosting plan that includes email and cPanel, be sure to check out our selection of plans at 1byte.com. We offer a variety of plans that include cPanel and email so that you can find the perfect plan for your needs. Plus, our plans come with a money-back guarantee, so you can be sure you’re getting the best value for your money.
Learn how to set up a mail server on Cpanel with 1Byte.
Create an Email Account
To start, open cPanel and click on the Email Accounts icon. Then, click on the Create button.
A new window will open. Start by filling in the requested information. Once you’re done, click the Create button.
Repeat the process to create another account.
Now that you know how to add email accounts in cPanel, you can start using them for your website.
FAQs
1. Is cPanel Free?
cPanel & WHM software is not free. We do require that you have a valid cPanel license to use our product. For more information on cPanel licensing, please visit https://cpanel.com/pricing.
How Much Does cPanel Cost?
cPanel & WHM licenses start at $15/month. However, pricing may vary depending on your hosting provider. For more information on cPanel pricing, please visit https://cpanel.com/pricing.
Do I Need a License to Use cPanel?
Yes, to use cPanel & WHM on your server, you must purchase a license from cPanel directly, or from one of our licensed partners.
2. Is cPanel Private?
Yes, your cPanel account is private. This means only you can access your website’s information and settings. It is important to keep your username and password secure to maintain your account’s privacy.
3. What are the best cPanel Host Options?
There are many great cPanel host options that can meet the needs of your WordPress website. In order to find the best host for your needs, you should consider factors such as reliability, performance, customer support, features, and pricing.
The best cPanel host option is 1Byte. This host offers reliable and performance-driven hosting solutions and excellent customer support. They also offer a variety of features to help you get the most out of your WordPress website. And finally, they offer competitive pricing options that can fit within your budget.
4. What is Managed WordPress Hosting?
Managed WordPress Hosting is a hosting environment specifically equipped for WordPress websites. In addition to providing higher levels of performance, security, and support, managed hosting also automates website updates and provides daily backups. This costs more because the hosting provider is managing the website environment.
5. Should You Use a Managed WordPress Platform?
There is no easy answer when it comes to deciding if you should use a managed WordPress platform or not. It depends on the size and traffic of your website, as well as your budget and technical abilities.
If you are just starting out, then a managed WordPress platform is probably not the best option for you. However, if your website is growing in popularity and you are seeing a lot of traffic, then a managed WordPress platform can be a great way to ensure that your website continues to run smoothly and without any glitches.
Managed WordPress platforms can be more expensive than other hosting options. Still, they are often worth the investment for businesses and popular blogs that rely on their website for income or visibility.
6. Where is cPanel in Managed WordPress Hosting?
Since cPanel is not a necessary part of managed WordPress hosting, you will not find it on a managed WordPress account. Managed WordPress hosting includes installing WordPress, handling server-level caching, creating backups of your website, and managing WordPress core updates.
Conclusion
cPanel is a powerful hosting platform that can be used to manage your website. If you’re looking for a cPanel Hosting service for shared hosting, check out 1Byte. We offer reliable and affordable hosting plans that include cPanel access so you can easily manage your website. Thanks for reading our guide on cPanel!