

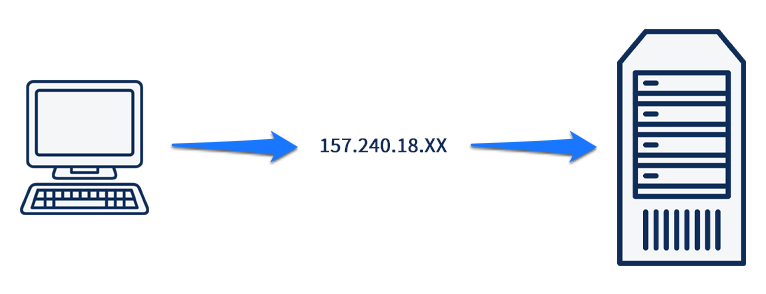
If you want to build a website or web apps, the first thing you need to do is buy a domain name. This is because a domain name is easier to remember than a server’s IP address. A website can only have one domain name, so no two websites on the internet can have the same name. Since a website’s domain name is its unique name, no two websites can have the same name. For Amazon Web Services (AWS), Amazon Route 53 is there to help when you want to buy a domain name.
In this post, we will show you step-by-step how to use the Route 53 function on AWS to buy a domain name.
An Overview of How Domain Registration Works
To start making a website or web application, you will first need to register a domain name, which is often called the name of your website. The user’s browser won’t show your website until they type in your domain name, which is a unique name like example.com.
Here is a list of what you need to do to register or buy an AWS domain name with Amazon Route 53.
1. Choose an AWS Domain Name You Want to Buy
You choose a domain name and then look to see if it’s already taken. This makes sure that no one else has already registered the domain name you want.
If the domain name you want is already taken, you can try other names or change the top-level domain from.com to .ninja or .hockey, if that’s the only change you want to make. See the article titled Domains that you can register with Amazon Route 53 for a list of the top-level domains that Route 53 supports.
2. Sign Up for A Domain Name
You will go to Route 53 to sign up for the domain name. When you register a domain, you have to give the names and contact information for the domain owner and any other people you want to get in touch with.
When you buy a domain name with AWS Route 53, it becomes the DNS provider for the domain right away by automatically doing the following:
- Creates a hosted zone whose name is the same as your domain’s.
- Assigns a set of four name servers to the hosted zone. When someone visits your website using a browser, like www.example.com, these name servers tell the browser where to find your resources, like a web server or an Amazon S3 bucket. For example, when someone opens your website in a browser. (Amazon S3 is a service for storing objects that lets users store and get back any amount of data from anywhere on the web. A bucket is a place where you can put the things you store in S3.
- Gets the name servers from the hosted zone which will be added to the domain.
3. Process Information
At the end of the registration process, AWS will send the information they have gathered about you to the registrar in charge of the domain. The company that registers domain names is either Amazon Registrar, Inc. or their registrar associate Gandi. Find out more about how to find your domain’s registrar by reading the article Finding your registrar.
The registrar will send your information to the registry, which is in charge of the domain. A registry is a company that helps people register domain names for one or more top-level domains, like.com. Customers are able to buy these services.
The information about your domain is kept in the registry’s own database, and some of it is also kept in the WHOIS database, which anyone can access.
If you want to learn more about how to buy or register a domain name with AWS, please visit Registering a new domain.
If you have already registered a domain name with another registrar, you can move it to Route 53. There are other parts of Route 53 that can be used without this. Check out Transferring a domain’s registration to Amazon Route 53 for more information and details.
How to Buy A Domain with AWS?
In this section, you will learn how to buy or register a domain name with an AWS account. For more details, we will provide you with images as illustrations as well.
Step 1: Buying a Domain
a. Start a web browser and get to the AWS Management Console.
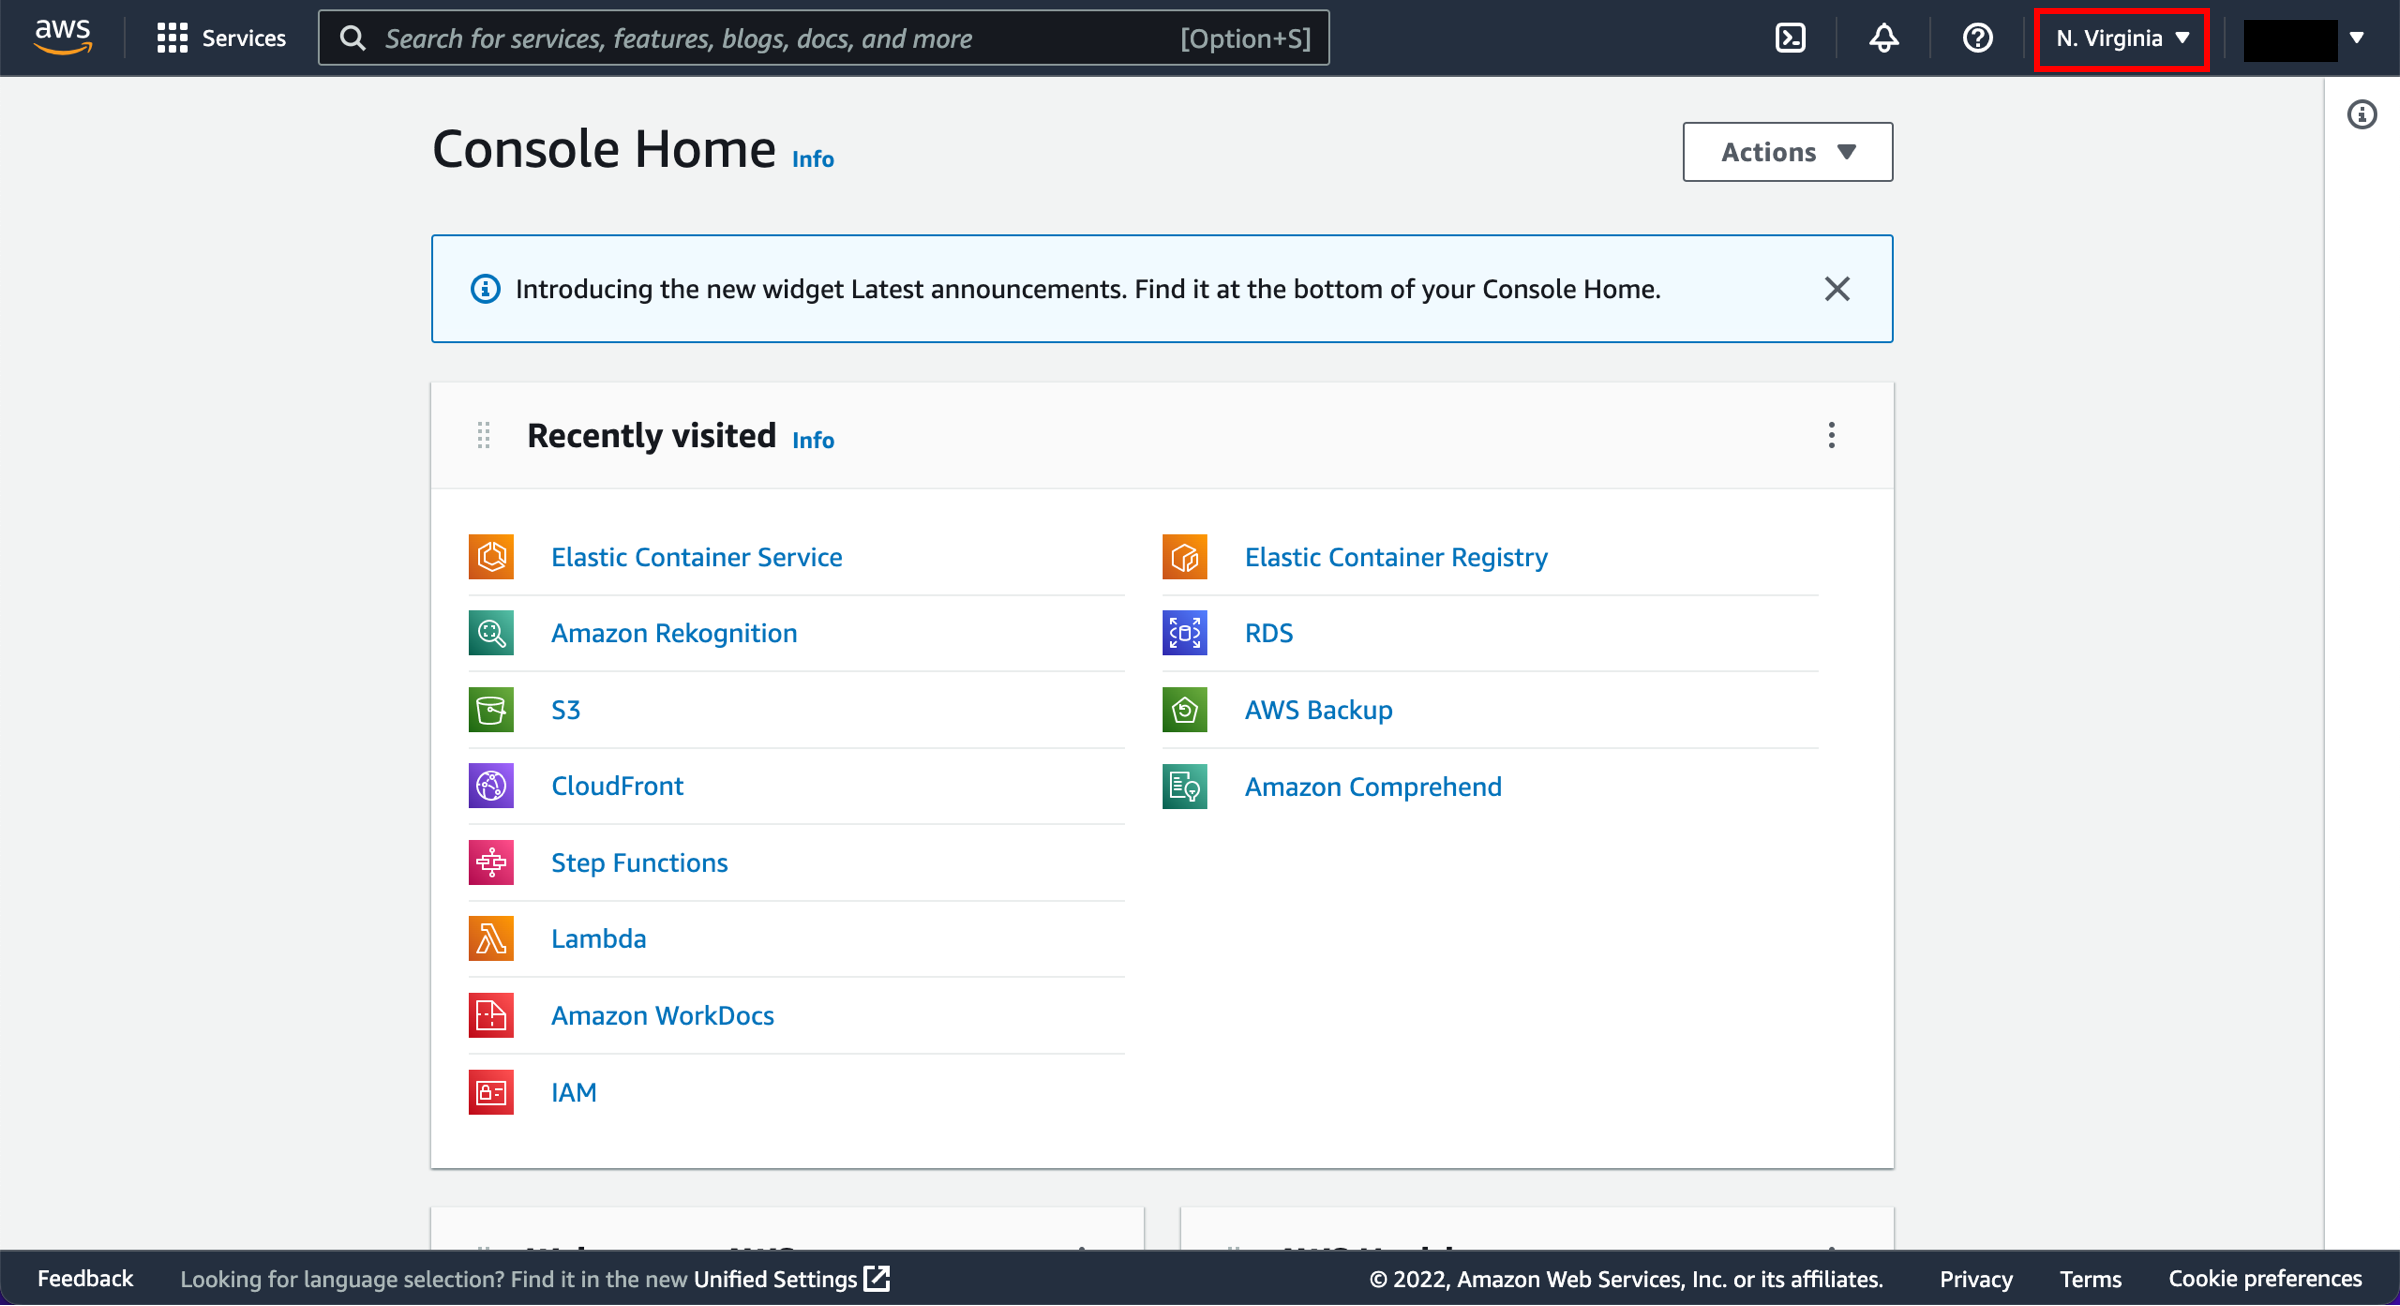
After you’ve logged in successfully, make sure you’ve chosen the right Region in the upper right corner based on what your infrastructure needs.
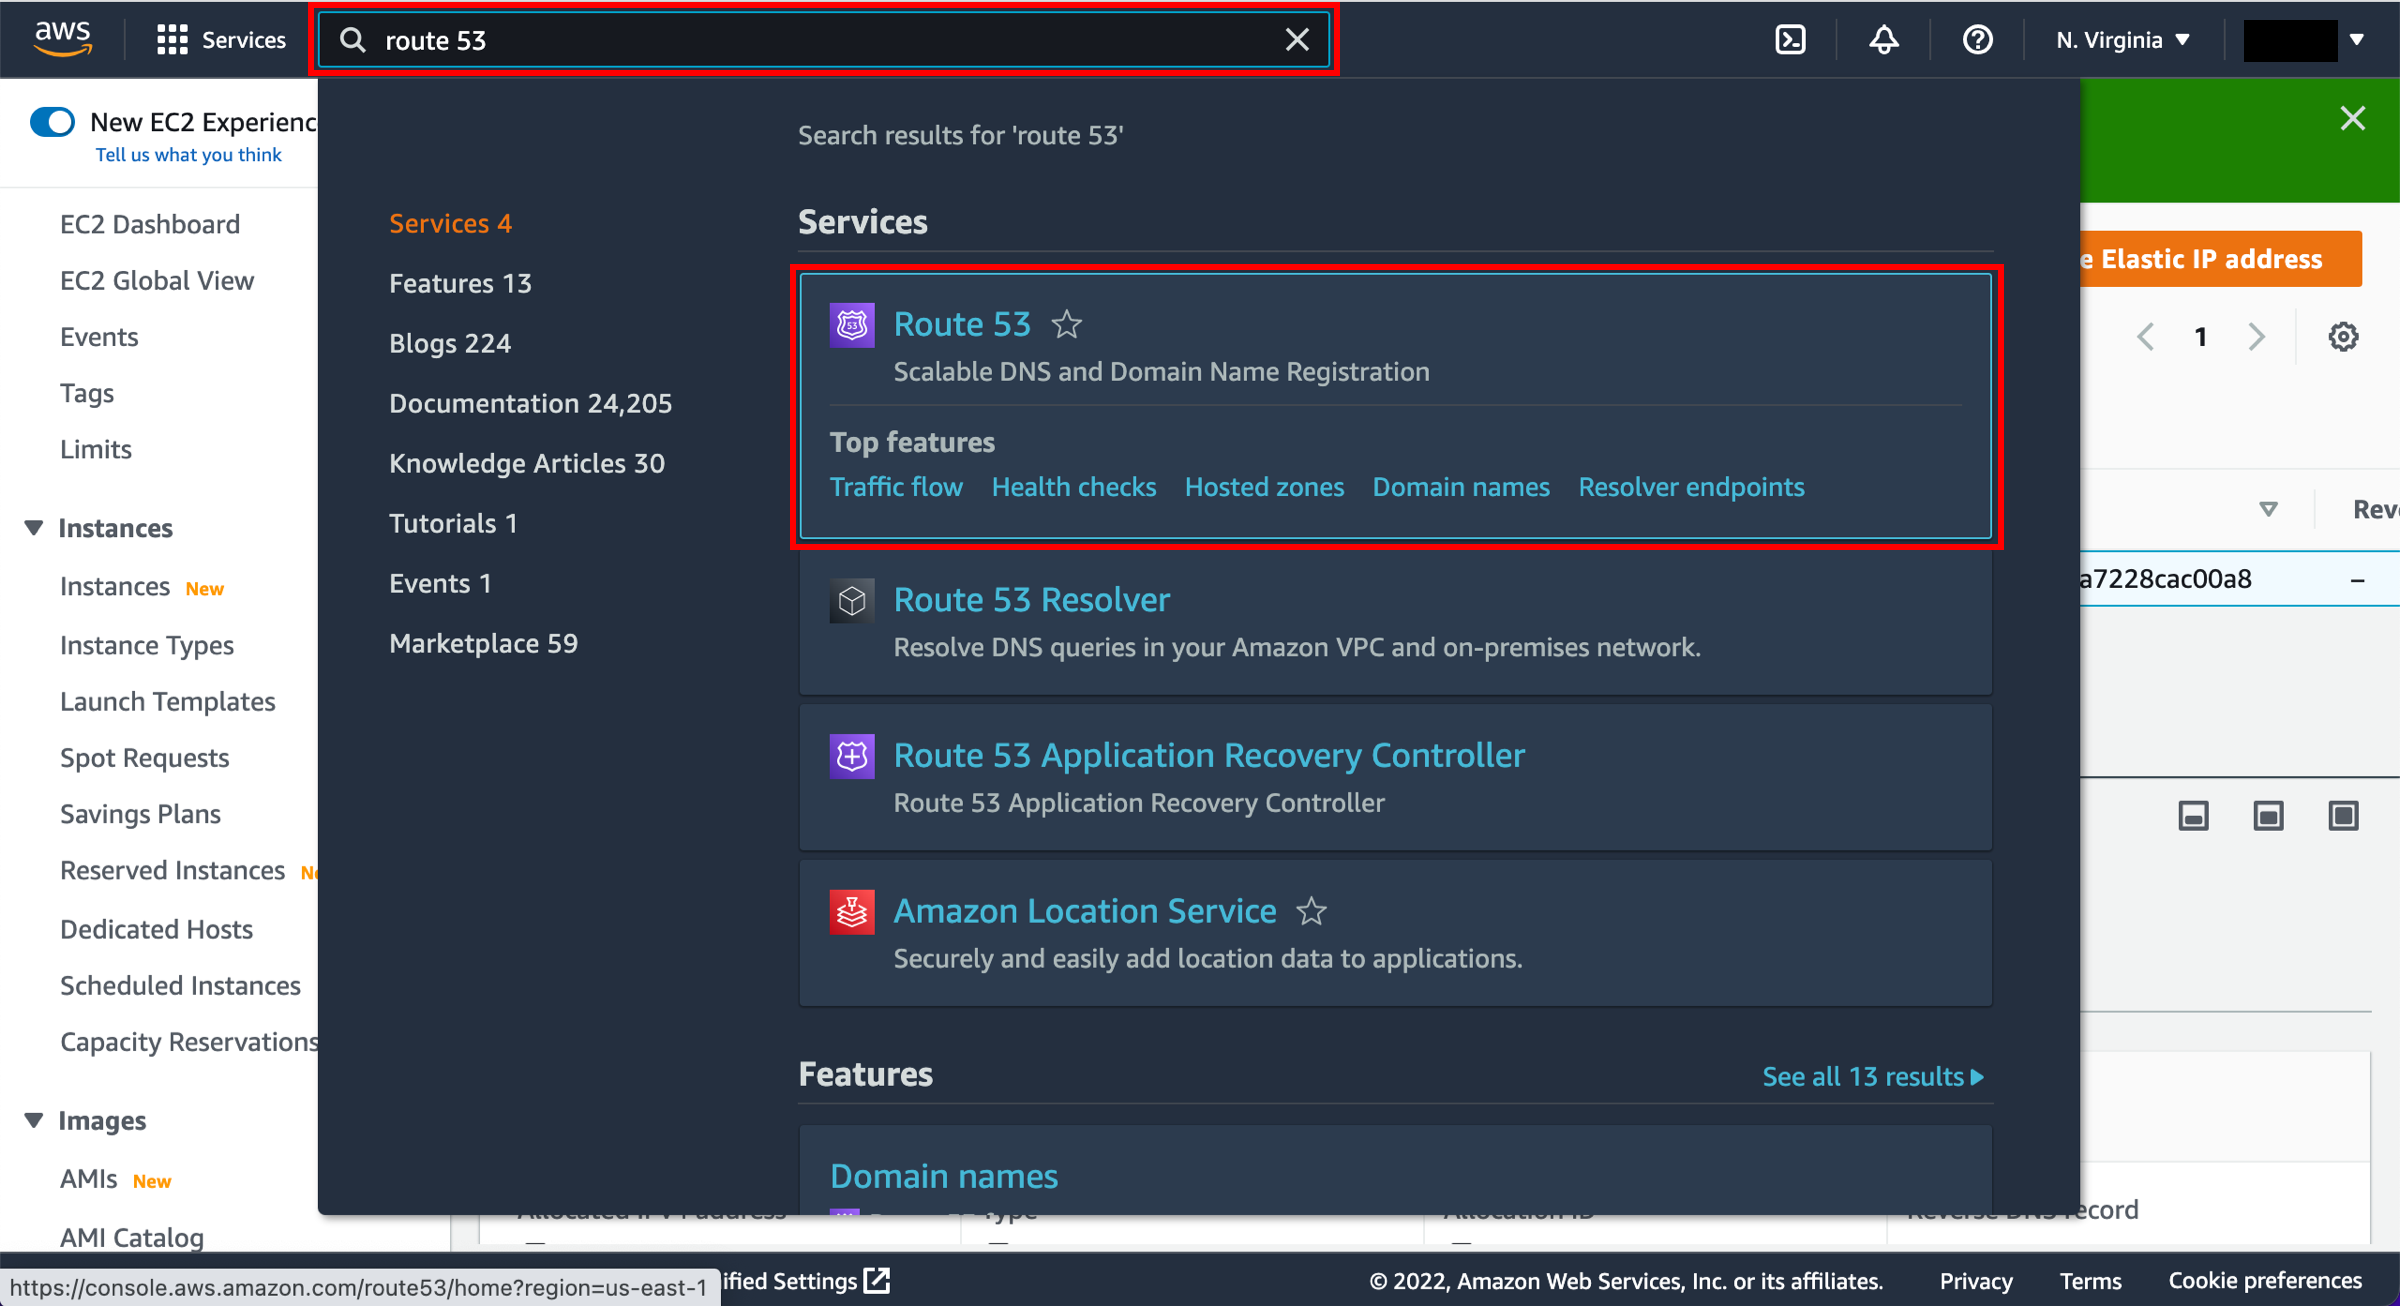
b. Type “Route 53” into the search bar and then choose “Route 53” from the list of results to open the service console.
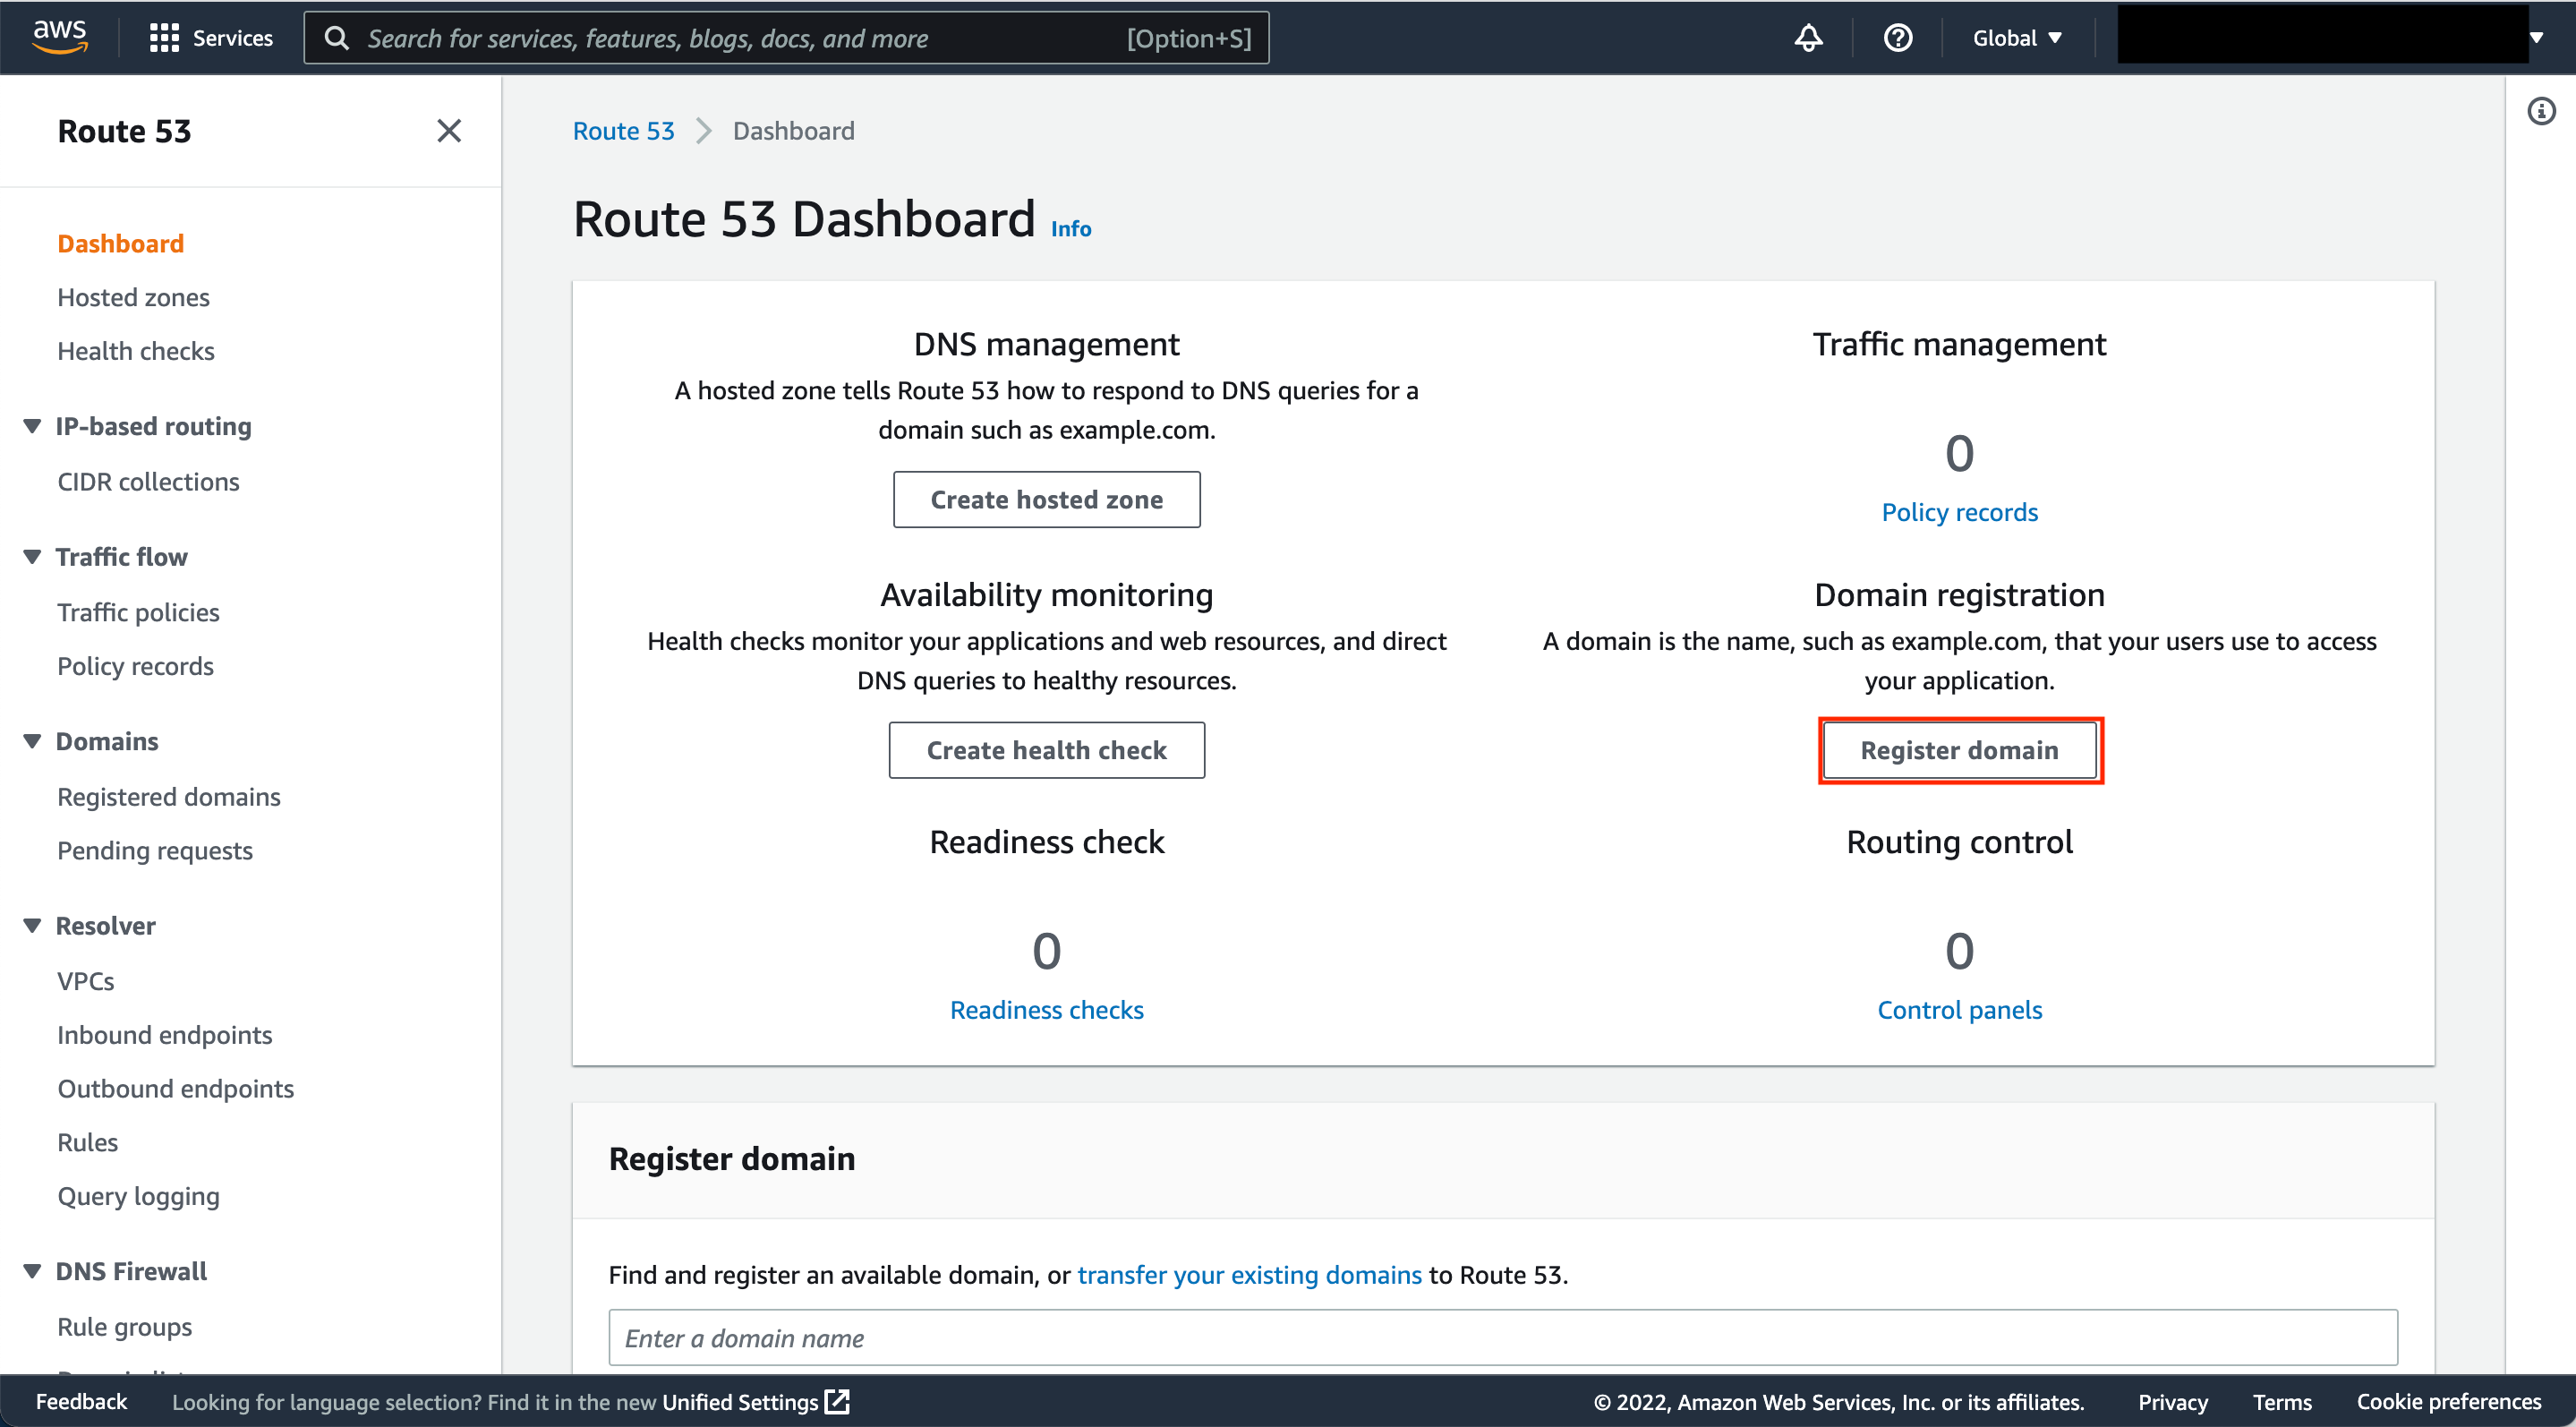
c. Click on the “Register domain” button.
d. Type the desired domain name into the text box, choose an extension from the list (such as.com), and then click the Check button.
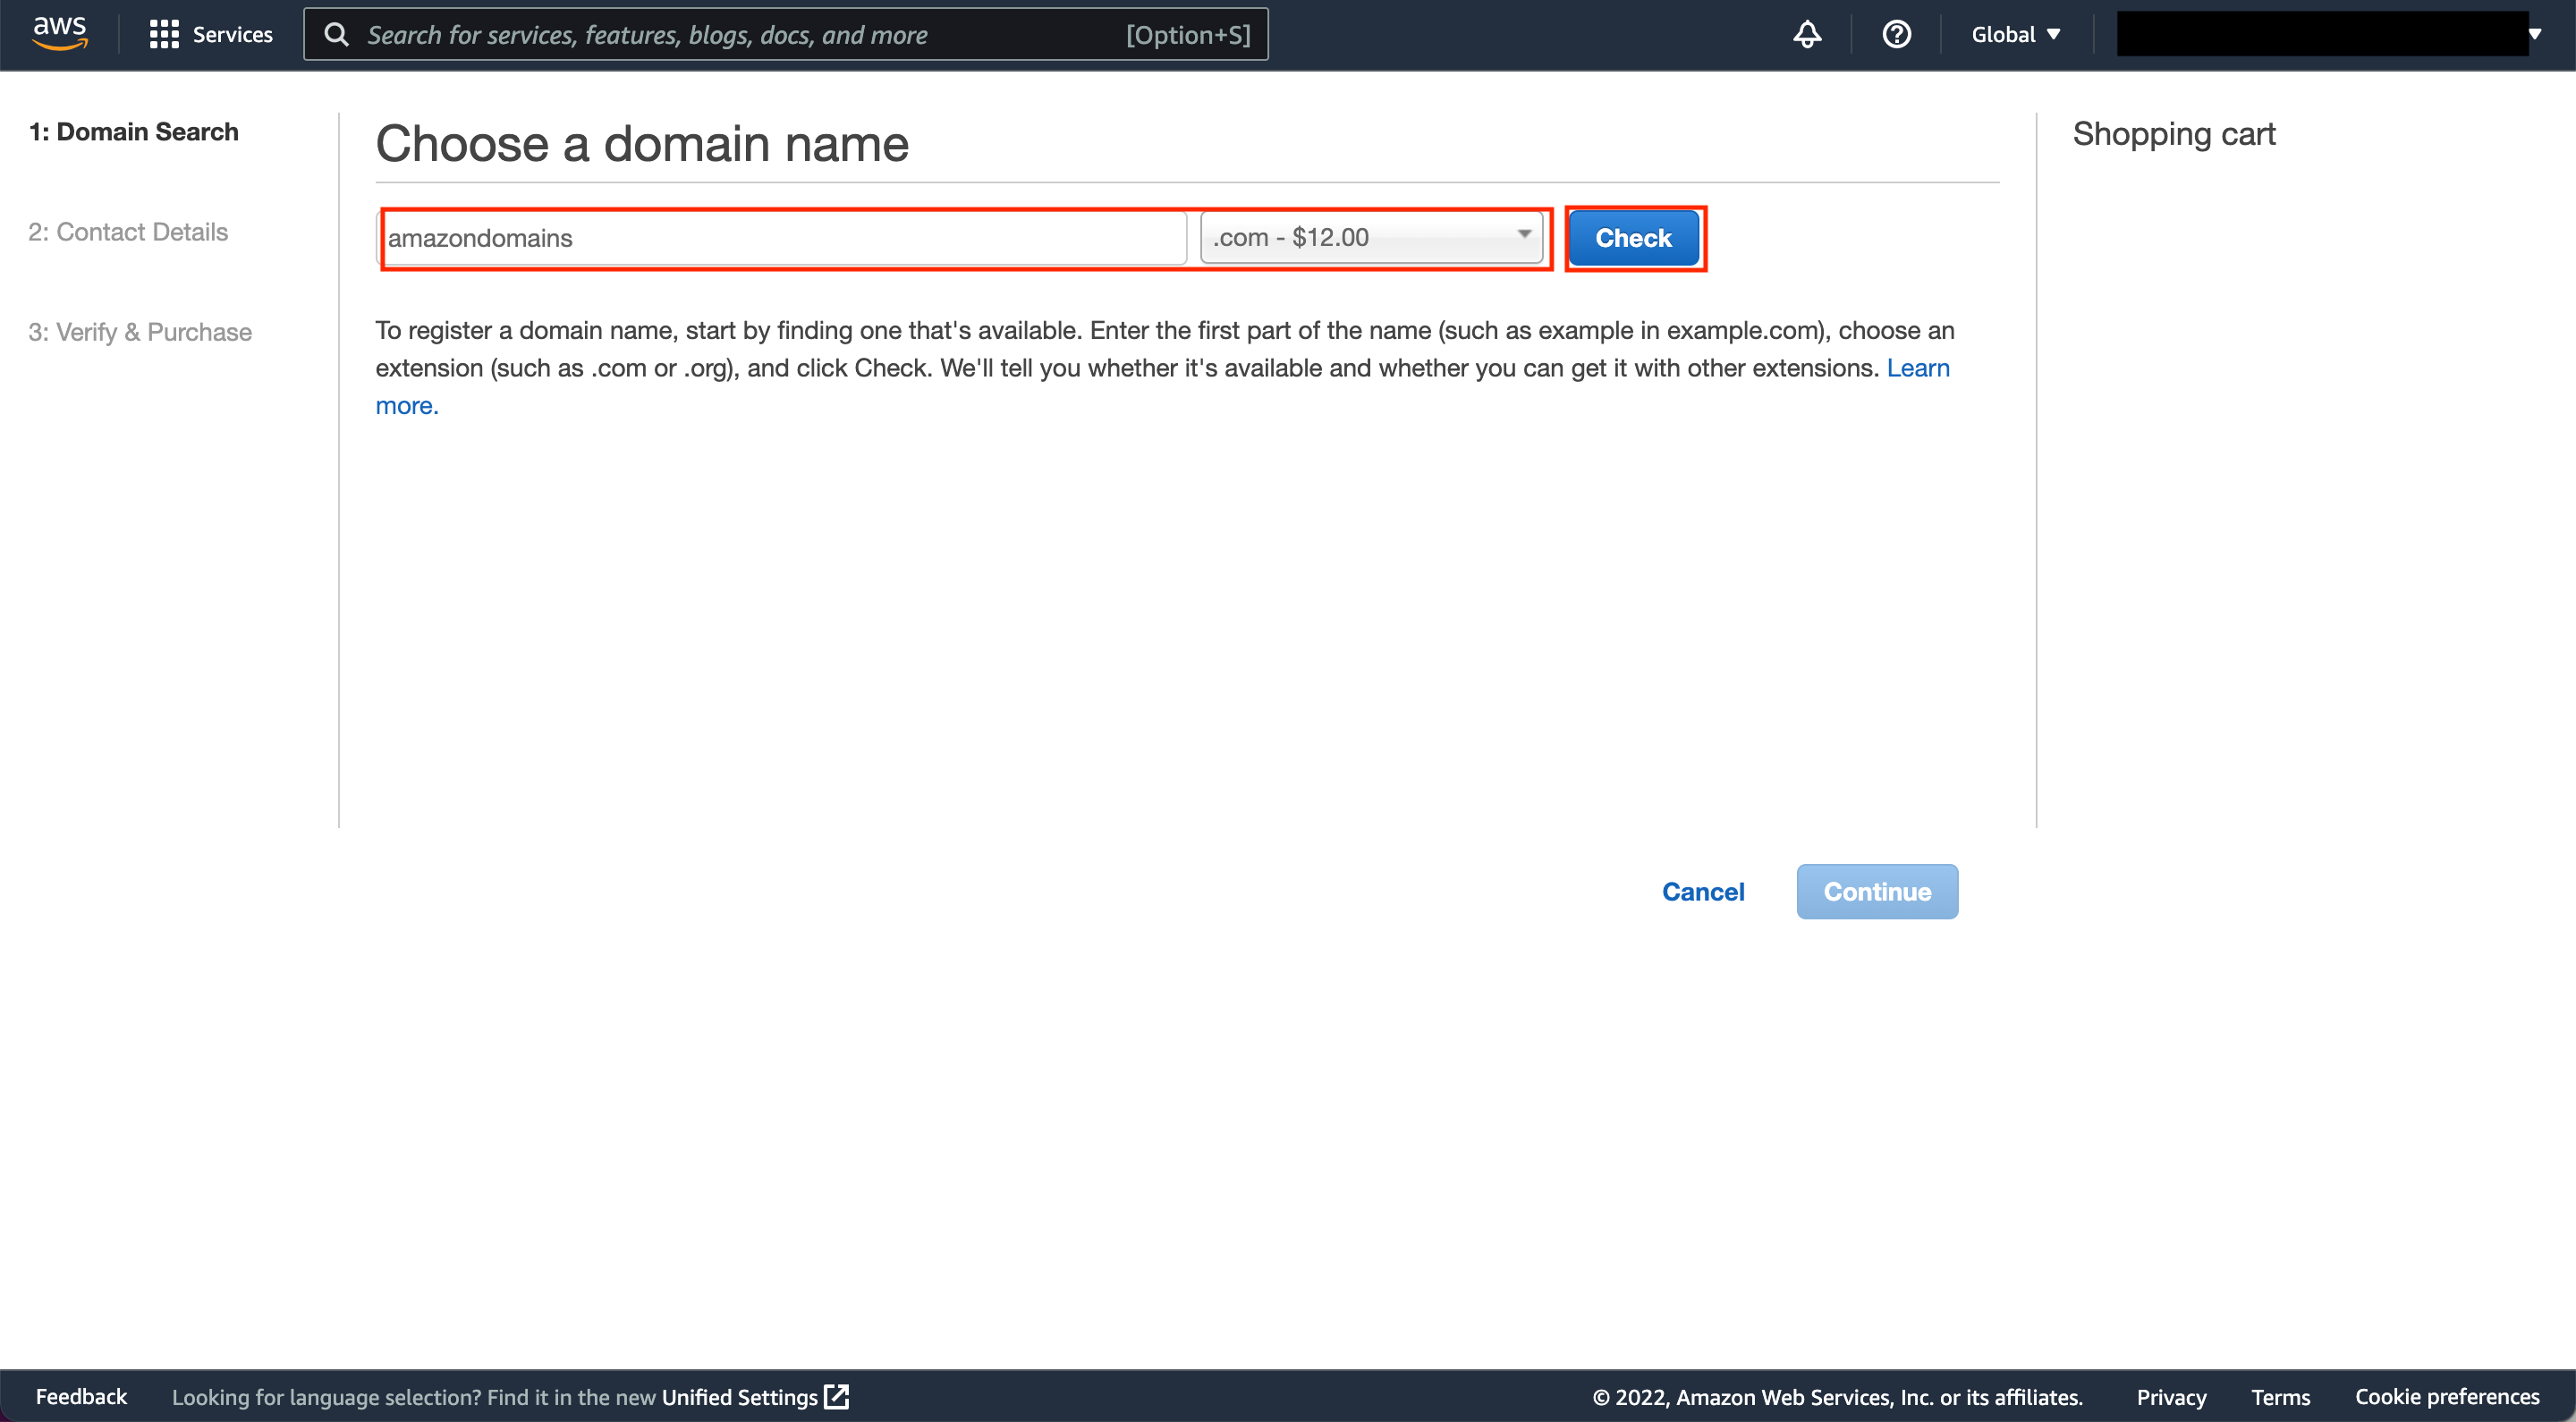
Click the “Add to cart” button next to the AWS domain you want to buy.
Click the Continue button at the bottom of the page to move forward with the process.
If the domain name you chose doesn’t seem to be available, you can try again with a different one. You can also choose one of the options for domains that are similar.
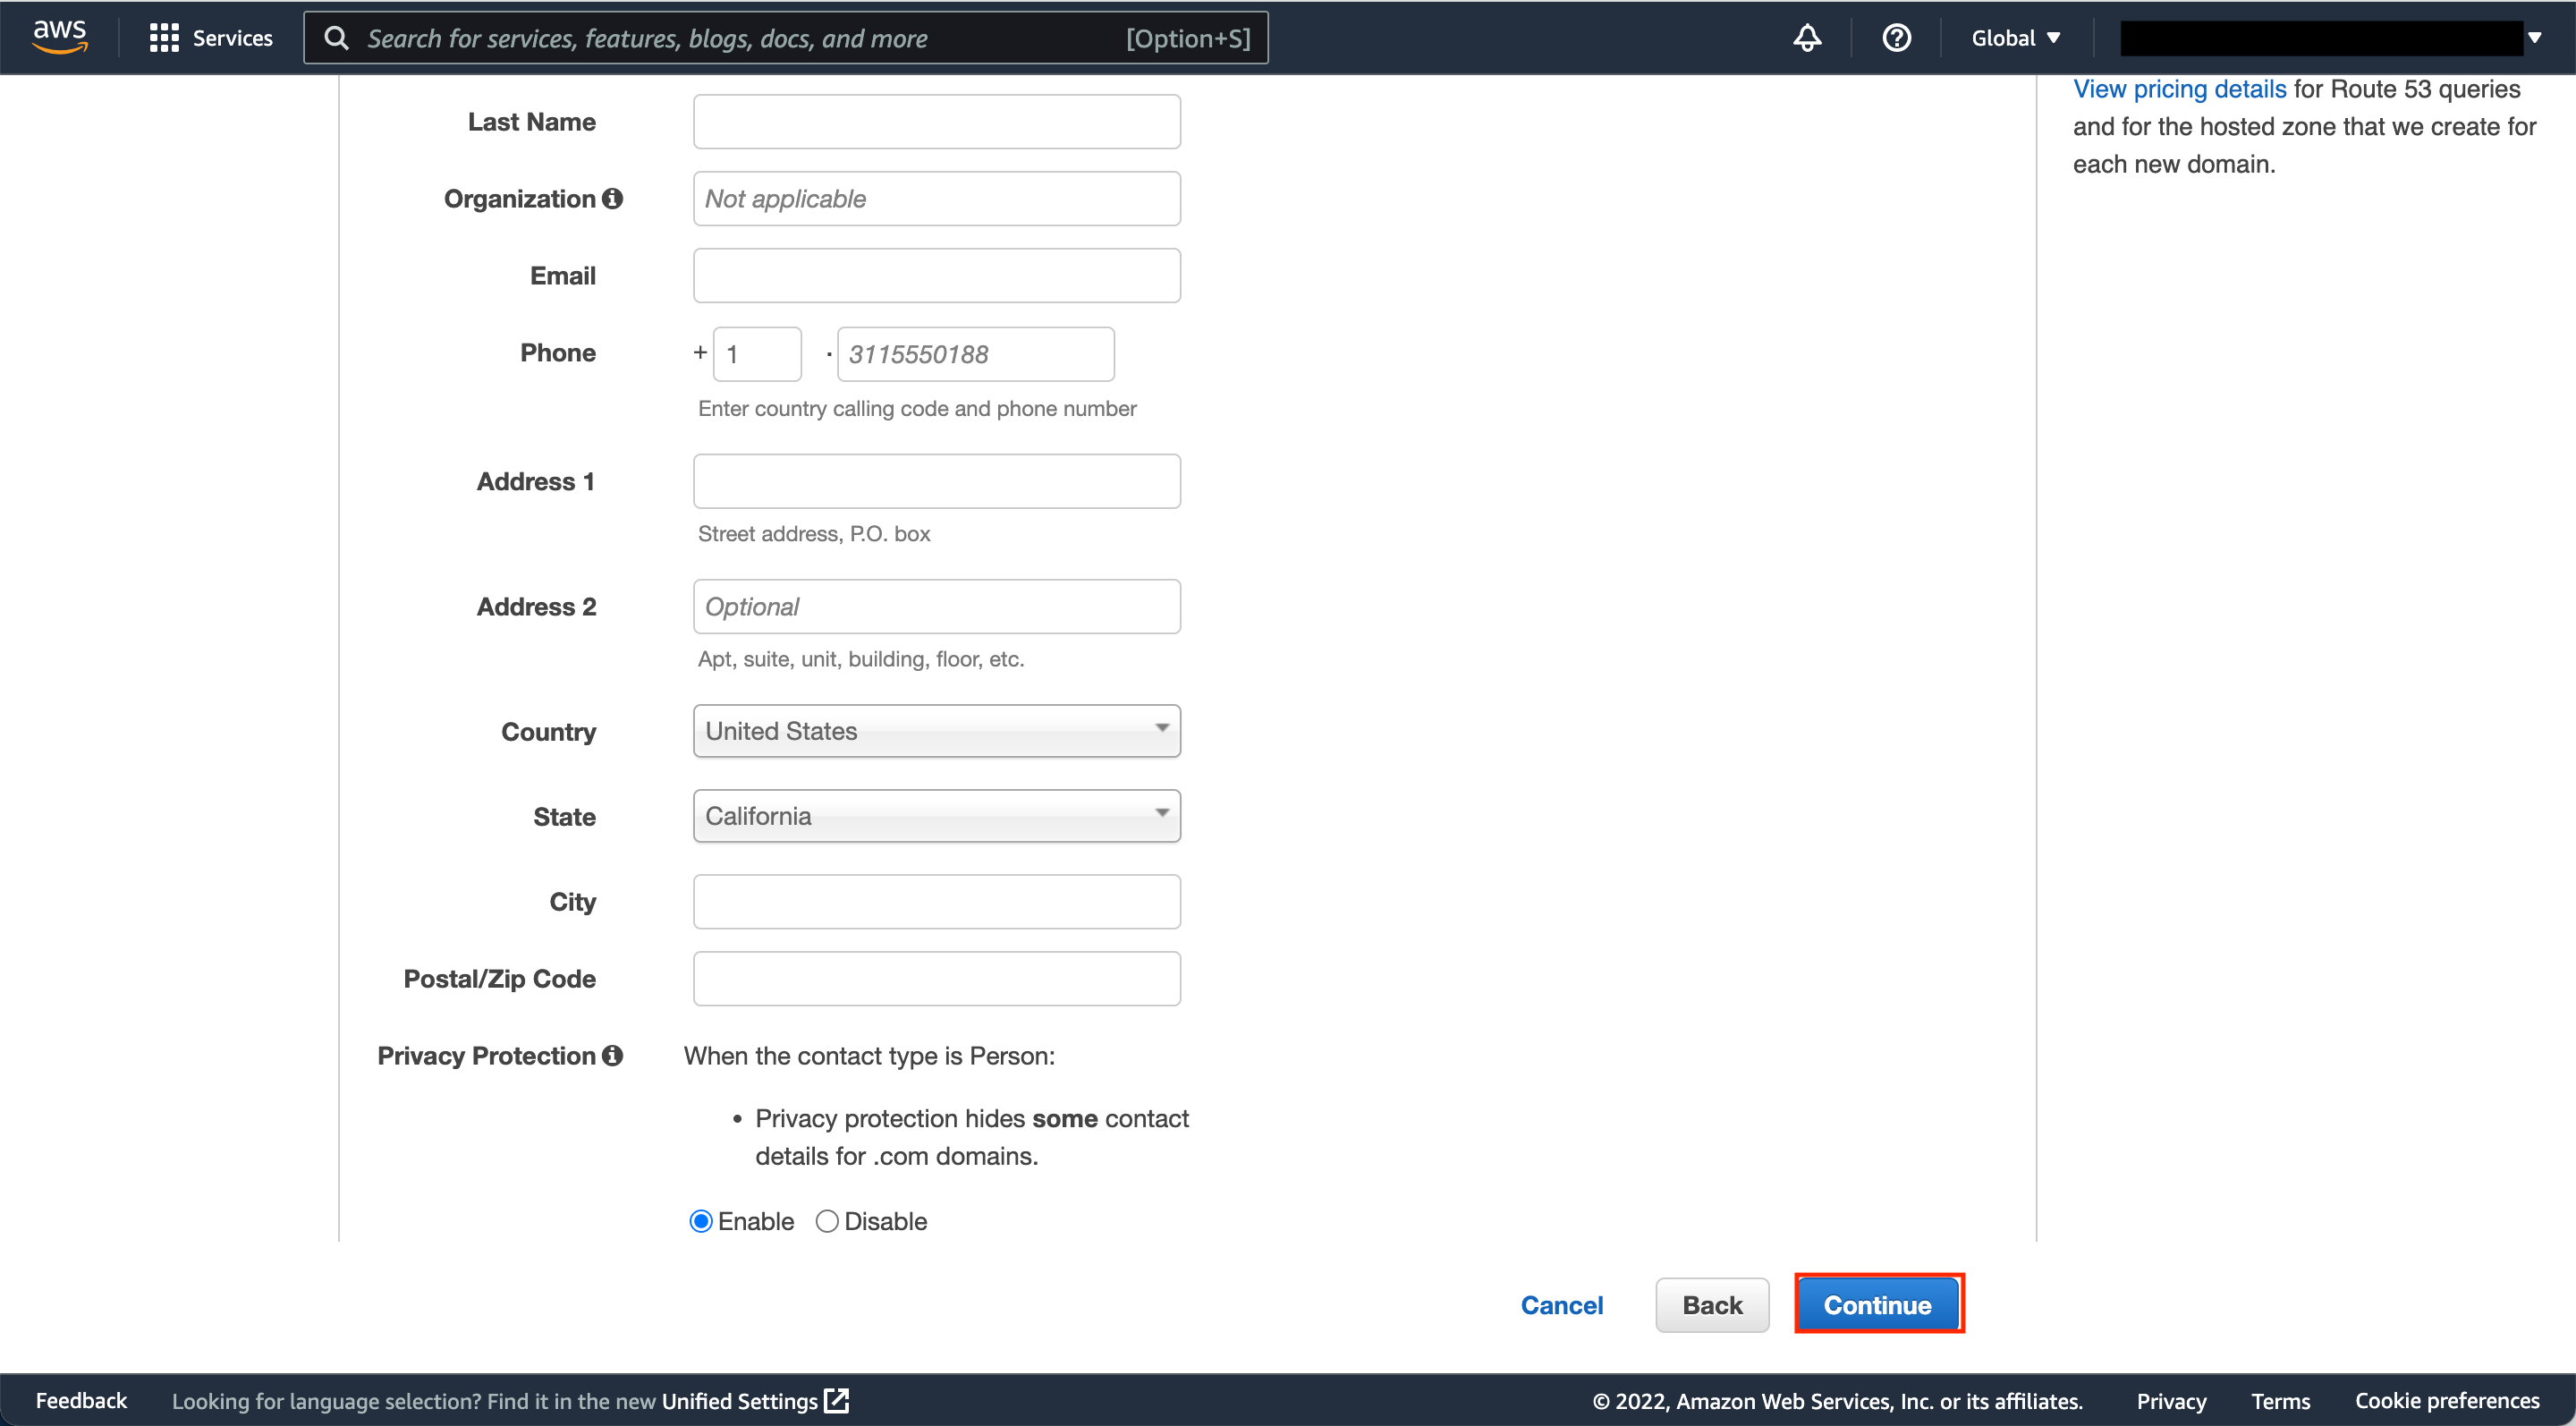
e. Give the information for the person who buys the AWS domain.
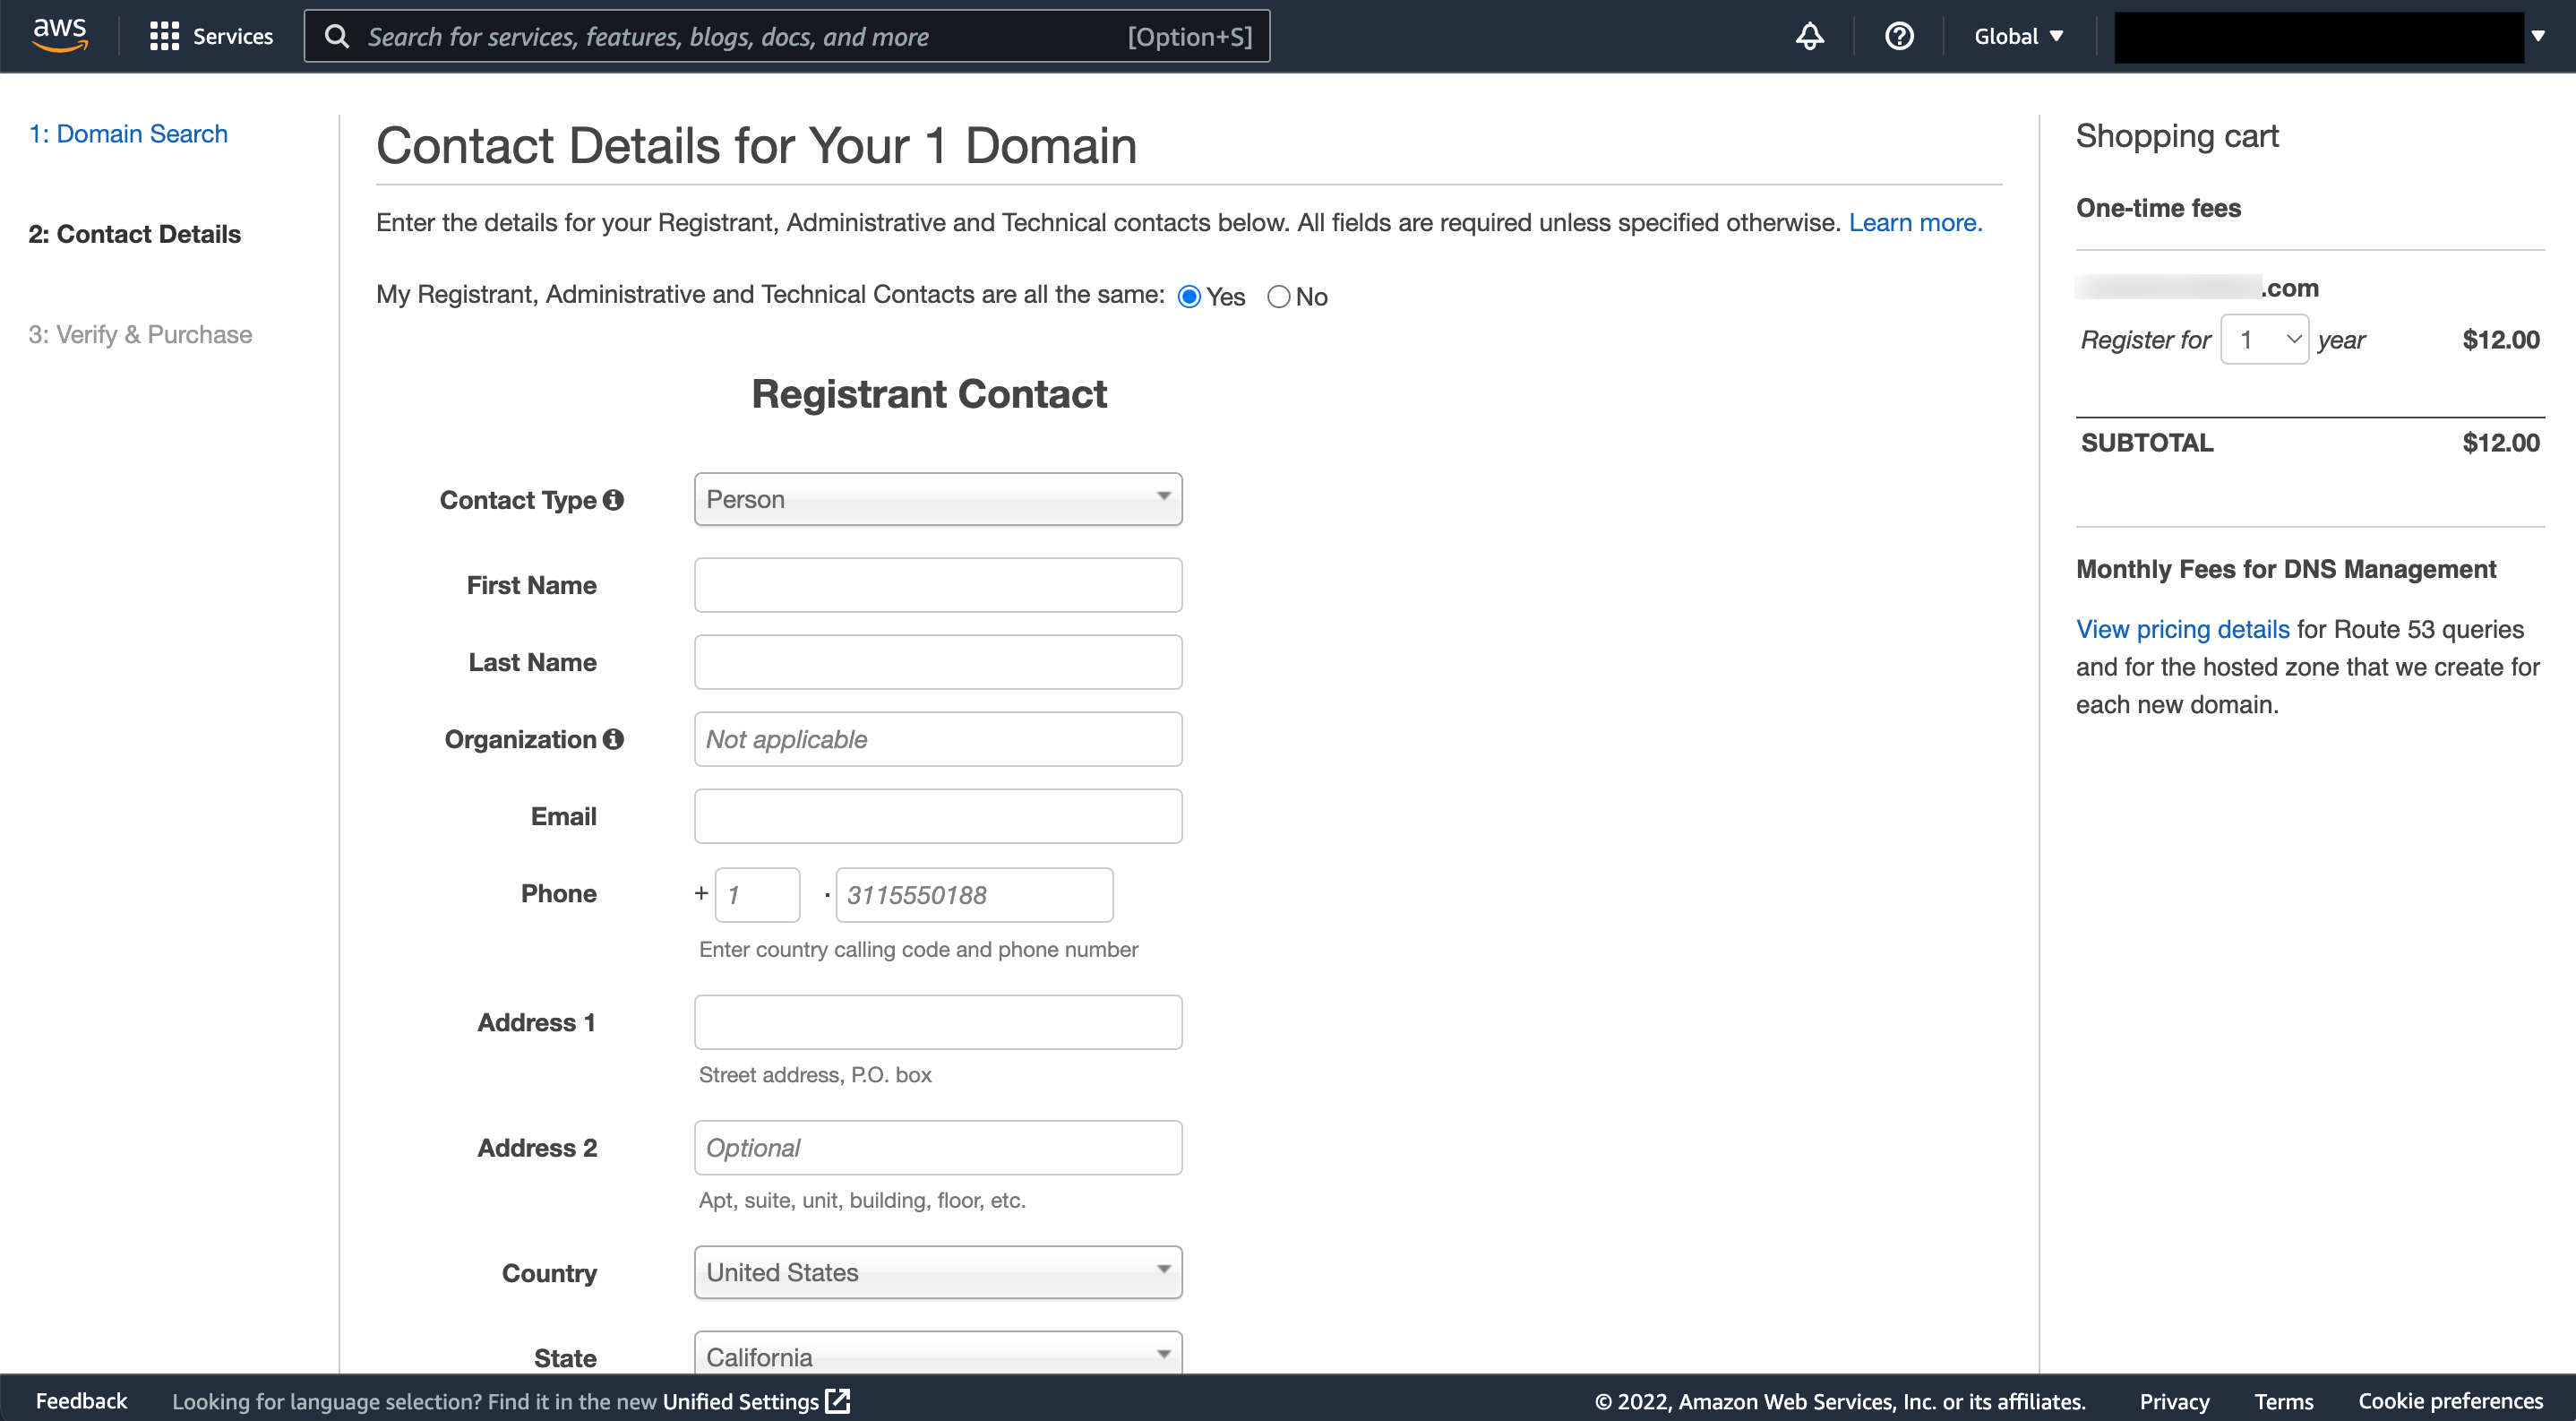
Click the Continue button at the bottom of the page to move forward with the process.
f. Make sure your contact info is right.
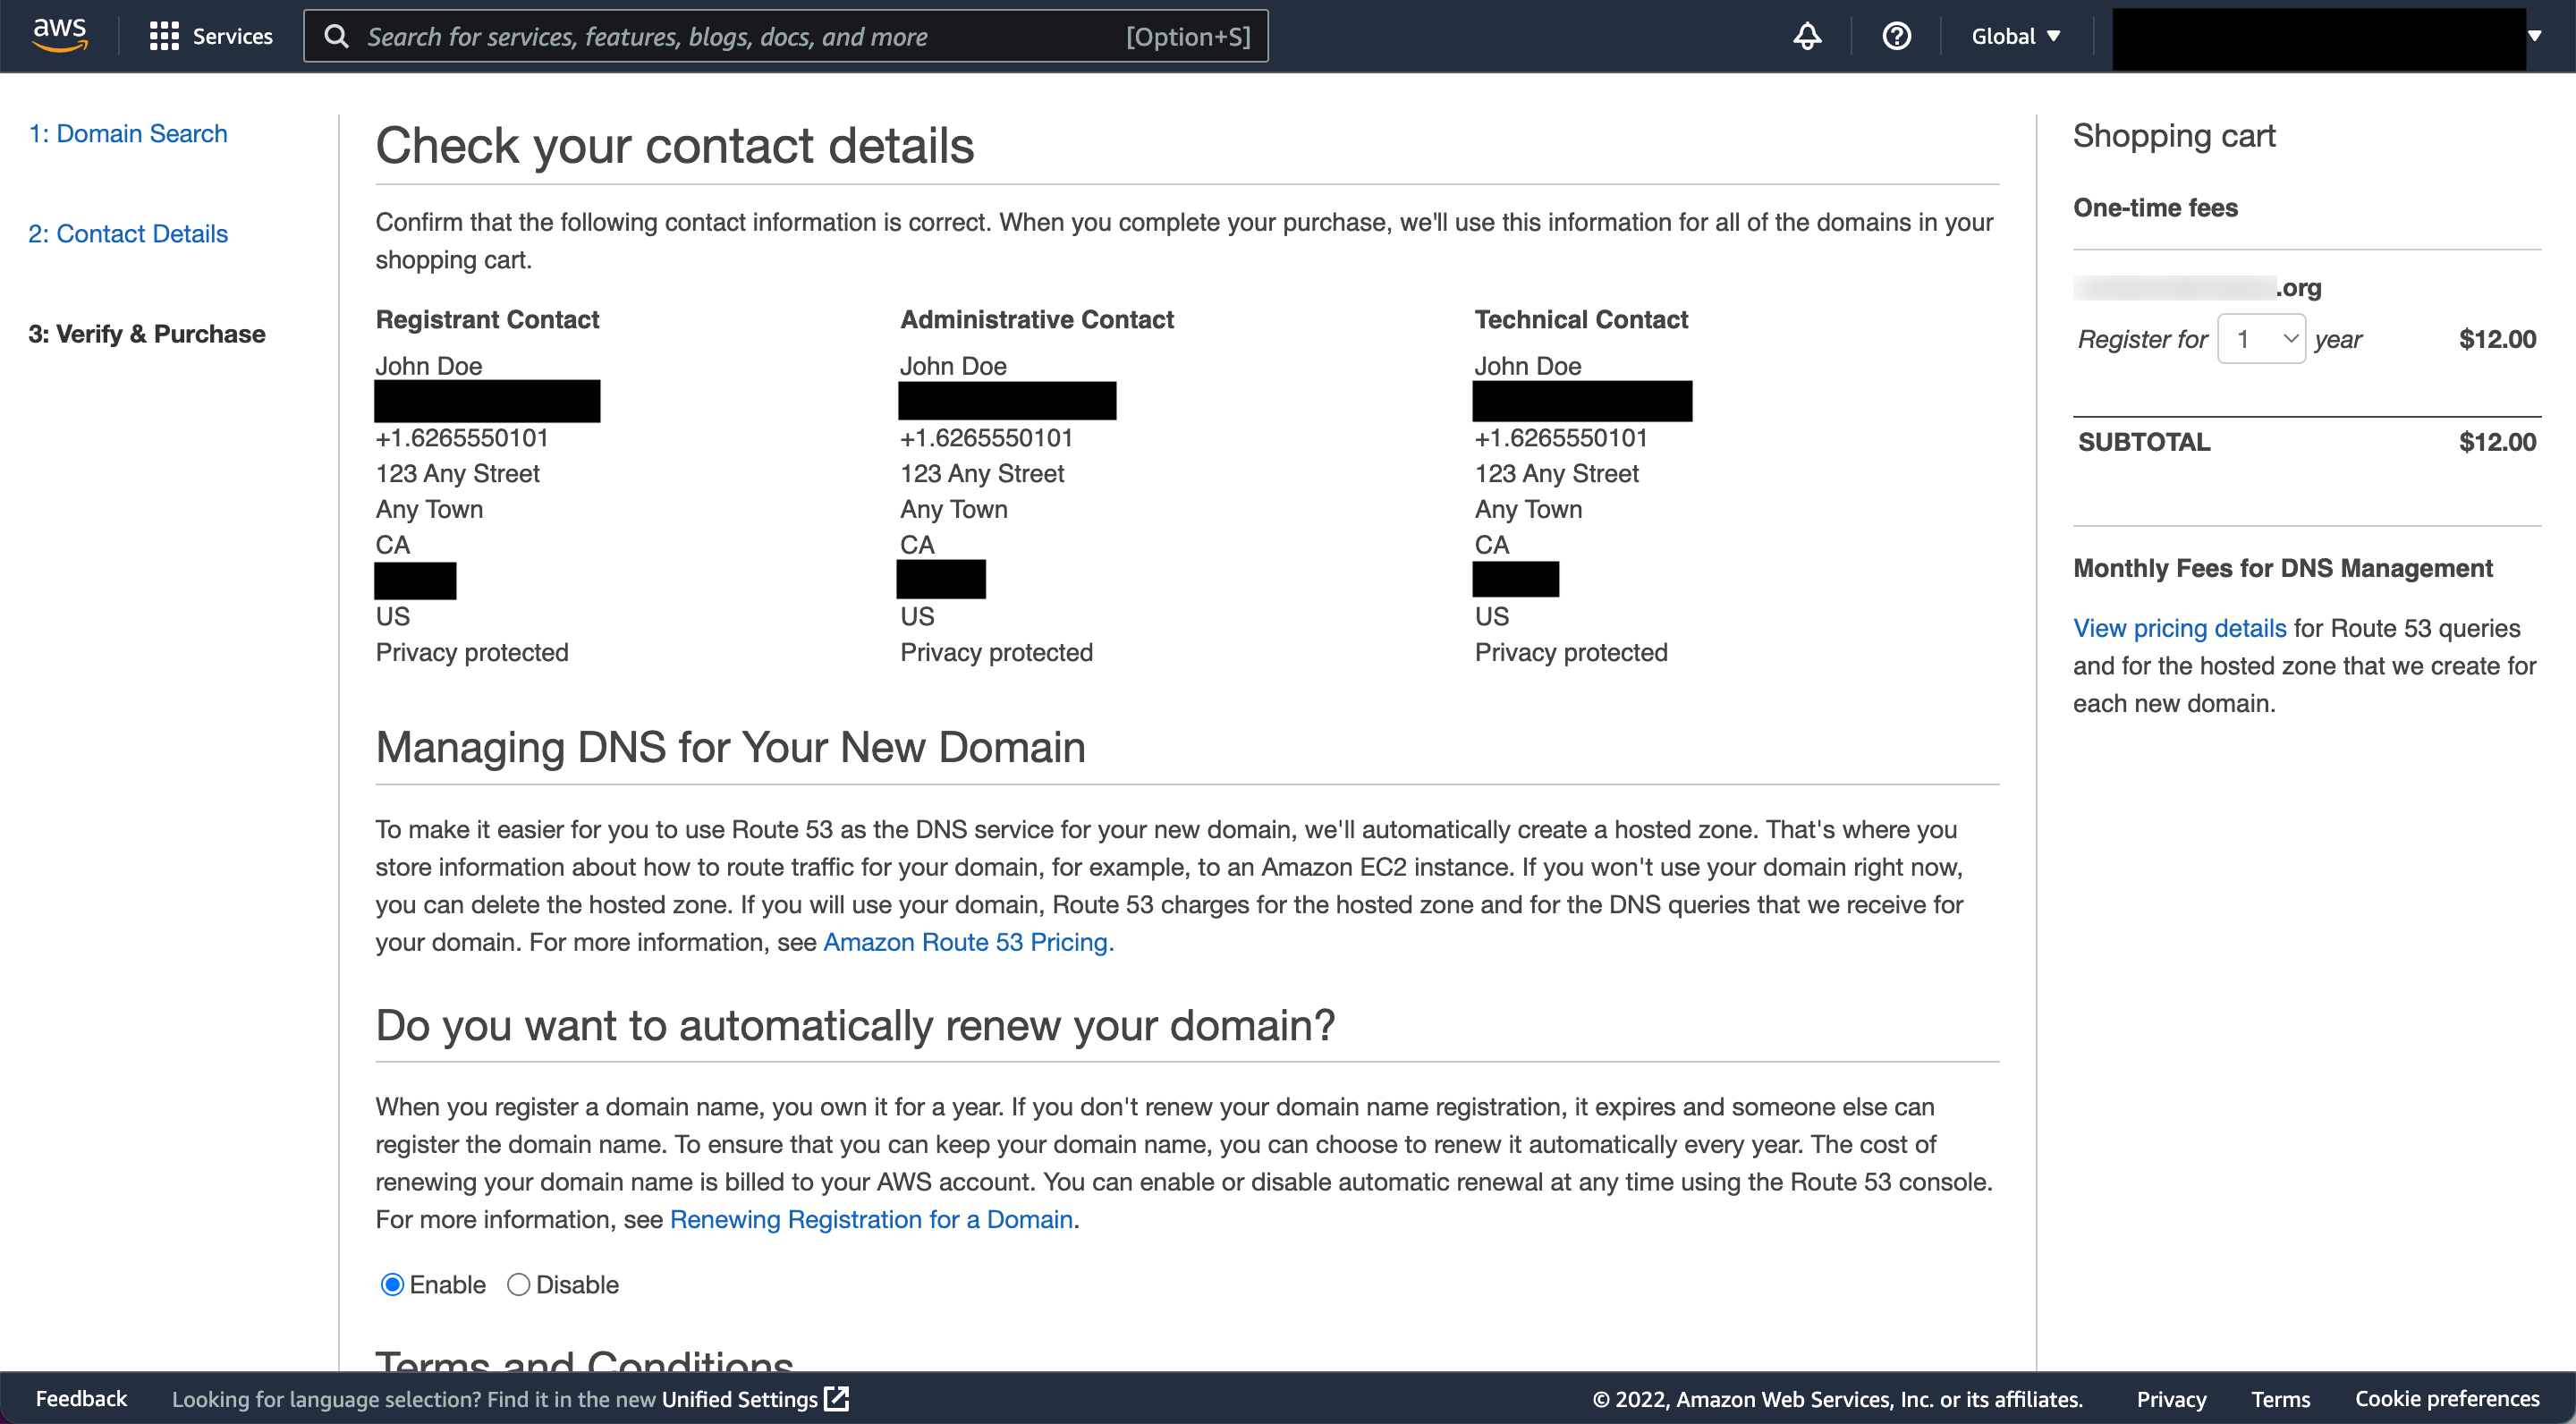
In the section for the automatic renewal, you can either choose “Enable” or “Disable.”
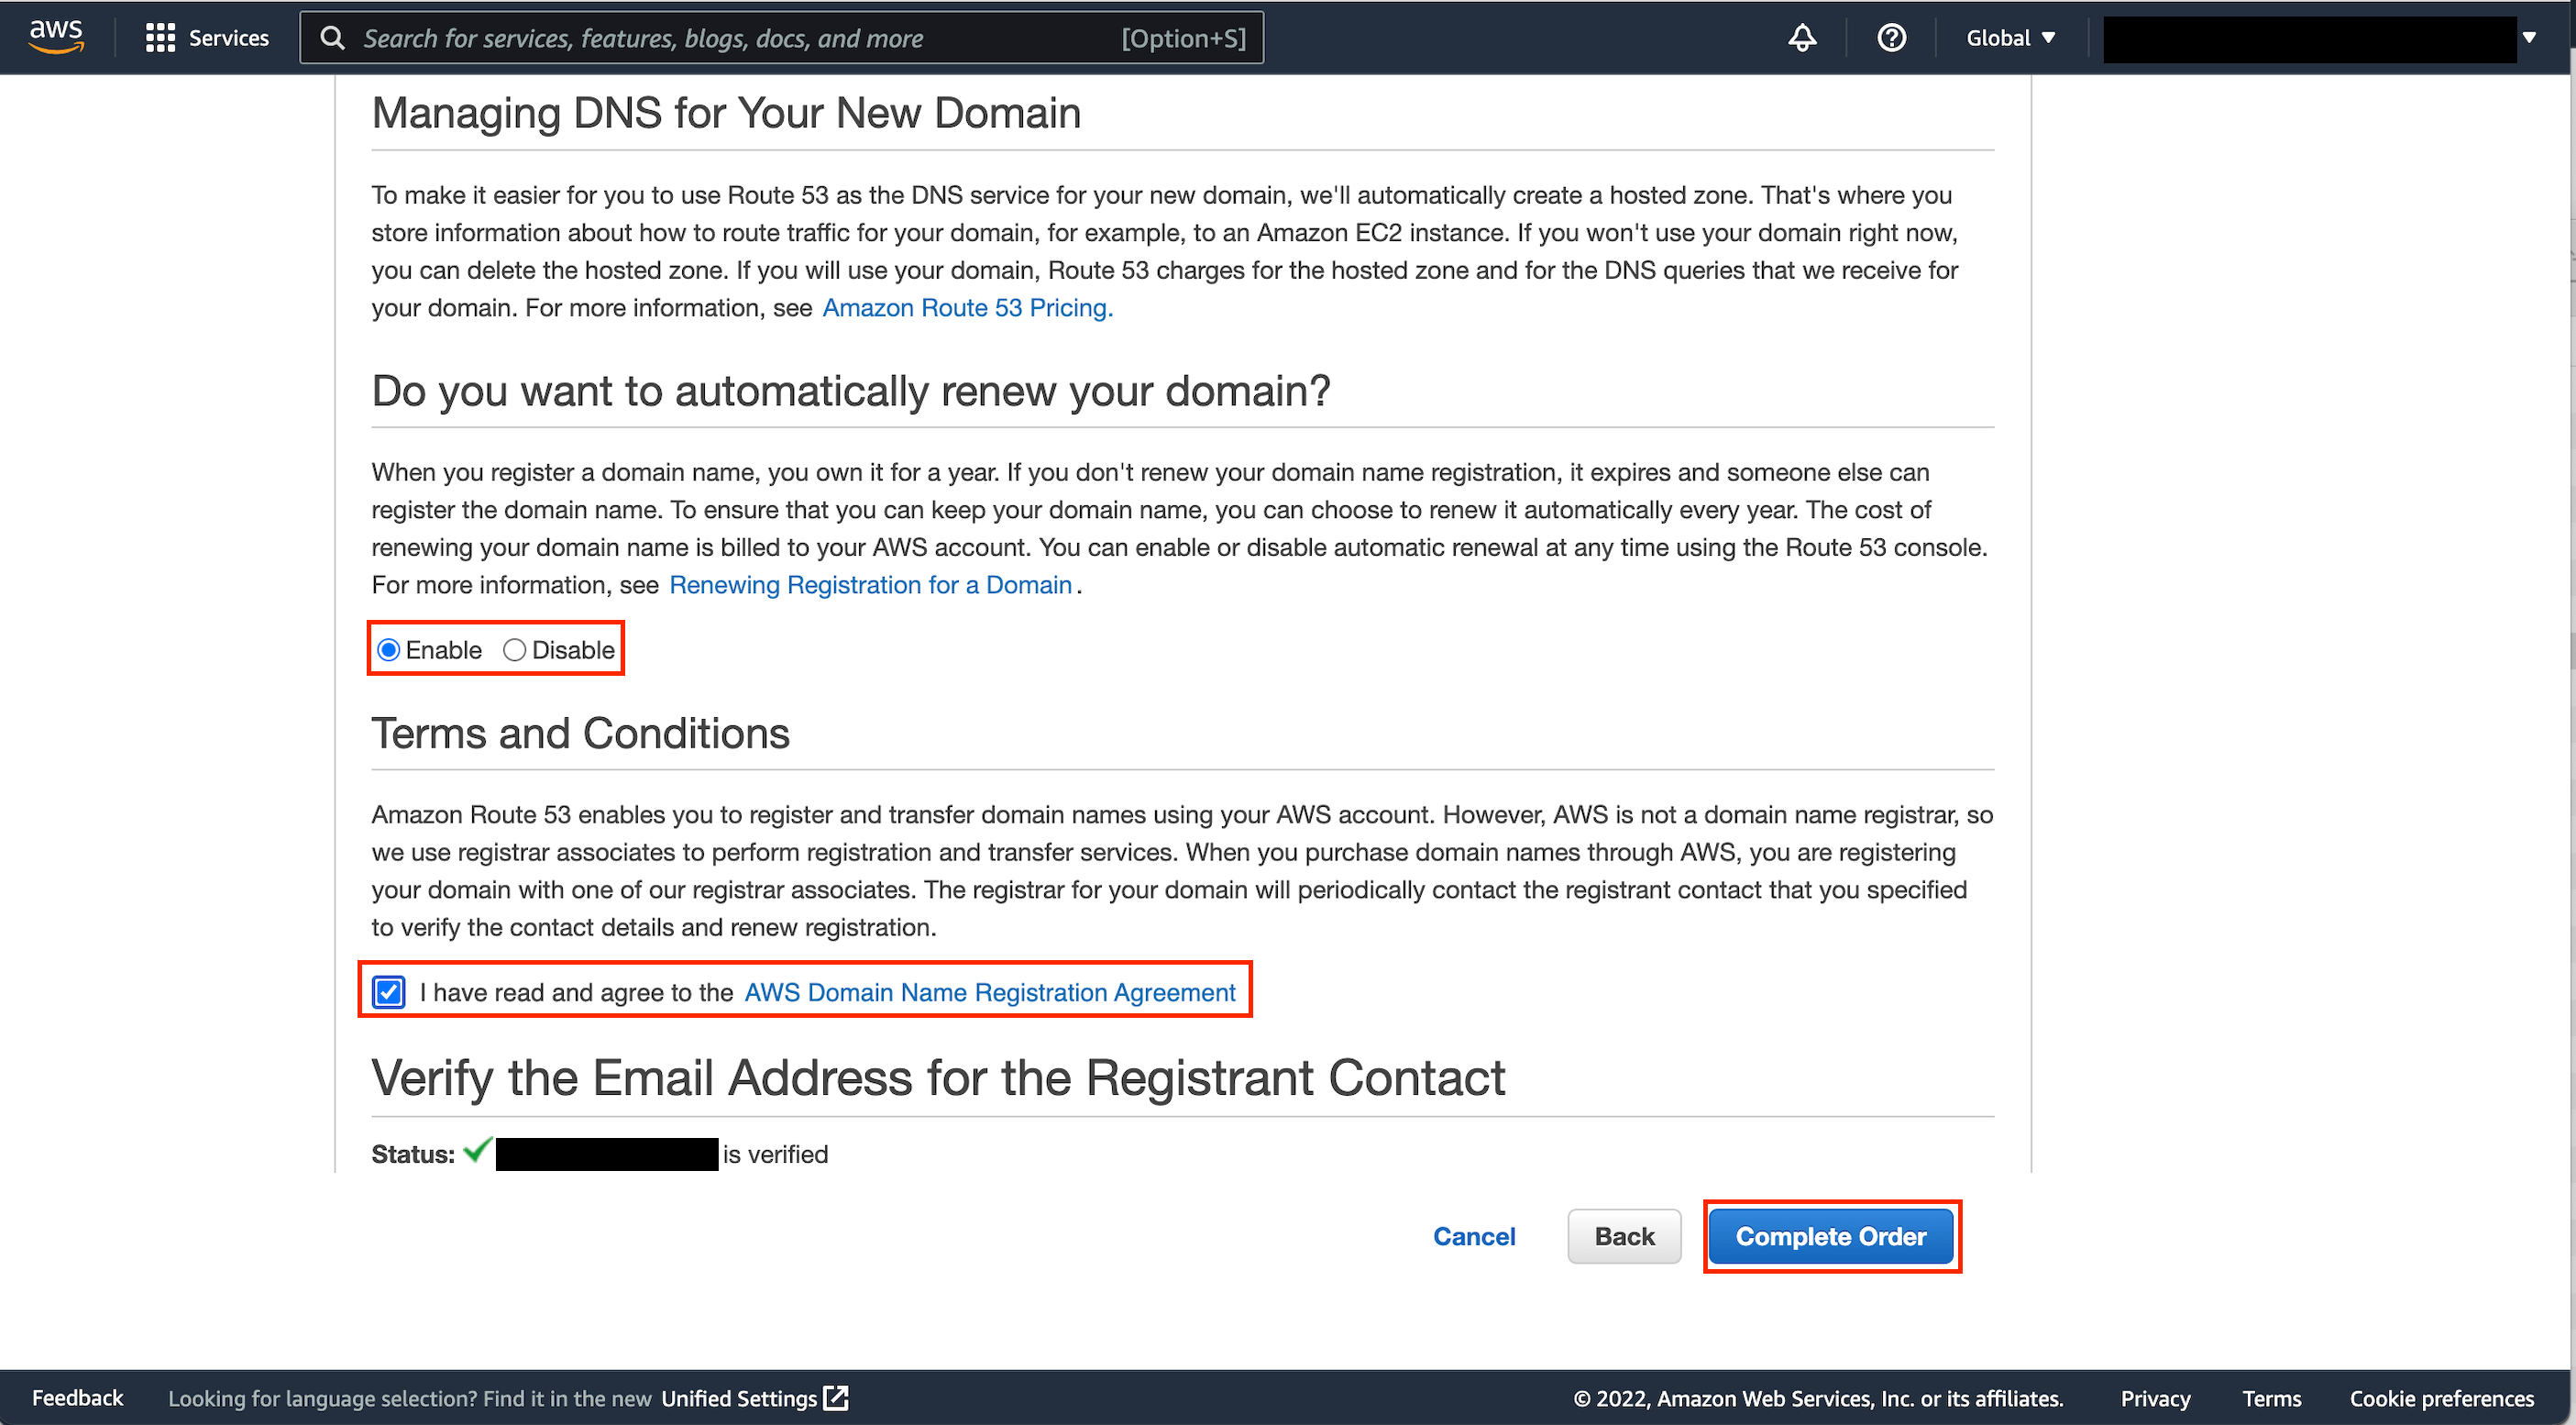
After you’ve read the terms and conditions and agreed to them, check the box to show that you agree with them.
Choose Complete Order.
When your domain registration has been approved, you will get an email telling you so.
Step 2: Configuring DNS
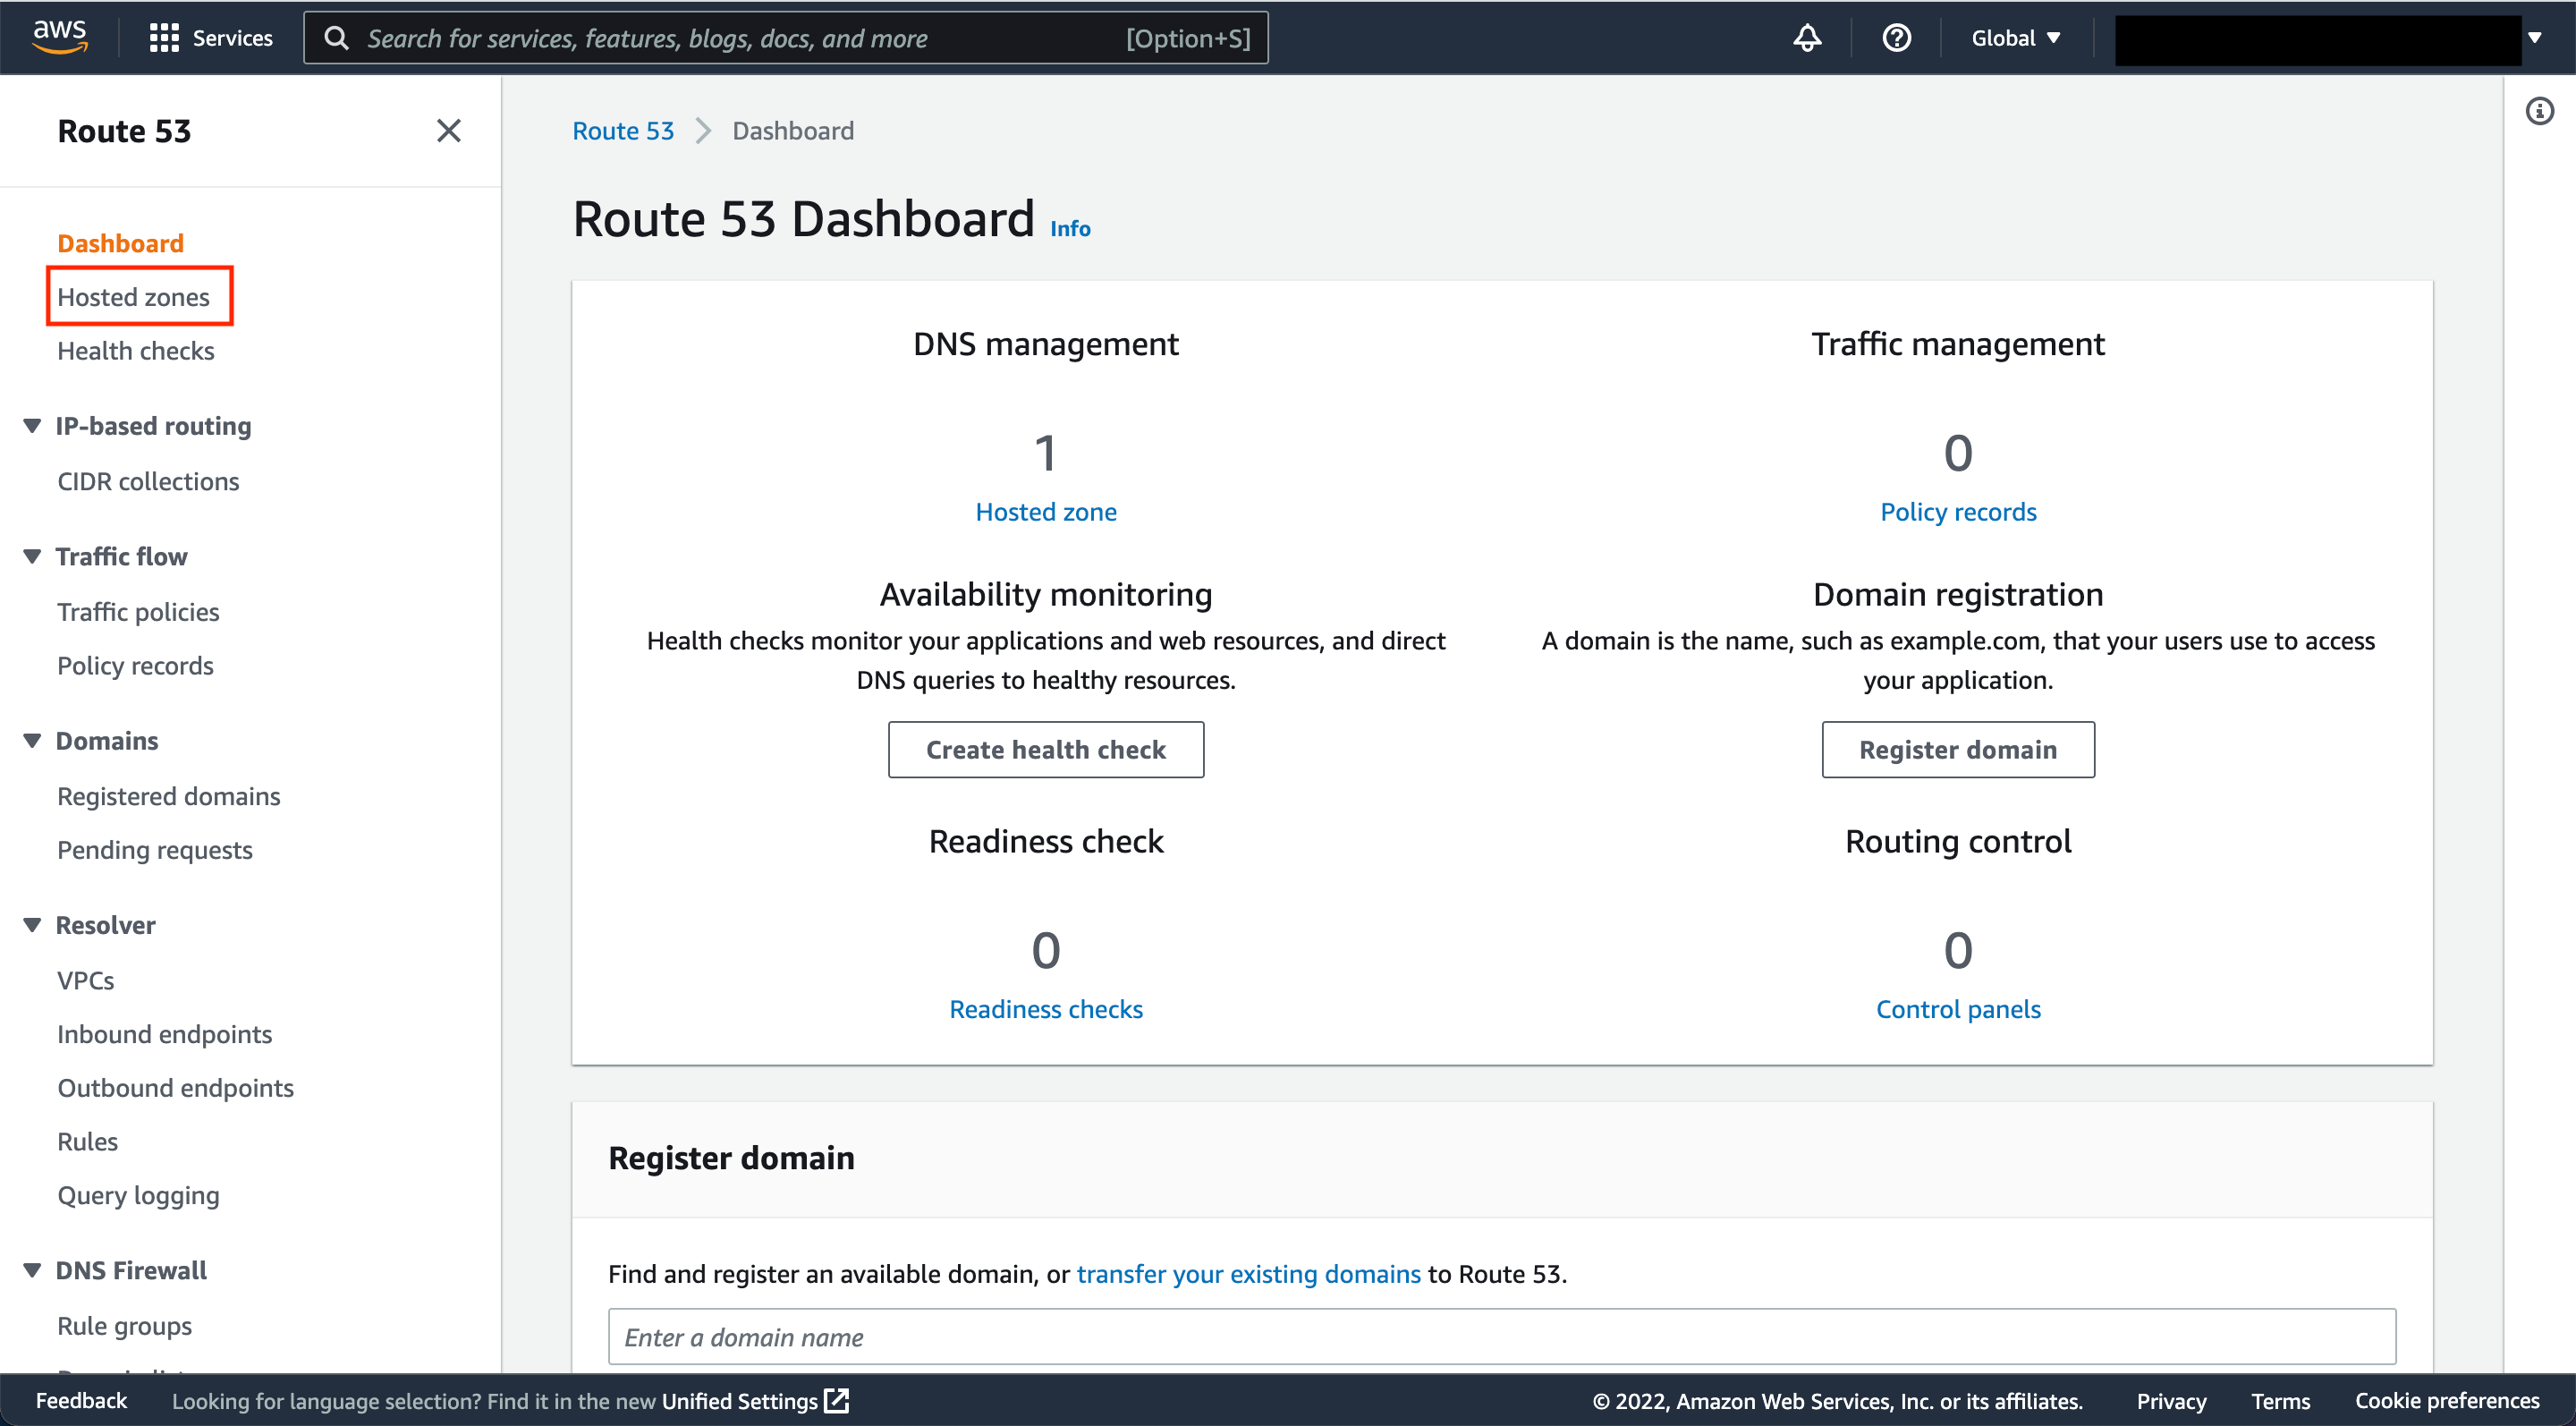
a. Once you’re done buying or registering your domain, you should go back to the AWS dashboard.
Just type “Route 53” into the search bar and choose “Route 53” from the list of results to open the service console.
b. In the left navigation pane, choose Hosted zones from the list of options.
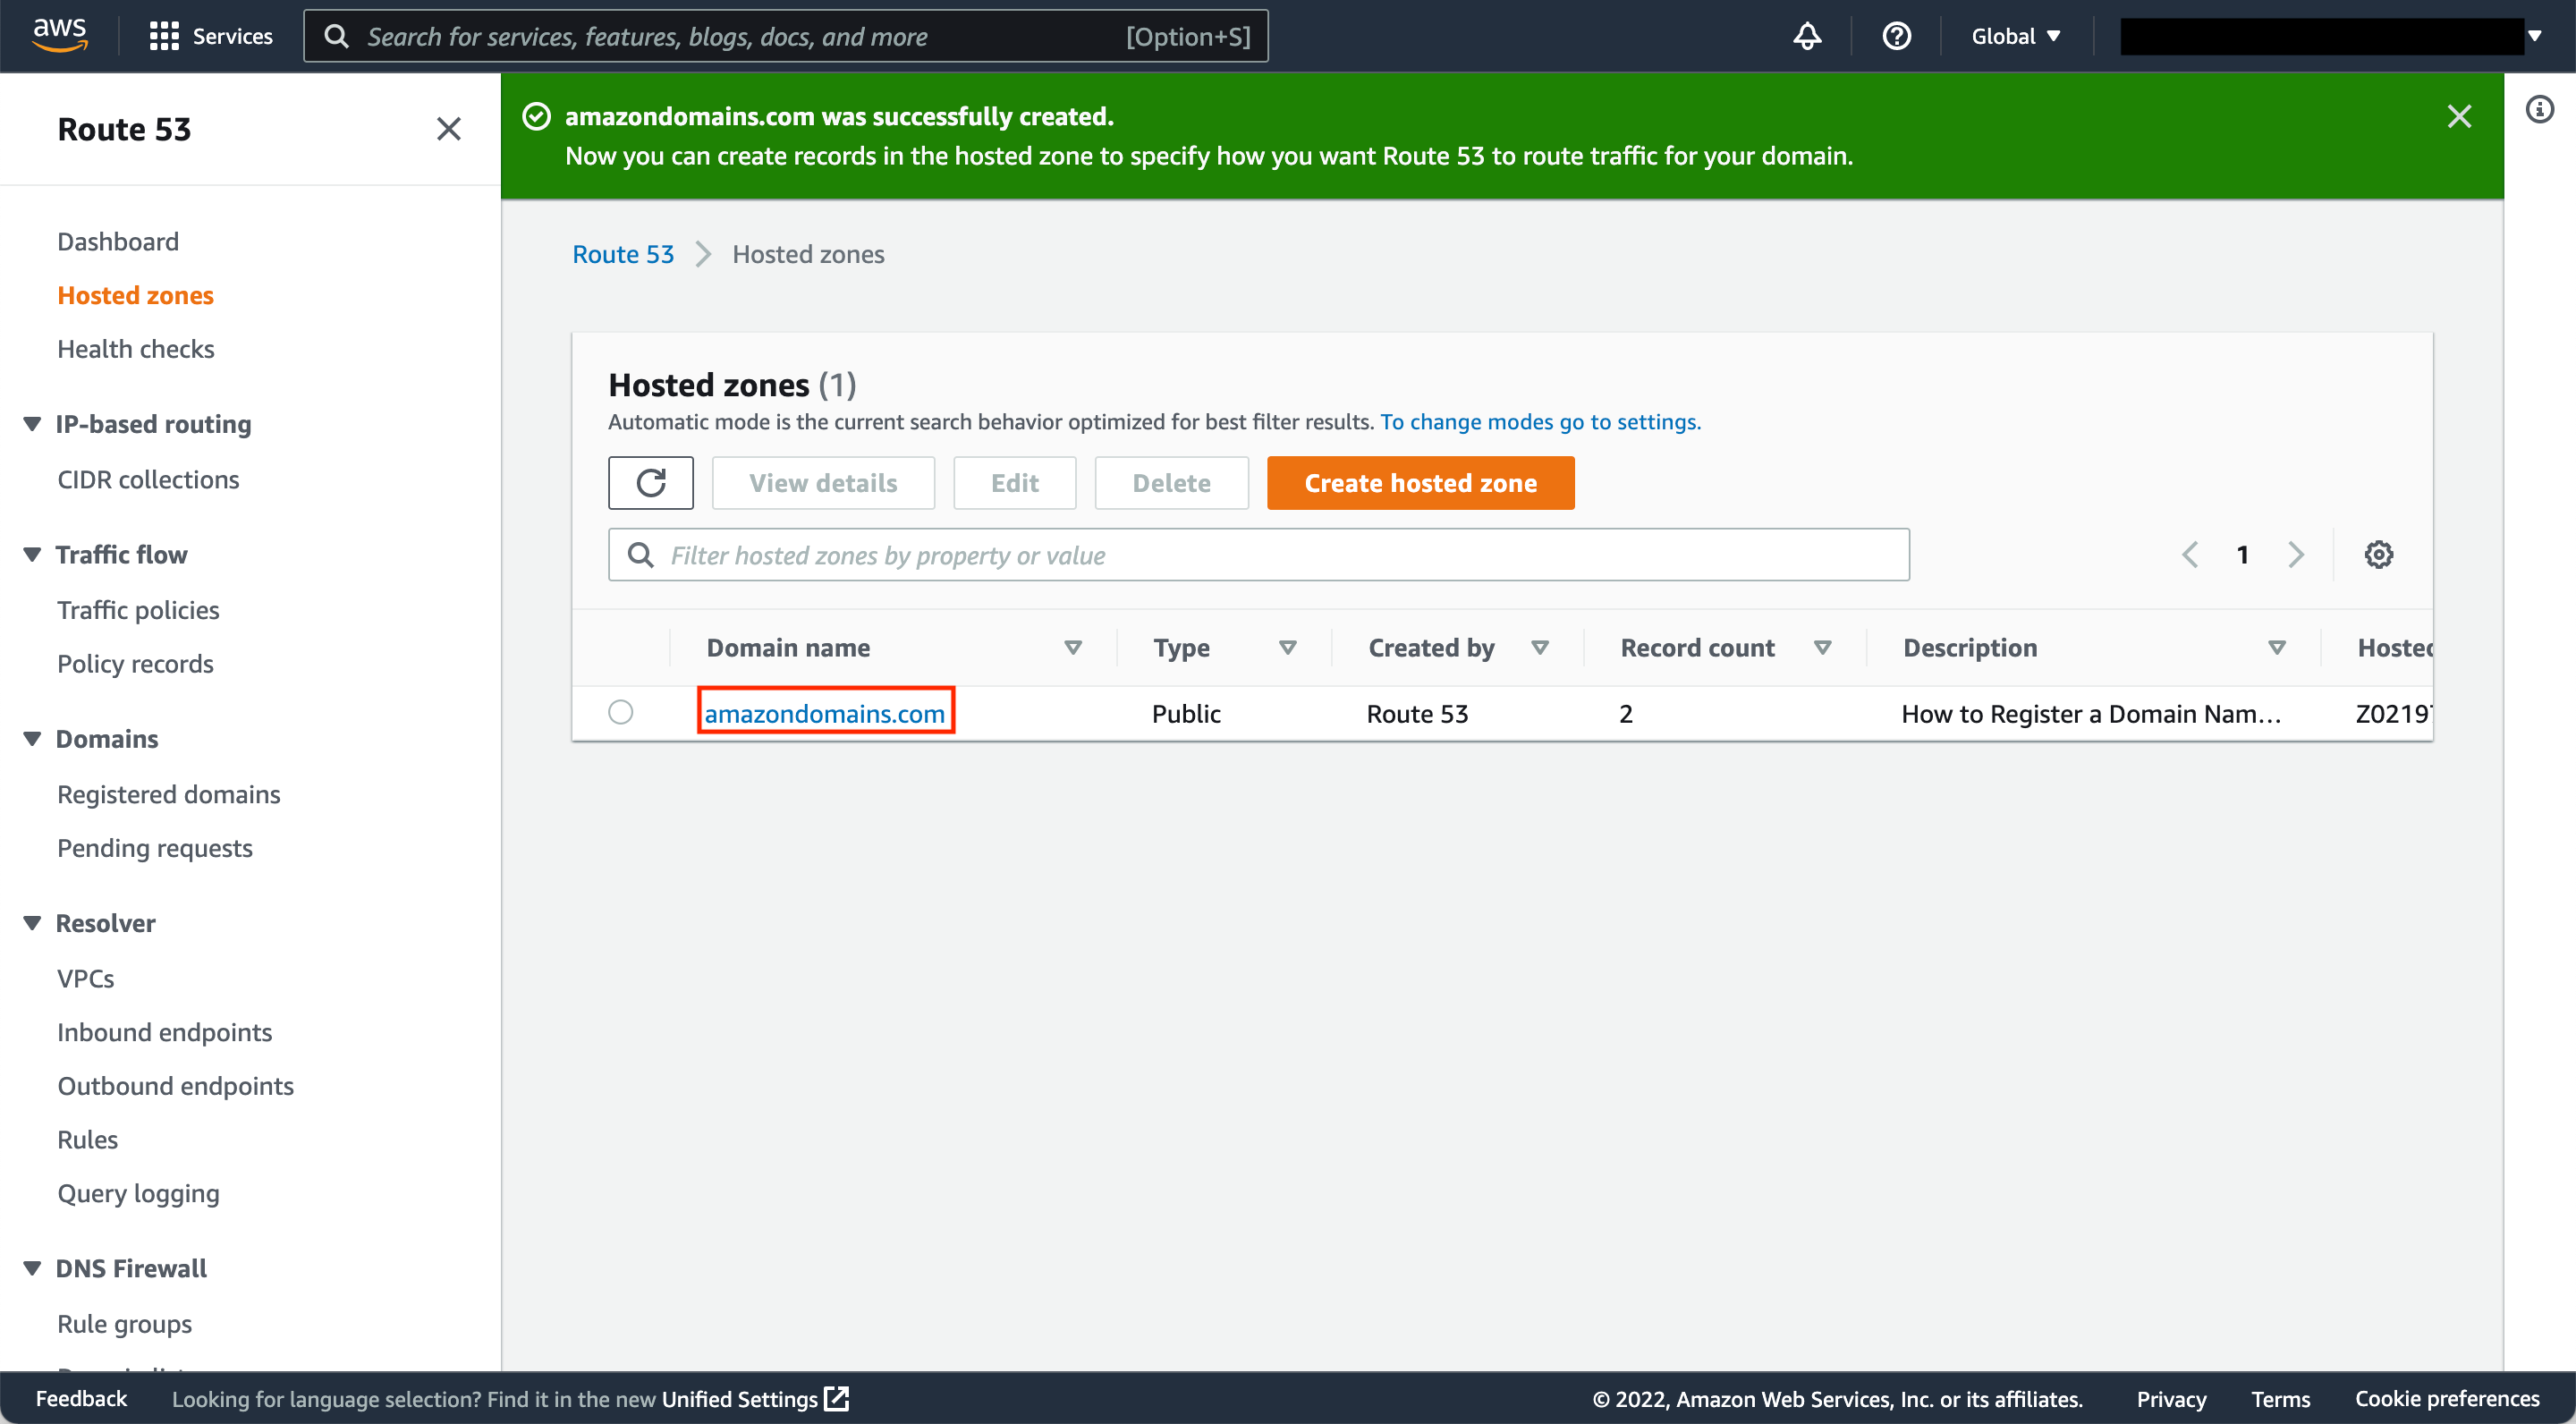
c. Choose the hosted zone that Route 53 made for you when you registered your domain. Your domain name should be in this hosted zone.
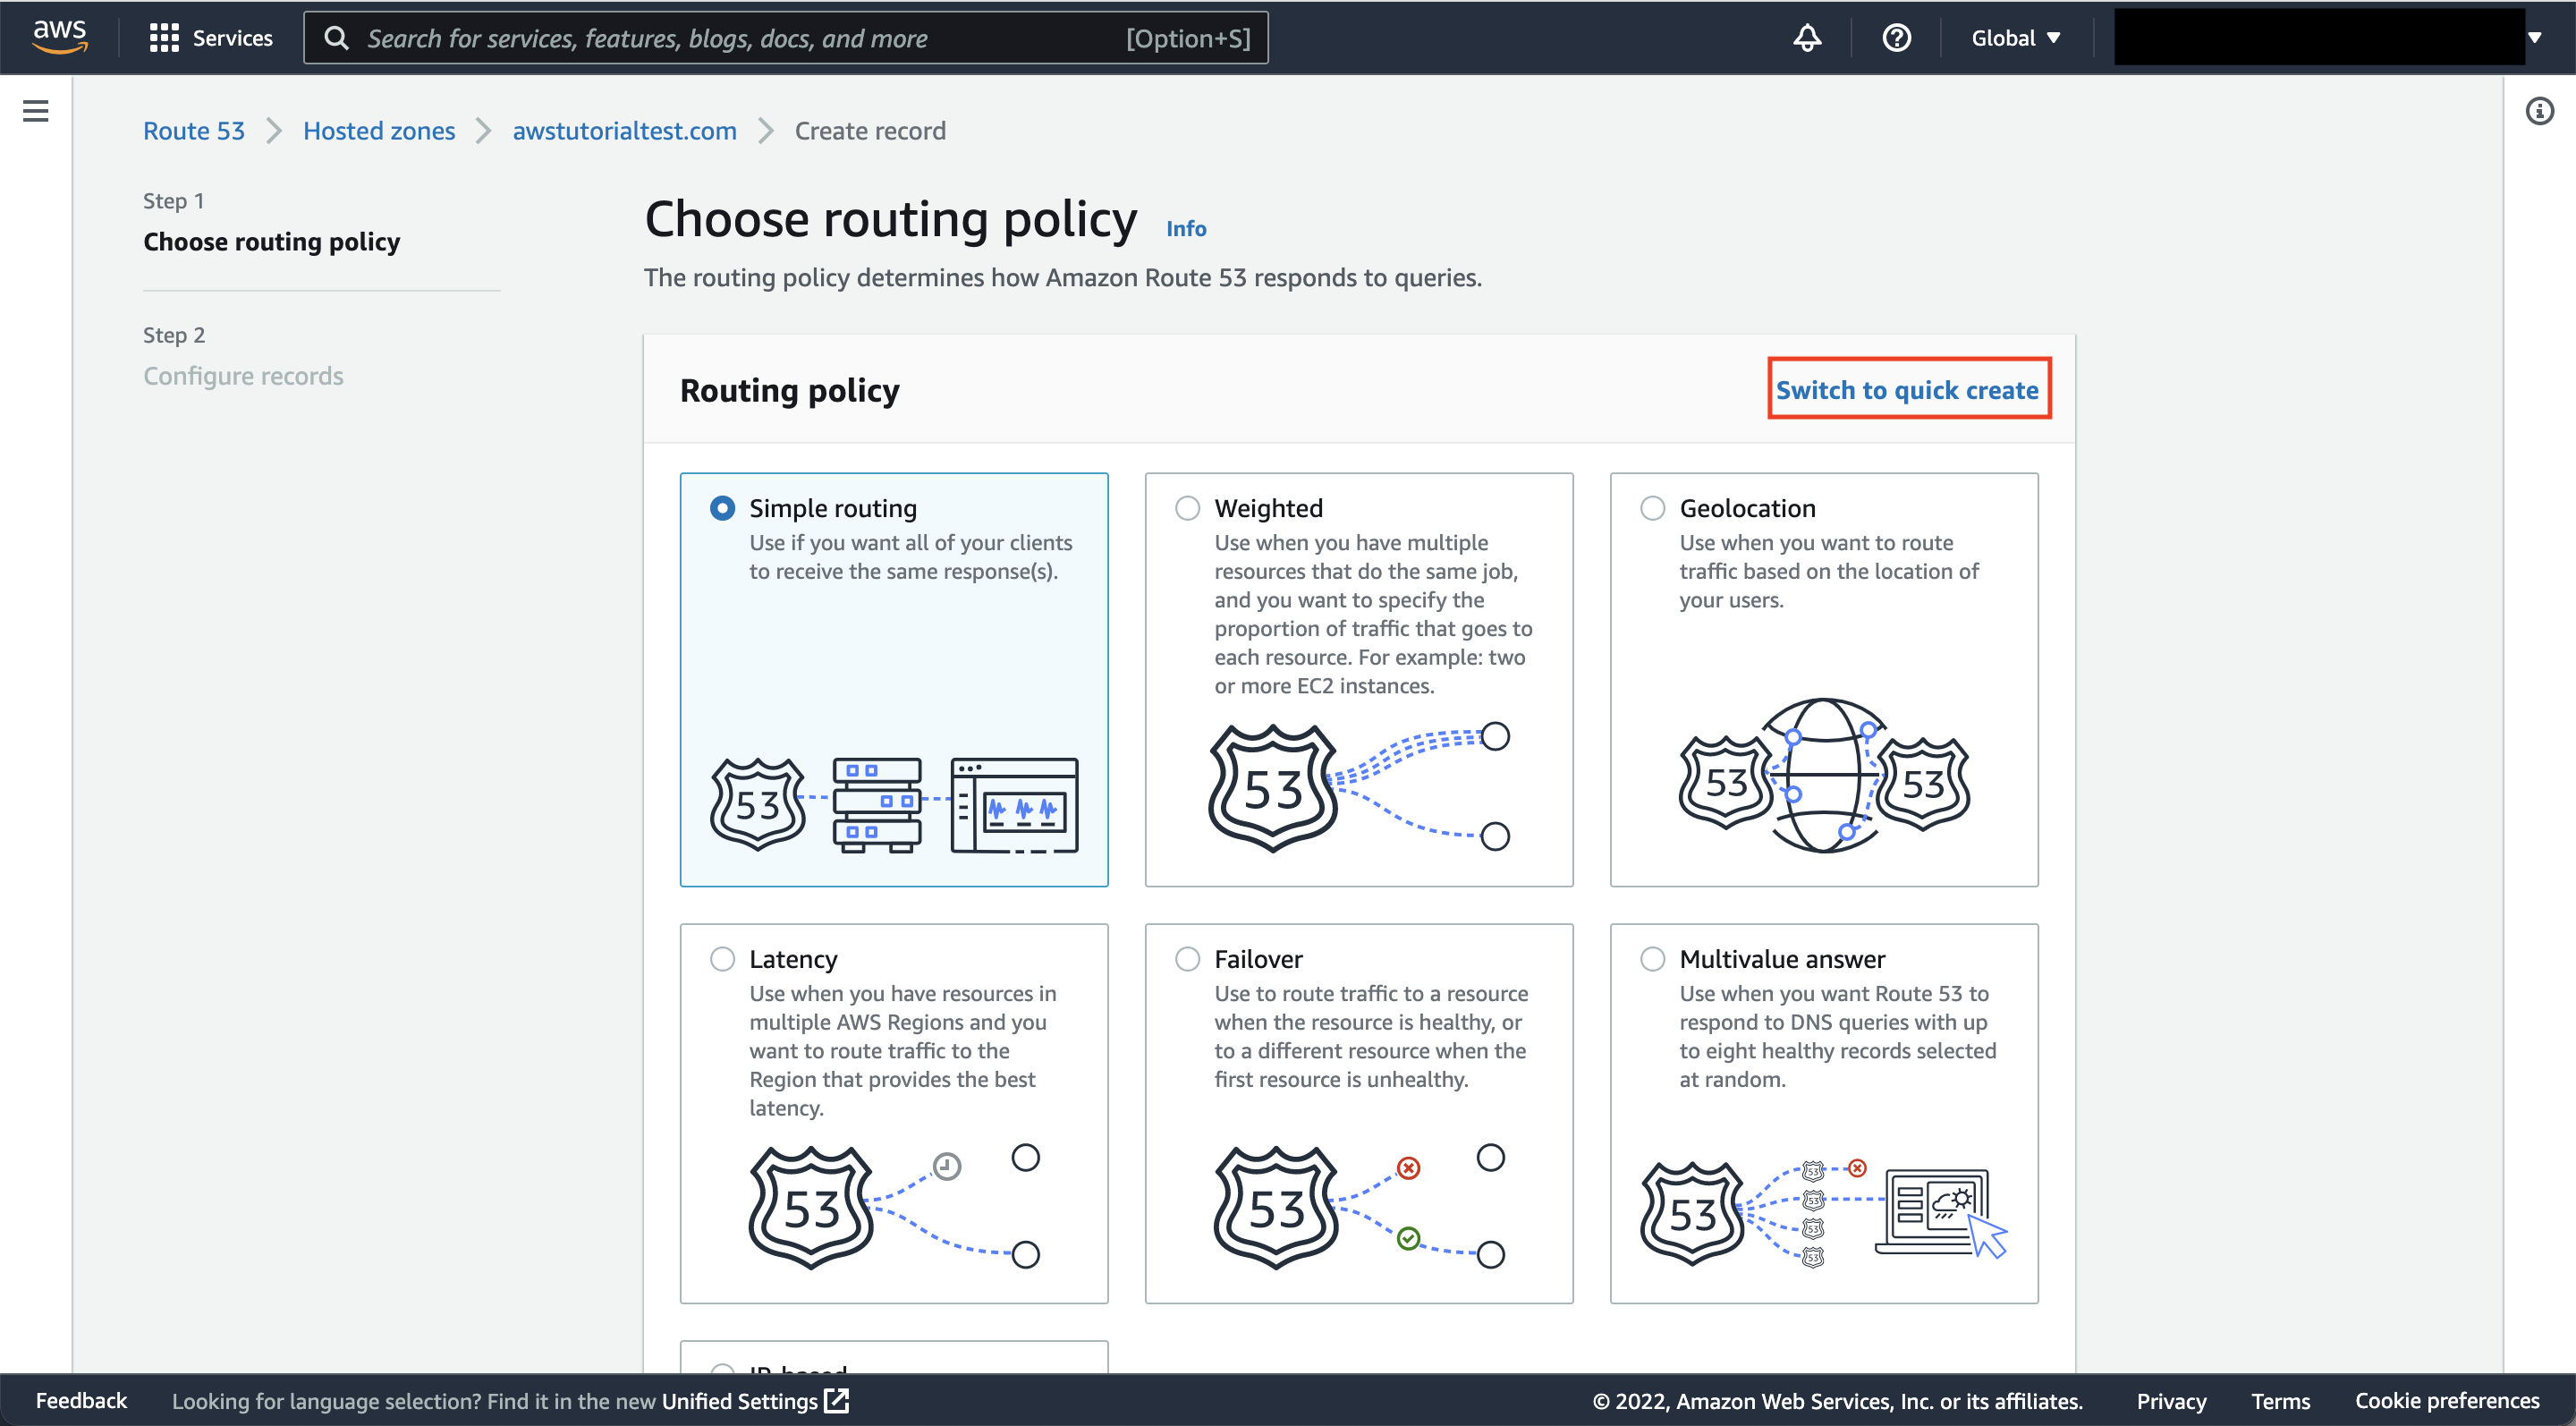
d. You now have the ability to set up DNS records for your domain. In this tutorial, we will make an A record type that is simple. To start, click the button on the toolbar that says “Create record.”
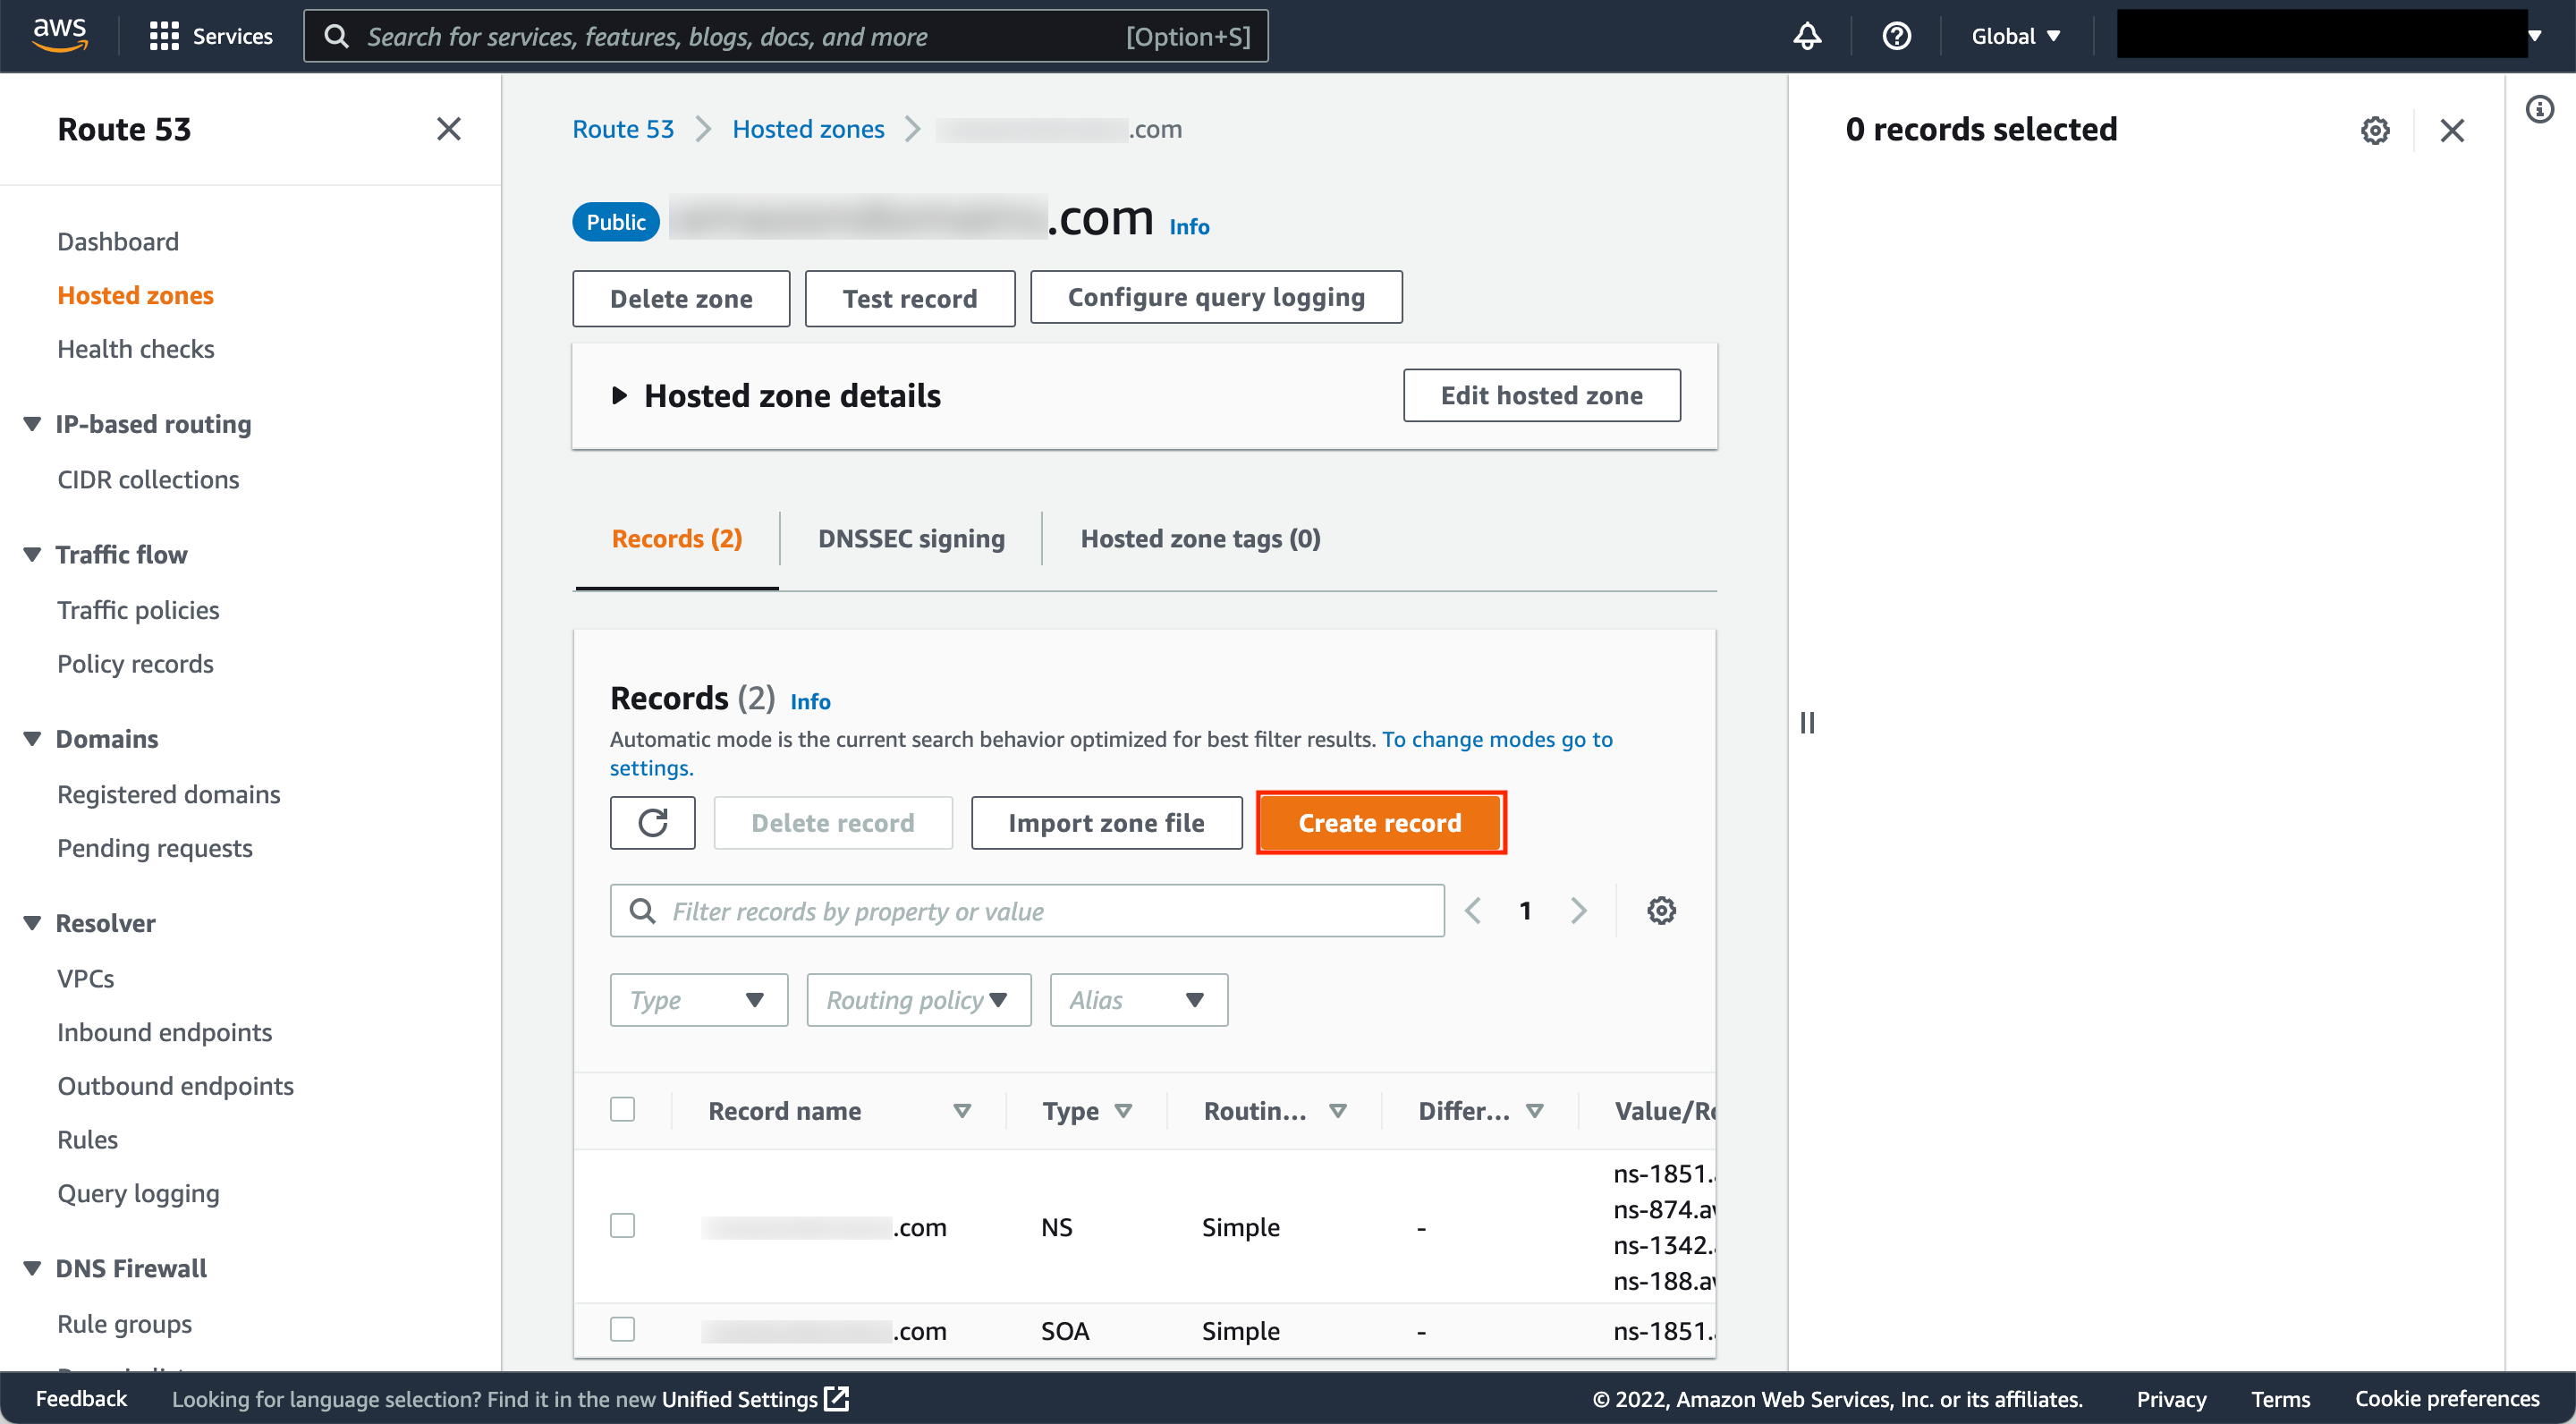
e. At this point, if you are still in the wizard view, choose Switch to quick create.
f. Type in the information for your A record and make sure the record type field is set to A so clients can connect to your ALB using IPv4. This will let customers use IPv4 to connect. In the Record name field, we will put www for the purposes of this instruction.
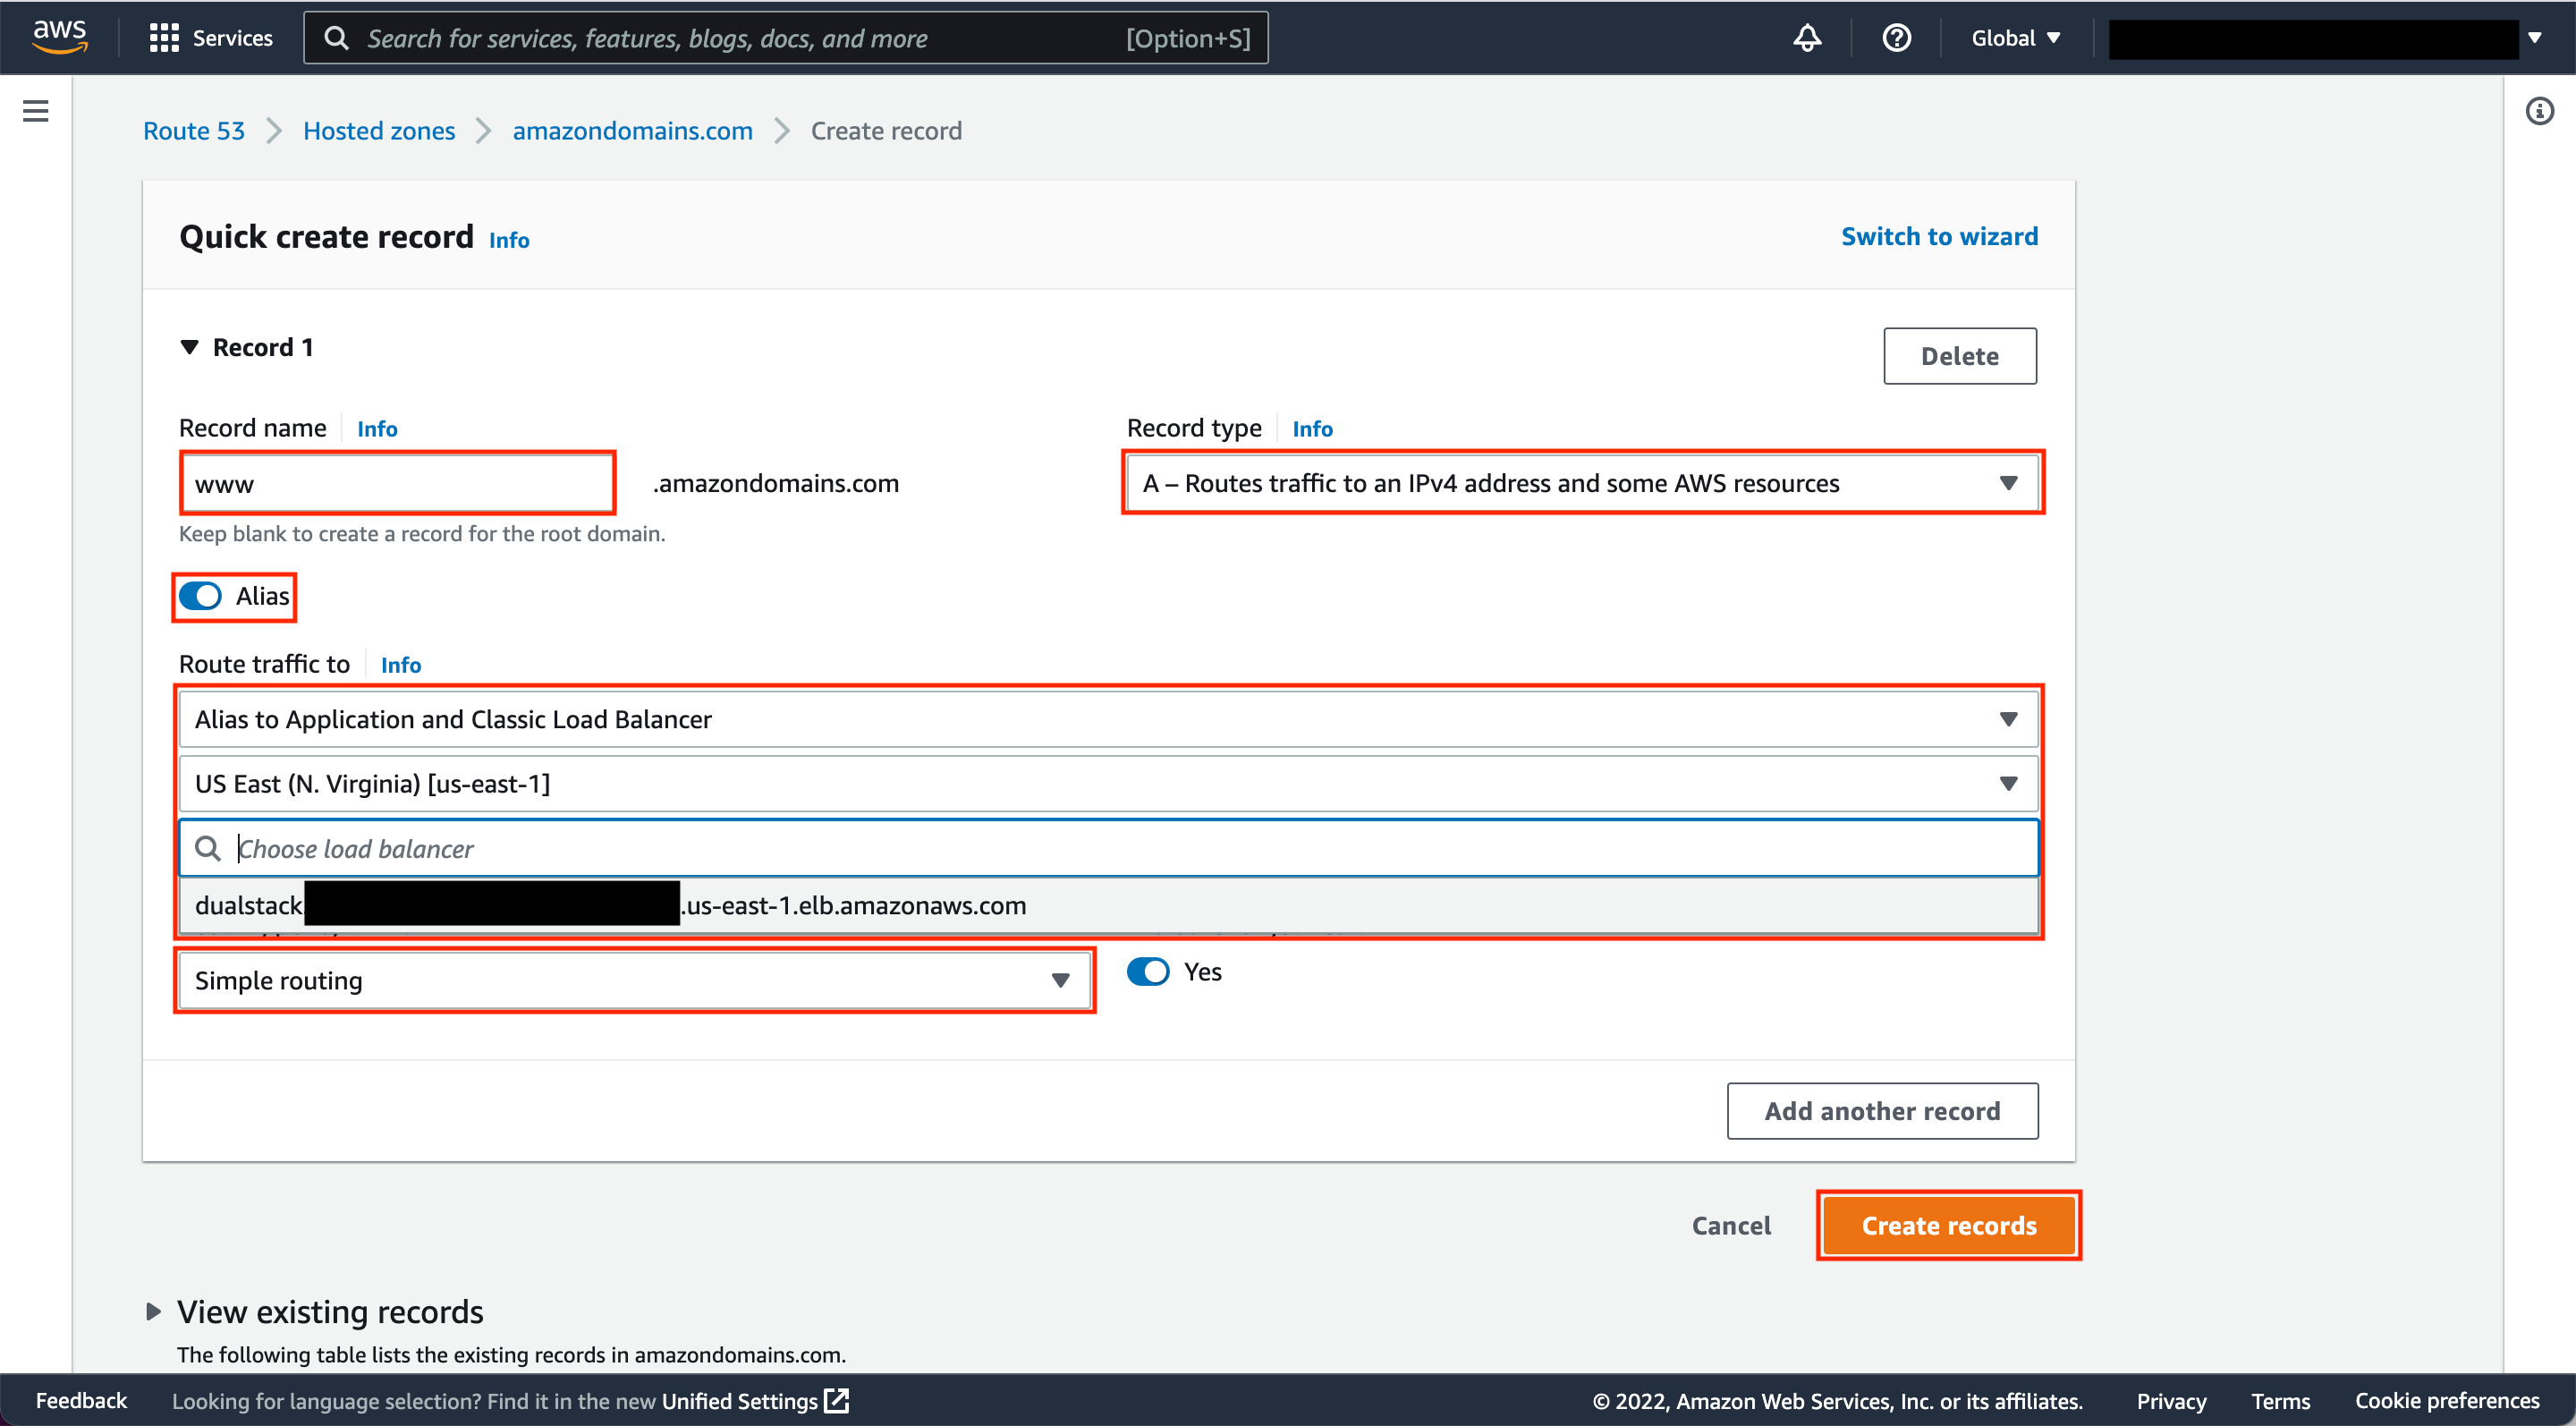
Alias should be put to use.
Choose Alias to Application and Classic Load Balancer from the list of end points in the Choose an end point drop-down menu.
In the “Choose Region,” drop-down menu, choose the region that matches the location of your ALB.
From the Choose load balancer drop-down menu, choose the existing application load balancer (ALB). This is the ALB you want to use to get traffic from this domain.
When you’re done, click the button that says “Create records.”
Choose Alias to Application and Classic Load Balancer from the list of end points in the Choose an end point drop-down menu.
From the drop-down menu called “Choose Region,” pick the region that matches where your ALB is.
From the Choose load balancer drop-down menu, choose the existing application load balancer (ALB). This is the ALB you want to use to get traffic from this domain.
When you’re done, click the button that says “Create records.”
g. If you want customers to be able to connect to your ALB using IPv6, you will need to fill out the information for your AAAA record and make sure that the Record type box is set to AAAA. In the Record name field, we will put www for the purposes of this instruction.
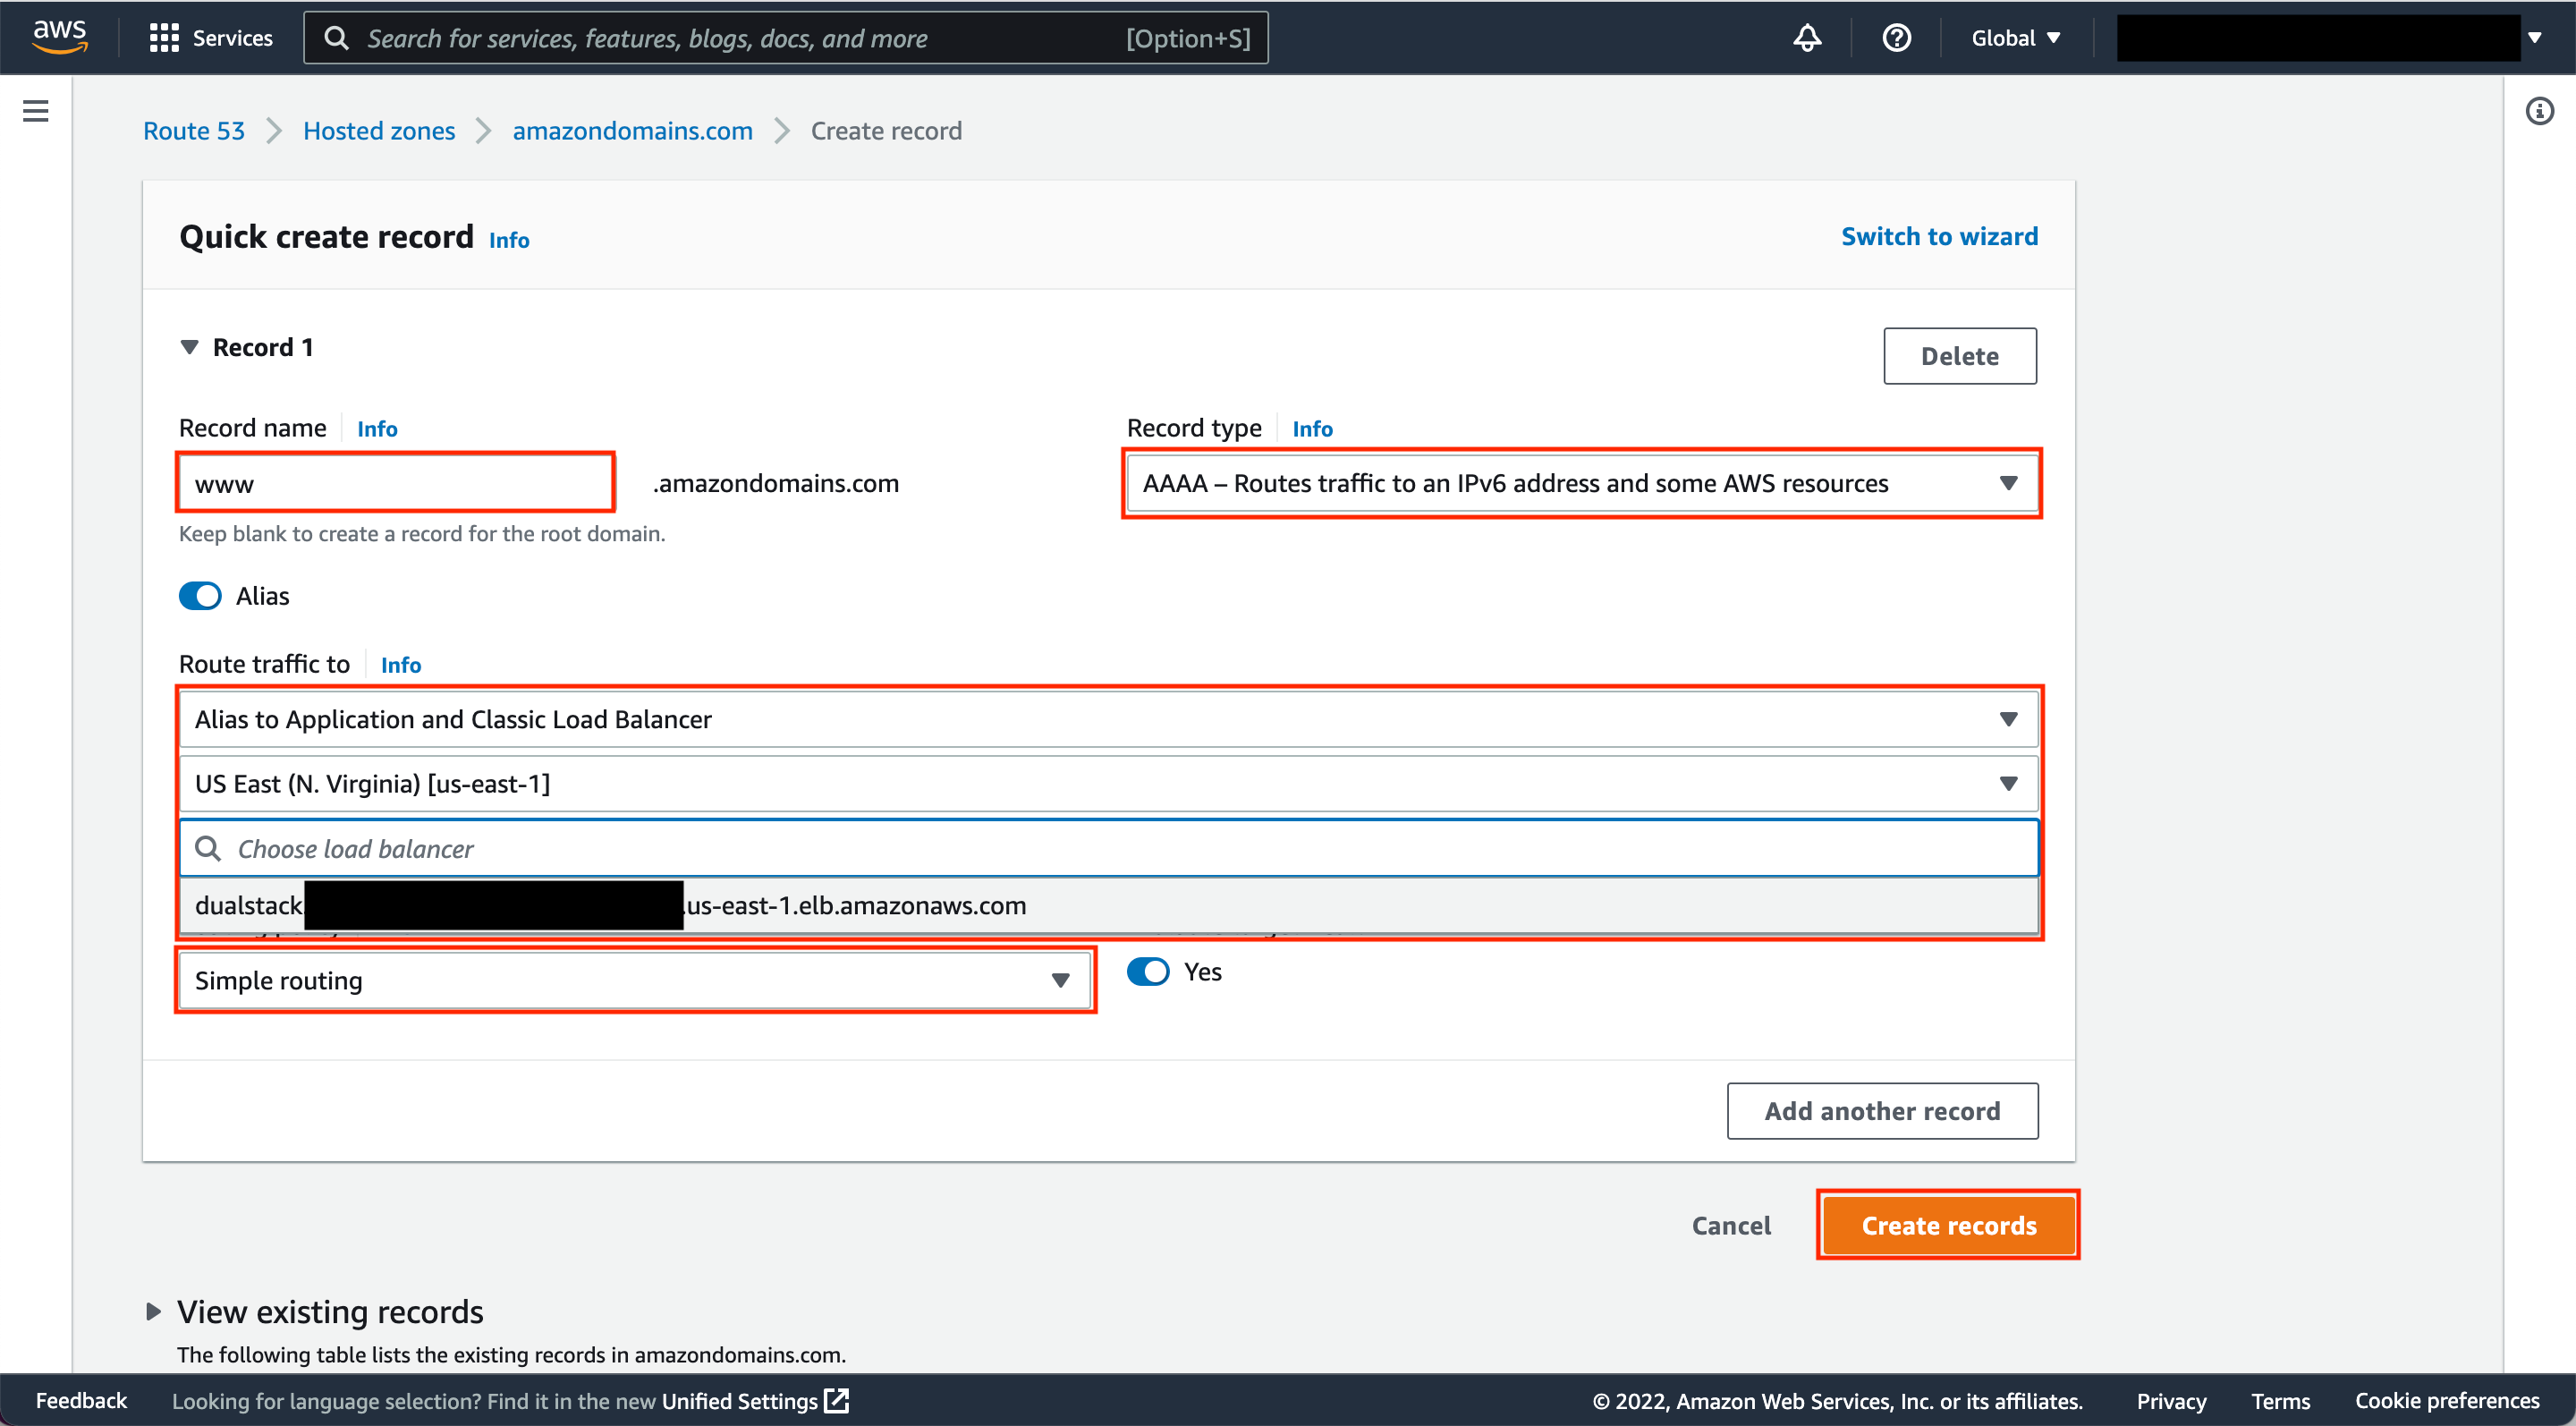
Alias should be put to use here too.
The rest is similar to the process with IPv4.
Conclusion
In this article, we saw steps to search for a domain name and buy it through the AWS console in AWS Route 53. In addition, we also learned how to provision a public IP address and configure DNS.
If you have any more questions, feel free to contact us. We at 1Byte, as an official AWS partner, are capable and willing to answer any of your AWS-related question.