

Here, you’ll be guided on how to use cPanel’s database management features. 1Byte will show you how to accomplish that in this post. The majority of current websites would not function without a database discreetly operating behind the scenes and managing the website’s data. In other words, the database stores all of your website’s content, including all of its pages, posts, and user data. As you may think, cPanel has a rather comprehensive module for creating and managing databases.

How to Manage Your Database on cPanel?
FURTHER READING: |
| 1. How to Update Your Preference in cPanel? |
| 2. How to Use IP Blocker in cPanel? |
| 3. How To Use Cron Jobs In cPanel? |
1. Creating a new Database
If you want to set up any modern website using a CMS, you’ll need to create a database for it first.
The “DATABASES” section of cPanel has a handful of options available:
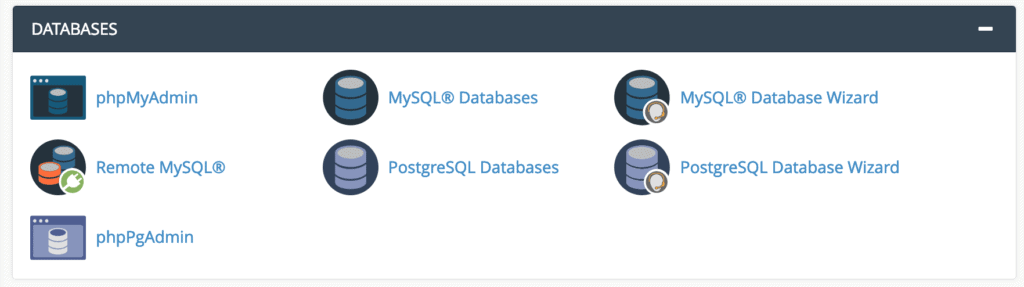
Notably, cPanel supports both MySQL and PostgreSQL databases. For the sake of this post, we’ll use MySQL, however, the process is essentially the same as PostgreSQL.
To establish a new database, in the “DATABASES” section, click on “MySQL Database Wizard” (see above). After that, you may begin configuring your new database.
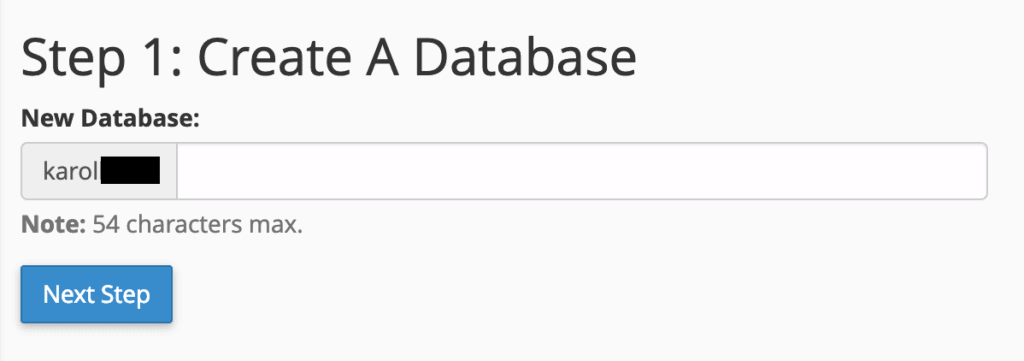
Set a name for your database
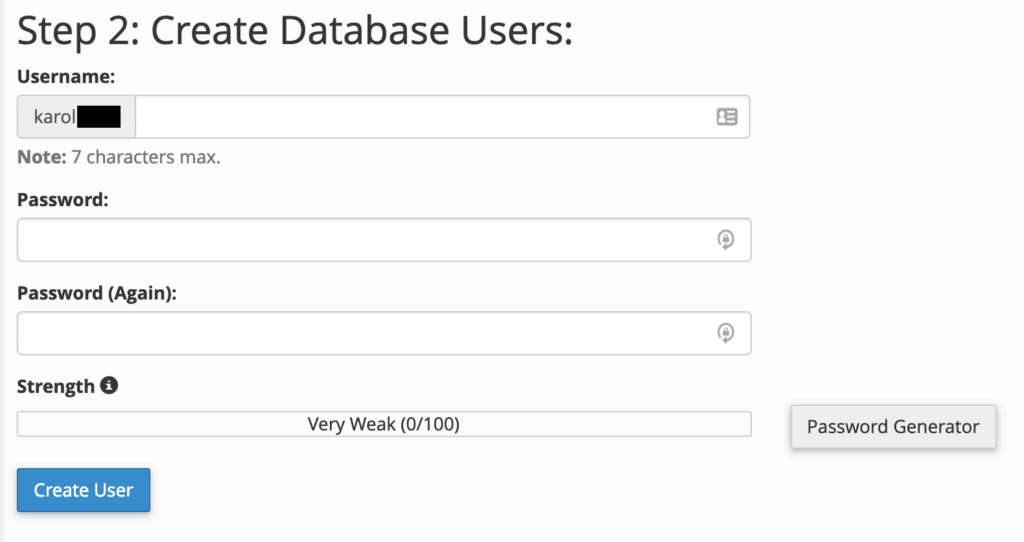
- Create a database user that will be used to access the database (this is required in order to work with the database later on):
- Assign the required privileges to that new database user; it’s best to select the option labeled “ALL PRIVILEGES”, like so:
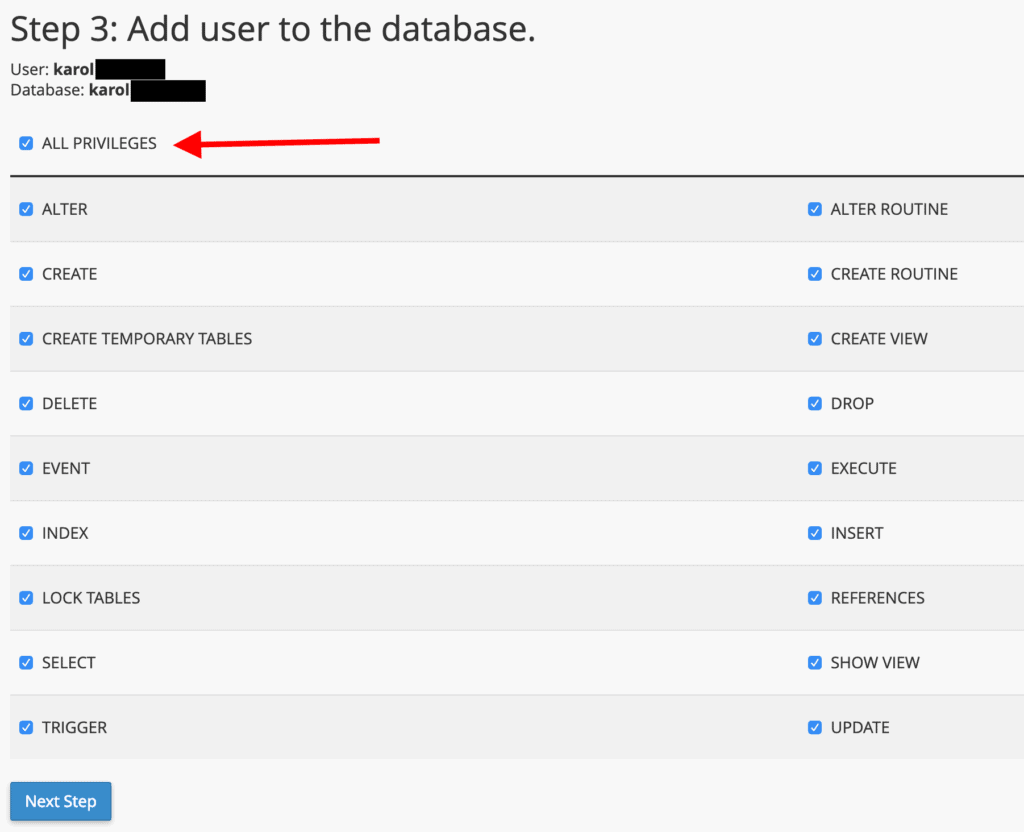 At this stage, your new database has been set. To see it, go back to the main page of cPanel and click on “MySQL Databases”.
2. Managing your Databases
To see all your databases, go to “MySQL Databases” from the “DATABASES” section of cPanel.

Each database can be renamed or deleted through the links to the right.
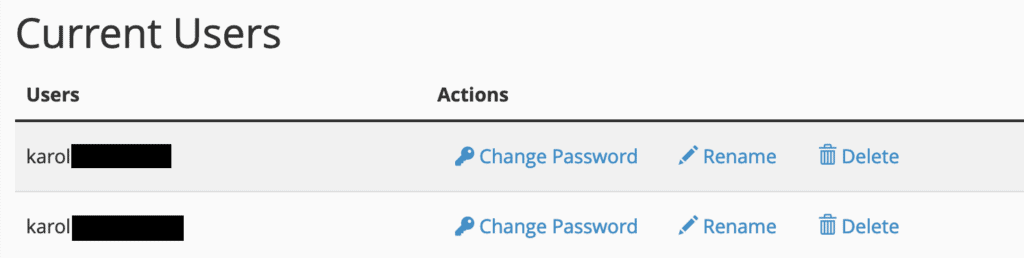
Additionally, you can also manage your database users there, a bit further down the page.
With this post, you’ve learned how to set up and maintain a database in cPanel, so congratulations!
FAQs
Where Is My Database in cPanel?
Click the “MySQL Databases” link in the Databases area of your cPanel dashboard. Navigate to the section labeled Modify Databases. In the Check Database section, select the database you want to check, then click Check Database.
How to View a MySQL Database’s Current State?
- Click the “MySQL Databases” link in the Databases area of your cPanel dashboard.
- Go to the “Current Databases” section by scrolling.
Your databases will be included under the Current Databases area, along with any database users that have access to the database. You can rename the database from this screen, remove the database, or delete the database user’s access.
How to Manage and List Active Database Users?
- Click the “MySQL Databases” link in the Databases area of your cPanel dashboard.
- Navigate to the area under “Current Users.”
You can view every database user you’ve created from here. You can delete a user, modify the user’s name, or change their password.
How to Fix a MySQL Database That Is Corrupted?
- Click the “MySQL Databases” link in the Databases area of your cPanel dashboard.
- Navigate to the section labeled Modify Databases.
In the Check Database section, select the database you want to check, then click Check Database. In the Repair Database section, select the database you want to fix, then click Repair Database.