

In this tutorial, we will walk you through the process of adding a website and installing WordPress on that website using aaPanel. Adding a website is a simple process; simply follow the steps given below, and you’ll have WordPress up and operating in a matter of minutes. WordPress is the most popular content management system (CMS), and the instructions in this post will surely prove beneficial to you, especially via detailing the installation of the website in a simple and quick manner.
How to Install WordPress in aaPanel?
To install WordPress in aaPanel, you can follow these step-by-step instructions:
Step 1: Log In to aaPanel
- Access your aaPanel account by visiting the aaPanel web interface and logging in.
Step 2: Access the Website Section
- In the aaPanel dashboard, click on “Website” or a similar option (the wording might vary slightly depending on your version).
Step 3: Create a New Website
- Select “Add Website” or a similar option to create a new website where you’ll install WordPress.
- Fill in the necessary details for your website, including the domain name, root directory, and other settings. You can also set up SSL if needed.
- Click “Save” or “Create” to create your website.
Step 4: Install WordPress
- Scroll down to the “Website” section in aaPanel and locate “WordPress.”
- Click on the WordPress icon or the “Install” option next to it.
Step 5: Configure WordPress Installation
- Fill in the necessary information for your WordPress installation:
- Software Setup: Choose the version of WordPress you want to install. Leave “In Directory” blank if you want WordPress to be installed in the root directory of your website.
- Site Settings: Enter your website name and description.
- Admin Account: Set the username and password for your WordPress admin account. This will be used to log in to your WordPress dashboard.
- Choose Language: Select the language for your WordPress installation.
- Select Plugins: You can choose to install additional plugins if desired.
- Click “Install” to begin the WordPress installation.
Step 6: Complete Installation
- aaPanel will now install WordPress on your server. Once the installation is complete, you will receive a confirmation message.
Step 7: Access Your WordPress Dashboard
- Visit your domain name in a web browser (e.g., www.yourdomain.com). You should see the WordPress setup page. Follow the prompts to complete the setup, including creating your WordPress admin account.
- After completing the setup, you can log in to your WordPress dashboard to start customizing your website and creating content.
Congratulations! You’ve successfully installed WordPress in aaPanel. You can now begin building and managing your WordPress website or blog.
FURTHER READING: |
| 1. 9 Common Settings of aaPanel |
| 2. aaPanel's Monitoring Settings: A Comprehensive Guide |
| 3. How to Easily Upload Your Website in aaPanel? |
How To Add Website In aaPanel?
Step 1
Proceed to aaPanel admin and choose Website from the menu on the left.
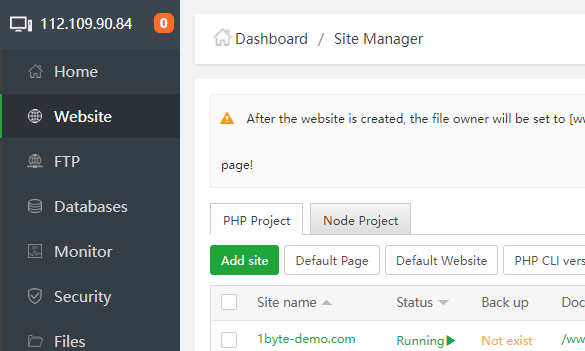
Step 2
To continue, press the green button denoting “Add site”.
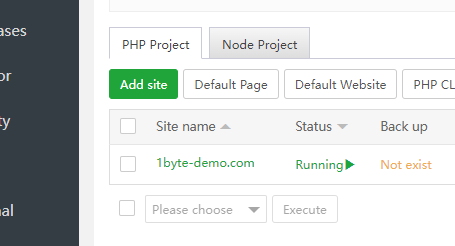
Step 3
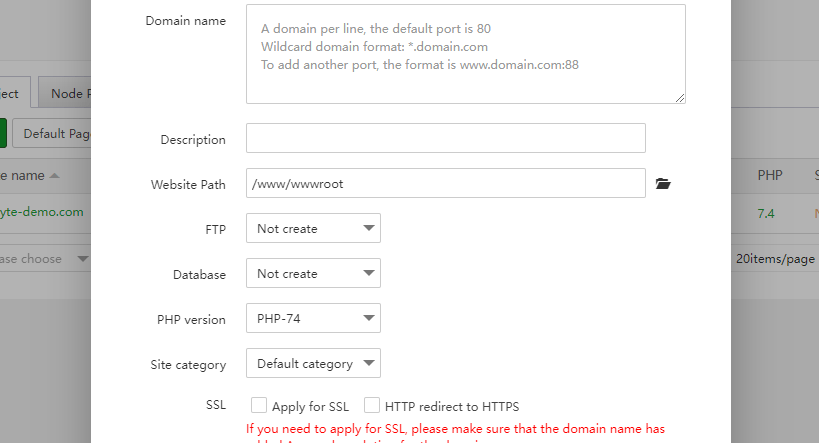
Please fill out the fields below with the required information in order to add a new website.
- Domain: Make sure to fill in the domain name as well as the port that will be bound. (a hostname for www will not be generated automatically).
- Description: Please provide a description of the function of the website.
- Website Path: This is referring to the location of the file that is currently being used by the website. Although you have the ability to select the point at which the directory is created, it is recommended that you utilize the default location (/www/wwwroot) wherever possible for easy management.
- FTP: When you build a website, you have the option of additionally creating an FTP account. This is a choice that may be made when creating a website.
- Database: When you are making a website, you have the option of also creating a Mysql database at the same time. This choice is available to you when you create a website.
- PHP version: Pick your website, which must be carried out with a particular version of PHP, and you must get more. In the panel’s application shop, PHP versions can be downloaded and installed (support 5.2-7.4)
- Site category: Used for the purpose of categorizing websites in order to make management easier
How To Deploy The Newly Created Website?
Step 1
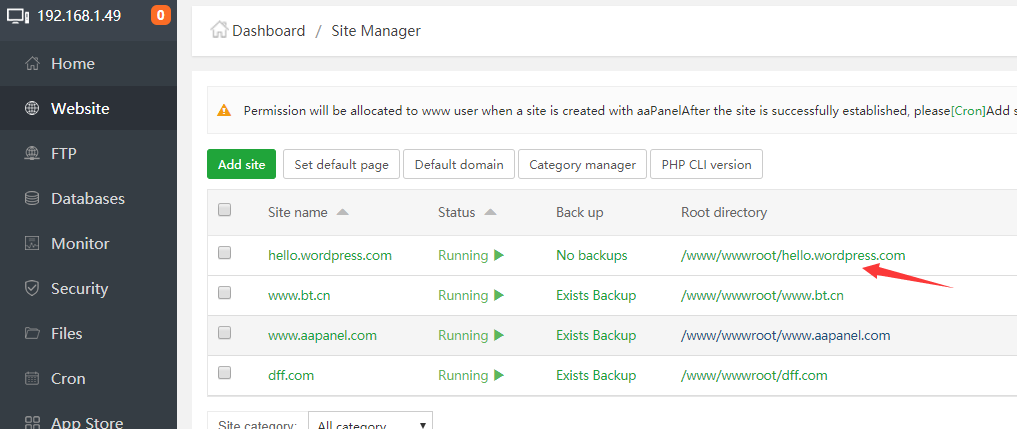
To access the website folder, click on the folder in the list (in the column Document Root).
Step 2
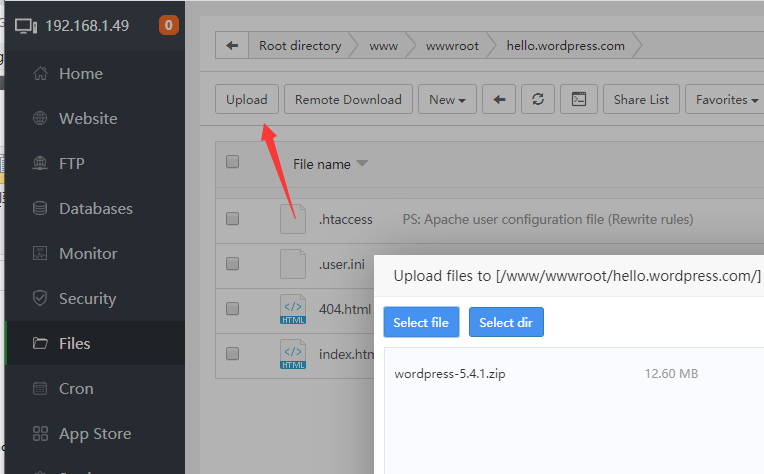
Click the Upload button, then simply select your desired website bundle afterward.
Step 3
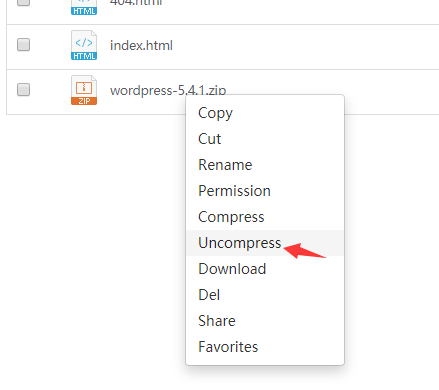
Unzip the file containing your website.
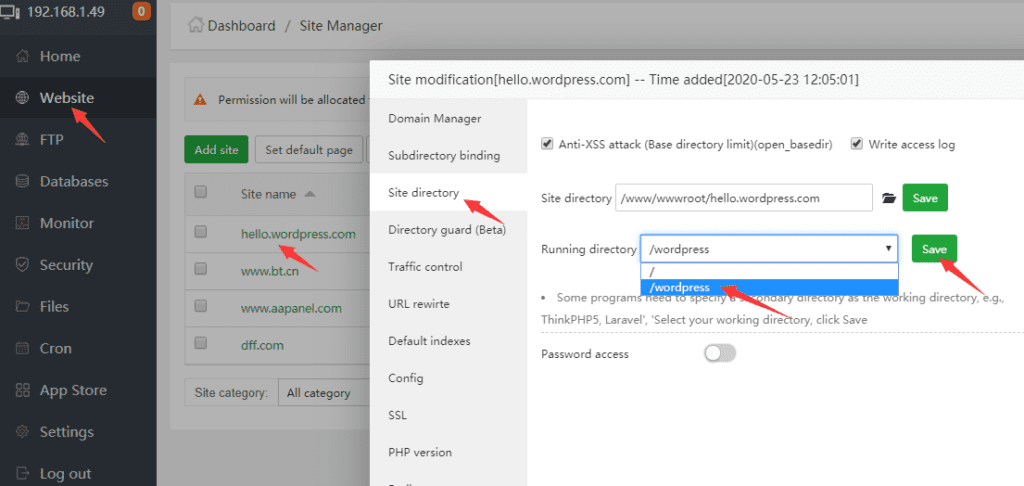
Step 4
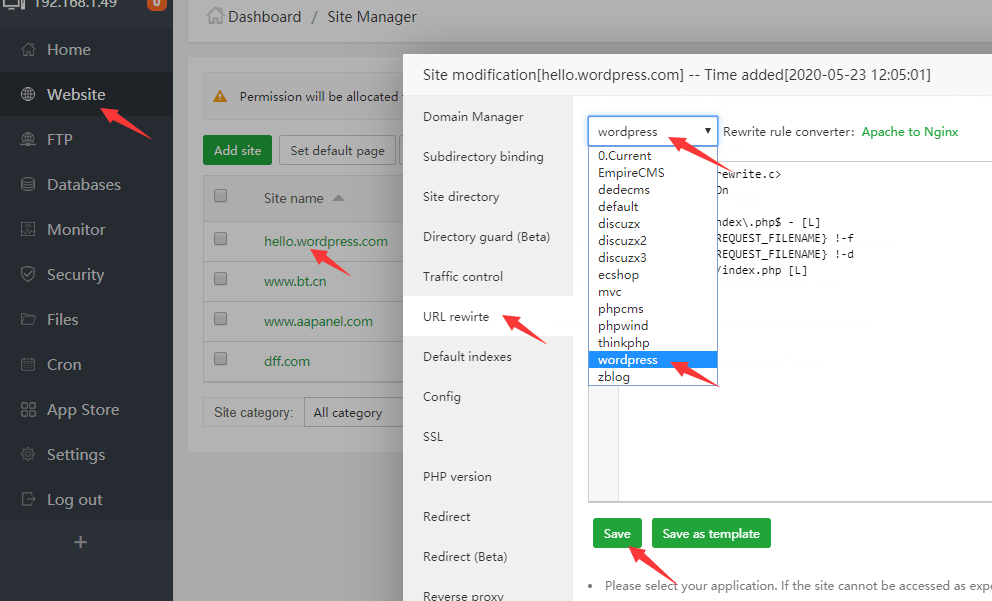
Set your website render, then set your URL-Rewrite.
Step 5
Enter your domain name in the browser to access it.
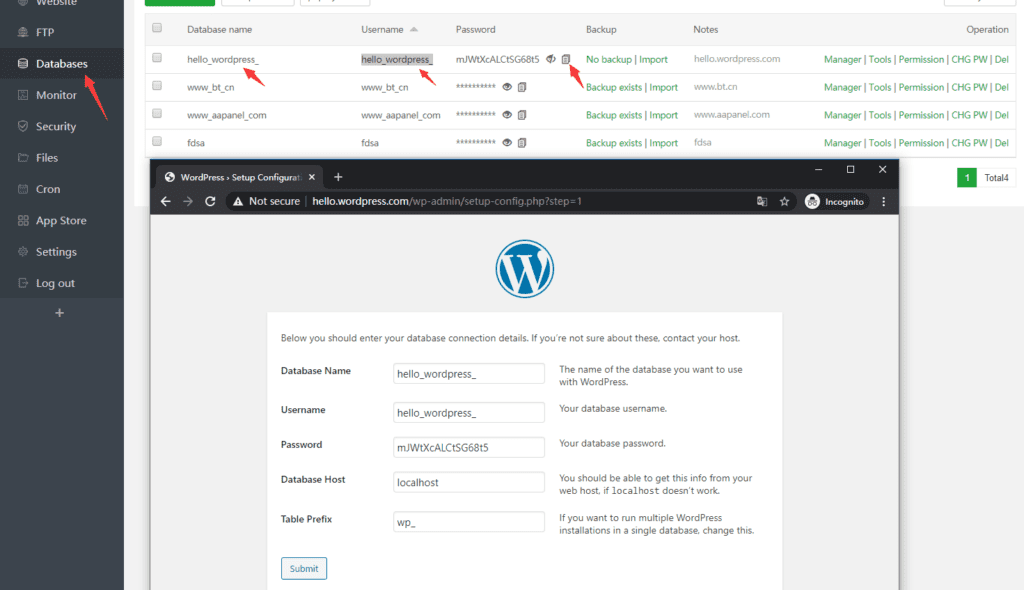
At the same time locate the name of your database, your username, and your password. After this is done, you can begin your voyage with WordPress by first filling out the information on your website in accordance with those shown on the Databases page.
Conclusion
In conclusion, installing WordPress in aaPanel is a relatively simple process that can be completed in just a few minutes. By following the steps outlined in this guide, you can have your WordPress website up and running in no time.
Here are some additional tips for installing WordPress in aaPanel:
- Make sure you have a domain name and hosting account set up before you begin.
- Choose a strong password for your WordPress admin account.
- Install a security plugin to protect your website from attacks.
- Back up your website regularly to prevent data loss.
With a little effort, you can easily install WordPress in aaPanel and create a beautiful and functional website.