
If you are looking for a powerful and easy-to-use database management solution, aaPanel is a perfect choice. Whether you are managing a simple website with just a few files and pages or more complex content with dynamic functionality, aaPanel makes it easy to manage everything within one system. In this article, we will show you how to manage your aaPanel database – as well as how to customize and back up your aaPanel database. Let’s get started!
What is aaPanel database?
aaPanel is a powerful yet easy-to-use web hosting control panel that lets you manage your website’s files (content, images, etc.), email accounts, and more. With aaPanel, you can easily create, modify, and back up your database to ensure that it runs smoothly and efficiently.
Several different types of databases can be managed using aaPanel, including MySQL for storing dynamic content, flat file databases for storing static content like HTML or CSS files, and MongoDB for storing complex datasets. Additionally, aaPanel enables you to customize settings according to your specific needs and preferences. For example, you can adjust database permissions to control which users have access to certain data.
FURTHER READING: |
| 1. How to Safety Management In aaPanel |
| 2. aaPanel Mail Server Setup with RoundCube Webmail |
| 3. How To Install WordPress and Create Website in aaPanel? |
Why is it important to manage aaPanel database properly?
Learning to manage aaPanel database properly is important for several reasons. First, it ensures that everything on your website runs smoothly and efficiently, preventing data loss and performance issues.
Additionally, it allows you to customize settings based on your preferences or specific needs. This helps improve usability and ensures that you are getting the most out of your database system.
Finally, proper database management also enables you to back up your database regularly, which helps protect against data loss in the event of an unexpected issue or outage.
How to customize & backup aaPanel database?
Here, we will show you how to set up aaPanel database – including all of the most frequently asked actions step-by-step. Every instruction below is followed with captured images from 1Byte dashboard for demonstration. Let’s dive in now!
1. Add database
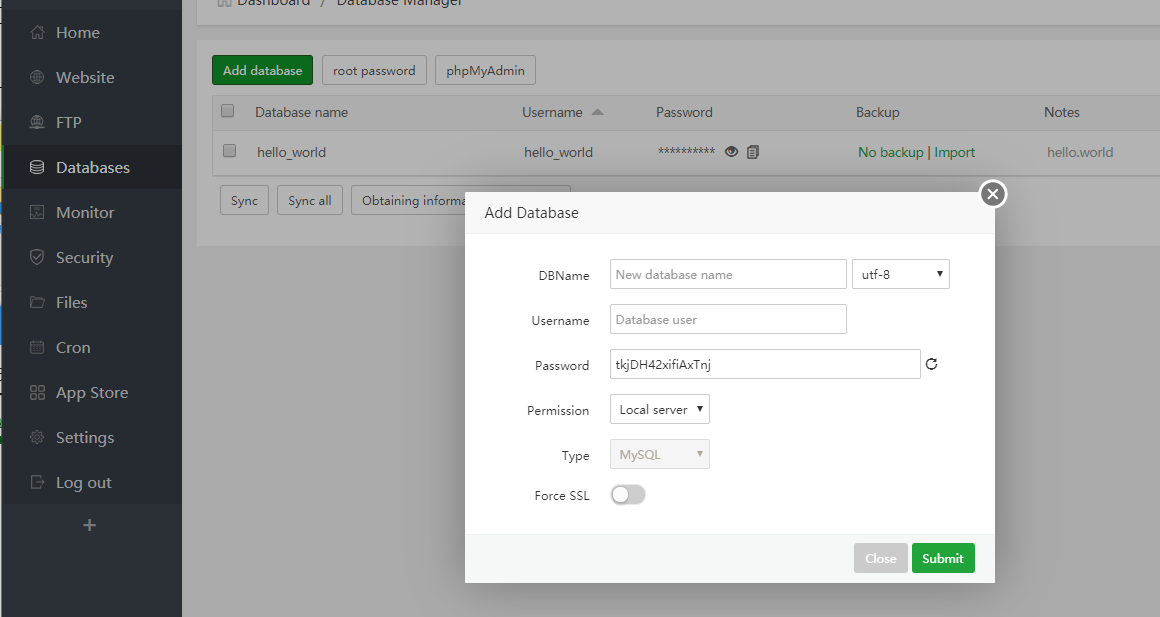
To successfully create a database, first input the database name, then pick the encoding type, enter the password, and configure the access rights.
DBname: the name of the new database; pick the encoding format, which is UTF-8 by default.
Password: The default password is a random password that you may change.
Permission: The local server permission is the default. Everyone or provide an IP address is a possibility.
Force SSL: Force the user to utilize an SSL connection, which may render the client unreachable if it lacks a certificate (the certificate can be downloaded in the SSL tag of the MySQL manager)
2. Change the root password
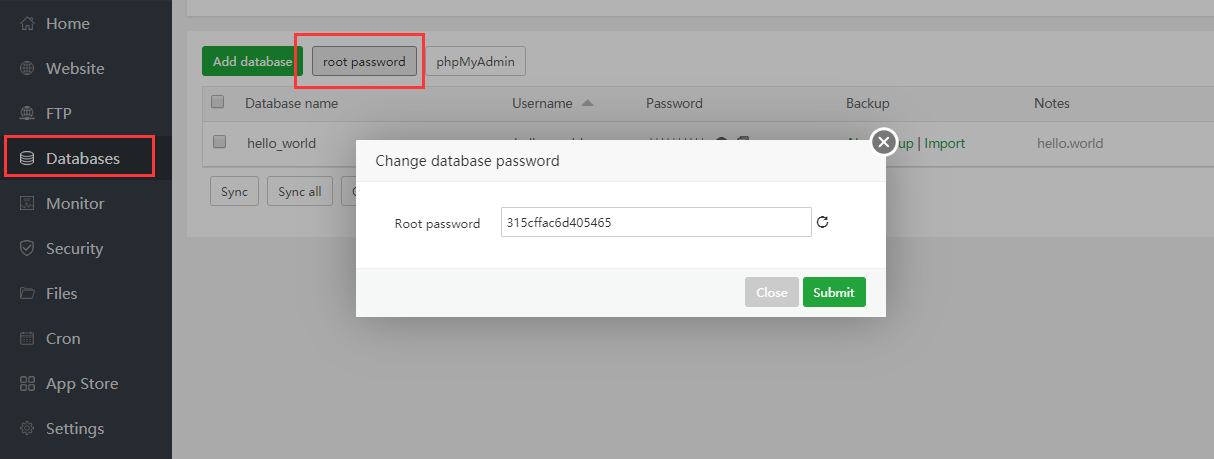
If you are unable to add data or are being prompted for an incorrect password, you can try to change the root password to resolve the issue.
Note that the default password is random, and the root is the password for the highest-privilege account. Please proceed with care.
3. aaPanel Backup Database
Manual backup
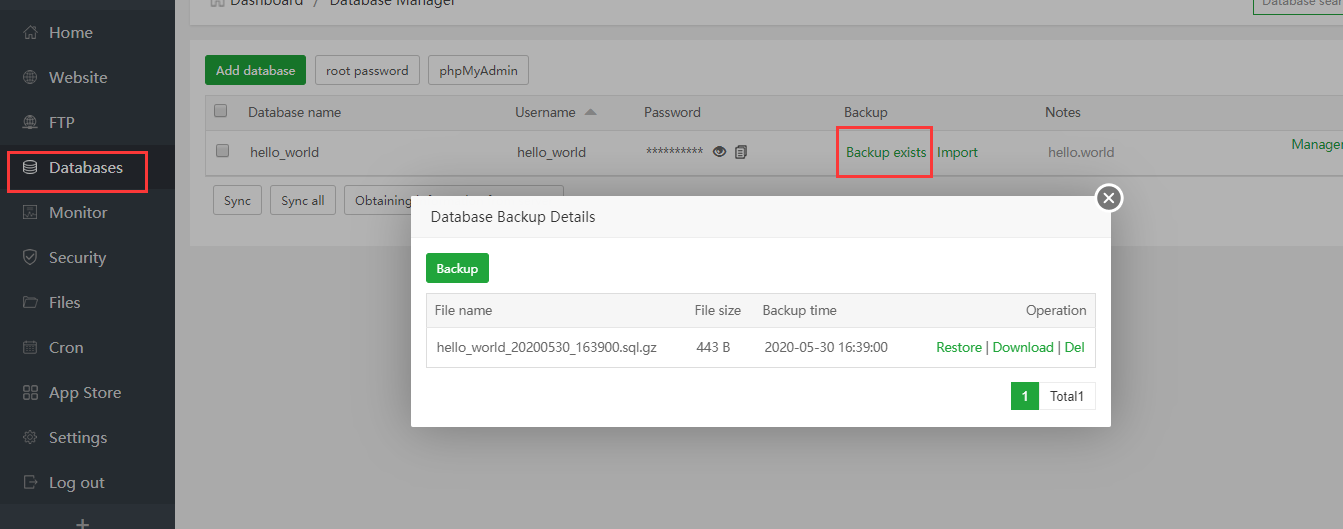
In the Database session, find the Backup column.
Click on Backup exists, then click the Backup button in the pop-up.
Automatic backup
In the Database session, find the Backup column.
Click on Backup exists, then click the Backup button in the pop-up.
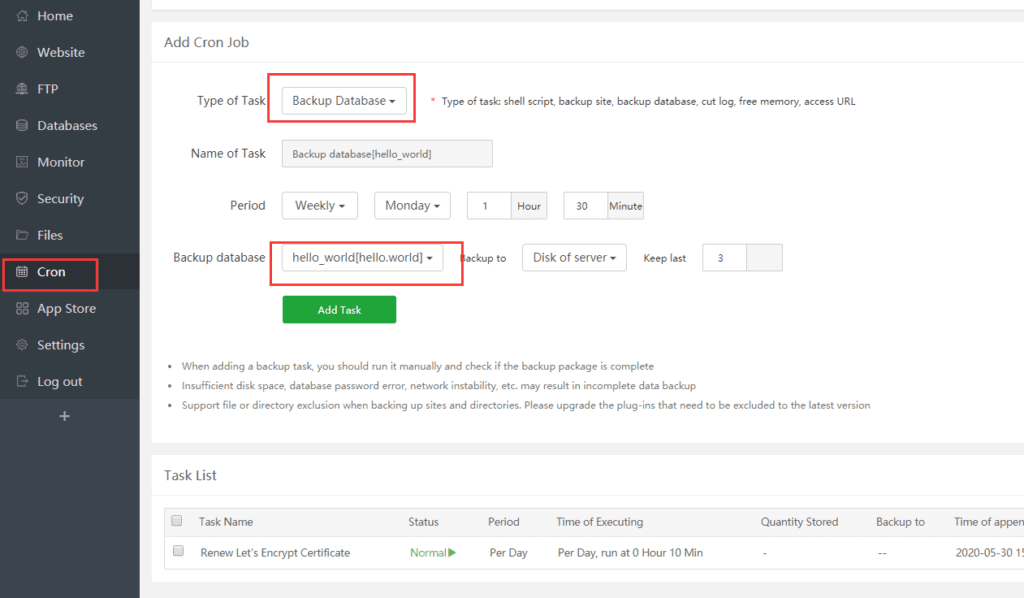
Go to the Cron session on the sidebar.
At the Type of Task field, choose Backup Database.
In the Backup database field, type the name of the database you want to back up.
Click on the Add Task button.
4. Restore & Import
Restore
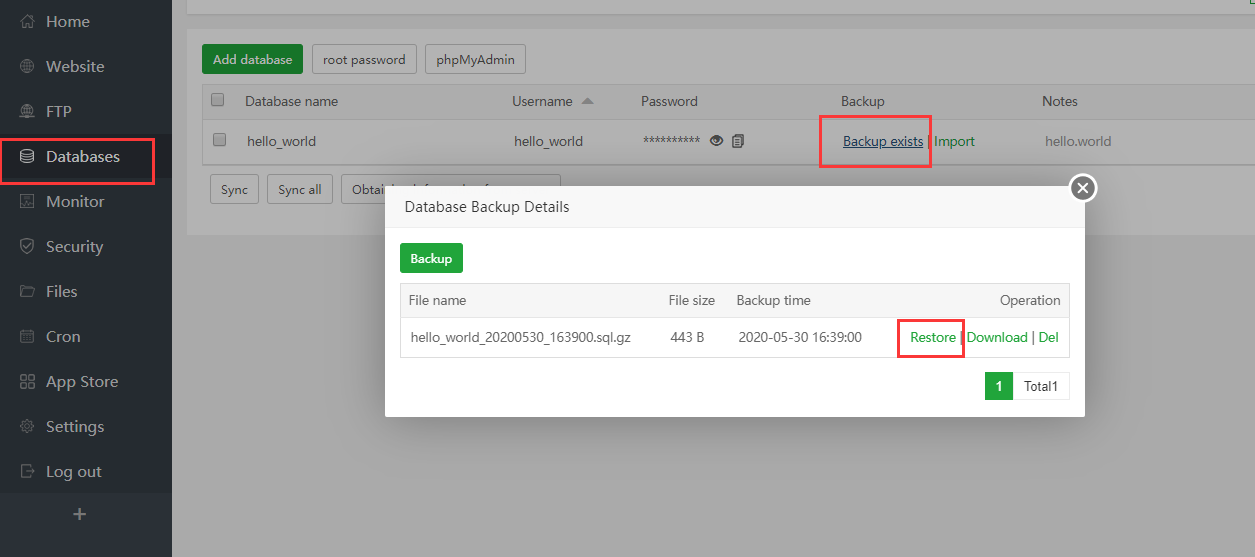
In the Database session, find the Backup column.
Click on Backup exists to show the Database Backup Details pop-up.
Find the Operation column, and click on Restore.
Import
In the Database session, find the Backup column.
Click on Import to show a pop-up.
Click on Upload from local.
Side facts
You have the option of uploading locally or restoring the backed-up files.
By default, the database is located in /www/backup/database.
All of the backup imports above make use of mysqldump.
The imported sql file’s format must be consistent with the standard. If you utilize the sql file exported by phpmyadmin.
Information such as the version code may be missing, preventing the file from being successfully imported by mysqldump.
- If you are unable to import normally, you can use phpmyadmin to import.
5. Permission Management
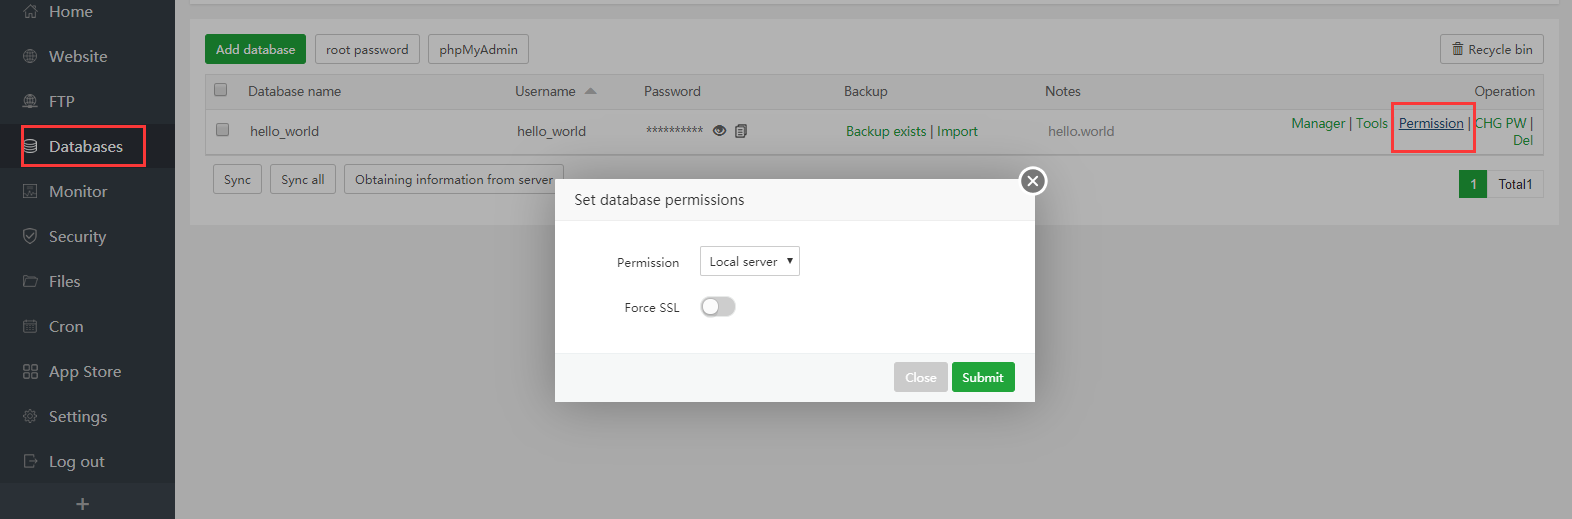
In the Database session, find the Operation column.
Click on Permission to show a pop-up
Set Permission and Force SSL, then Submit.
Additional information
Local server: Restricts access to the current database to this server.
Anyone: Anyone can connect remotely to the database.
IP address: Only specified IP addresses are supported; only one IP address is supported.
If you require external network connectivity, you must still open the MySQL port in the firewall (default 3306).
Forcing SSL: Forcing the user to use an SSL connection, which may render the client without a certificate unreachable (the certificate can be downloaded in the SSL tag of the MySQL manager)
6. Change Database Password
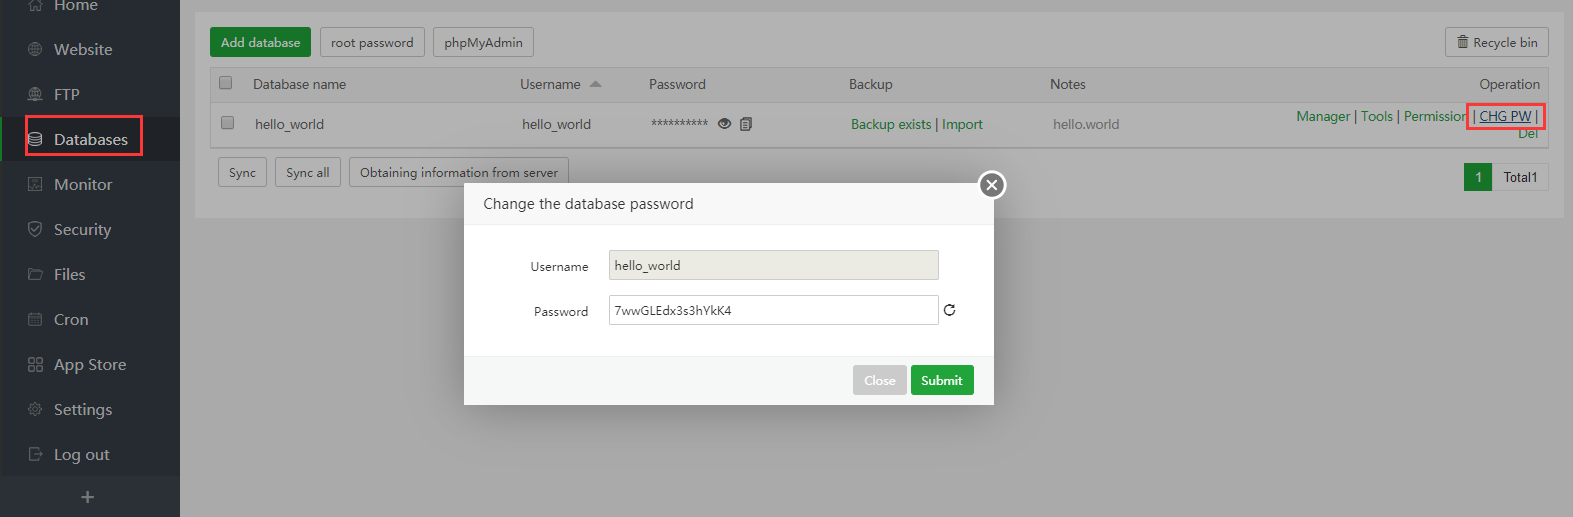
In the Database session, find the Operation column.
Click on CHG PW to show a pop-up
Type your new password, then Submit
Note: This password is not the root password; so that you need to modify the root password.
Conclusion
That’s it! That’s all the information about how to customize, manage & backup aaPanel Database. You can also check these articles about FTP management in aaPanel and monitor the sidebar menu in aaPanel as well.