

Managing email services is an essential aspect of web hosting. aaPanel, a popular control panel, makes it easy to set up and configure your own mail server. In this guide, we will walk you through the process of setting up an aaPanel Mail Server with RoundCube Webmail, ensuring efficient email management for your websites.
Without this series of mail servers, you would only be able to send emails to people whose email address domains matched your own — i.e., you could only send messages from one example.com account to another example.com account.
How to Set Up aaPanel Mail Server?
Video work through from step 1 to step 4
Step 1. Login Into 1byte’s Account And Navigate To Cloud Hosting
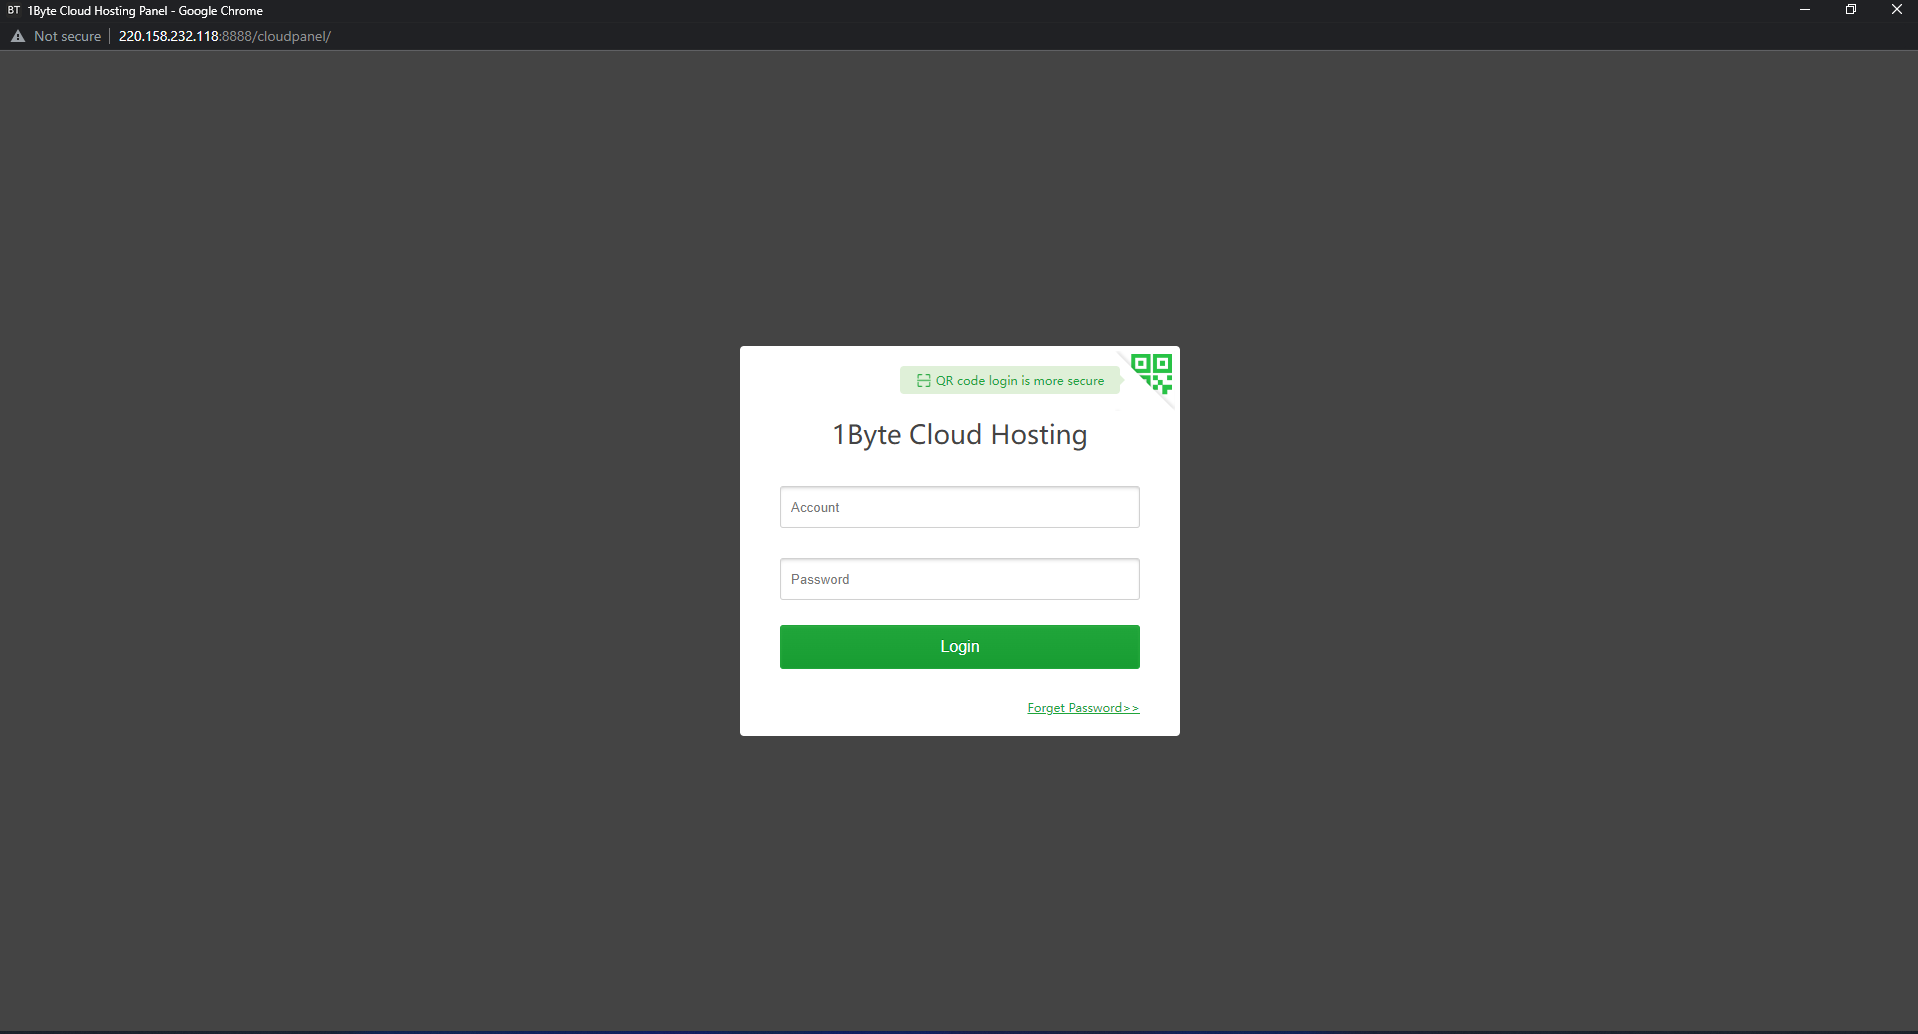
- Type your Username and Password to login into your 1Byte account
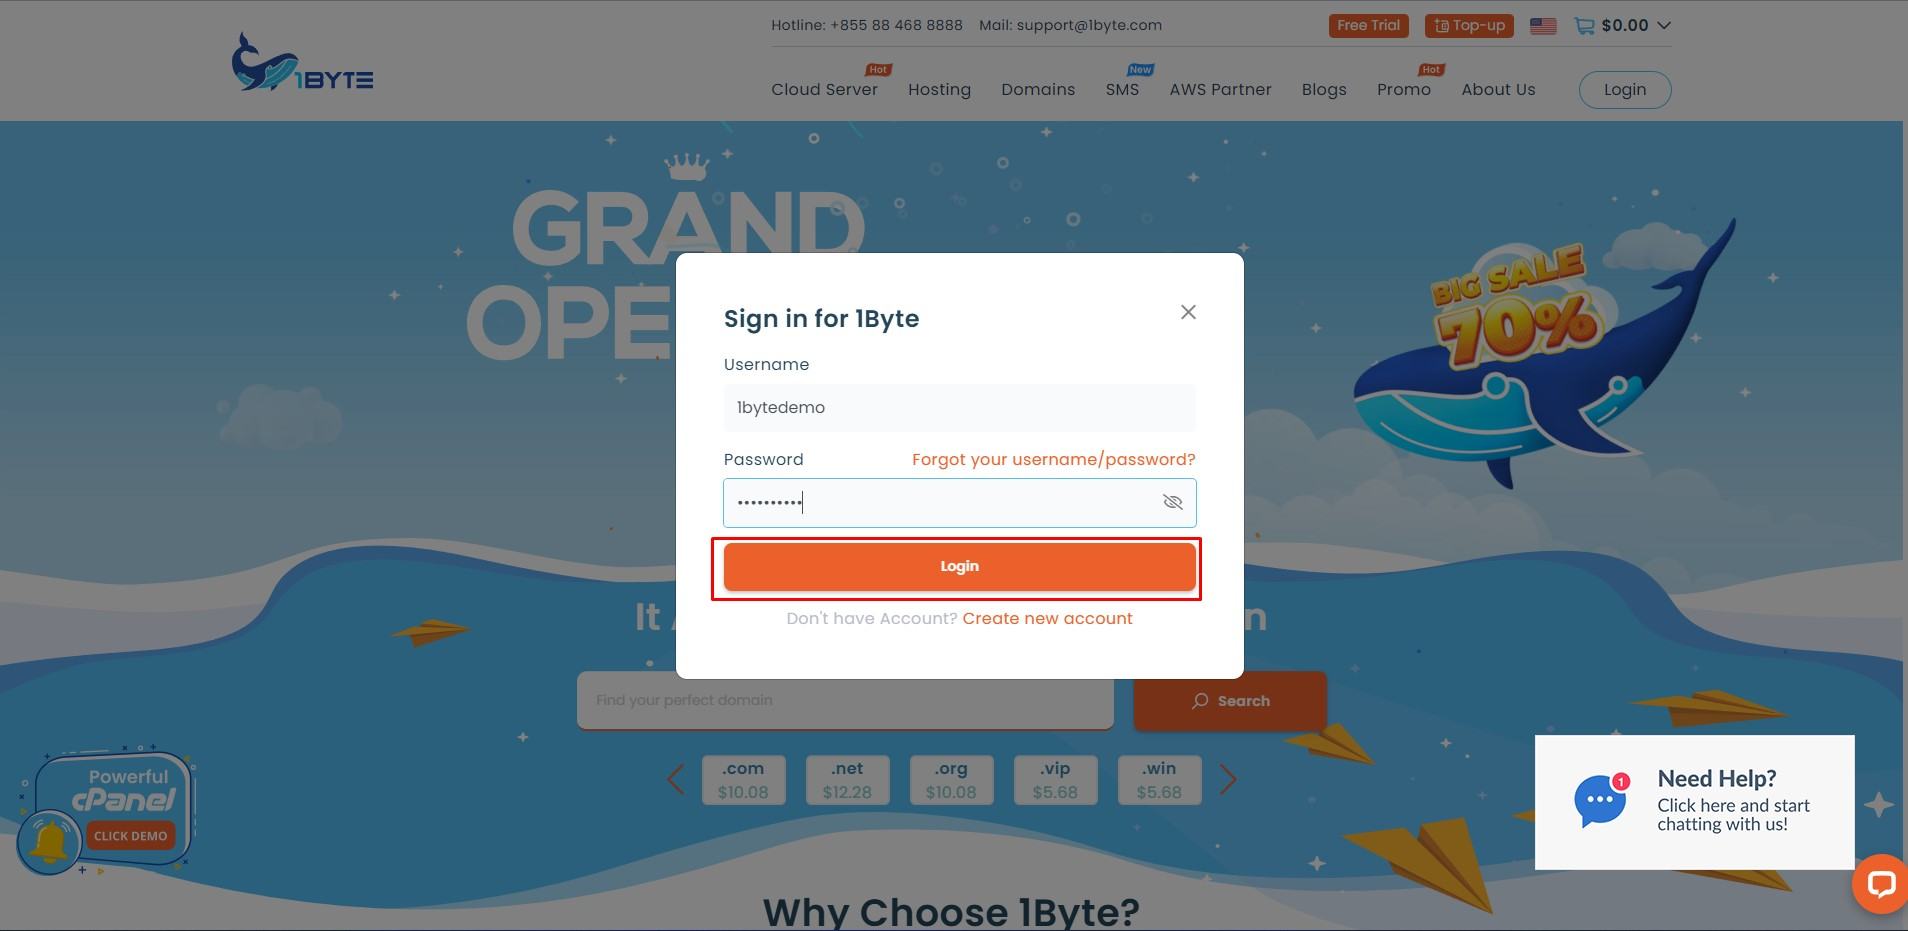
- After login, go to your Dashboard
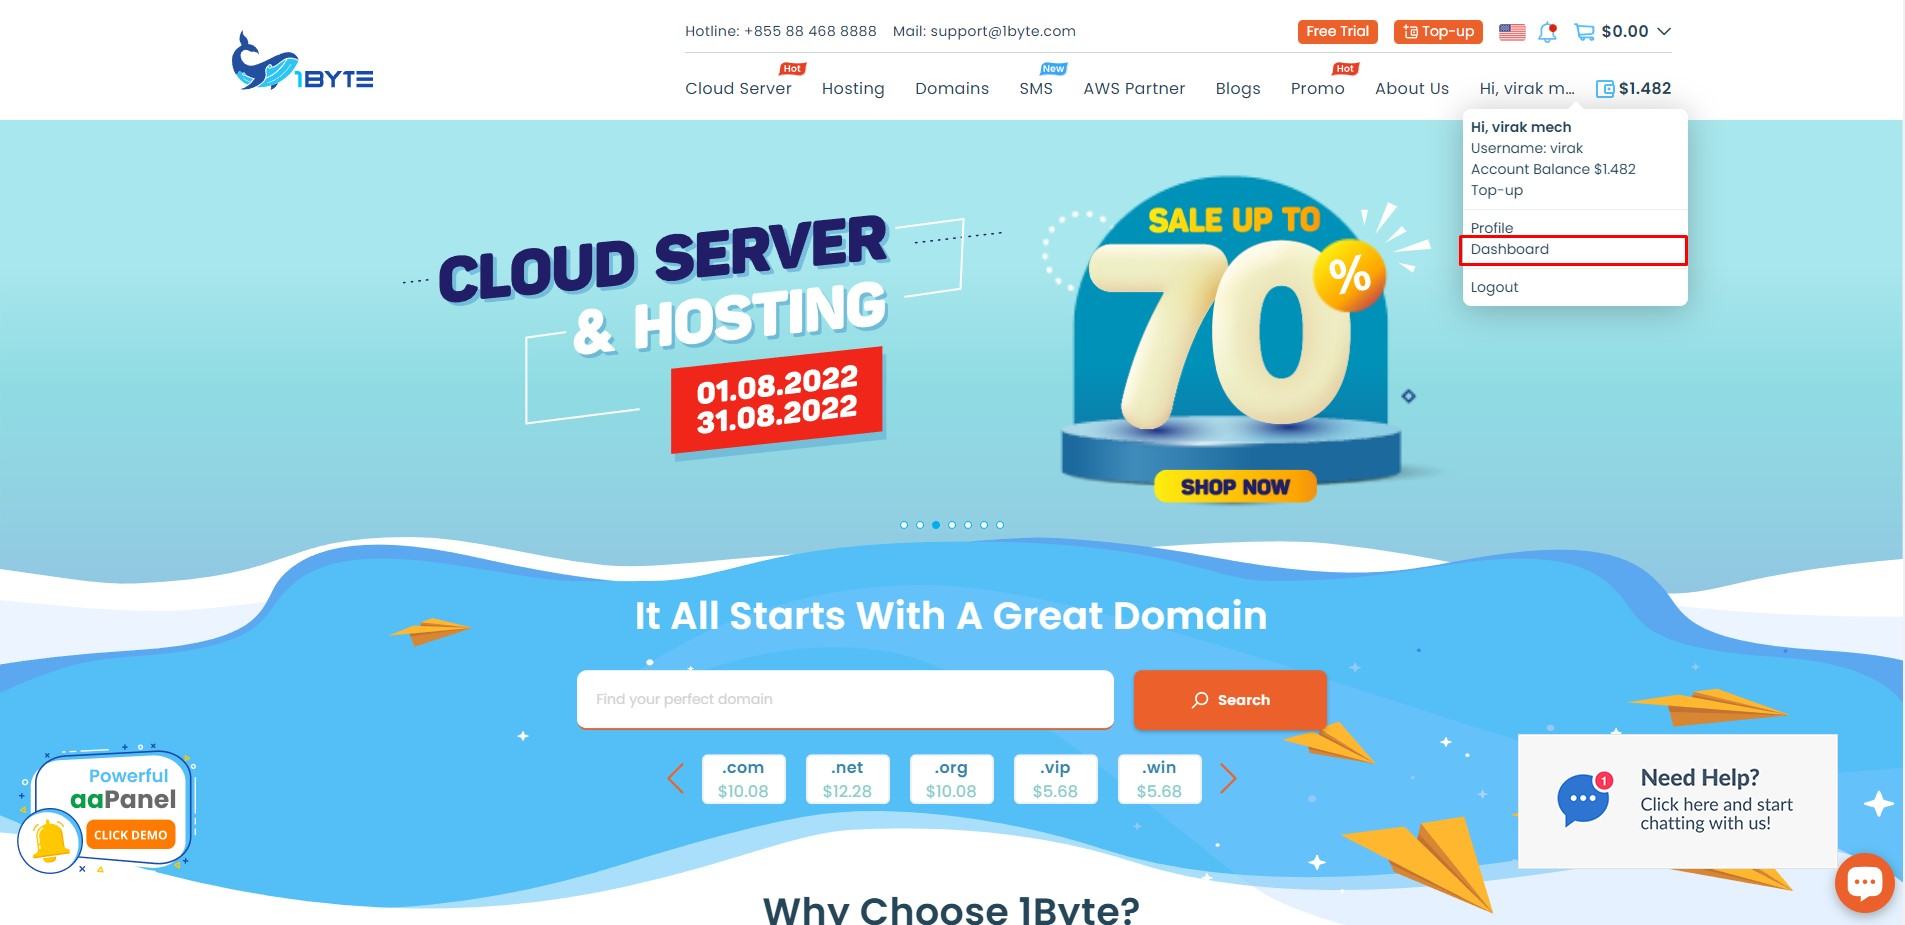
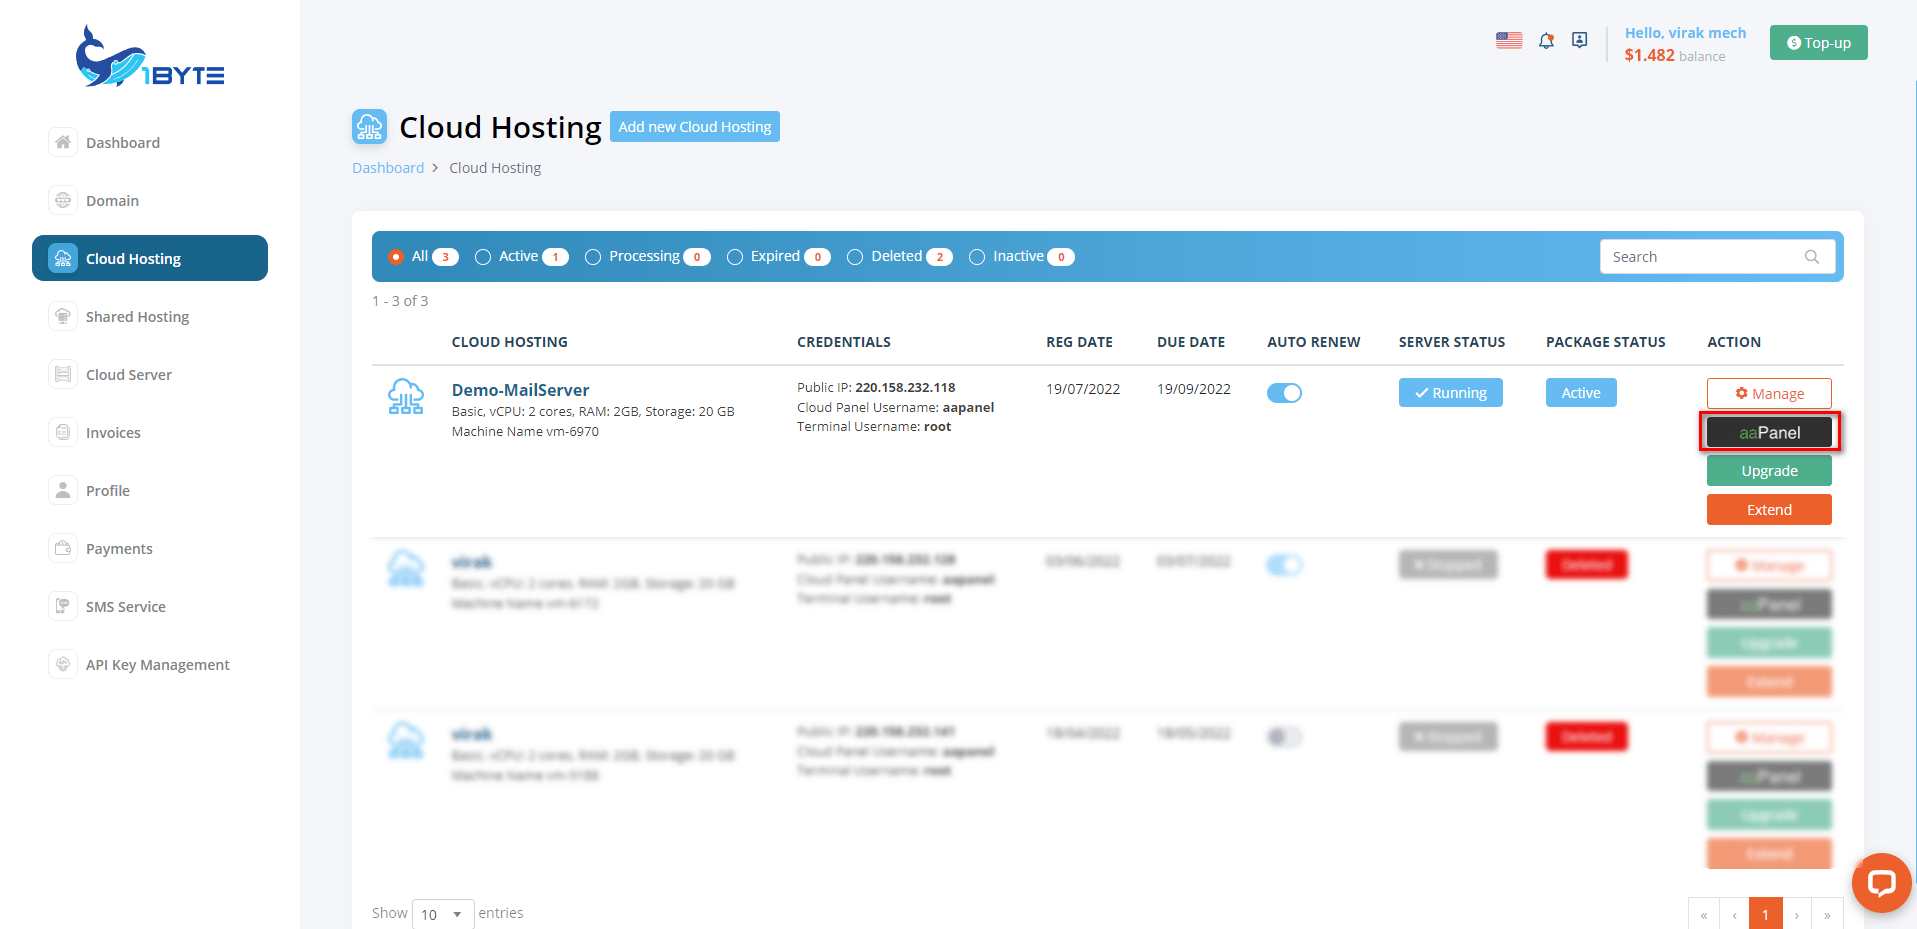
- Find Cloud Hosting in your Dashboard
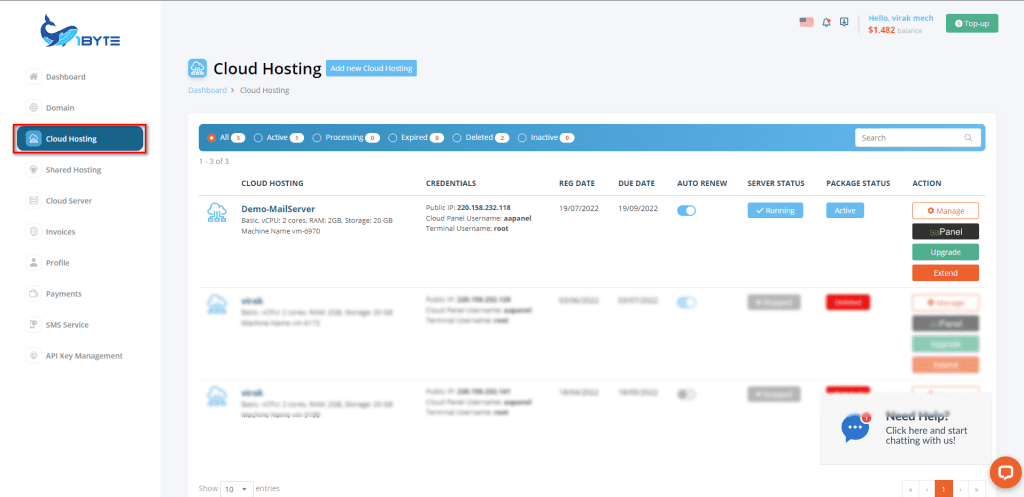
- In this demo, we will set up a mail Server on this Cloud hosting: 220.158.232.118
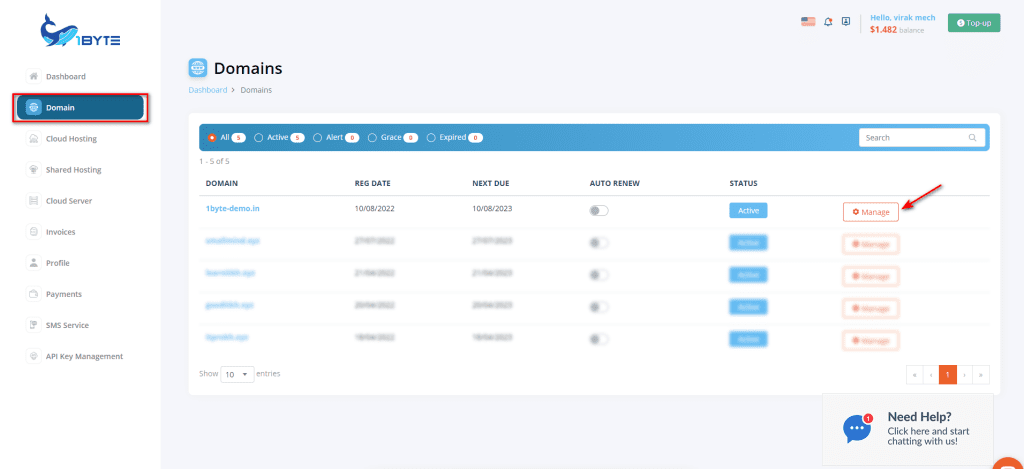
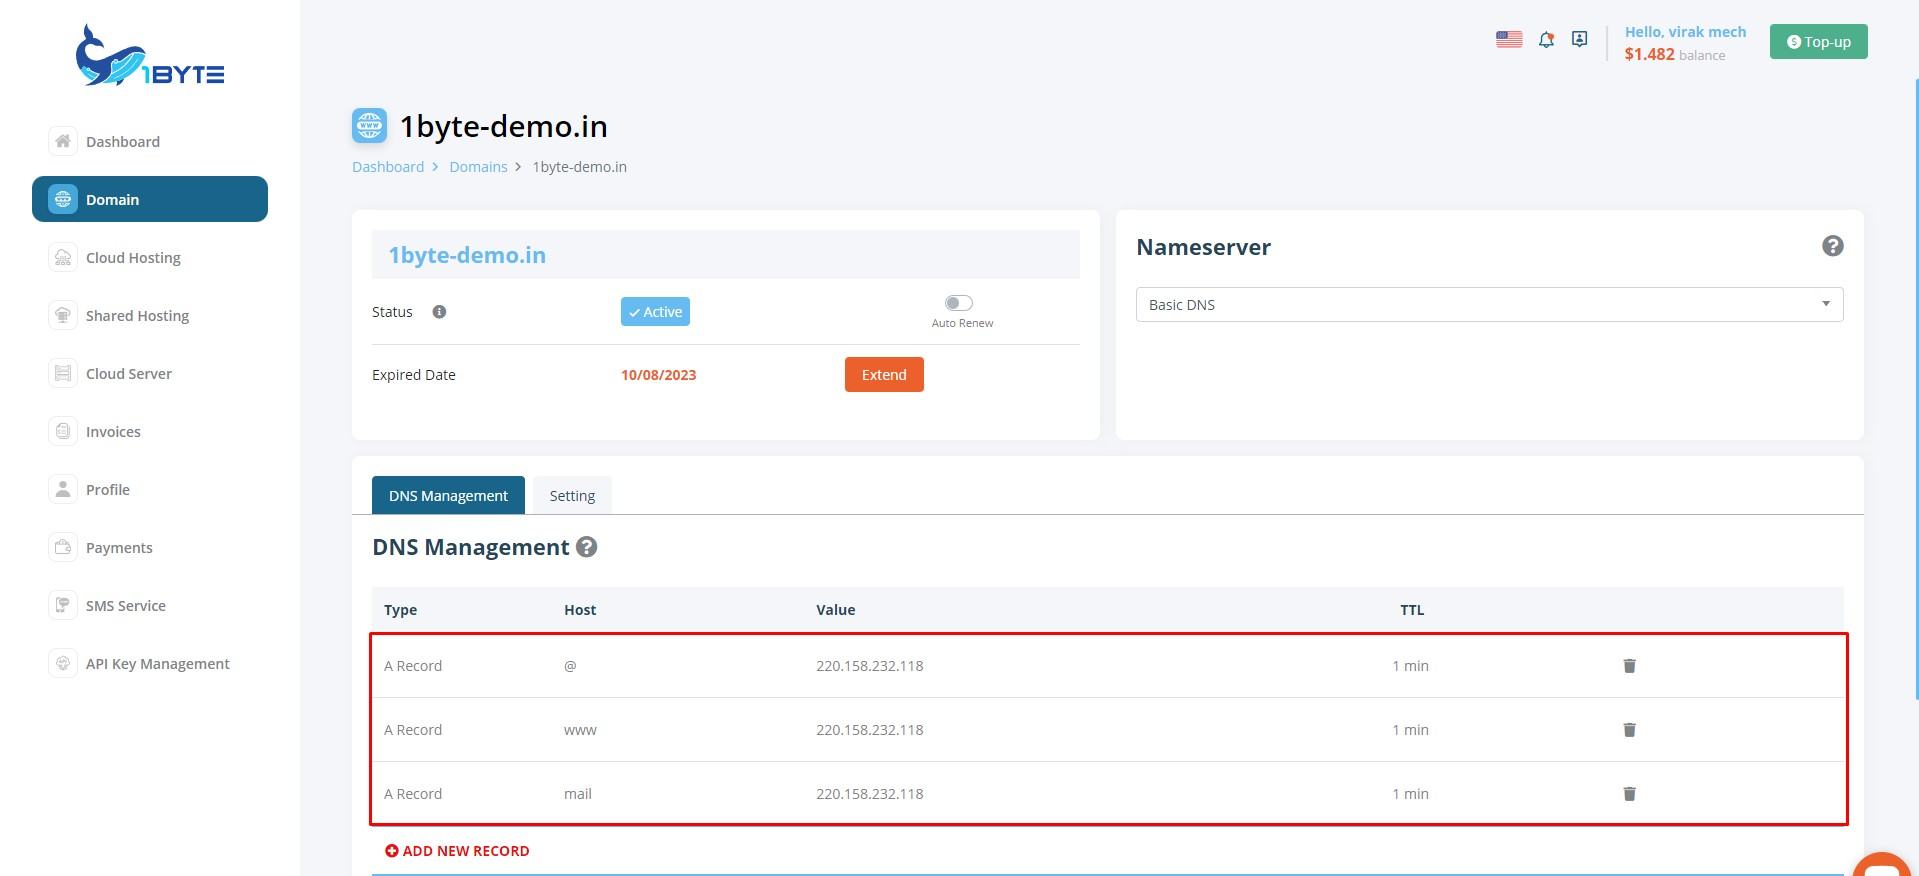
Step 2. Point Domain To The Cloud Hosting
- First, go to Domain and click Manage
- At Nameserver, choose Basic DNS

- Add a Record for this domain
- Finally, login to aaPanel to prepare for the next steps
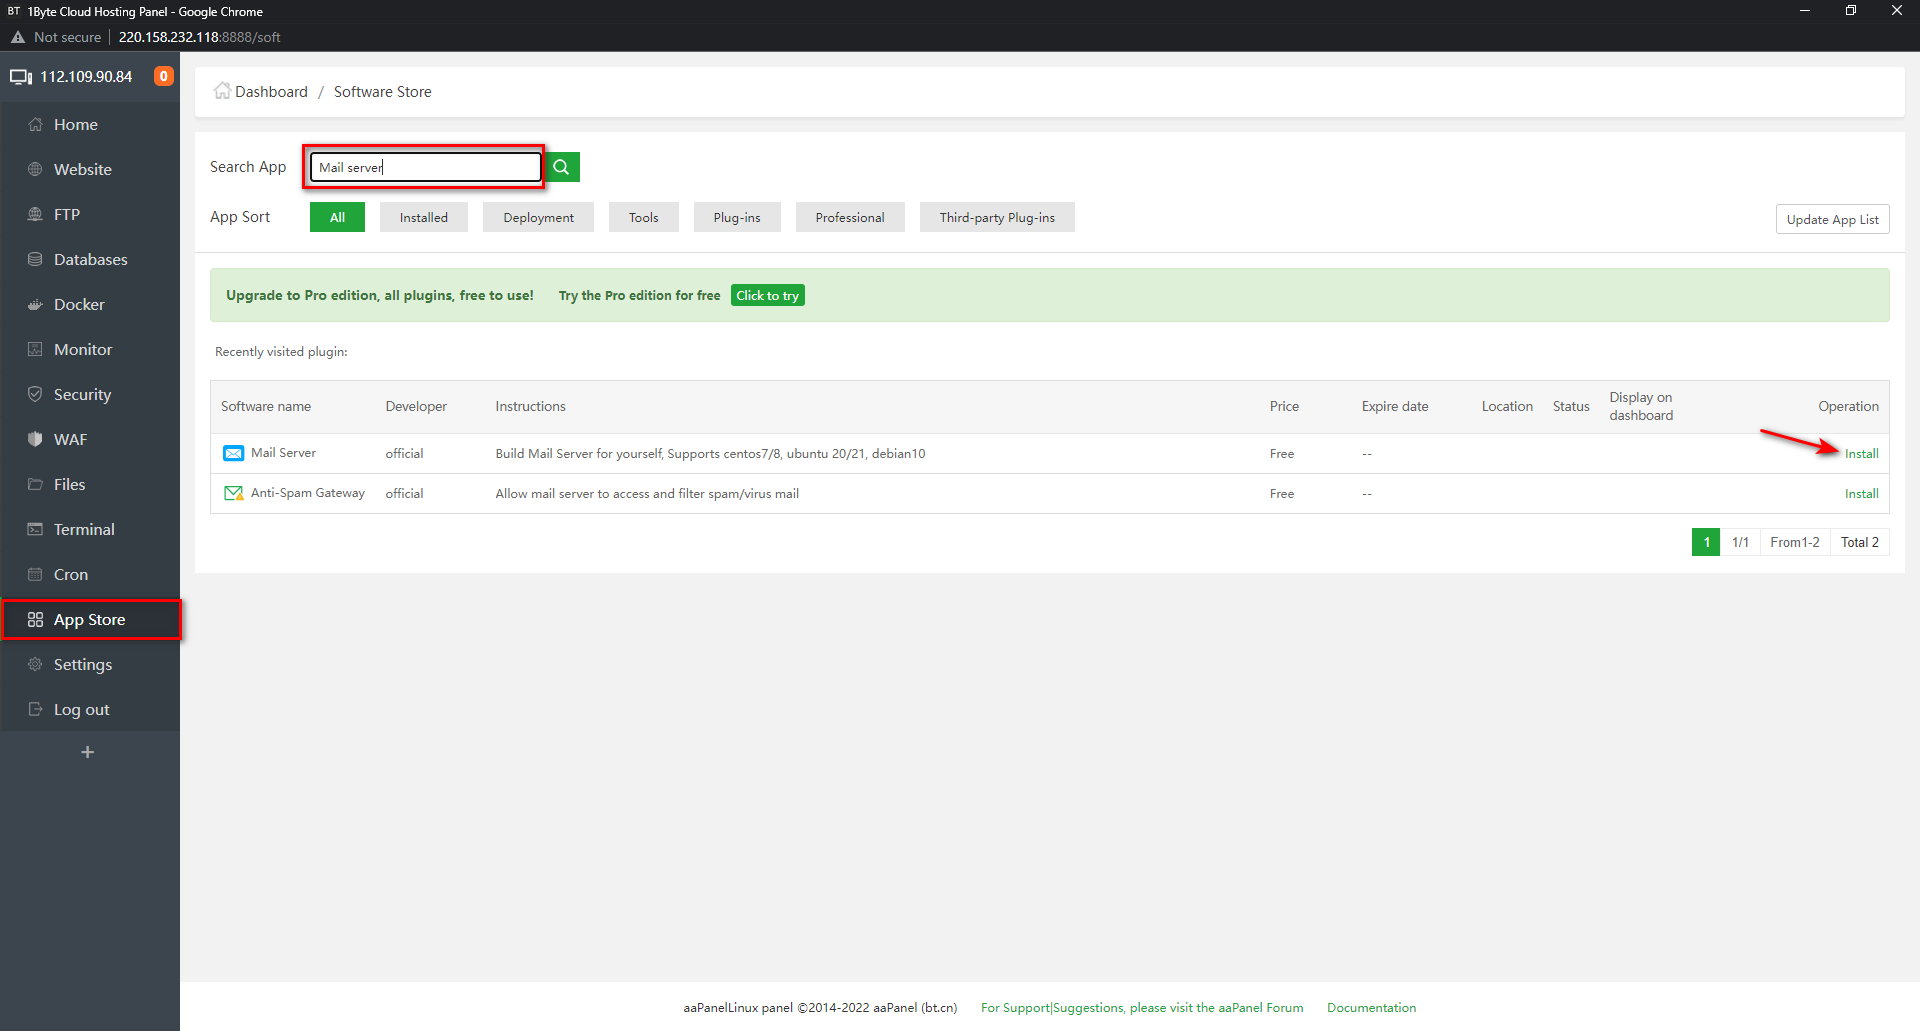
Step 3. From The App Store, Install The Following Packages/applications
3.1. Search the Keyword “Mail Server” And Install
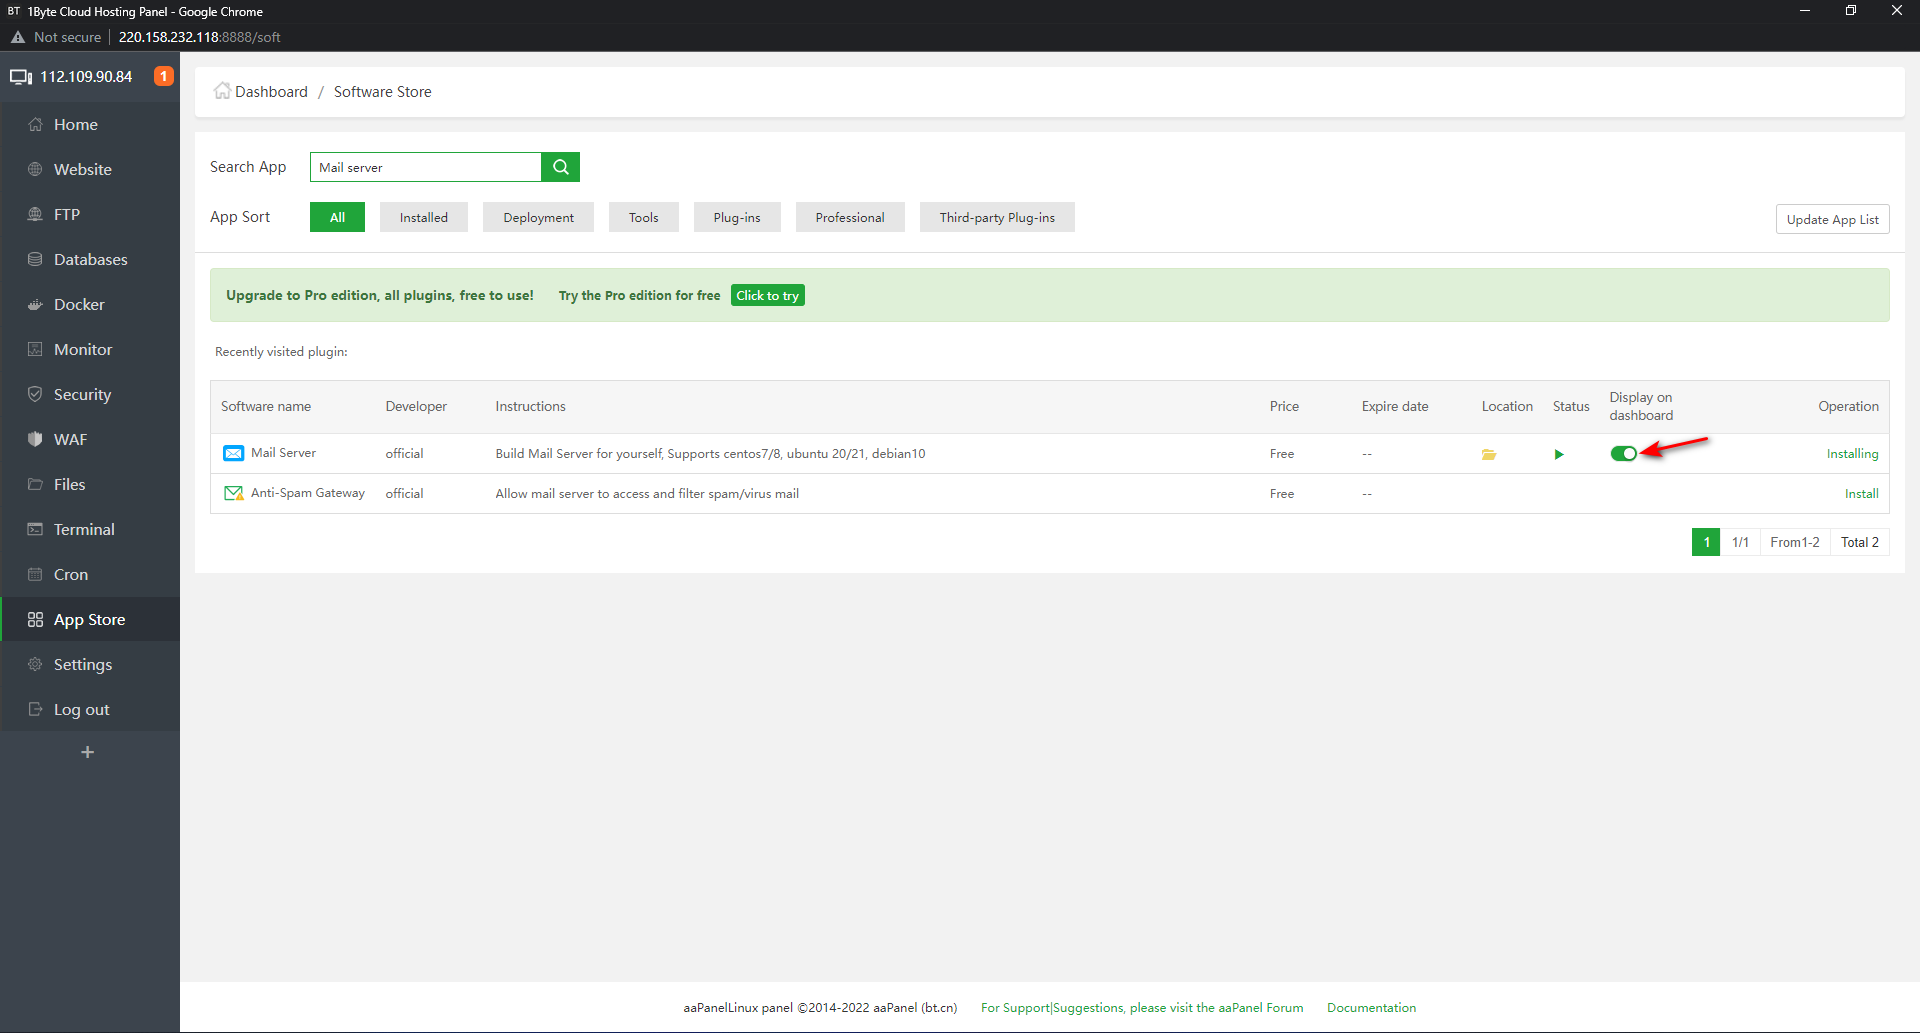
- In App Store, type Mail Server in the Search App box. Find the Operation column and click Install
- Turn on Display on the dashboard
- Next, open up Mail Server and check what the missing conditions are
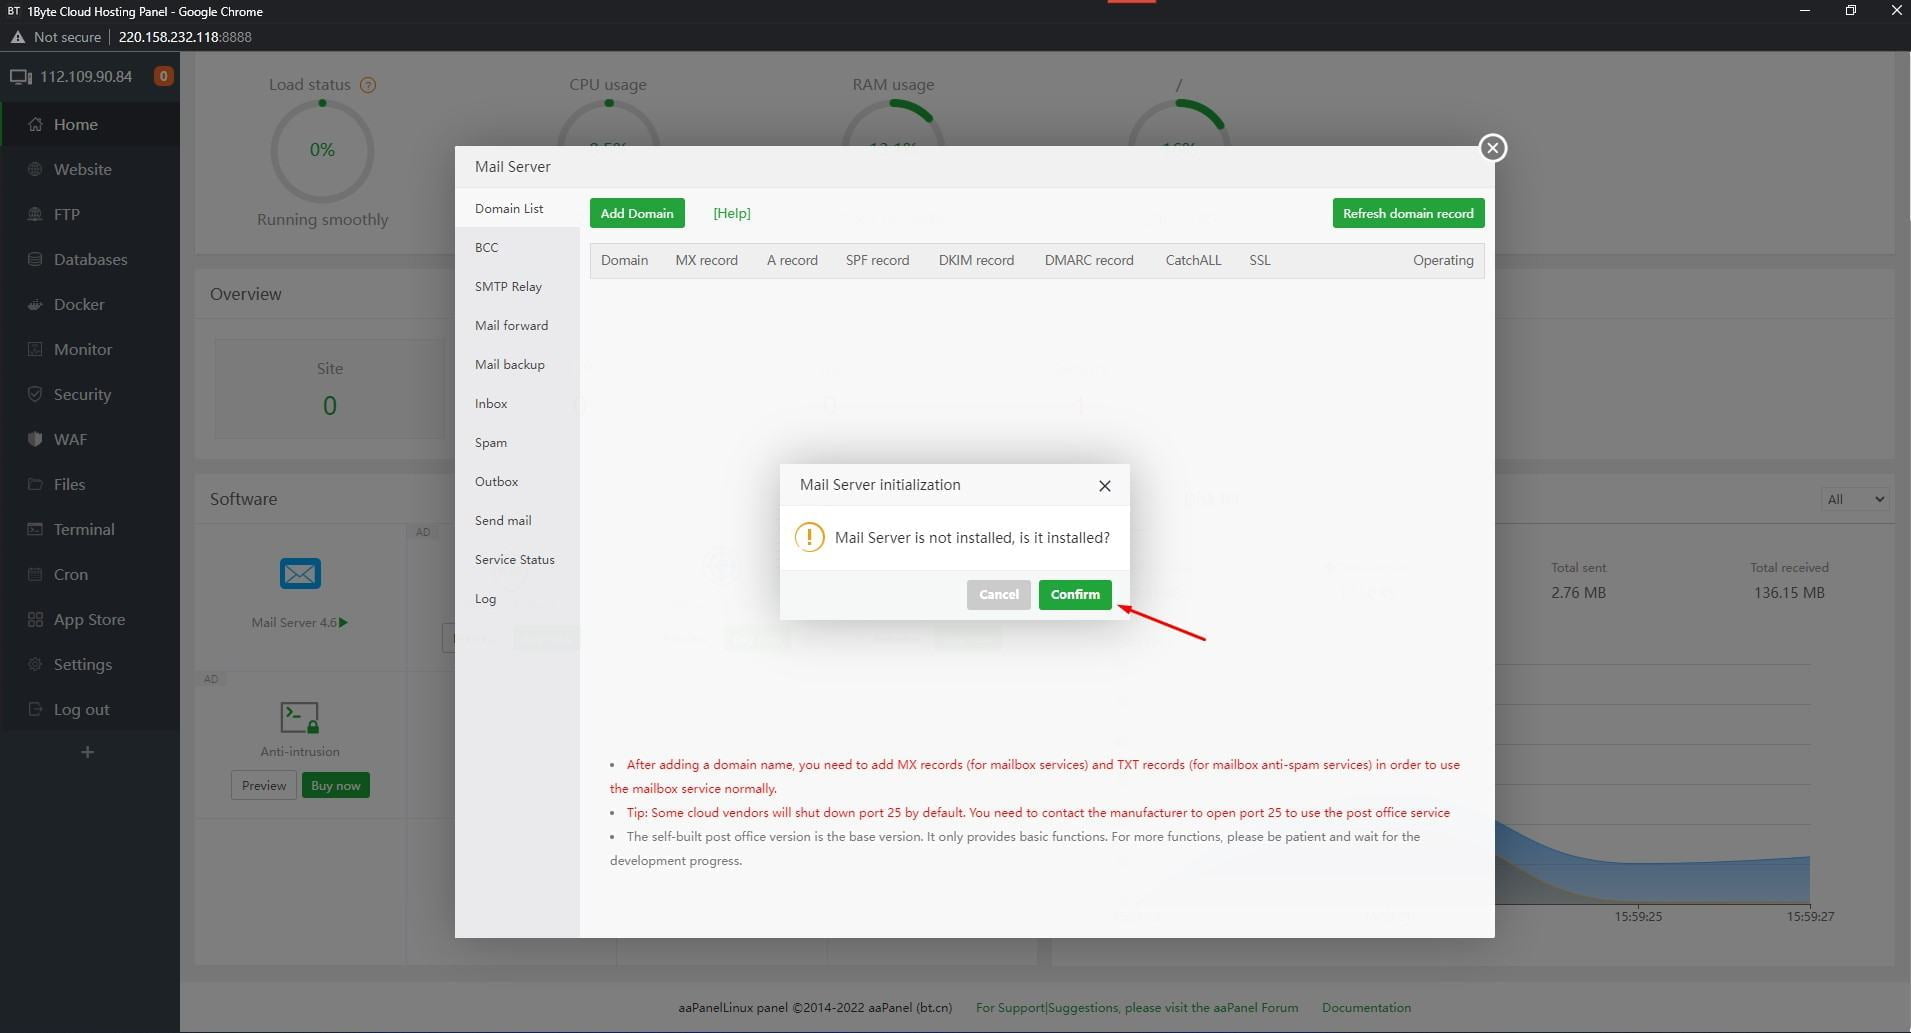
- As you can see here, Mail Server has not recognized the hostname variable
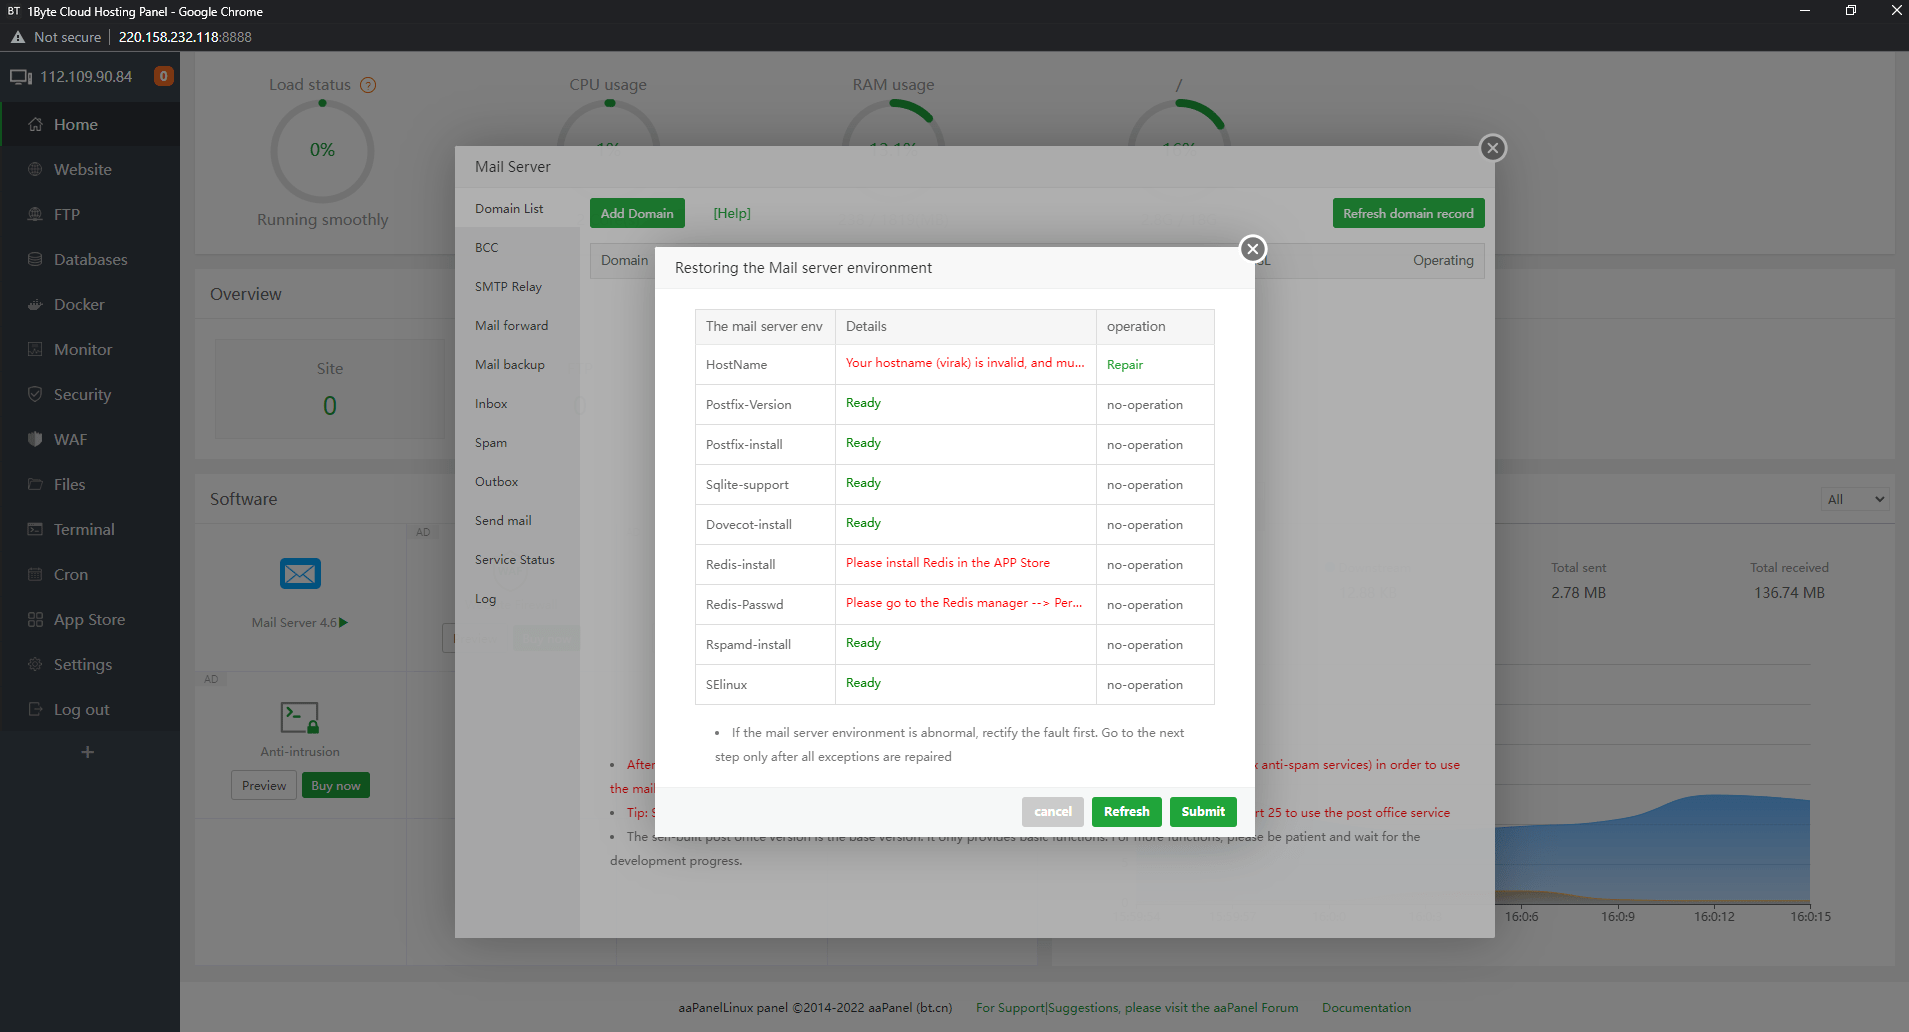
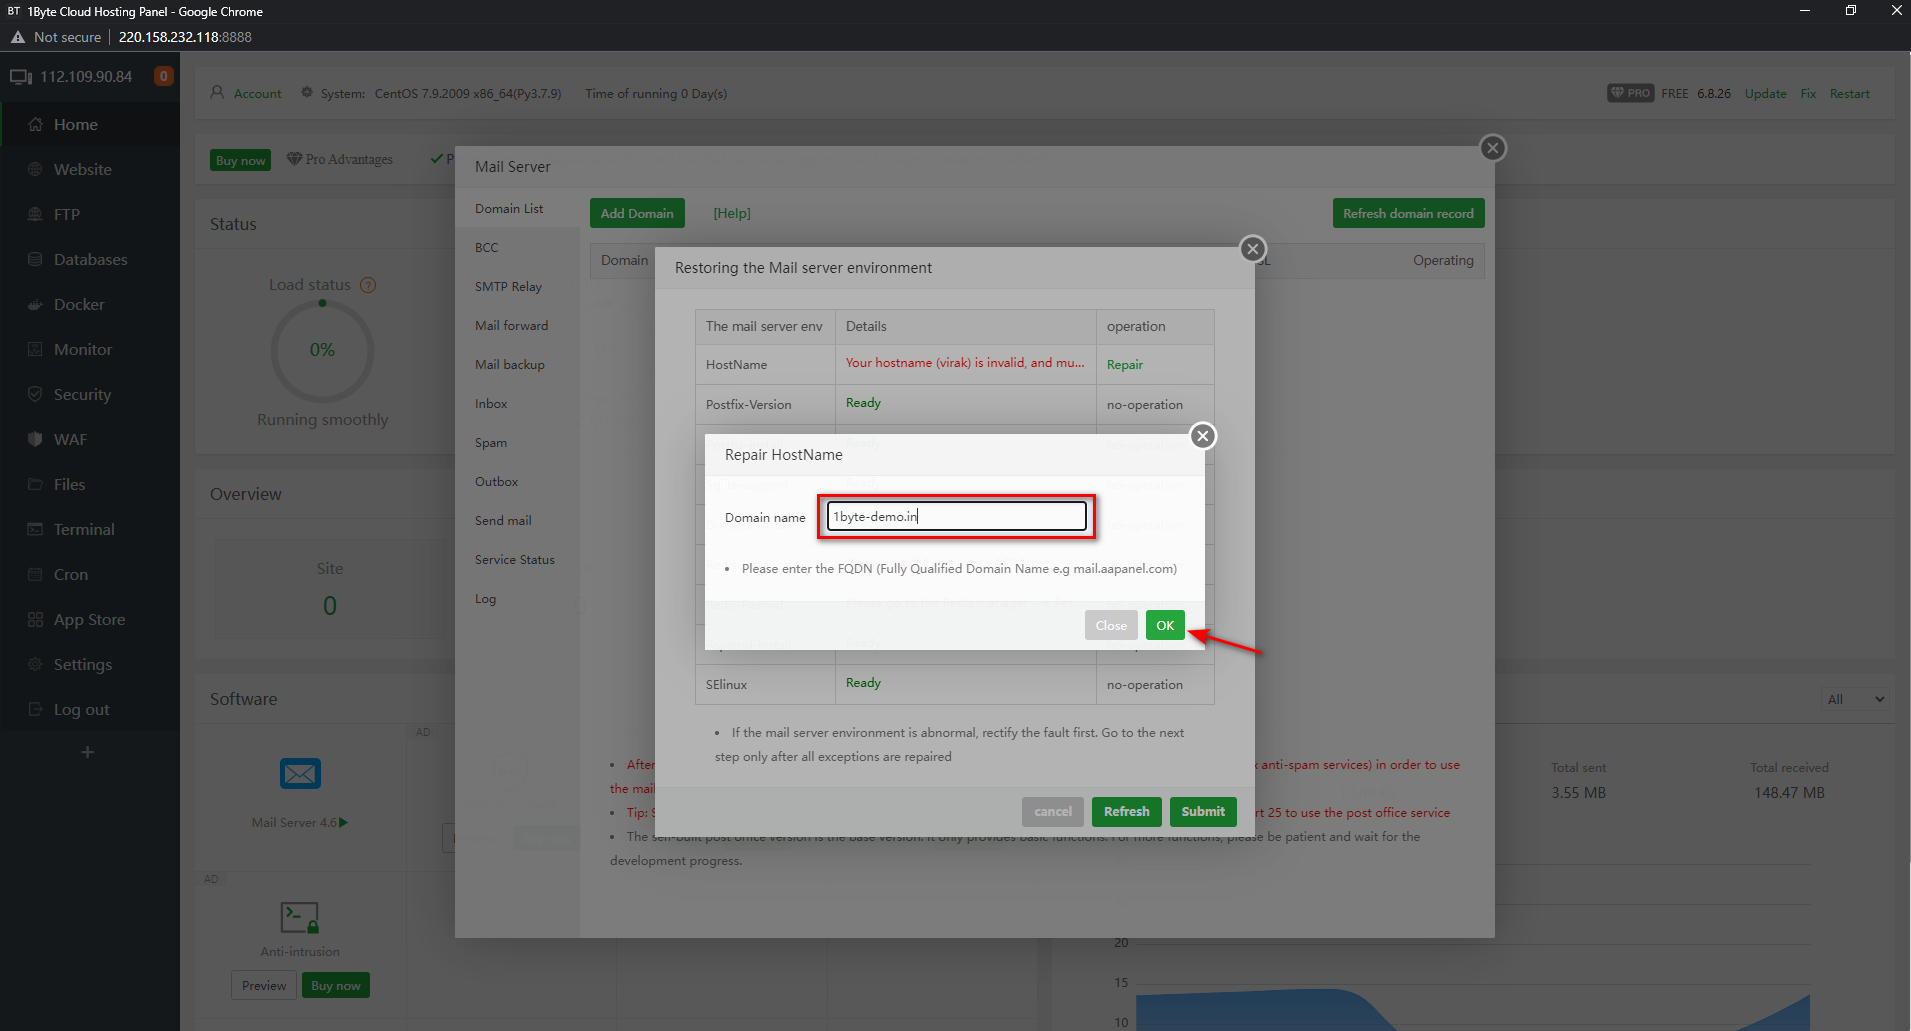
- Select Repair and enter your domain name to fix
3.2. Download “Redis” From ” App Store
Similar to Mail Server, type redis at Search app box in App Store. And click Install at Operation column.

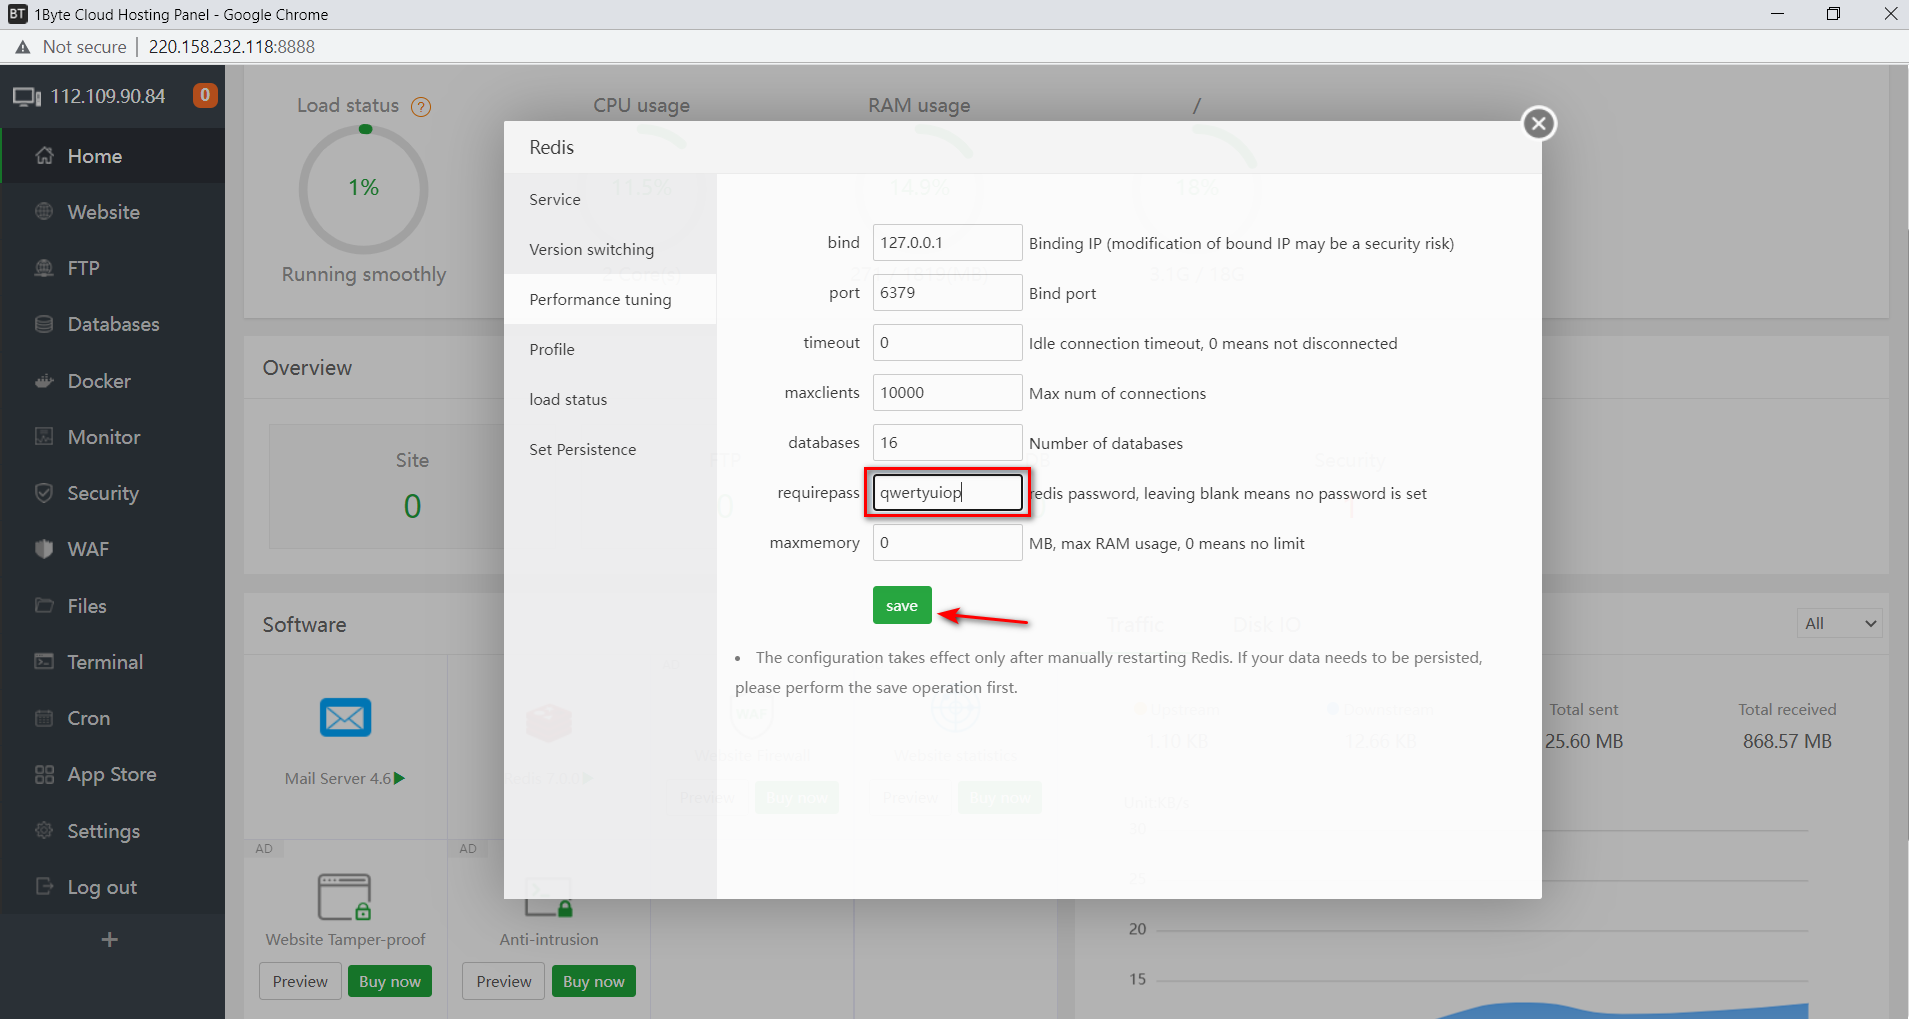
- In Performance tuning, type a password for Redis at required pass box.
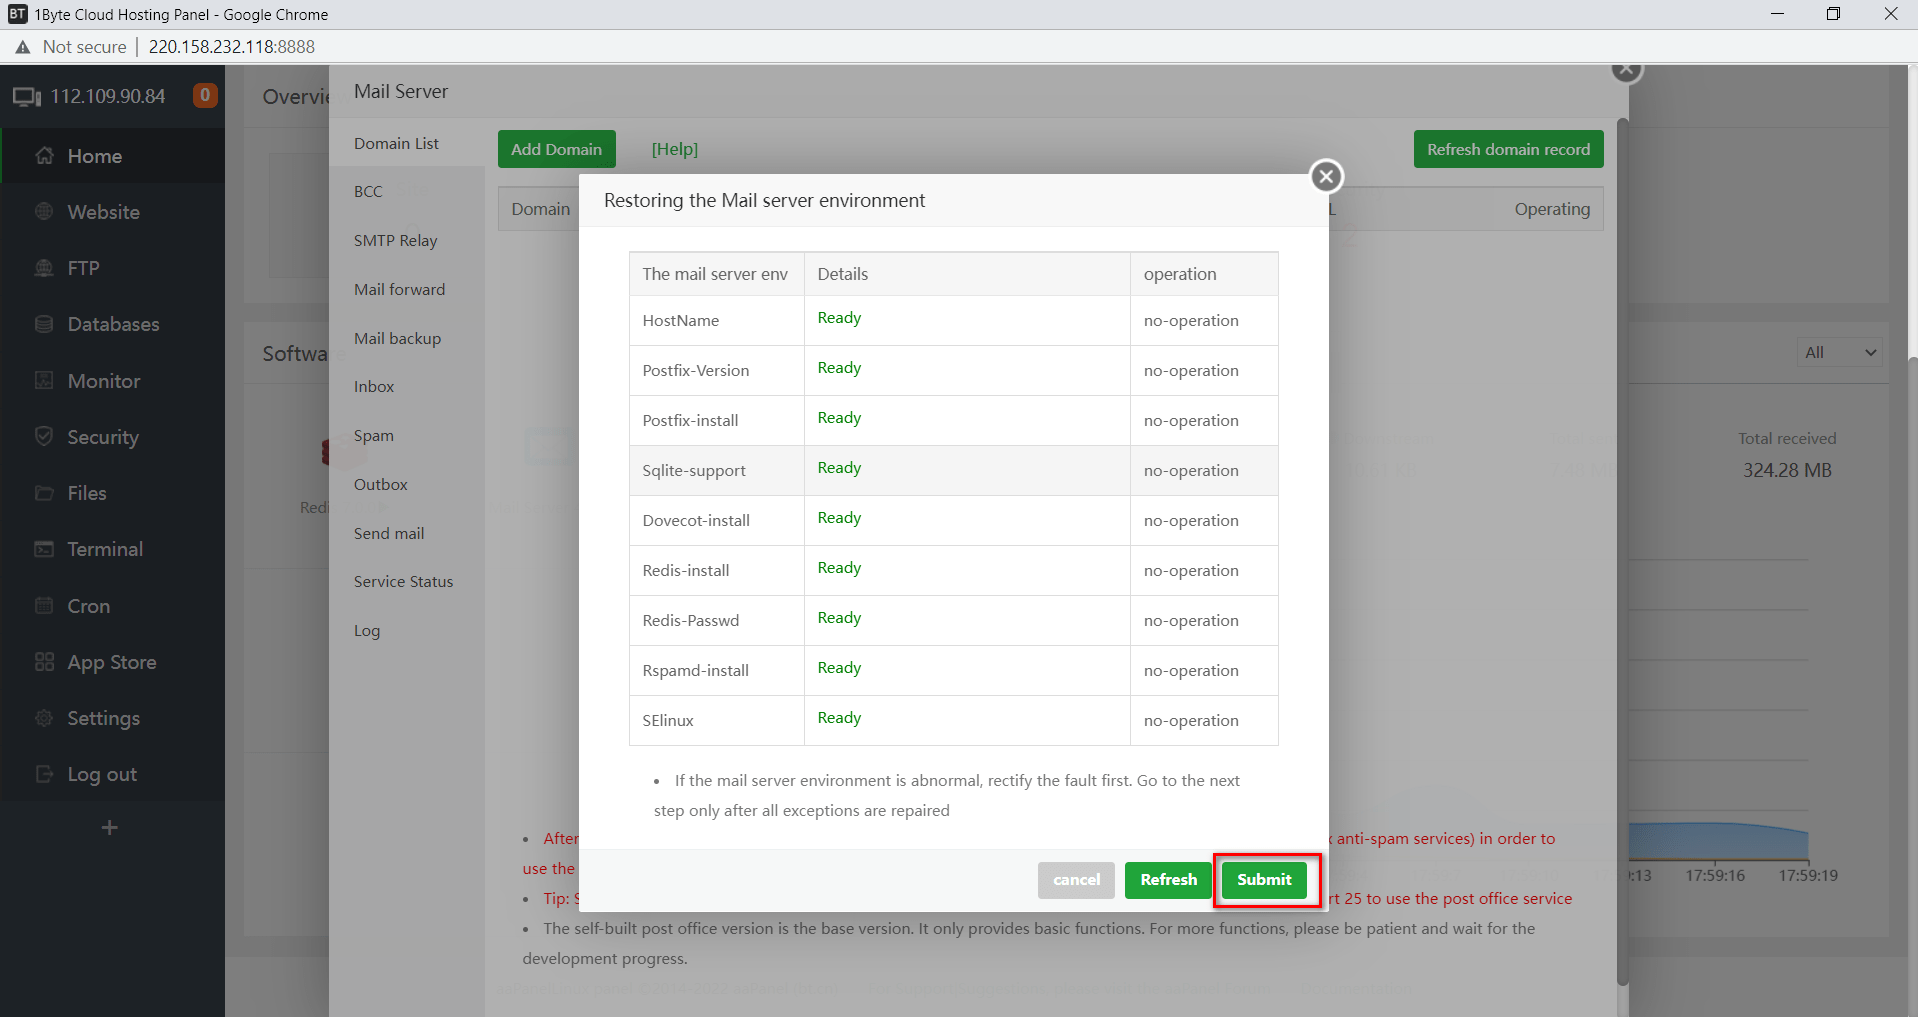
- Go back to Mail Server to check if there is anything missing.
- If everything is ready, click Submit button to proceed with the setup.
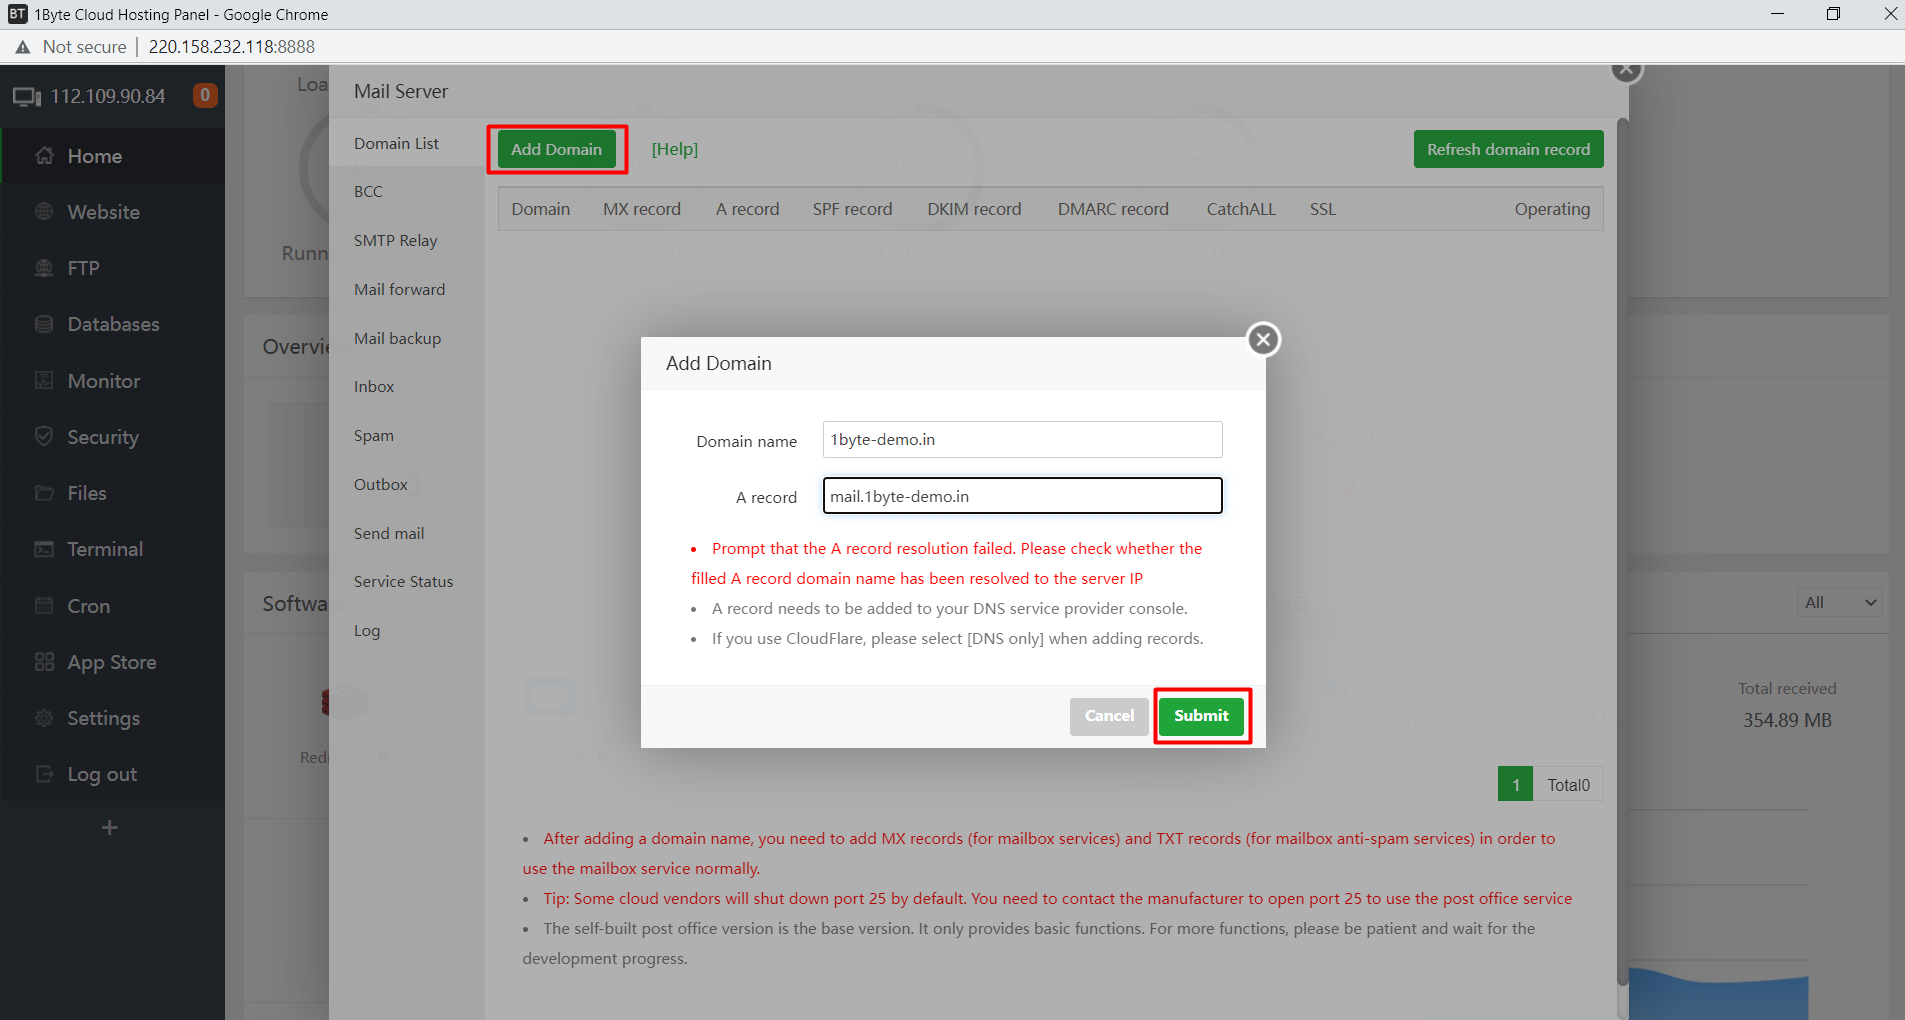
- Next, click on Add Domain in this Mail Server.
- Add the Domain name and A record, then Submit.
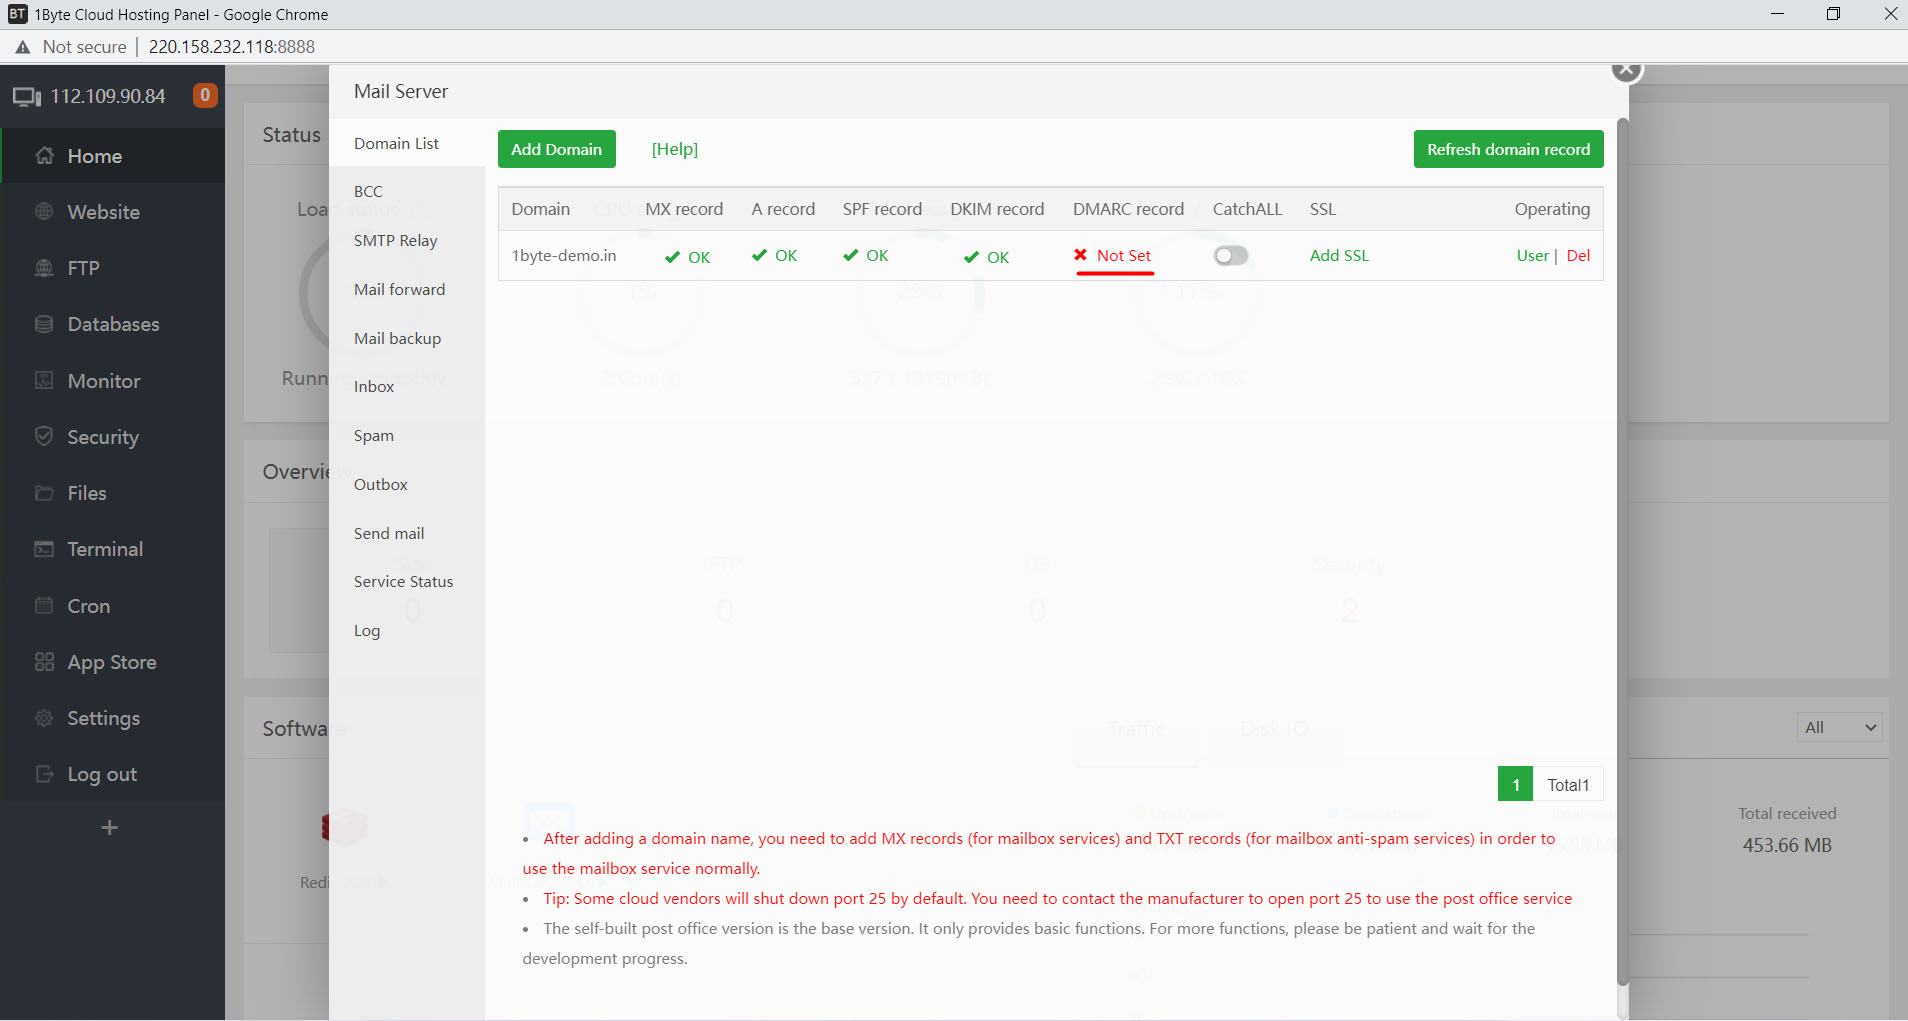
- After that you will see some missing record
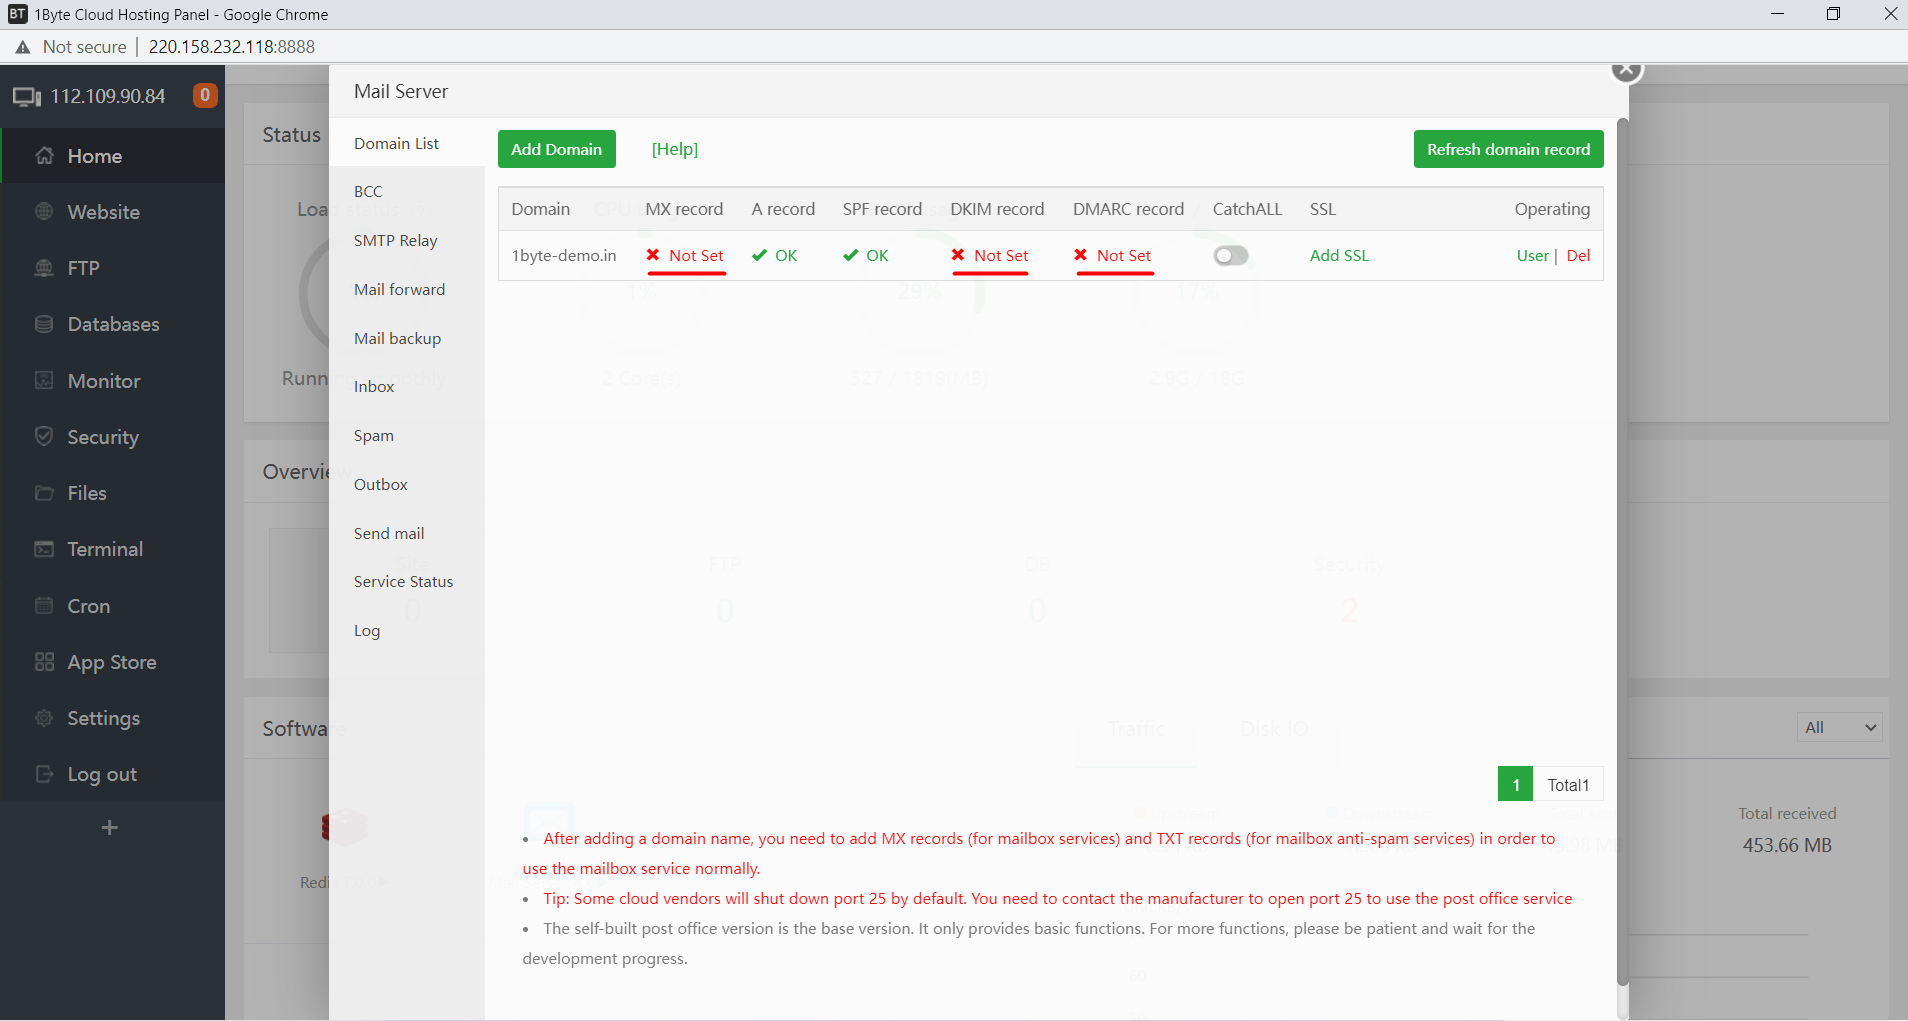
- Click on Not Set and follow the prompts to add related records
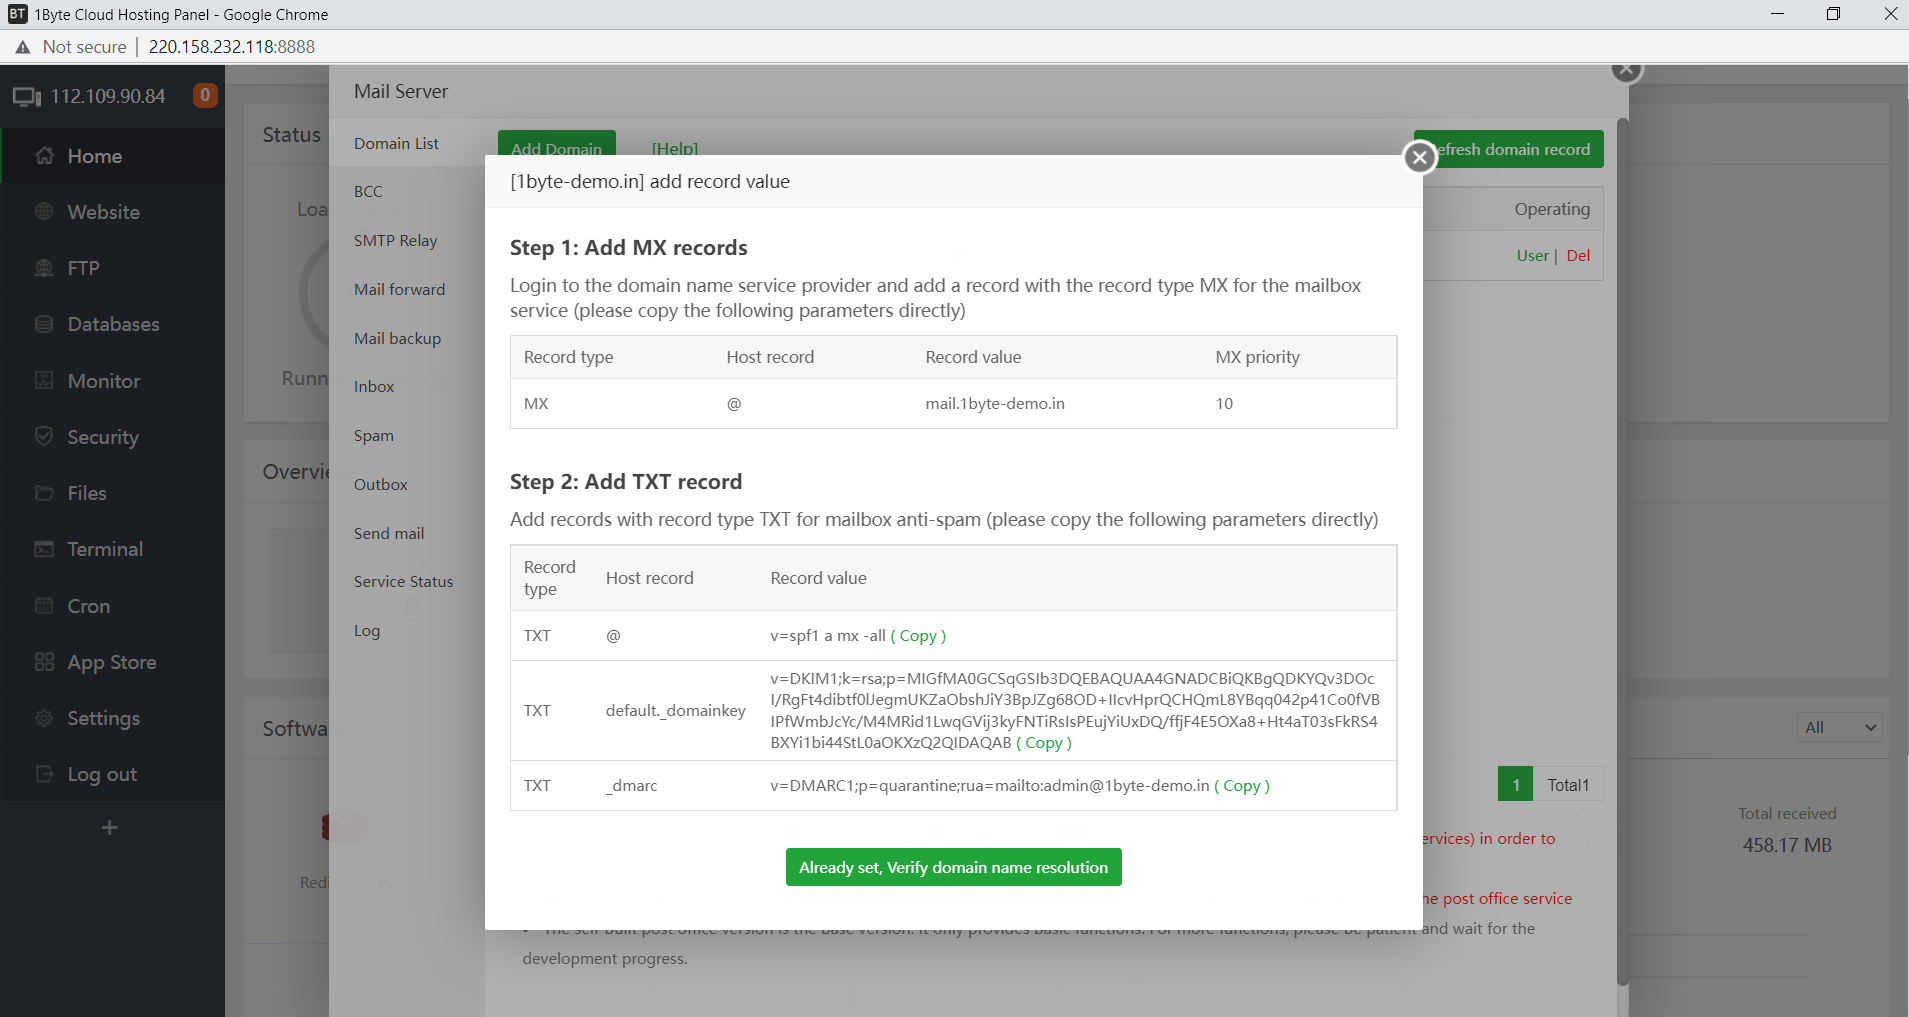
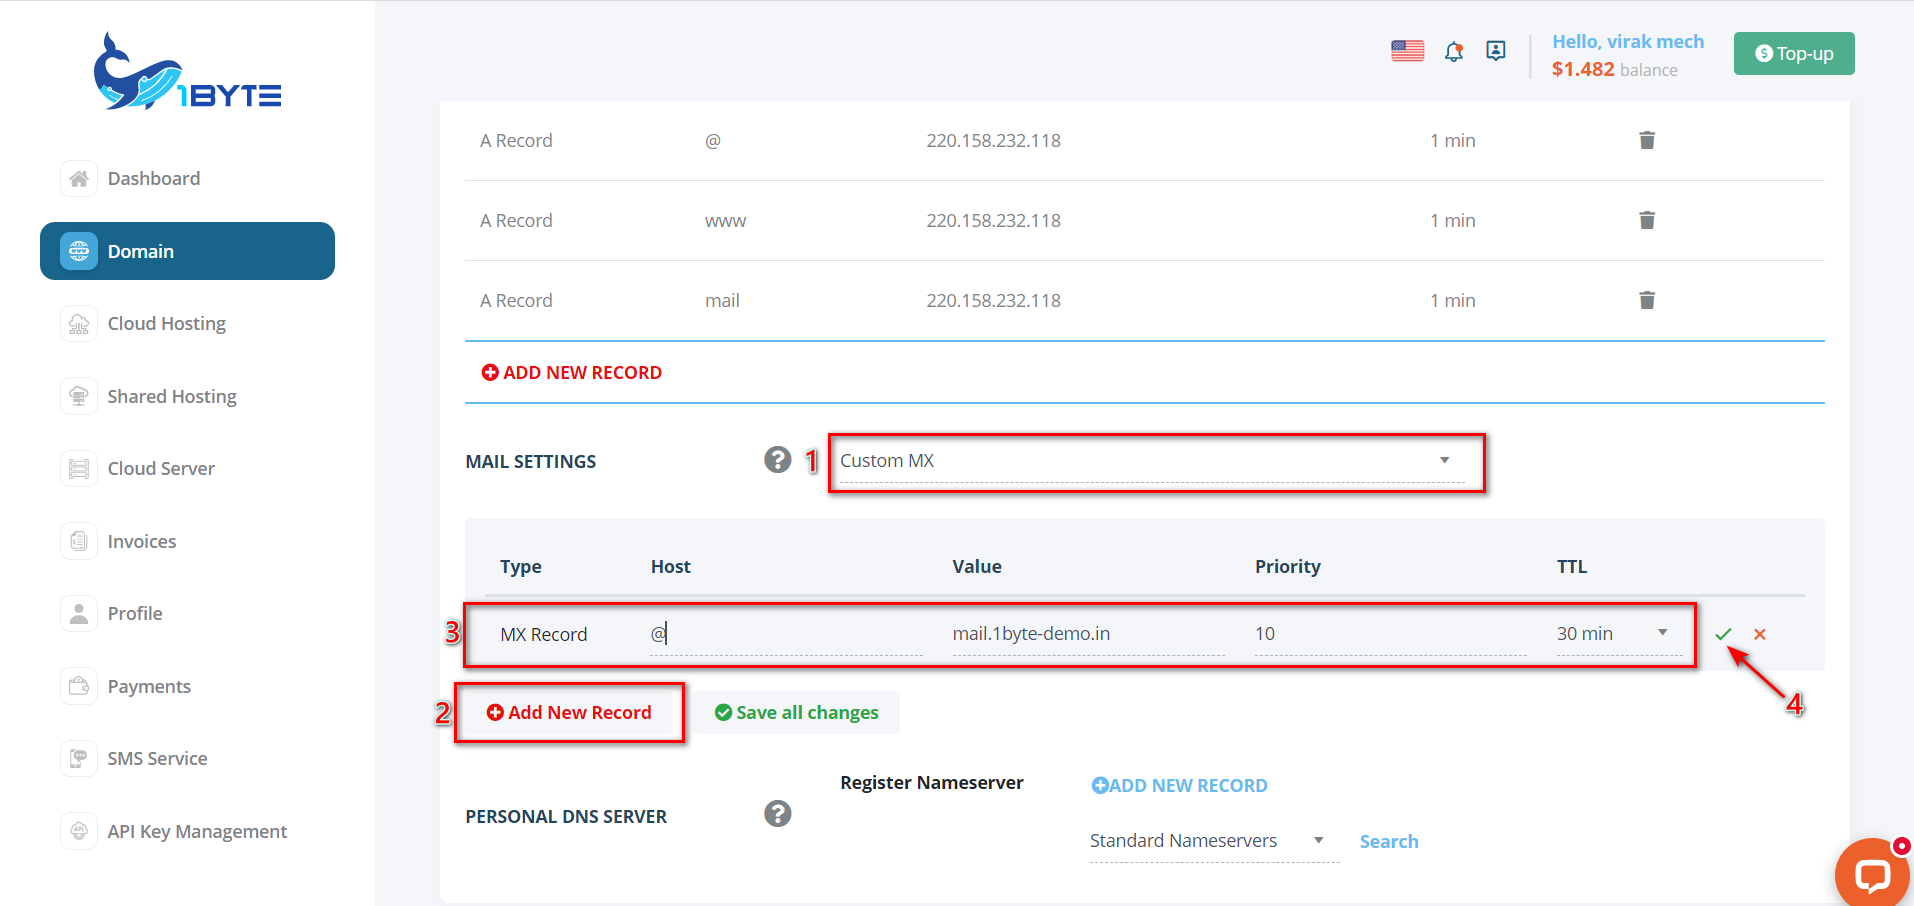
- Go to Domain Dashboard add MX Record
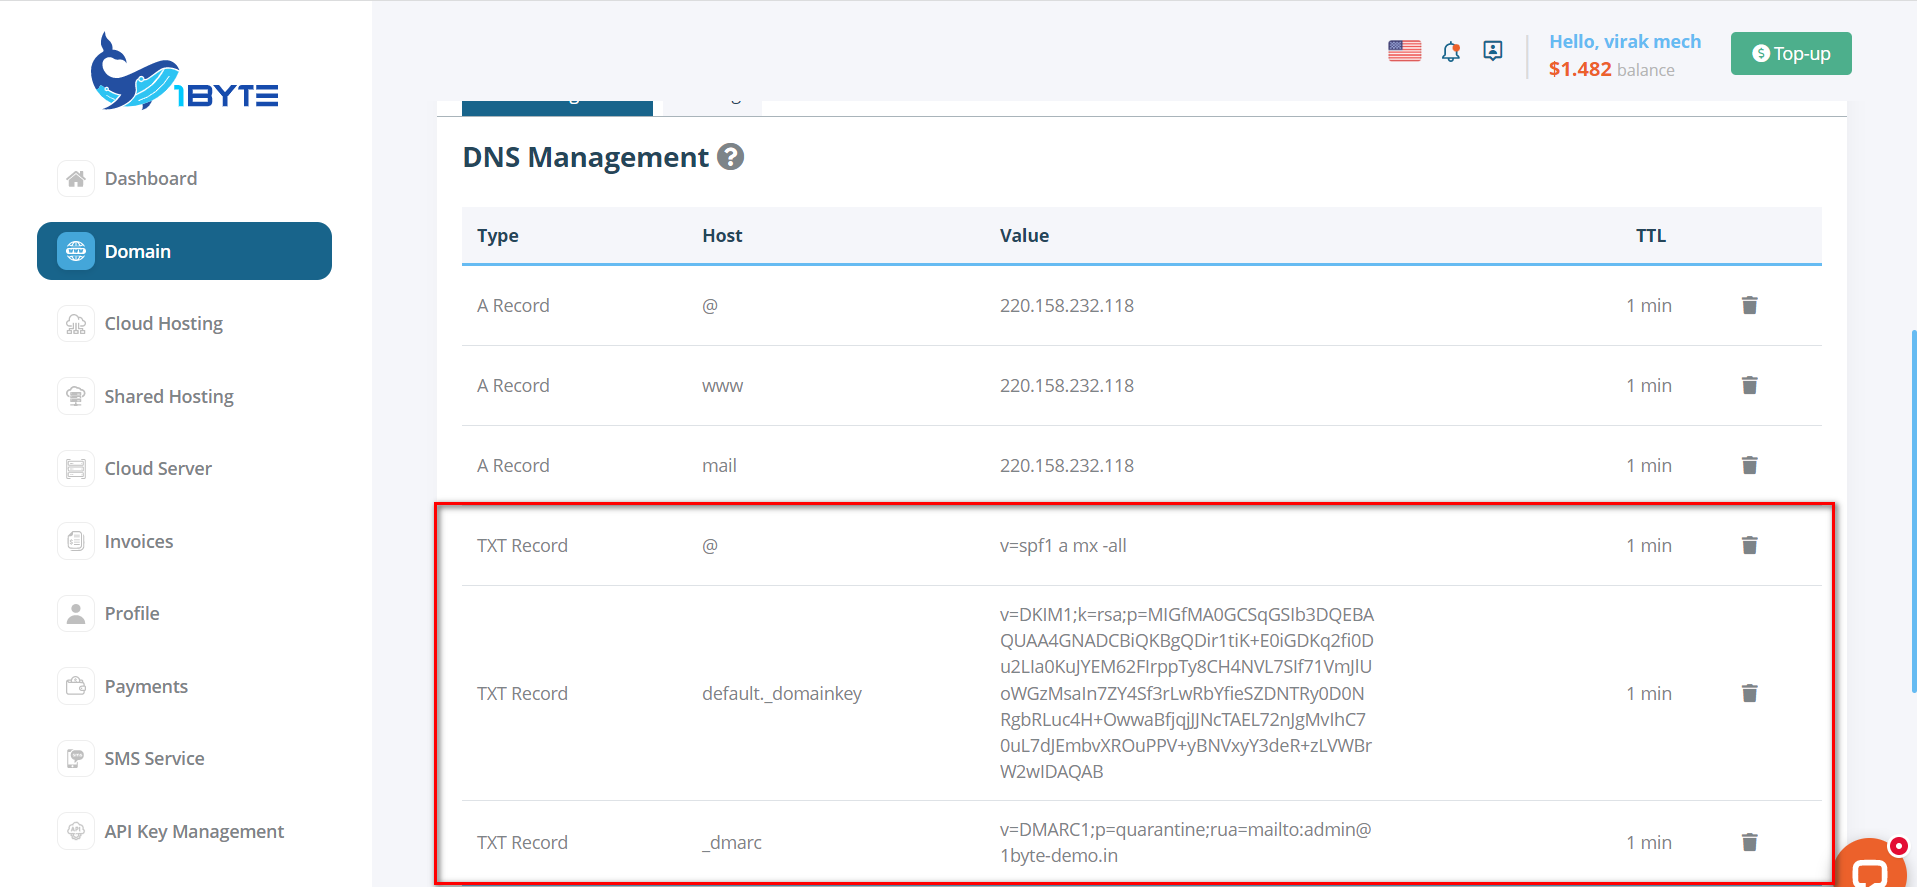
- Add the remaining TXT records

- After that, the TXT Record will look like the image below
- Finally, check to see if the DNS system has updated these records for the Domain
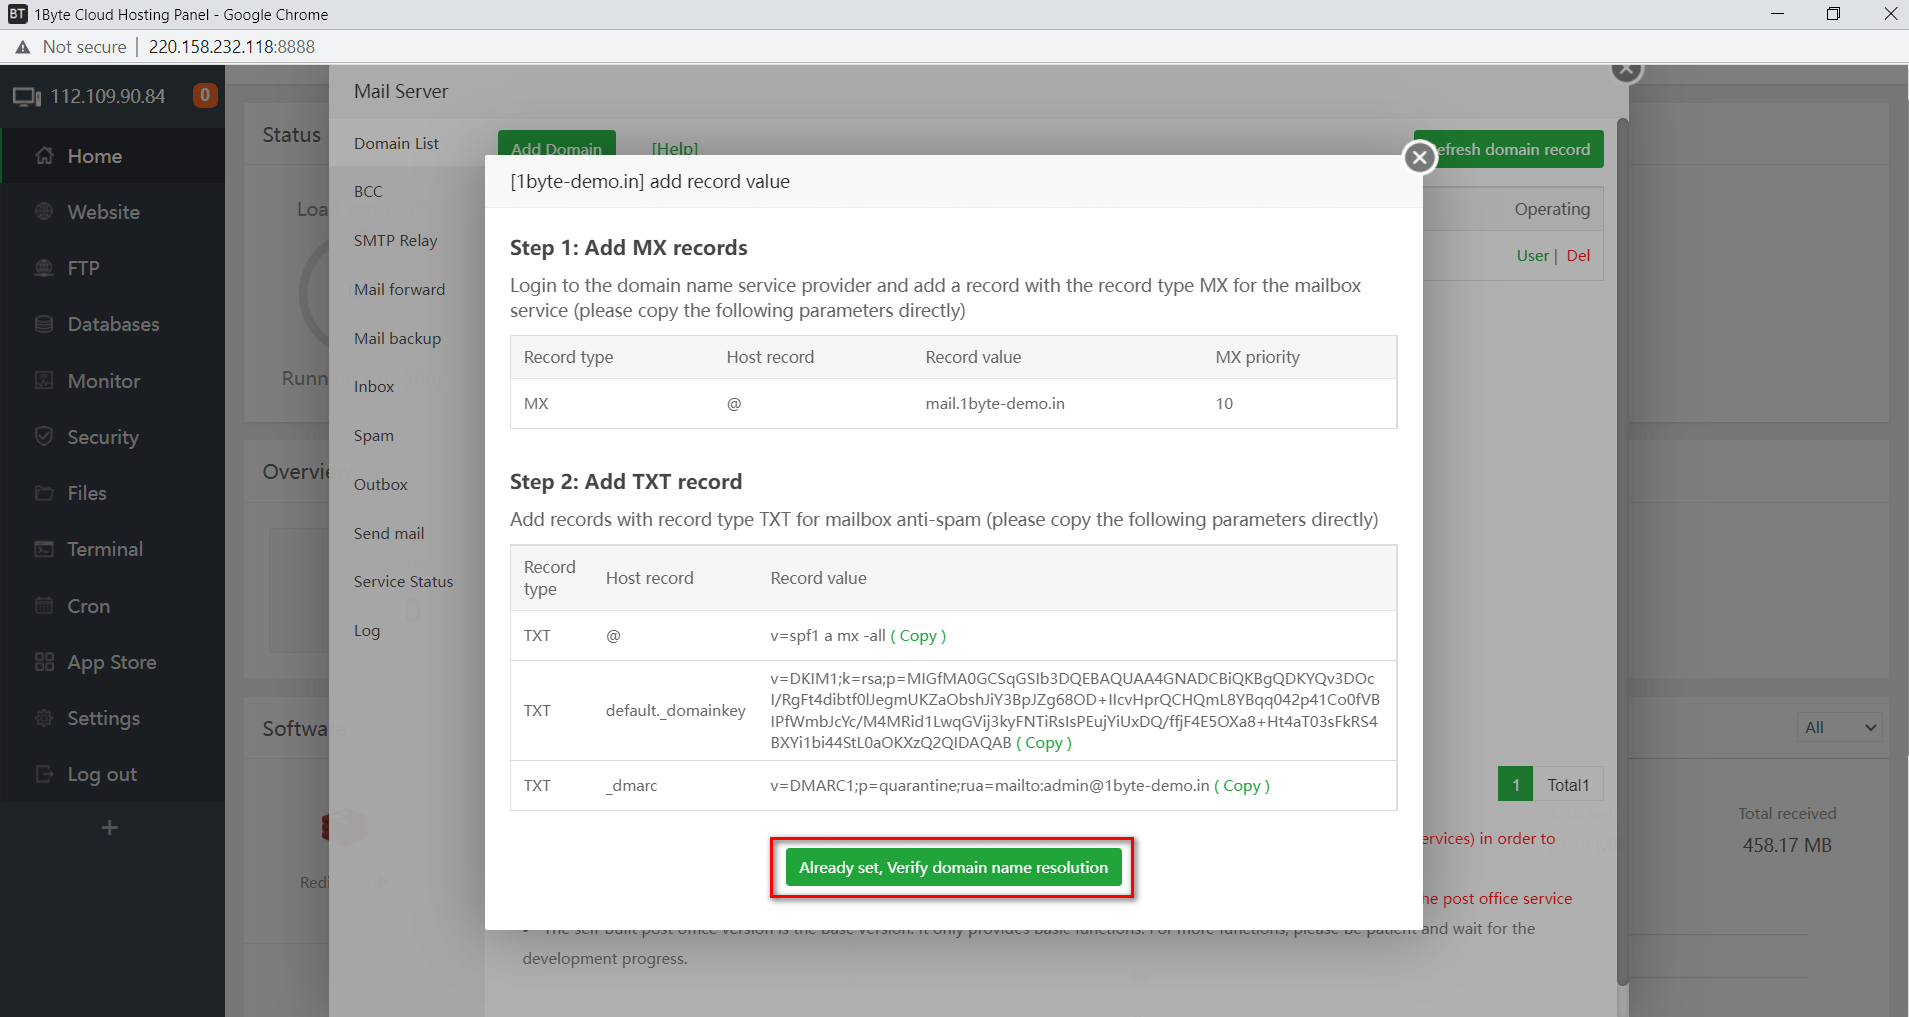
- Don’t worry if a certain record has not been set. Click the Refresh Domain record button to re-check
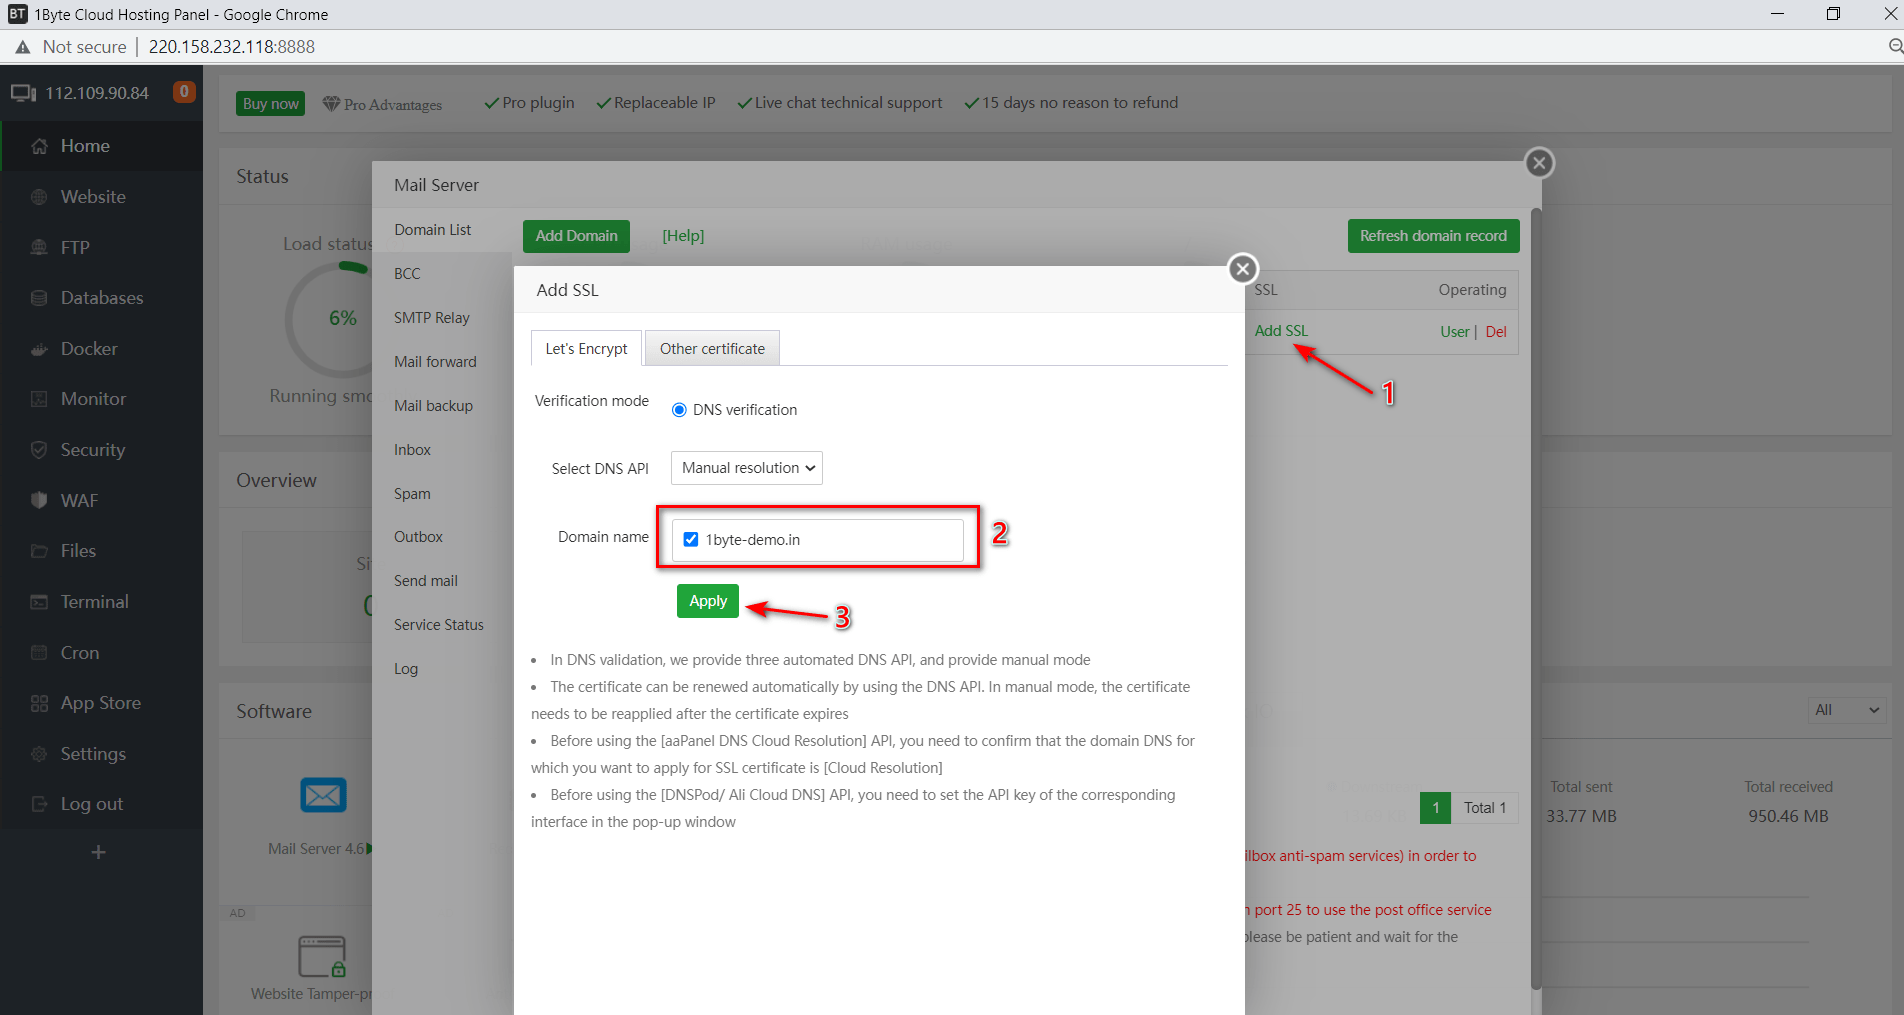
- Next we will set up SSL for mail Server by Click on Add SSL
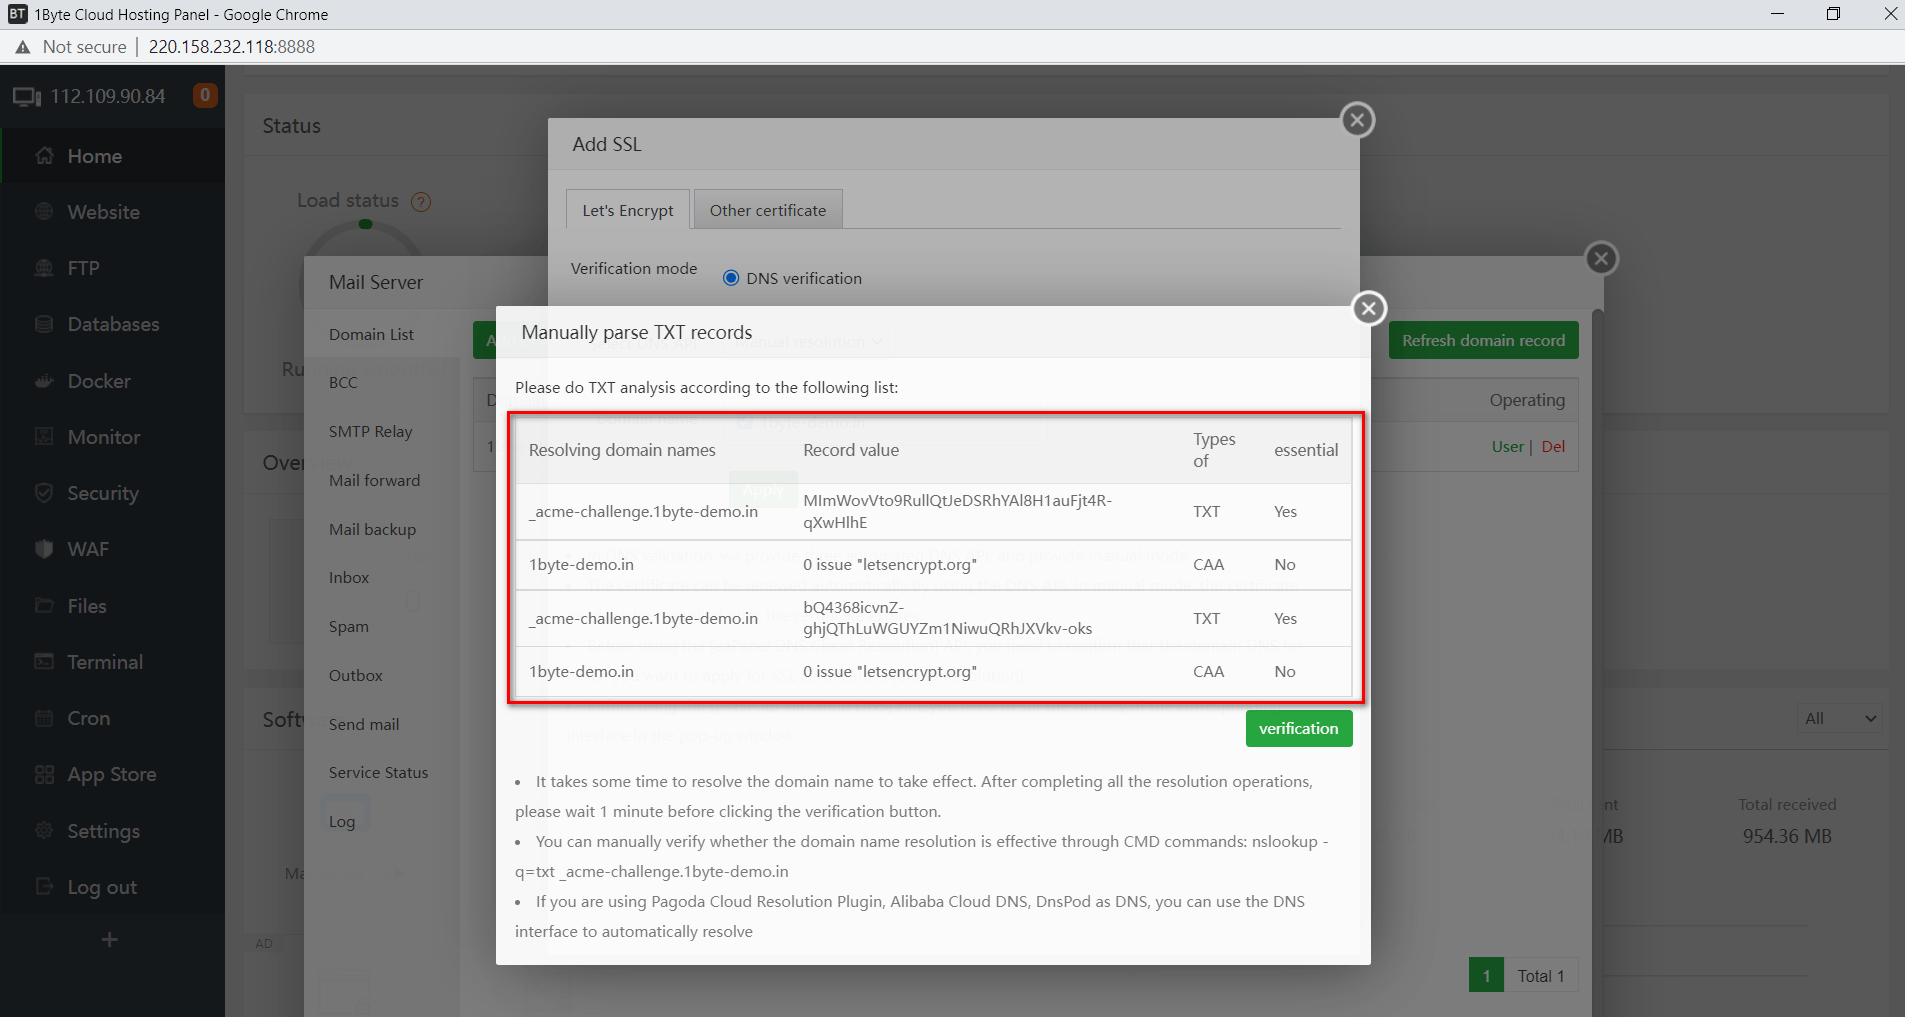
- Add these records to your Domain and then click the verification button
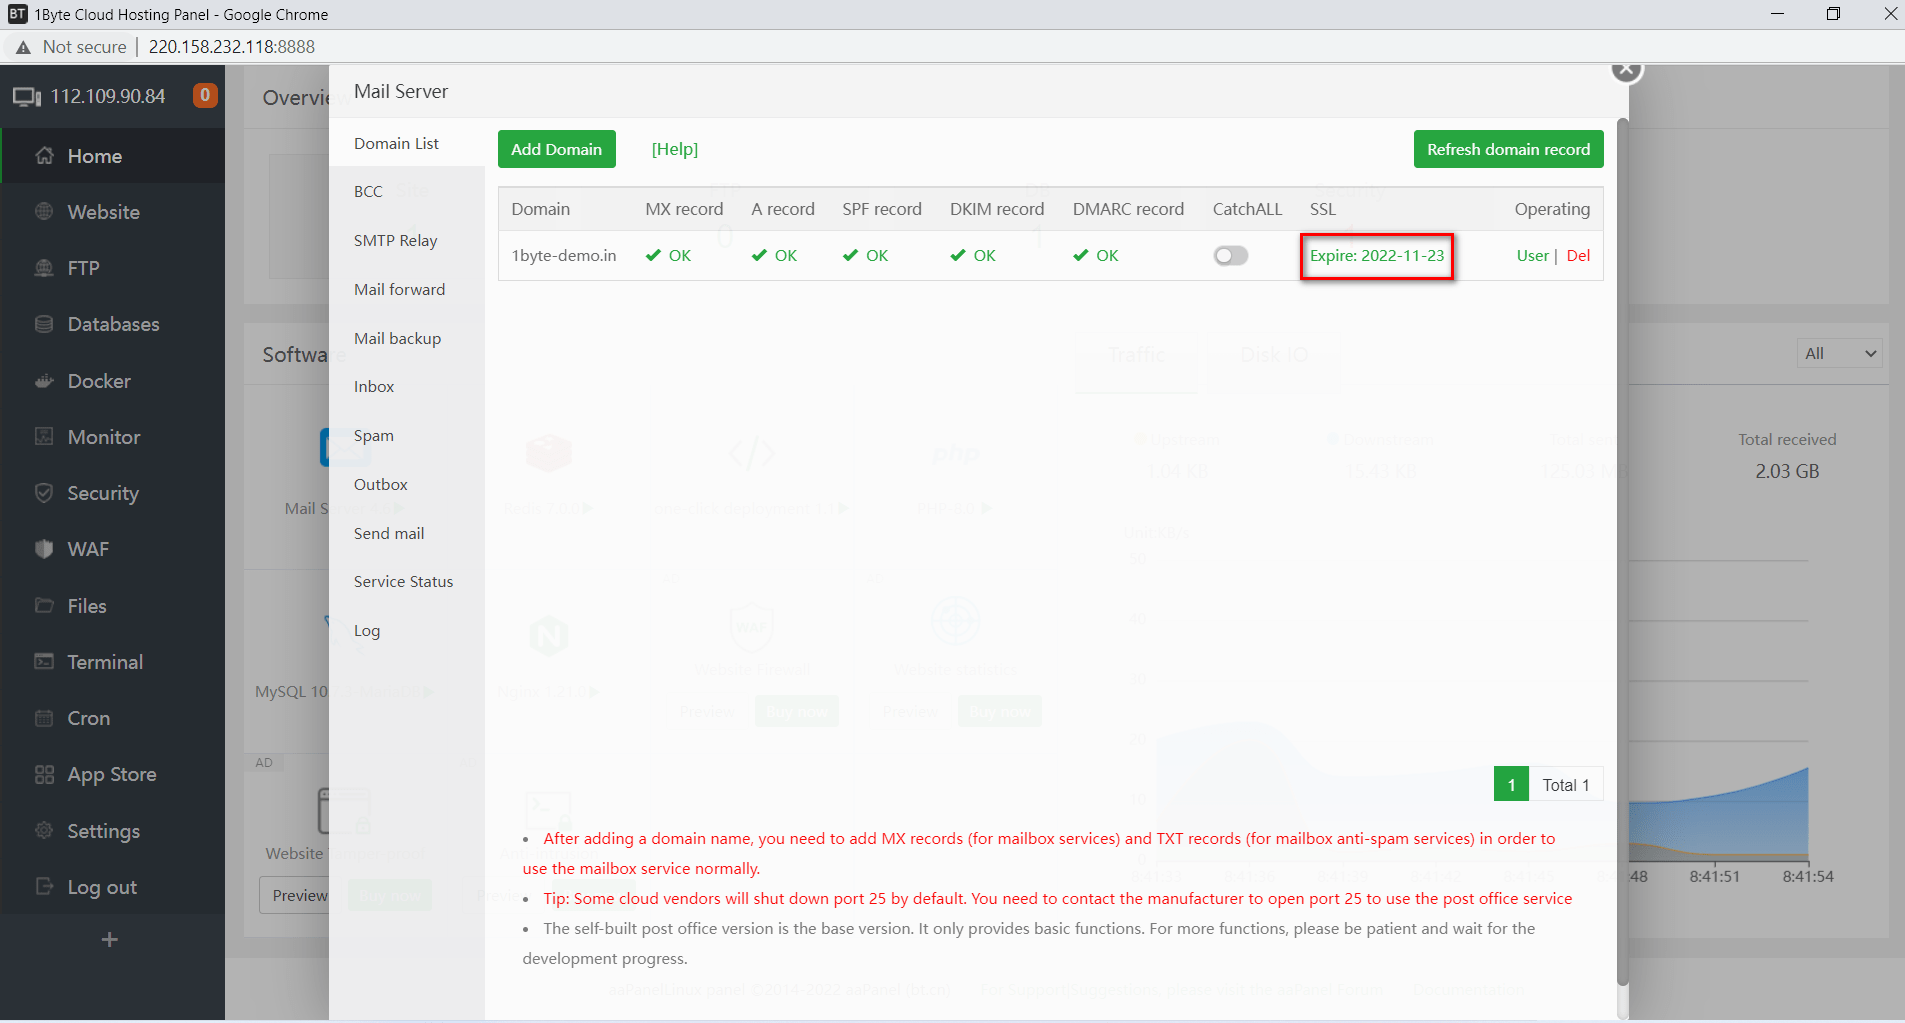
- After installing SSL successfully, you will see your SSL expired date
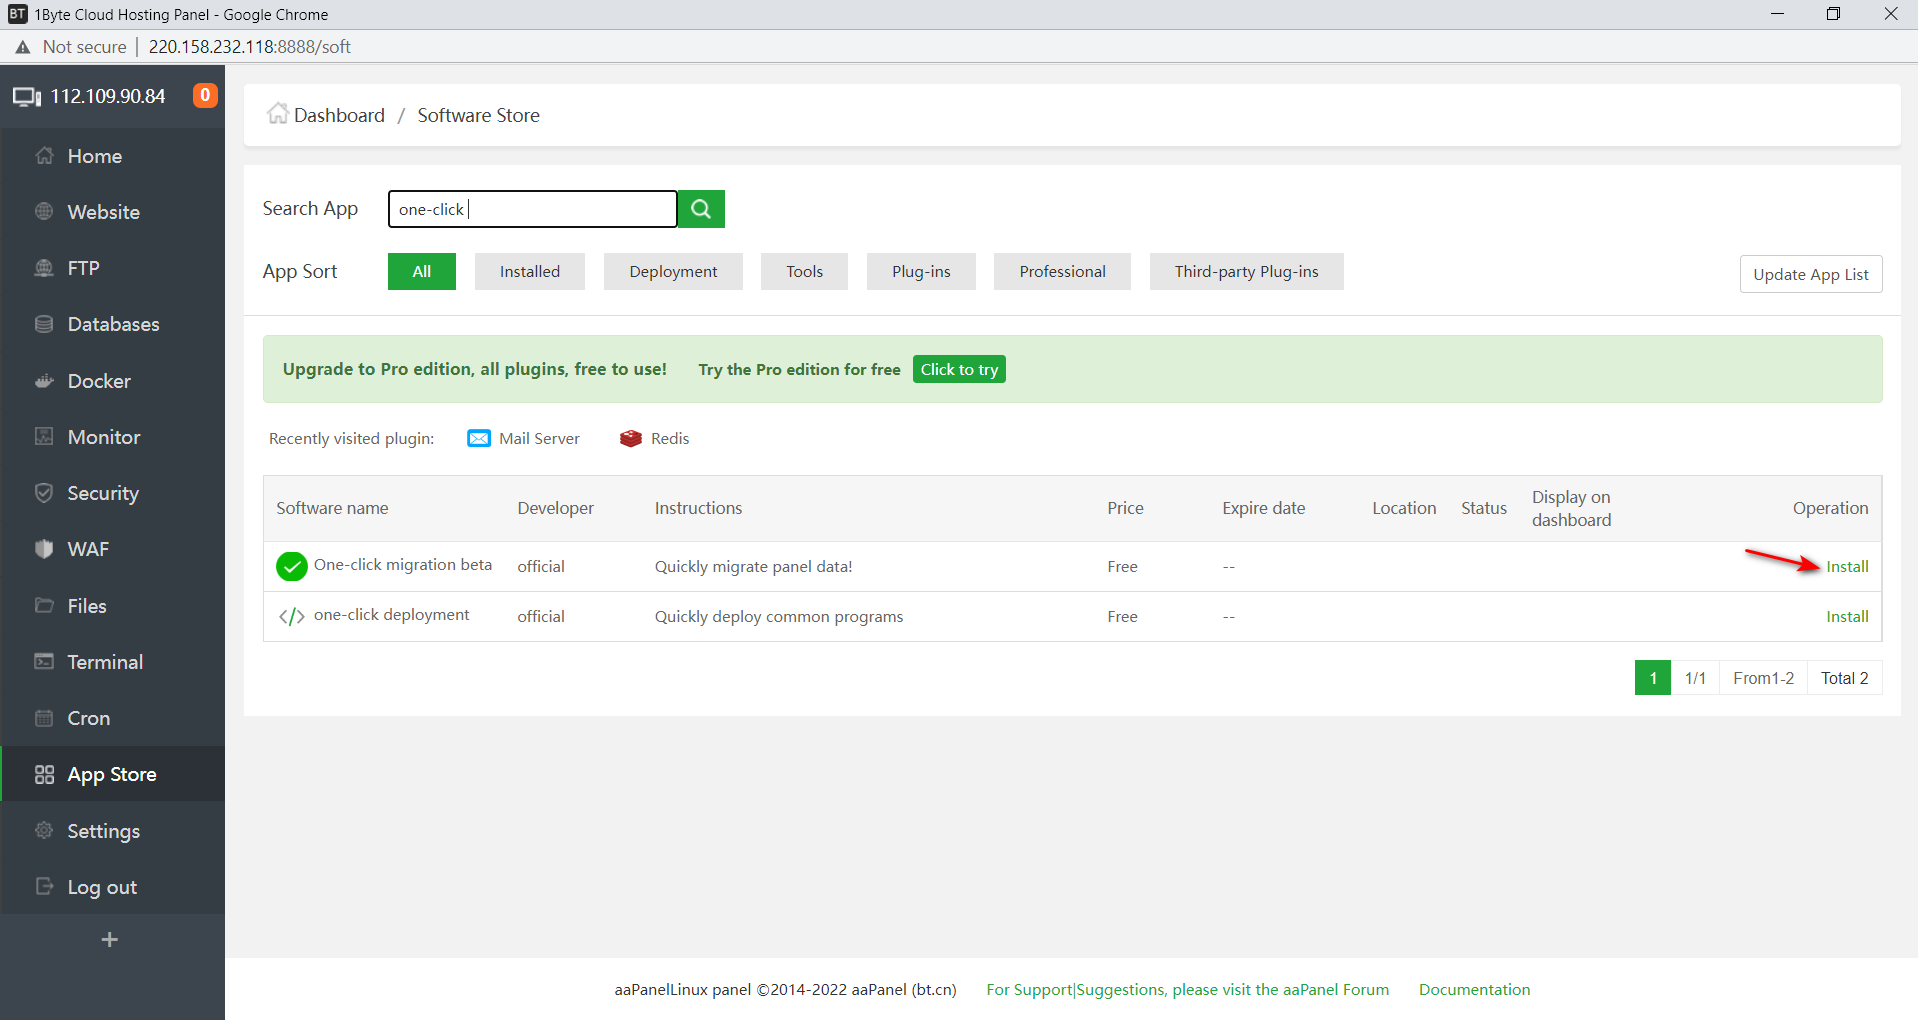
3.3. Install “one-click-deployment” utility
One more time, now type one-click deployment in the Search app box in App Store. And click Install at Operation column
- From one-click deployment, let’s install RoundCube
- From RoundCube webmail, install PHP, Nginx and MySQL
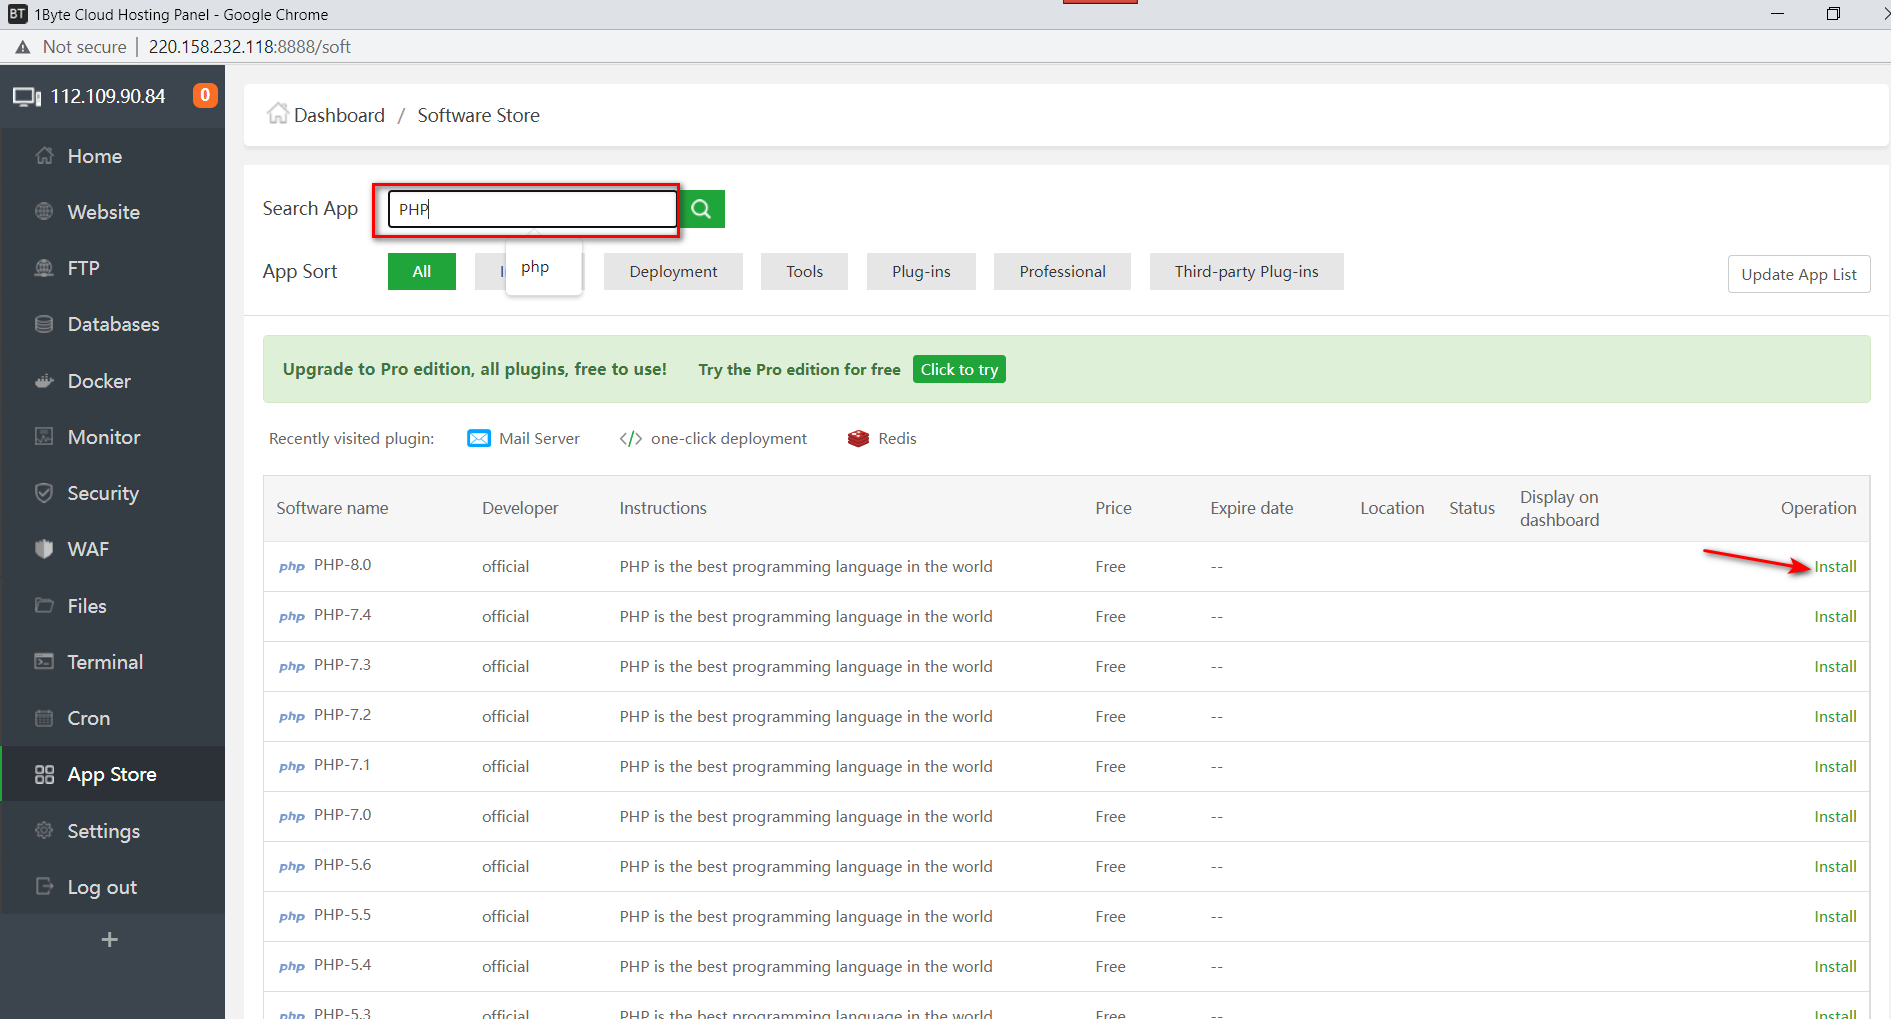
3.4. Let’s Install PHP 8.0
This time, let’s type PHP 8.0 at the Search app box in the App Store. And click Install at the Operation column.
- Fill out the pop-up form and click submit.
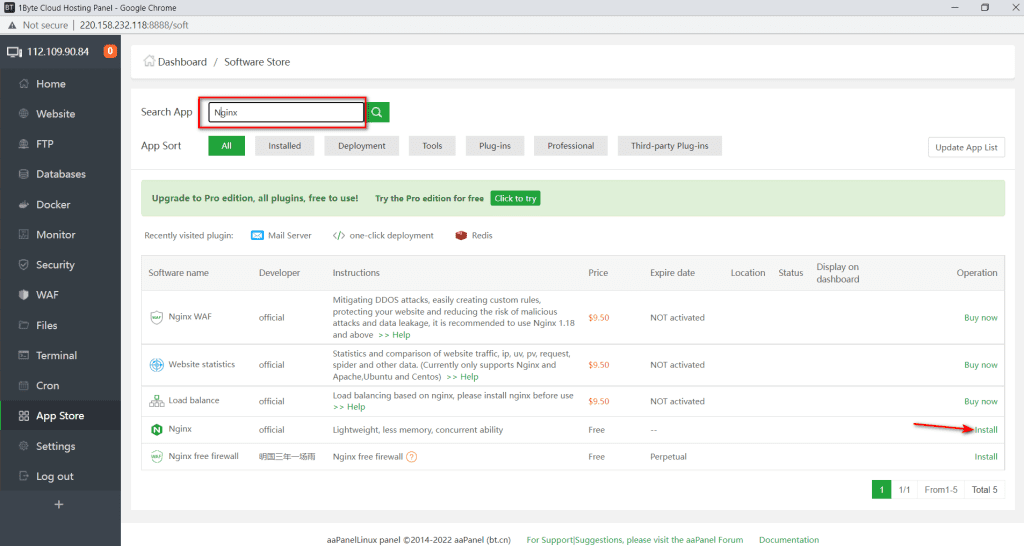
3.5. Install Nginx Web Server
Type NGINX in the Search app box in the App Store. Click Install in the Operation column.
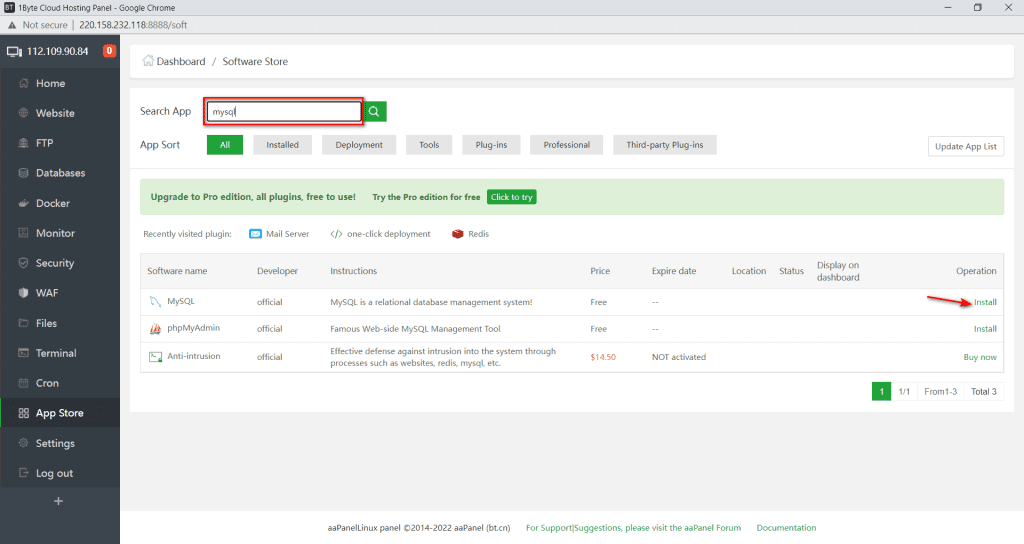
3.6. Install MySQL Database for RoundCube
Type mySQL in the Search app box in the App Store. Click Install in the Operation column.
3.7. Install RoundCube
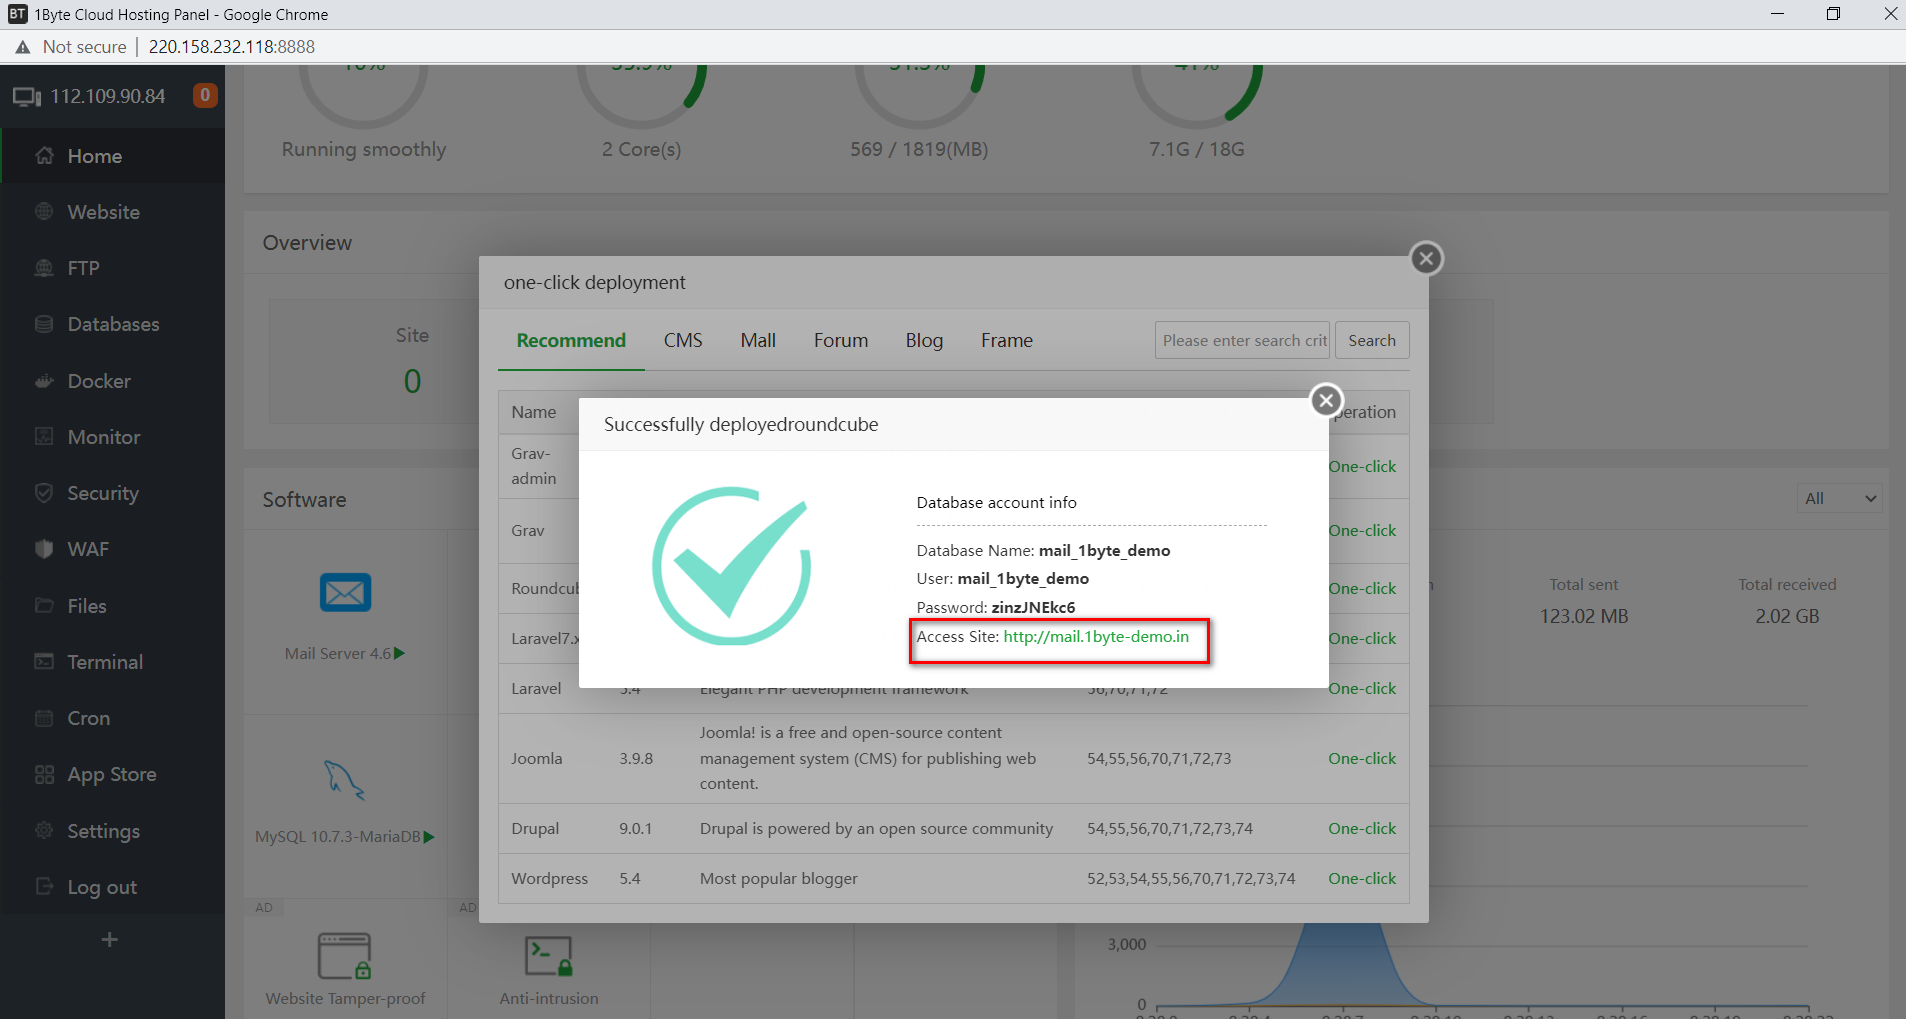
Go to the Home dashboard and open one-click deployment

- RoundCube and click on One-Click to install

- Set up the URL for RoundCube webmail, then Submit

- To log in to RoundCube webmail, access your URL on the pop-up
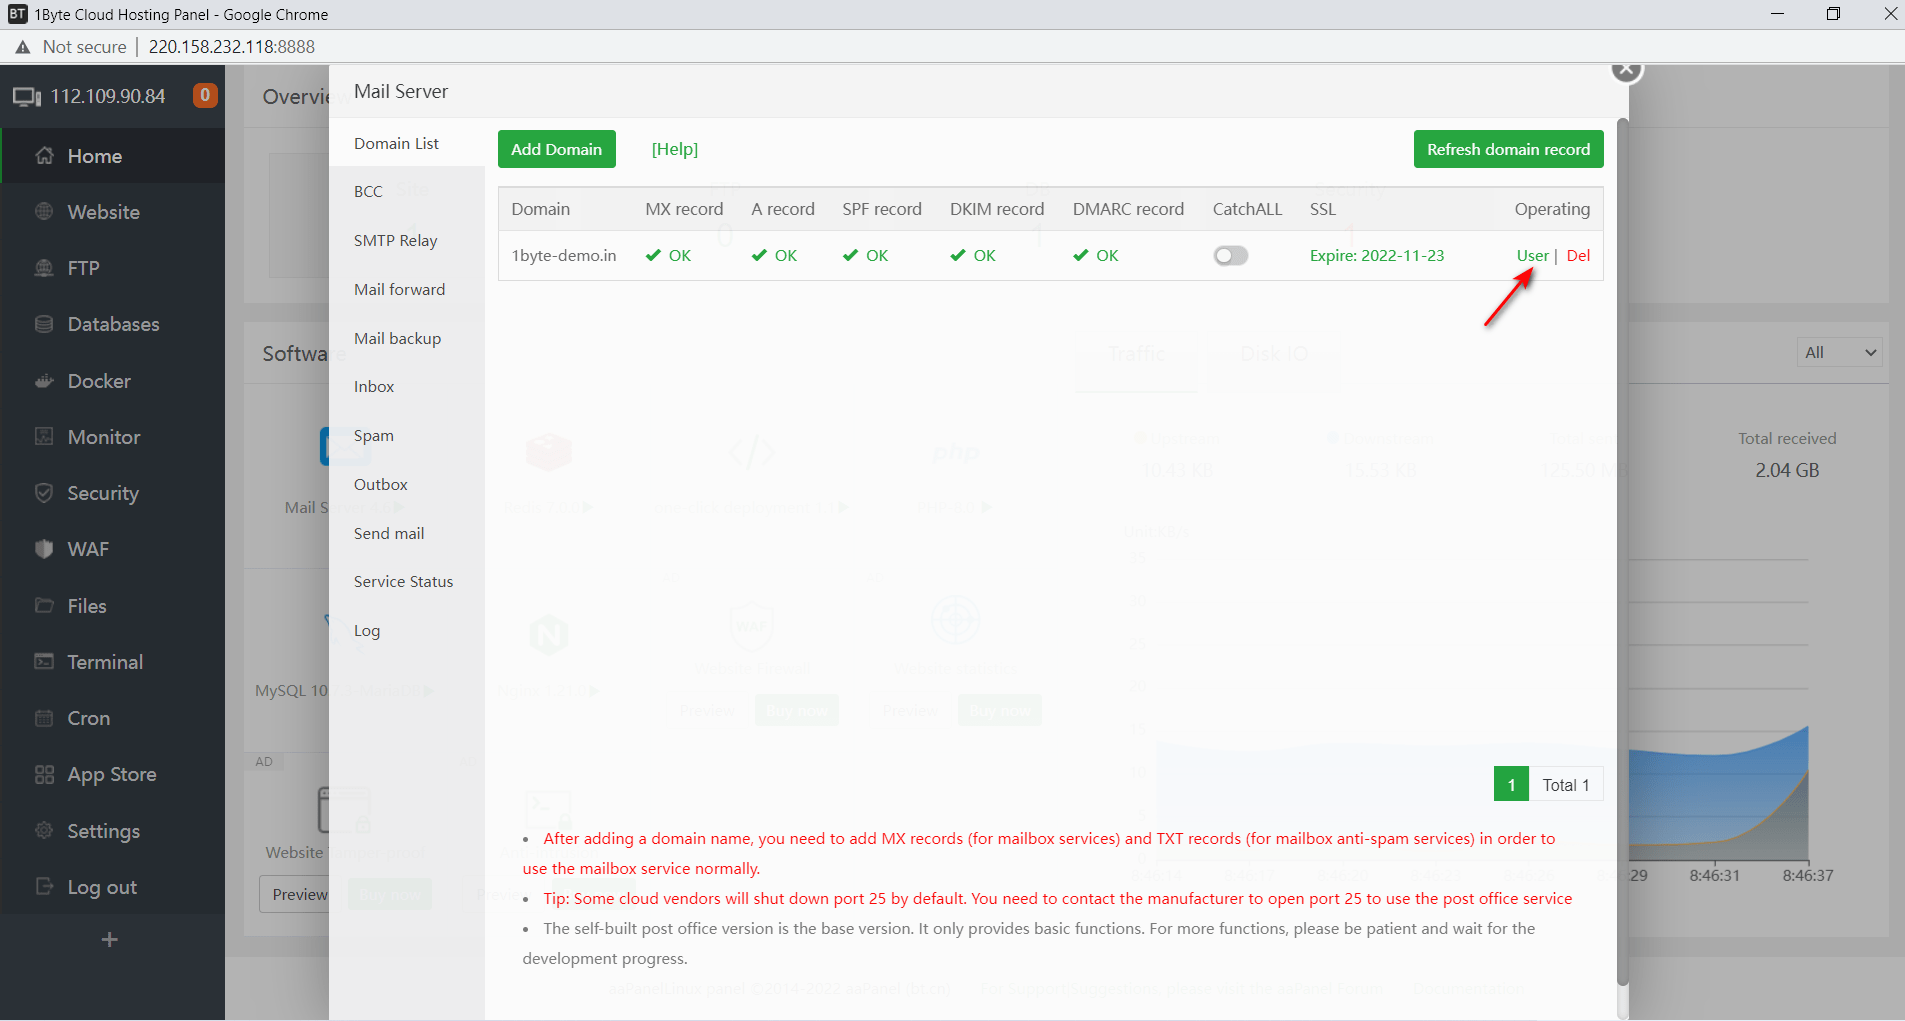
- We just installed RoundCube, and now we need to create an account for RoundCube.
- From your Domain List, in the Operating column, click on User to create a new account.
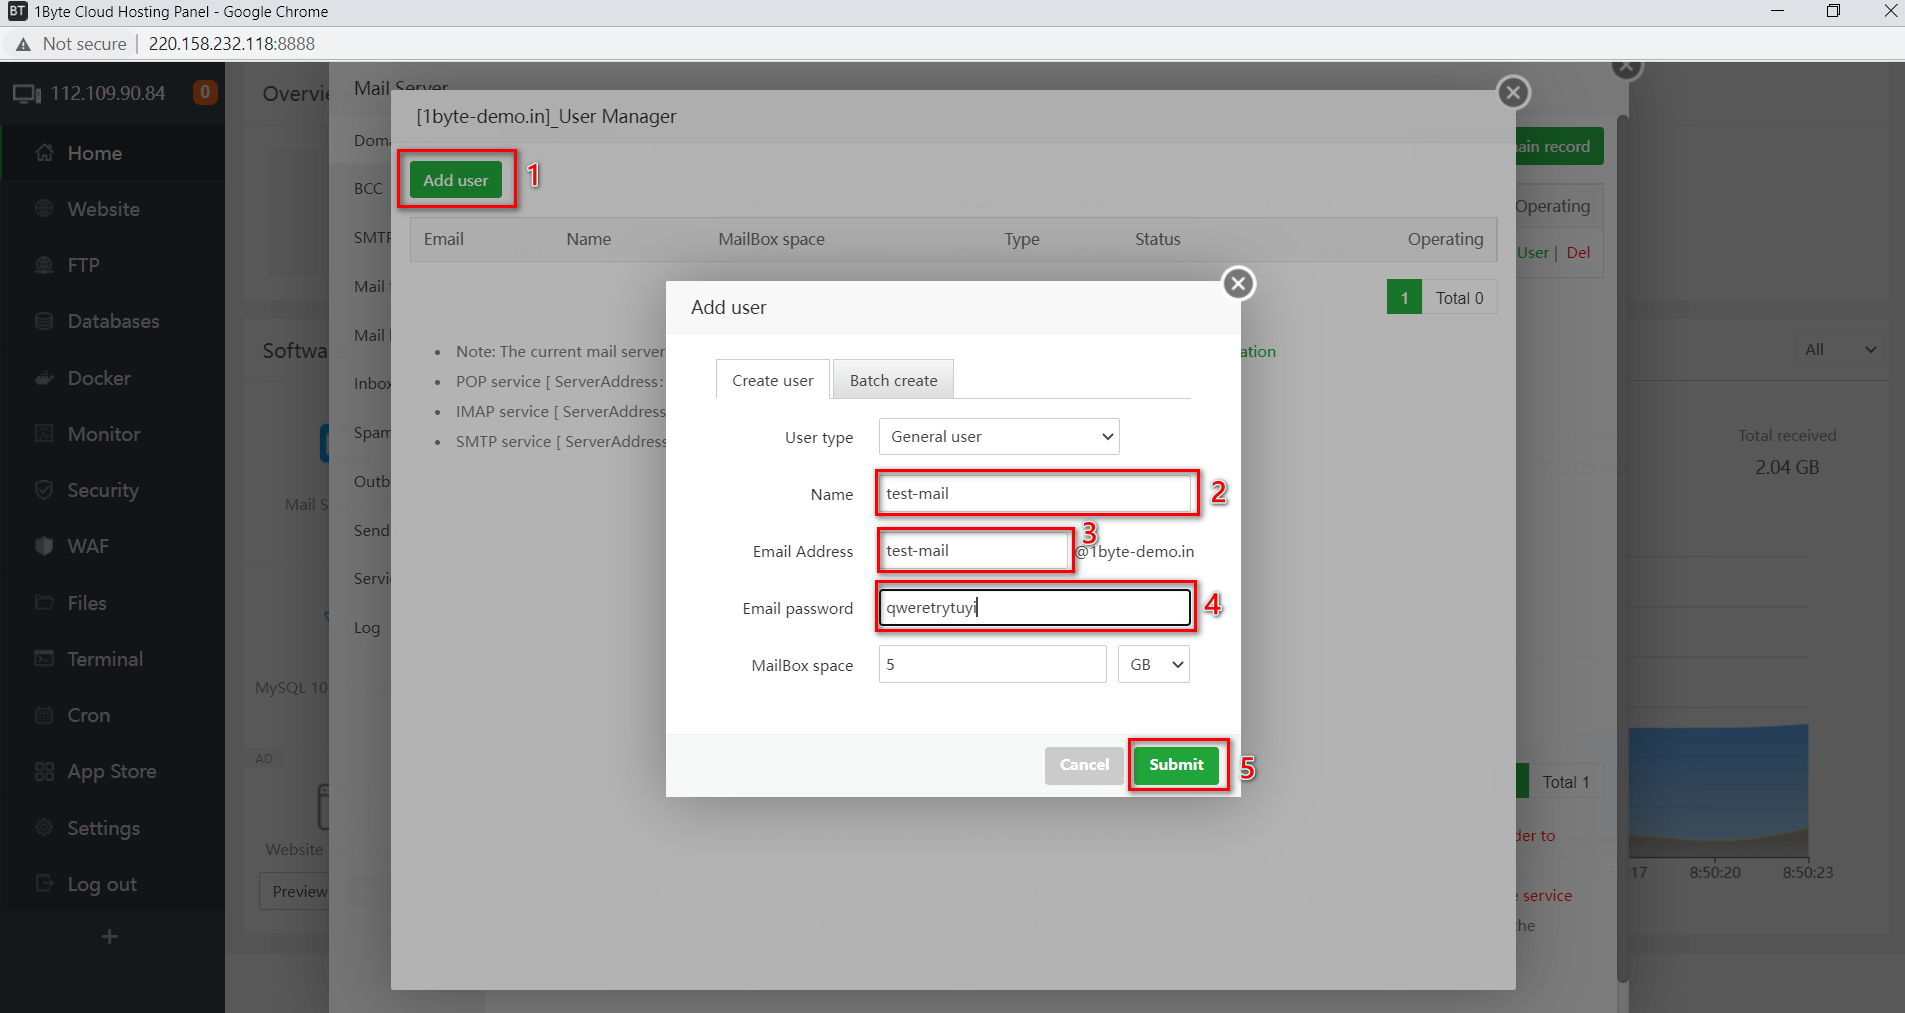
Click Add User and fill in the details, then Submit.
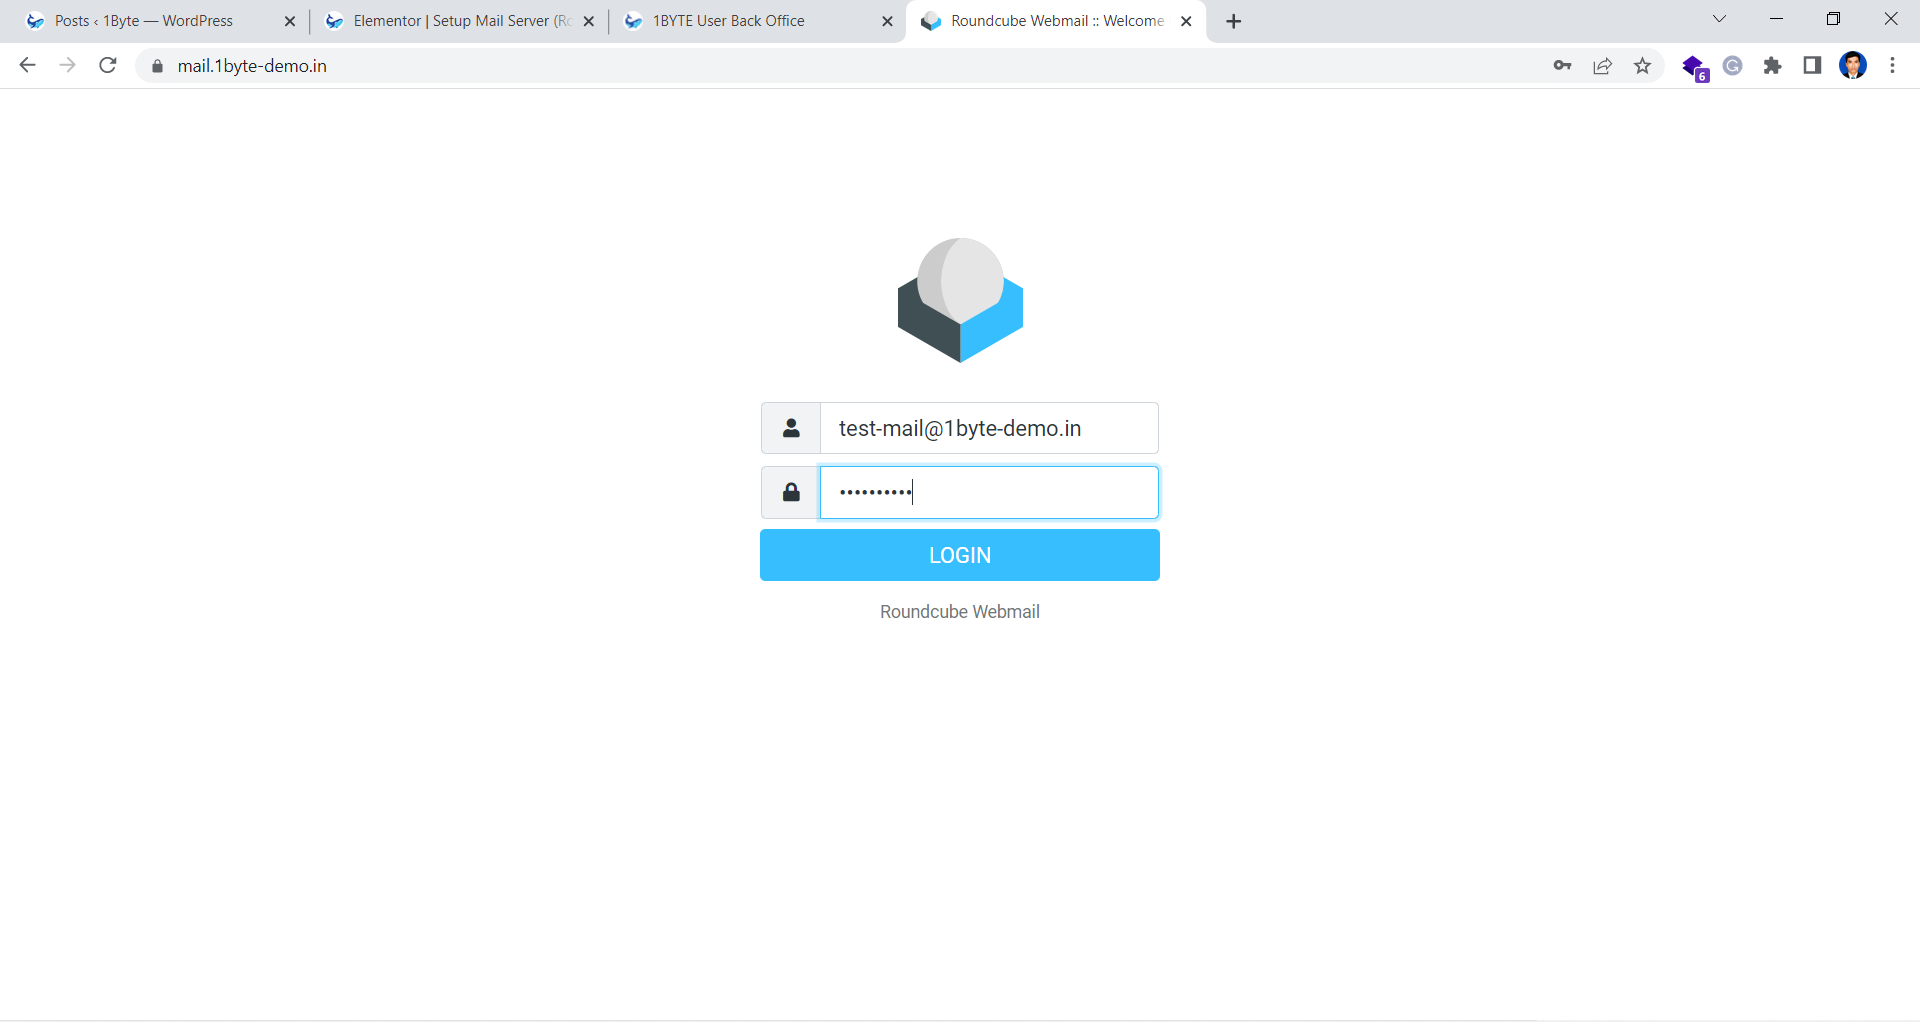
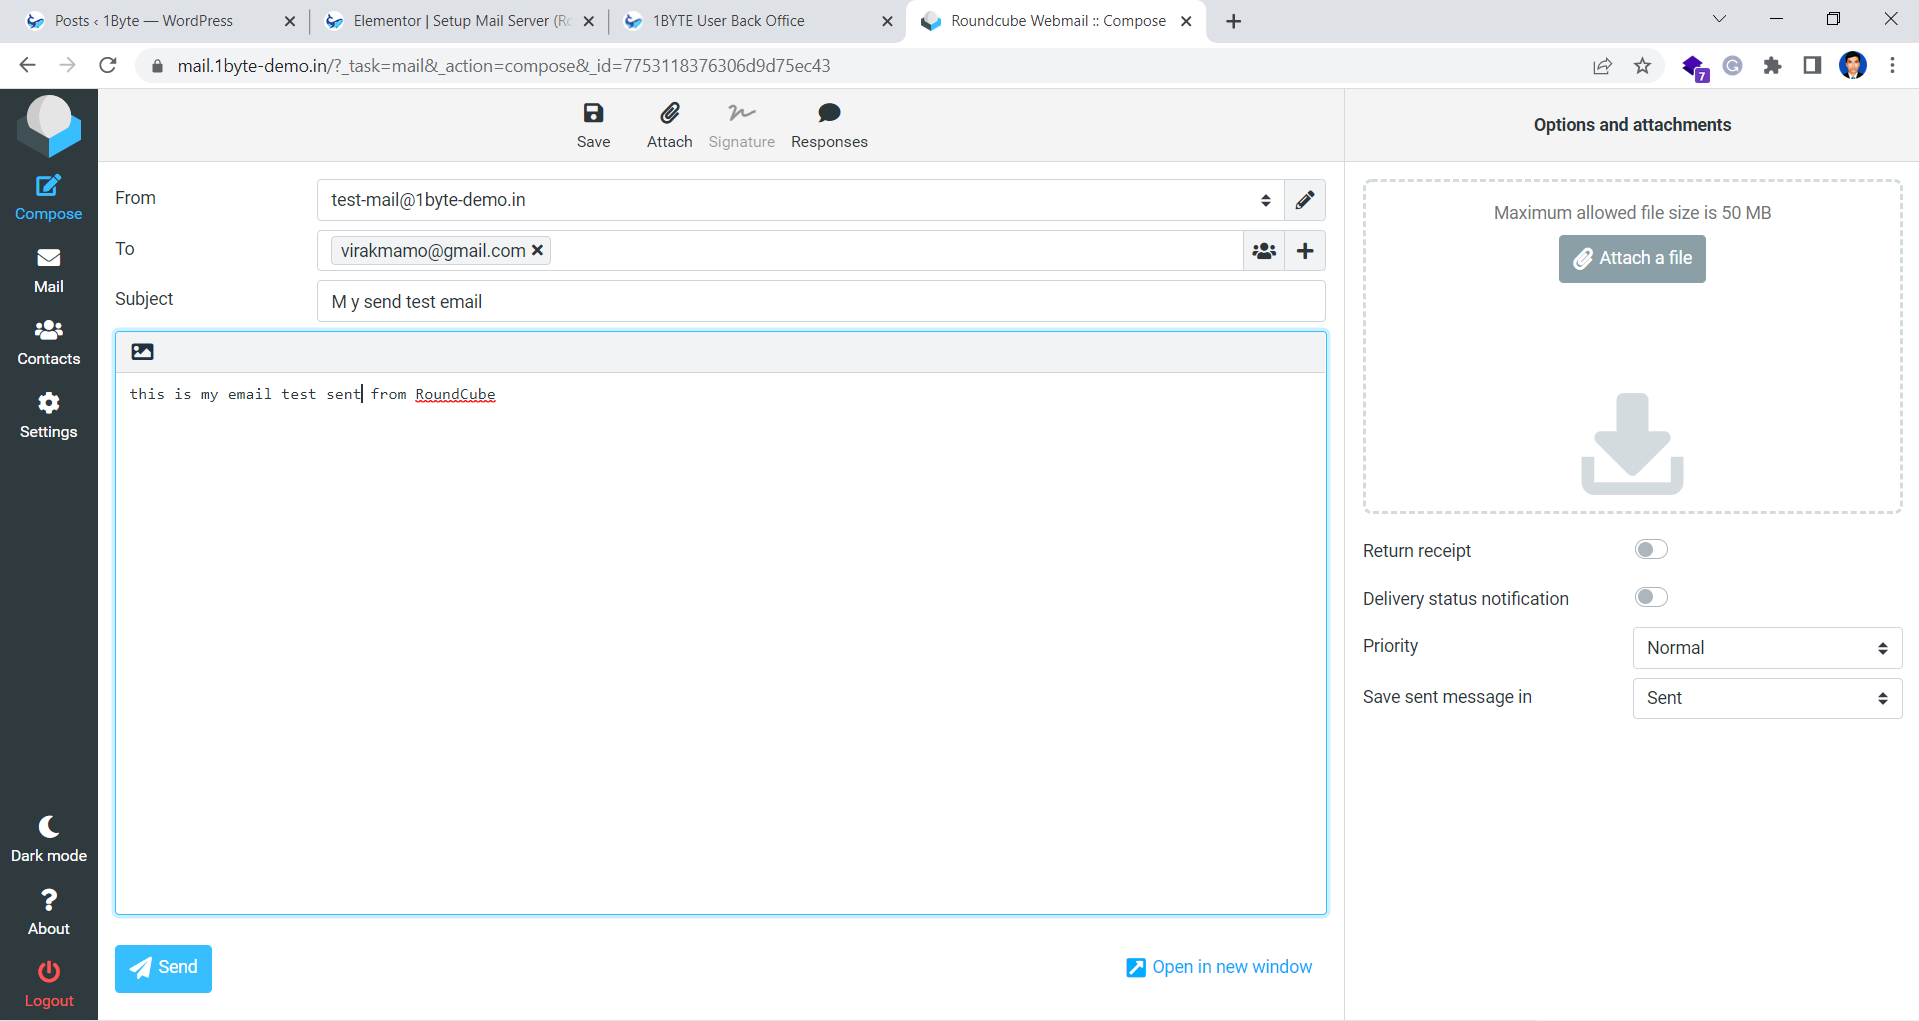
Step 4. Test Sending And Receiving Email
Go to Webmail and use the newly created account to log in
- Try to compose an email and send it to Gmail
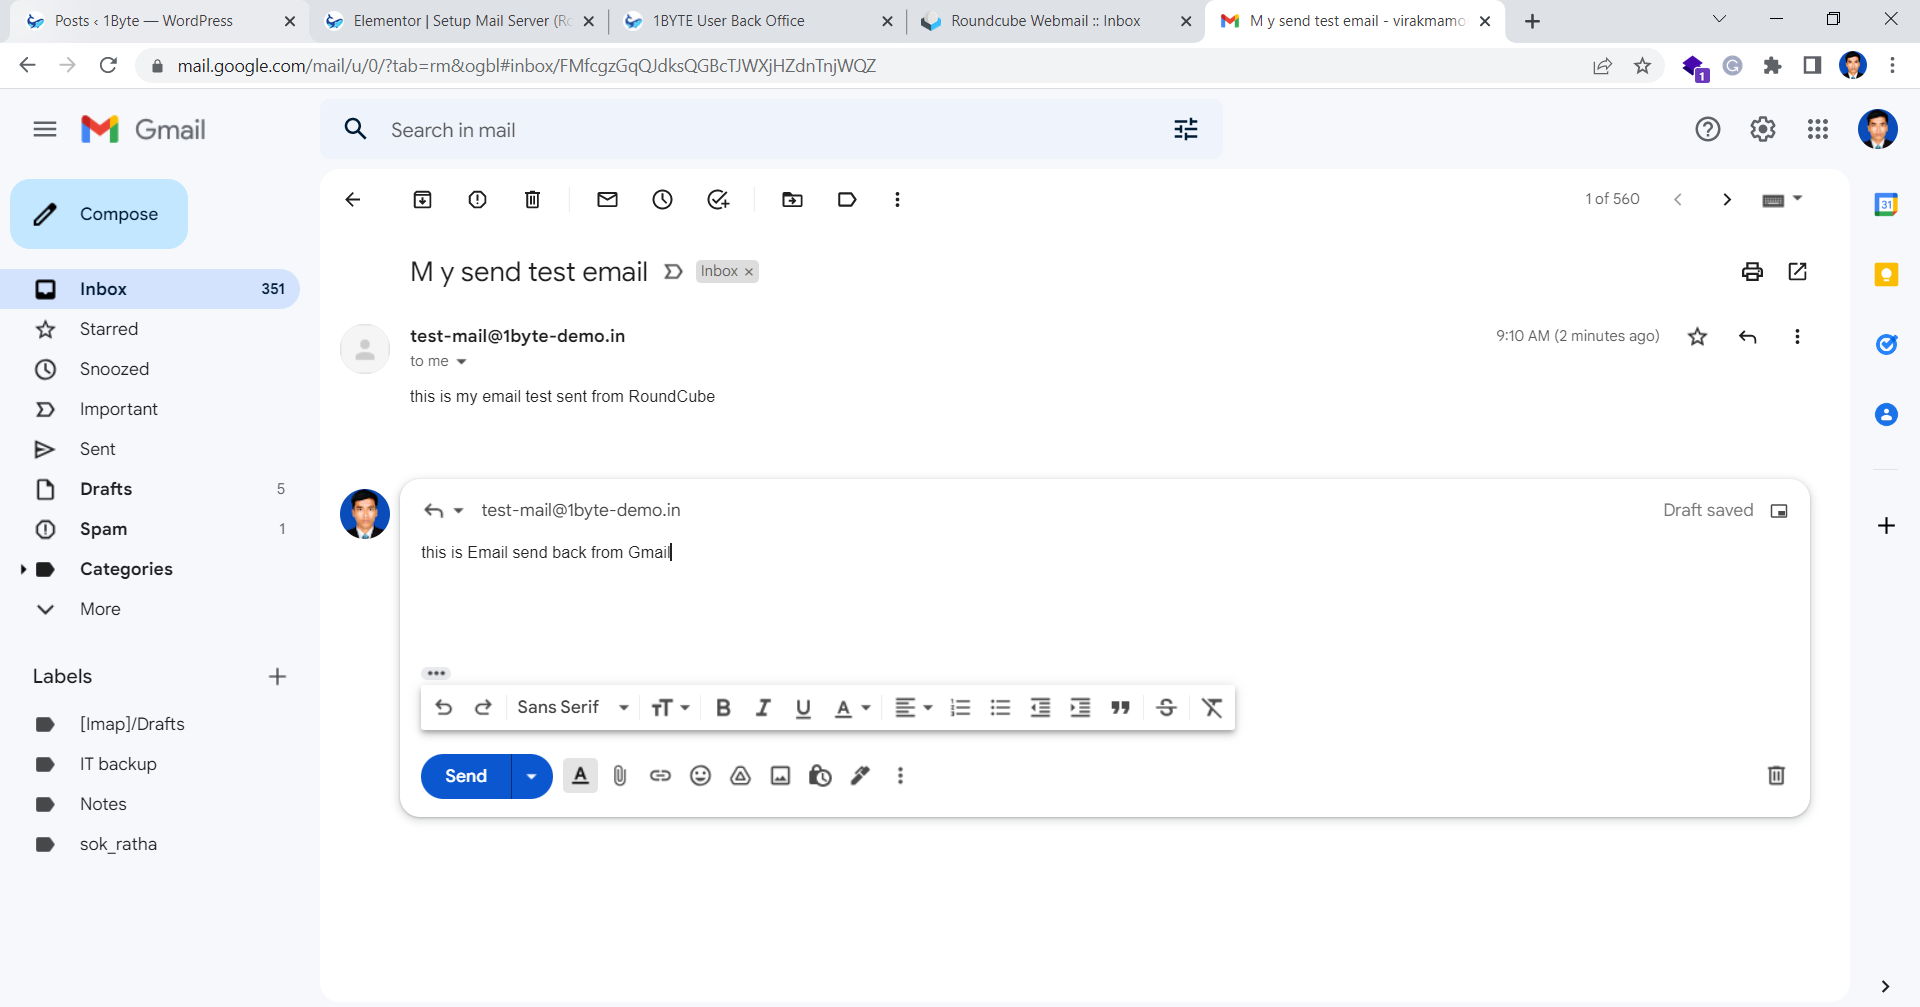
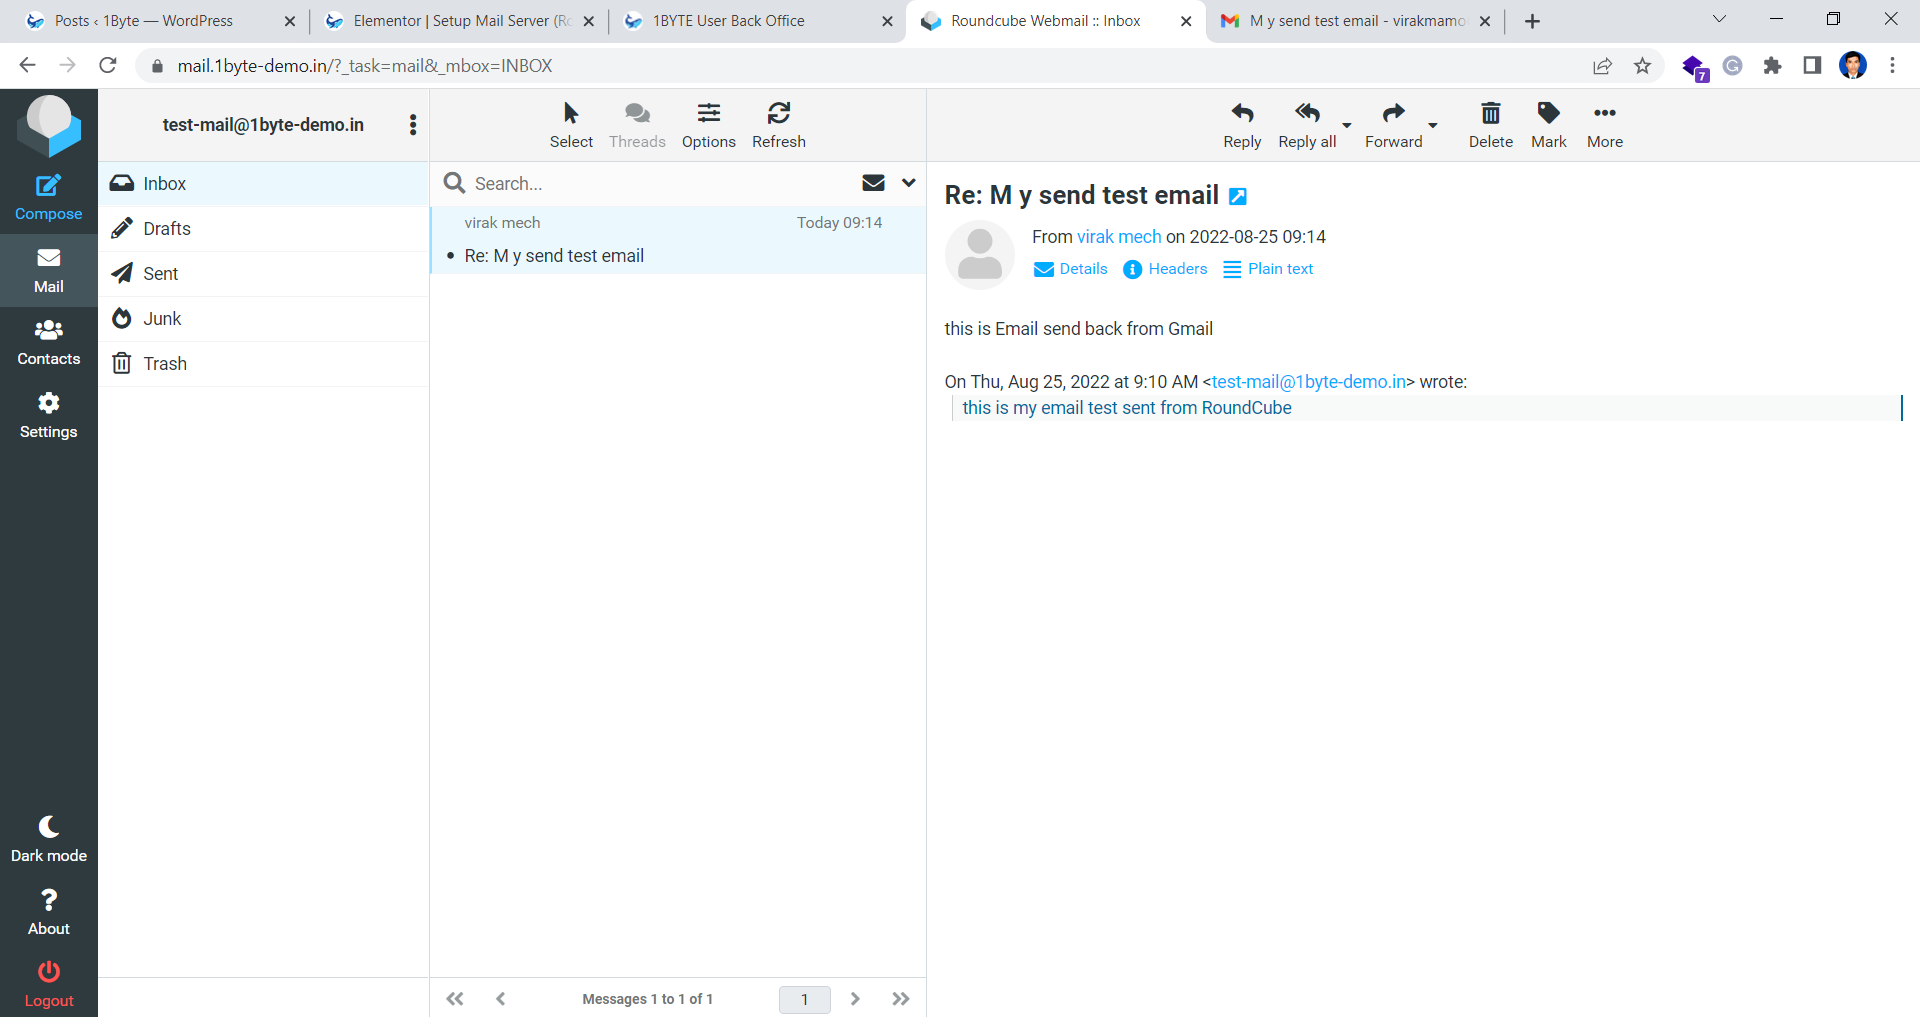
Check your mail in Gmail and send it back
- Finally, we successfully created an email that can send and receive email
Conclusion
You should use your professional email address to convey confidence in your brand, company, or organization. Once you’ve decided on a domain name that reflects your company or profession.
1Byte is proud to provide the best cloud hosting you can get for very affordable pricing. So, if you haven’t already, go ahead and buy now!