

The “FILES” section of cPanel is your go-to spot for uploading files, backing up your website, and managing your files via FTP *.
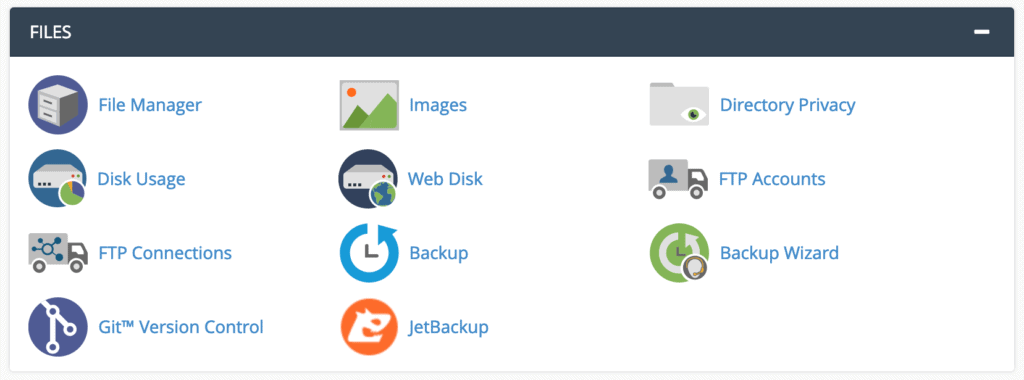
* FTP stands for File Transfer Protocol. You can use FTP to manage the files associated with your website – whether that means uploading, reading, or retrieving them. All you need to use FTP is a client application such as FileZilla. Alternatively, cPanel also provides you with tools to manage your files without an FTP tool. We’ll cover that next.
What does a cPanel do?
A control panel built on Linux called cPanel is used to manage your web hosting easily. The system functions much like a desktop program. With cPanel, you may carry out tasks from a simple dashboard as opposed to using complicated commands.
FURTHER READING: |
| 1. How to Manage Your Database on cPanel? |
| 2. How to Update Your Preference in cPanel? |
| 3. How to Use IP Blocker in cPanel? |
1. Using the File Manager
The “File Manager” is the first area within the “FILES” section that you’ll want to familiarize yourself with.
The “File Manager” feature enables you to manage all of your sites’ files easily from inside the cPanel interface, eliminating the need for a third-party FTP client.
To begin, click on the “File Manager” icon (as seen in the picture above). What you’ll see is the “File Manager’s” center panel. It will resemble the following:
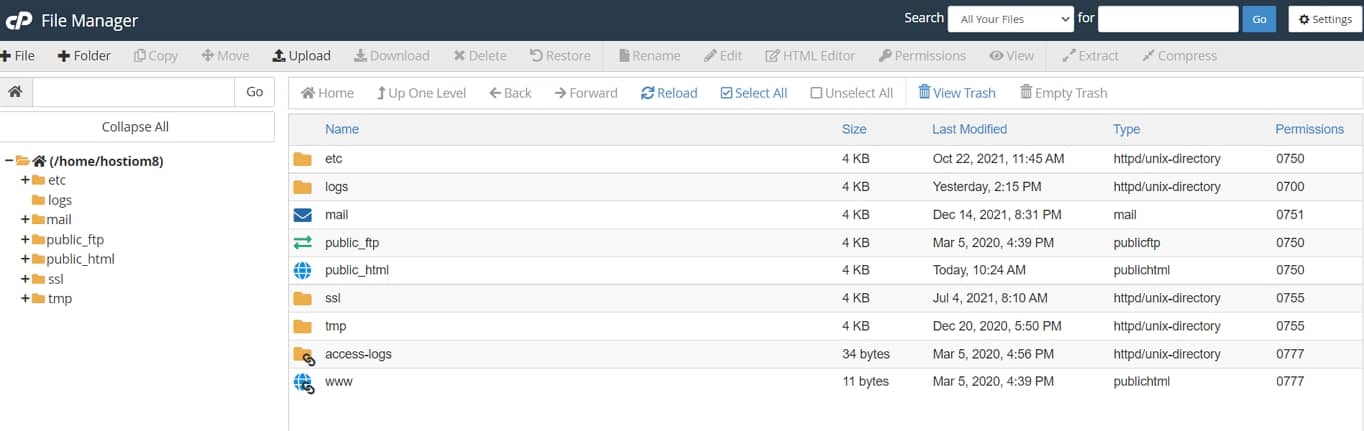
This is the location where you may manage all the files on your server, so proceed with utmost caution before making any modifications.
There are a few key points to make about this screen. To begin, on the left, locate your root (main) folder and a few sub-folders (you can see this in the screenshot above).
Then, in the center of the screen, you’ll see the contents of the selected folder.
Given this, the following are some actions you may wish to take:
Creating a new Folder
To create a new folder, simply click on the “+ Folder” button along with the top menu, as shown below:

You’ll then be asked to name your new folder and enter the destination where the folder will be created.
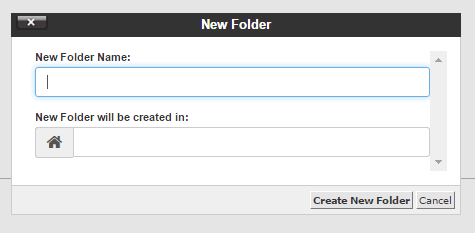
When you’re done, click on “Create New Folder”, and you’re set.
Uploading a file using File Manager
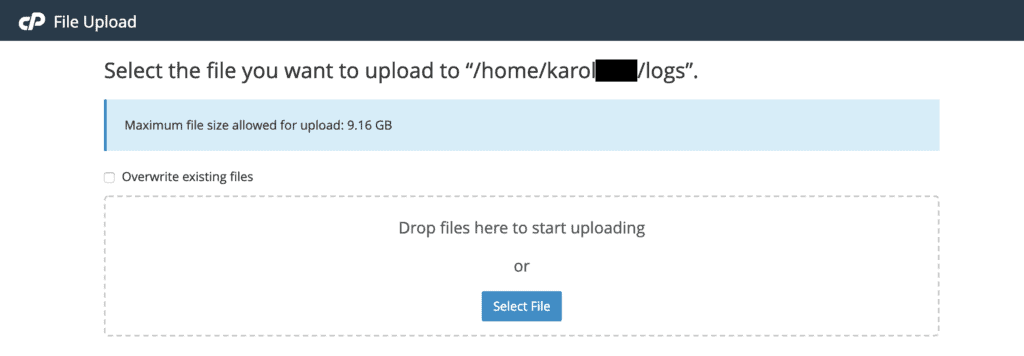
To add a file – for example, a huge video clip that you want people to be able to download or a high-resolution photo that you want to put on your site – you must first click on the folder that contains the file you wish to upload. Then, just click the “Upload” icon in the top menu bar:

You’ll be asked to drag and drop the file you want to upload, or simply select the file from your local drive:
Nota Bene: If your website software allows you to upload files directly from the user interface, utilize that rather than the File Manager in cPanel. Because such files will be used on your site anyhow, it’s simply easier to manage them that way — your website software will “see” the file immediately. That may not be the case if you upload a file through the File Manager or FTP. WordPress is extremely efficient when it comes to filing management.
2. Accessing your main FTP Account
Depending on how your web host configured your cPanel account, you may be able to access your main FTP account using the same cPanel username and password.
To determine whether this is the case, select “FTP Accounts” from the “FILES” section. Scroll down to “Special FTP Accounts” once there. There should be an entry for your primary FTP account.

By default, the main FTP account will have access to the root folder.
3. Adding a new FTP Account
When dealing with cPanel and launching new projects/websites on your hosting configuration, creating new FTP accounts is a recommended practice.
Creating a separate account for each project is an excellent place to start. The aim is to grant those individual accounts access to only the folders they require – not to the entire web server.
To establish new FTP accounts, navigate to the “FILES” area and click on “FTP Accounts.” You’ll see the following screen:
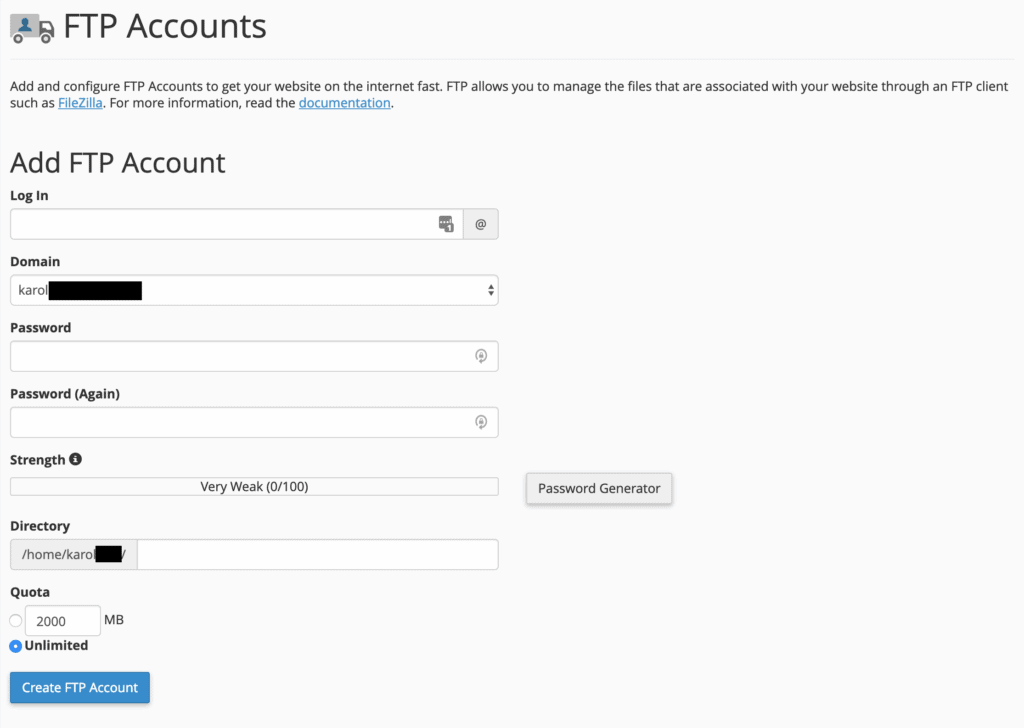
Here’s how to fill out that form and create a new account:
- Log In – This is the username of the new account.
- Domain –The domain name that the new user account will be assigned to. Pick from the drop-down.
- Directory – This defines the new FTP account’s highest level of directory access. If you leave this blank, the user will have access to the root. It’s best to input the directory associated with the project that the account is for.
- Quota – The maximum space that the new user can take up. Best leave at “Unlimited”.
Once you click on “Create FTP Account”, the new user will be added.
You can manage your existing FTP accounts on the same page, below the new user form:
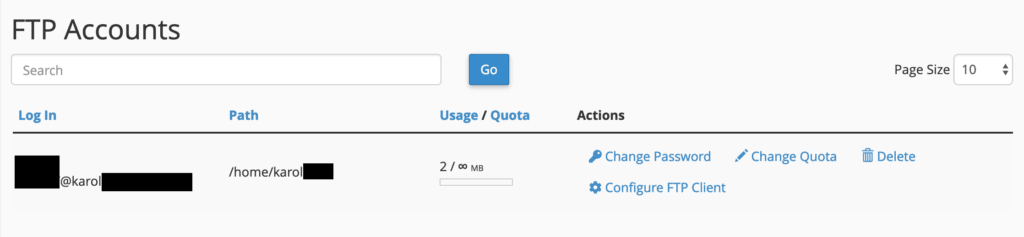
File and FTP Account Management is now a piece of cake for you.