

Sudo is a powerful tool that allows users to perform administrative tasks on a Debian system without granting them full root access. By default, only the root user can run administrative commands on a Debian system. However, the sudo command can be used to temporarily elevate a user’s privileges to perform specific tasks. In this article, we will discuss six methods to add users to sudoers Debian.
The 6 Methods to Add Users to Sudoers Debian
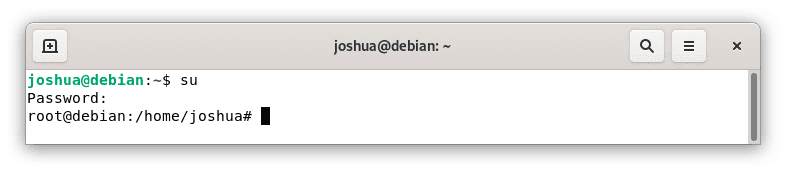
1. Changing to Root (su)
In order to create a new sudo user, you first need to login into your Debian root account. But when you first install Debian, before you continue with the process, you first need to set a root password.
Use the following command su to change to root:
![]()
Once you enter the root password, your username should be changed to “root”.
FURTHER READING: |
1. Investing in Websites: A Step-by-step Guide |
2. How to Host Multiple Websites on a Single Server (Apache & NGINX) |
2. Create a User Account on Debian
The best way to learn how to create a new user account is by following this tutorial. You will be able to grant permission for an existing one, but we’ll go through creating it from scratch
First, we will create a new account for you with the username that best suits your needs.
![]()
The system will now ask you to enter your password. Make it a strong one with uppercase letters, lowercase characters, and symbols as well numbers or special punctuation marks such as !$%&
Example of prompt:

By now you should have set the password for your new user. When prompted, enter all available information regarding what’s called a username–this will help protect both yourself and those who access this service from outside interference!
Example of prompt:
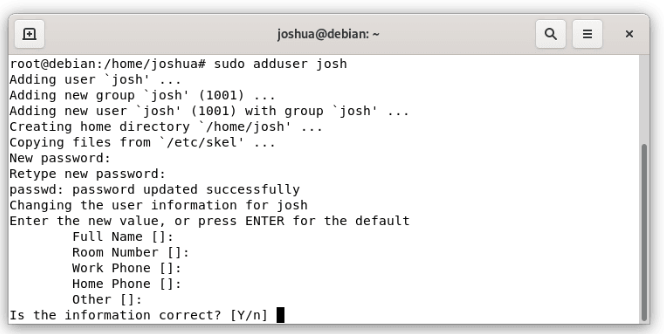
By now you should have set the password for your new user, type Y and press the enter key to proceed.
Running the following command to confirm the user has been added successfully:
![]()
Example output:
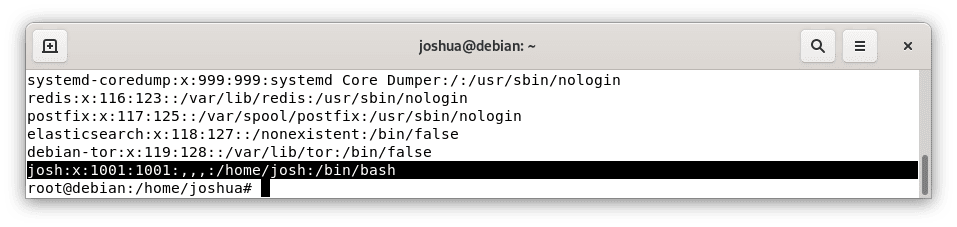
The file containing all of your user information is located in /etc/password.
The output should be more exciting and creative while still being grammatically correct.
3. Add a New User in Debian
Next, you’re going to want to give your new user Sudoers access by typing the following command in a terminal window:
![]()
Make sure to run the id command to find out if your username has been added correctly.
![]()
Example output:

use the gpasswd command as follows for the alternative:
![]()
4. Add User to the Sudo Group
The sudo command allows users to run commands with elevated privileges, which means they are not limited by the permissions that regular accounts have.
Everyone in the group automatically gets sudo access to Debian and Ubuntu operating systems.
![]()
The components of the command are as follows:
- The usermod command is used to modify a predefined set of systemwide installed user accounts.
- -aG is an option that allows the user to be added or belong in a specific group. The -a command uses where you want new users added instead, while G will do just this without removing them from their current groups.
- The sudo group provides extended privileges to users.
- The username you want to add as a member of the sudo group.
5. Verify Sudo Access in Debian
To verify the new user who has sudo privileges:
![]()
6. Using Sudo
To run a command with root access, type “sudo” and enter your required commands.
![]()
The terminal is asking you for the user’s password. Once they give it, a window will open with what looks like file listings inside of directories called “root.”
You don’t have to enter your password again when you log in for the first time.
Other Methods to Add Users to Sudoers Debian
1. Add user to sudoers using the Graphical User Interface(GUI) format in Debian
To add a new user with sudo privileges, follow these steps.
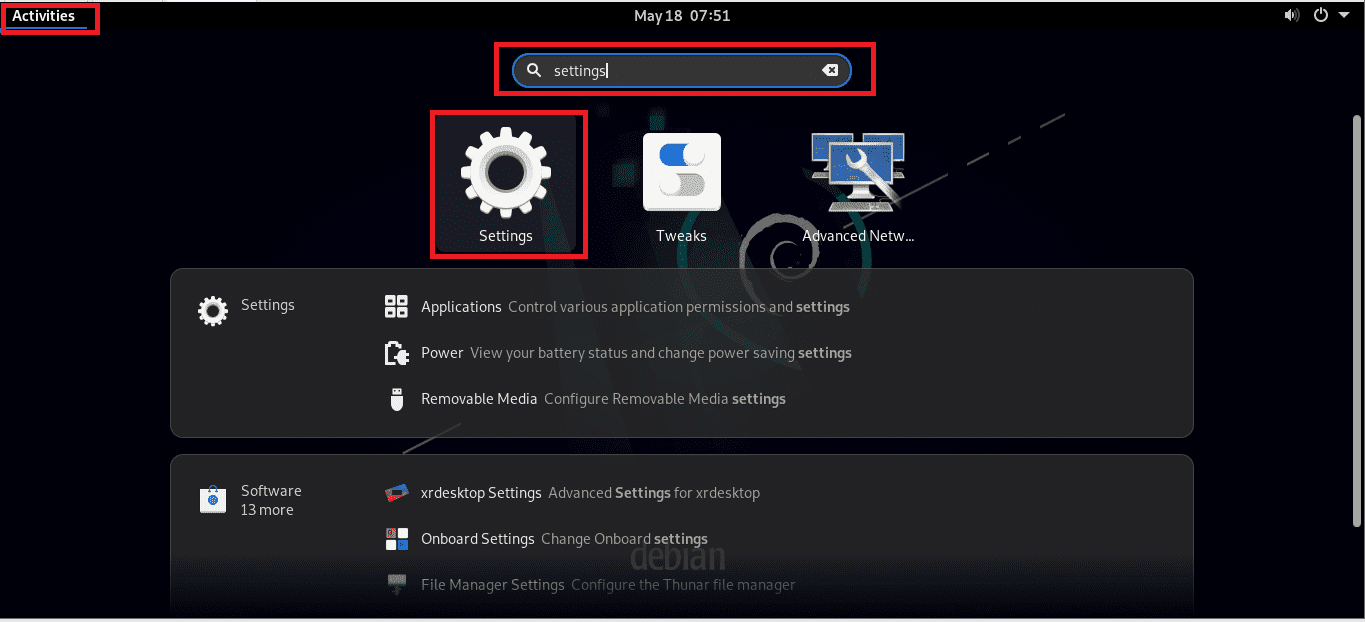
Step 1: Moving to “Activities.” to search for “Settings” at the search button:
To add a user, you have to scroll down on the left side of Settings and select “Users.” There will be an existing list here that shows what users are already active in your account but before adding another one click “unlock” for any changes we want to make over at the admin section!
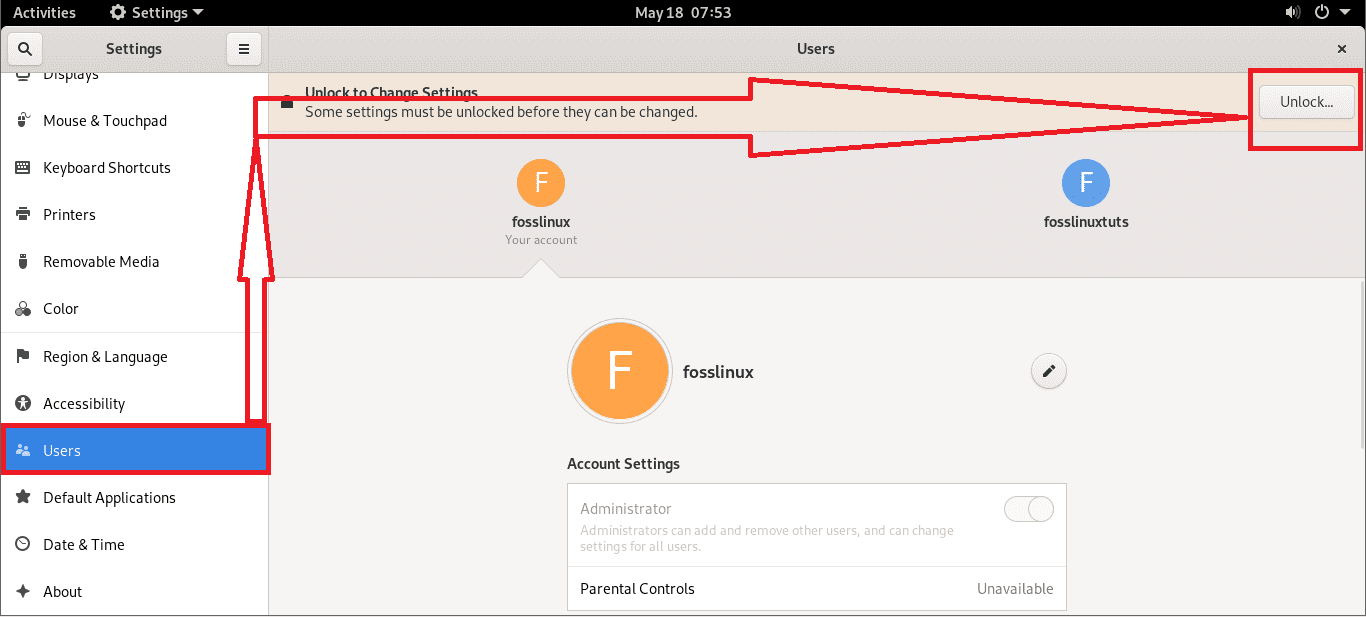
Once you’ve clicked the “Unlock” button, your computer will be quizzed to see if it’s indeed yours. Type in a password and click ‘ authenticate.’

After authenticating, you should locate an “Add User” button on the right corner of your user’s window. Click it!
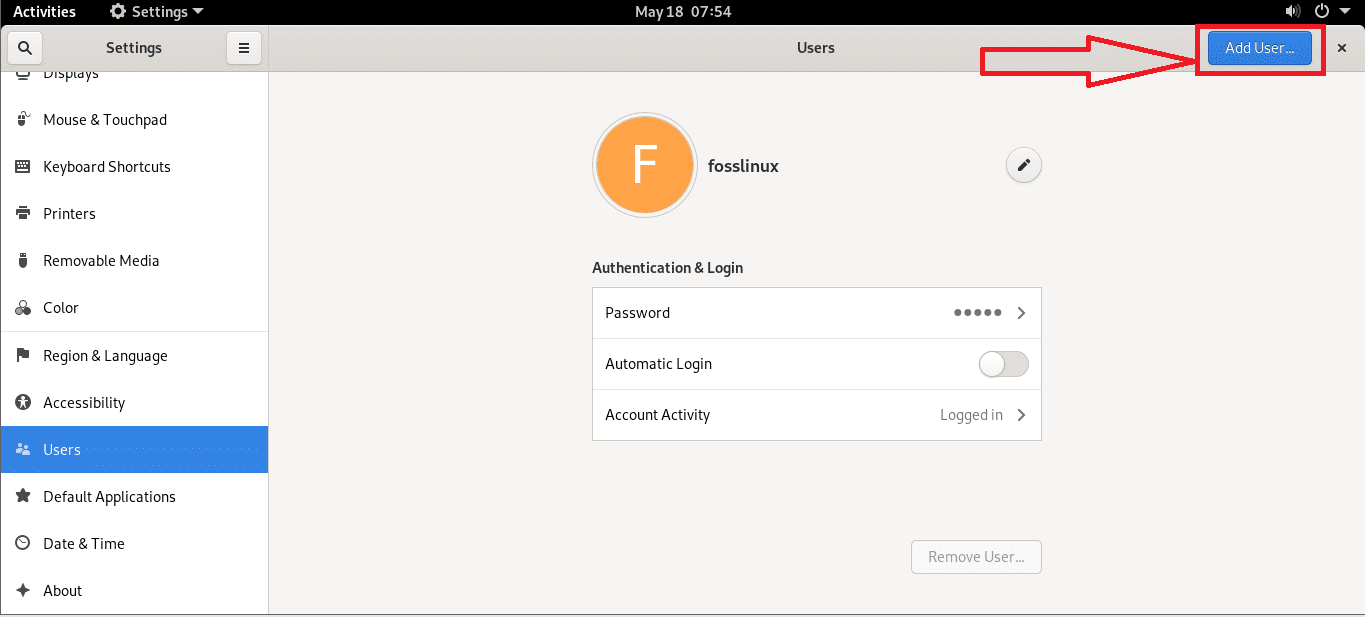
Note: The button to add a new user is only accessible once you’ve unlocked their profile.
Now that you’ve added your first user, there are a few more changes to make.
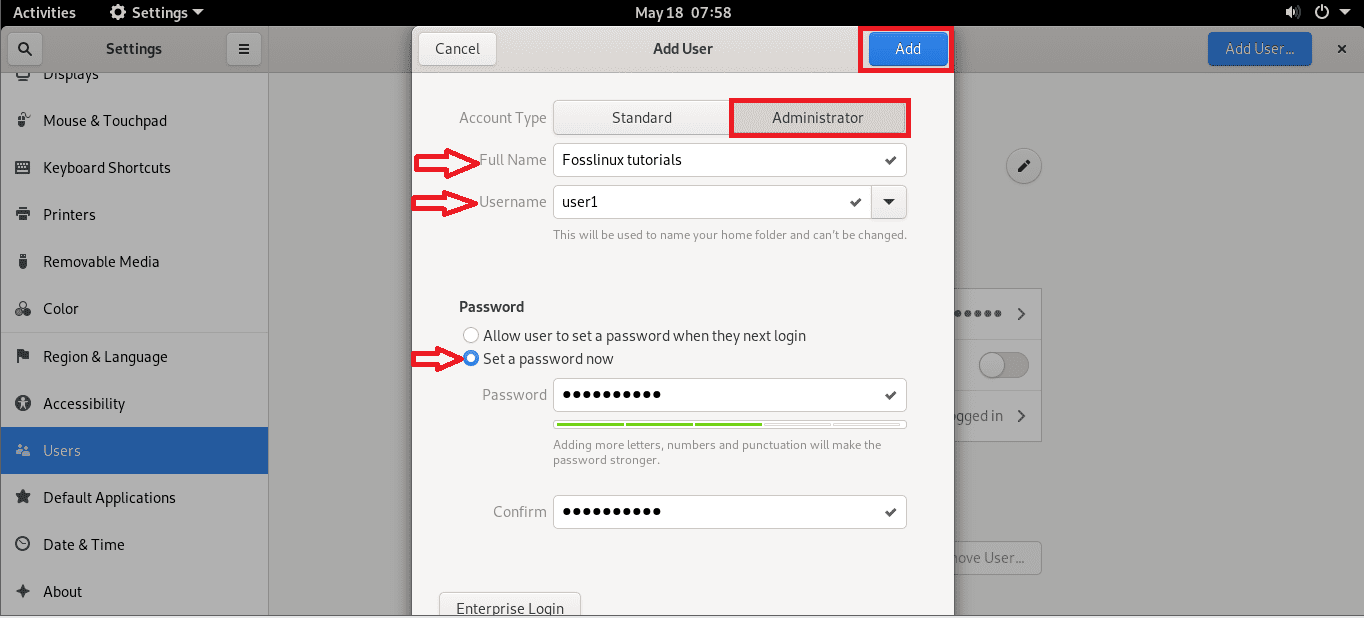
The new window will appear after clicking on “Add User.” Now here they come!
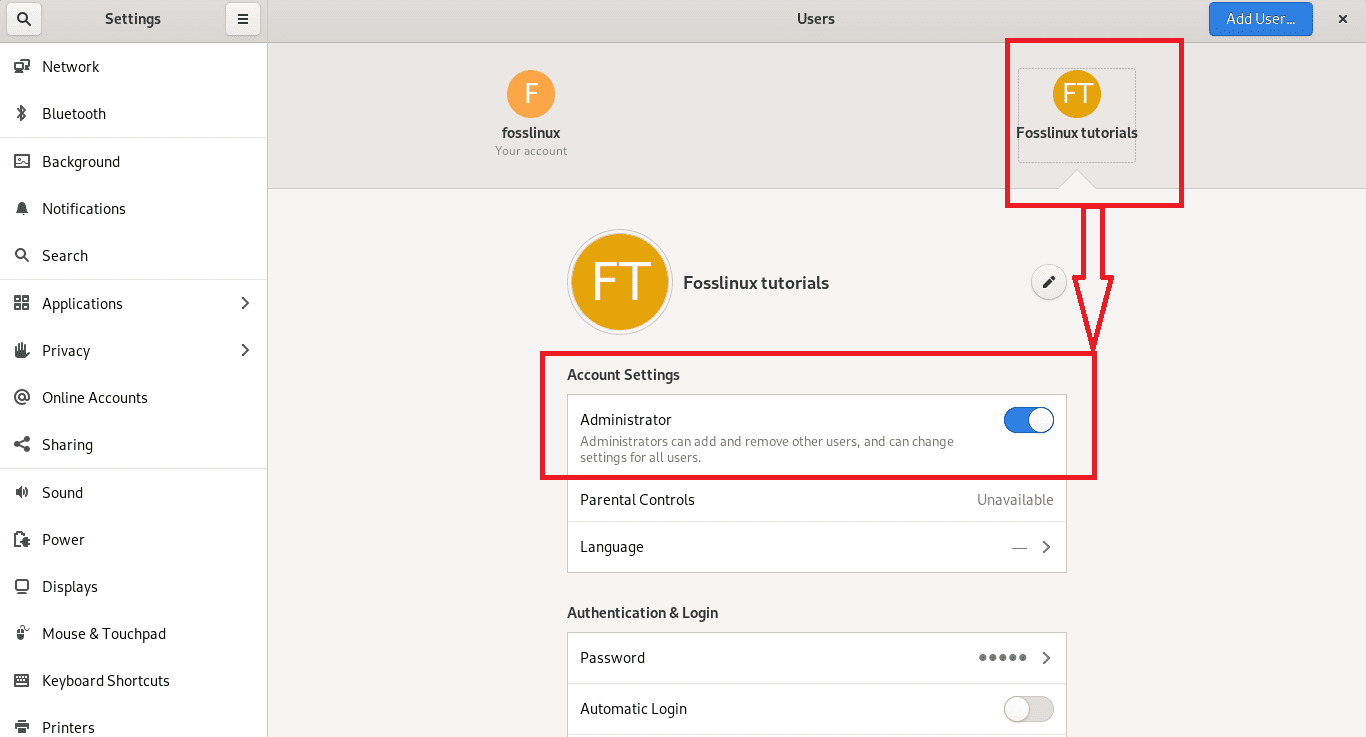
Step 1: set the “Account Type” to “Administrator”
Step 2: Please input the full name and username. In this case, we will use “Fosslinux tutorials” as our new user’s moniker while User1 can be used by whoever needs access to these tutorial videos!
Step 3: Next, go to “Set Password now” and input the password for “user1.” Finally, click on confirm to complete your registration process.
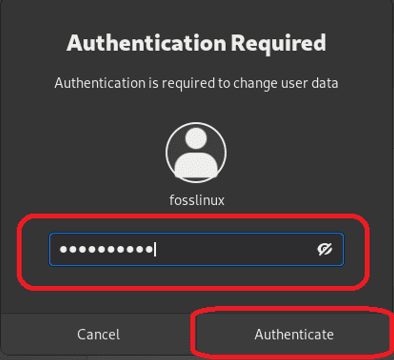
Next, you will be asked to authenticate by typing in the password and clicking on “ Authenticate .”
The user is automatically created in some instances without requiring any authentication.
The user should now have administrative privileges as they are a member of the “Fosslinux tutorials” group.
2. Manually change the sudoers file
The final method of securing the sudoers file involves opening and appending a few other lines that would depict that a particular user has now claimed their rights.
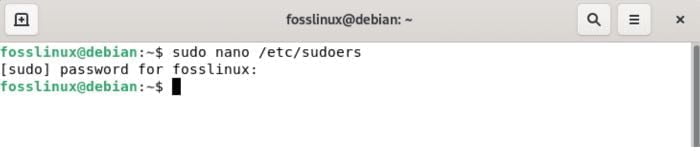
This can be done by navigating to the file with a simple command.
![]()
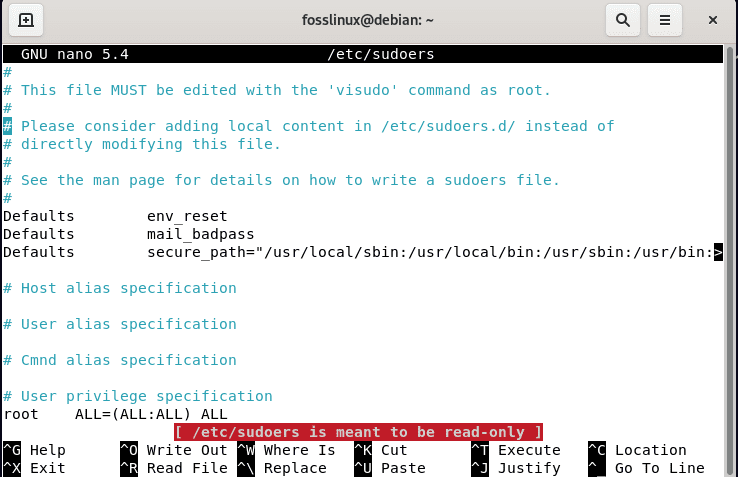
The sudoers file should be open like this by default.
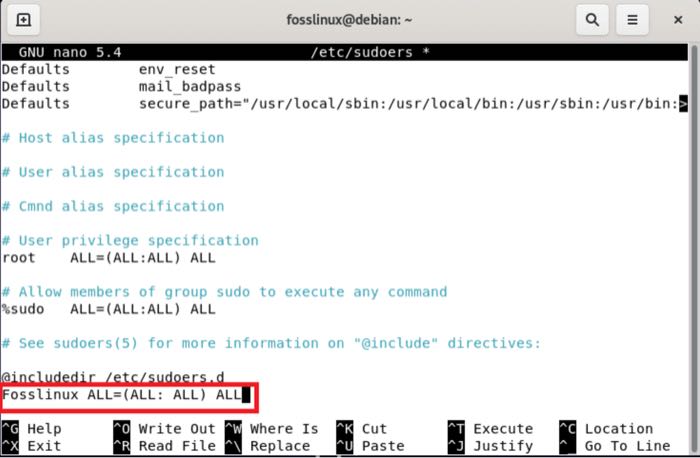
Next, we need to navigate down and manually type in this syntax replacing “username” with your desired username that will enable you for “su” rights. It would be best if copy-pasted from here so there are no typographical errors made directly into the code itself!
![]()
In our case, we will give the user “Fosslinux” su rights. As such you should enter this command:
![]()
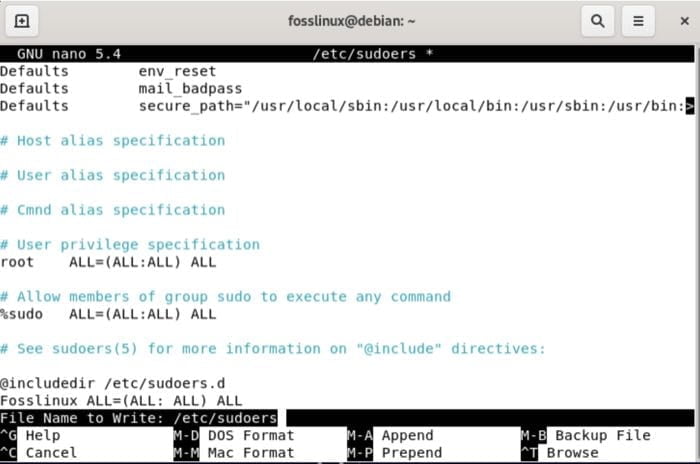
The sudoers file ends with a line that looks like this:
Now, you should close up the file by pressing “ctrl+x.”
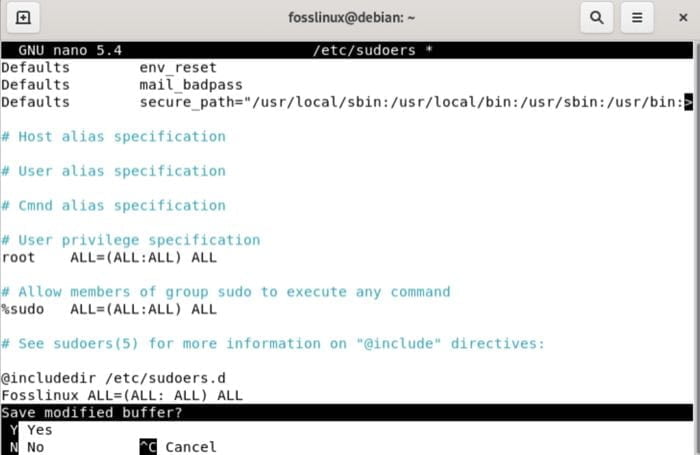
When you are done editing the document, type “y” and hit enter to exit.
With this simple change, you can now run your existing users with sudo rights on Debian 11 bullseye and the same will work for any future releases.