Before you go any further, ensure you have activated your SSL certificate, completed the necessary validation steps, and downloaded your SSL and Private key files.
How to Install SSL Certificate using WHM
Step 1
Log in to your WHM account. Once logged in, navigate to the option to Install an SSL certificate on a domain name.
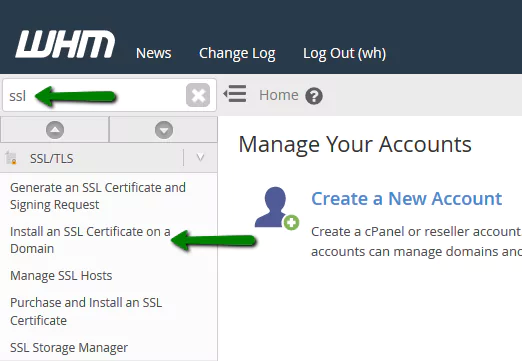
In the new window, you’ll find fields for Domain, Certificate, Private Key, and Certificate Authority Bundle.
Enter the domain (or subdomain) for which the SSL certificate should be installed in the Domain field.
Step 2
Paste the certificate issued for your domain name into the Certificate box. For Comodo certificates, locate the file named yourdomain.crt within the zip file you received upon SSL certificate issuance. Open it with a text editor like Notepad and paste its content into the box.
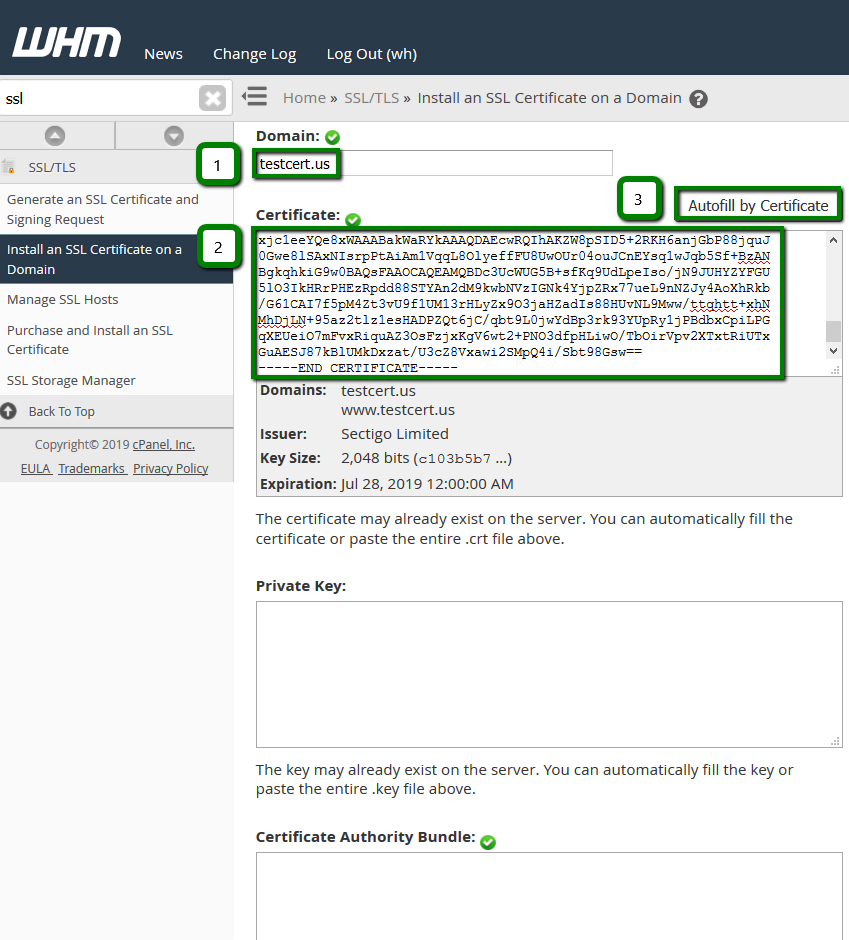
The second box, Private Key, is for the key generated with the CSR used for certificate activation. It typically looks like a block of code with a header —–BEGIN RSA PRIVATE KEY—-. If you generated the CSR using WHM in the same account, an Autofill by certificate button will appear after pasting the certificate. Click on it to fetch the CA Bundle and RSA Private Key automatically. If not, paste the Private Key manually.
Step 3
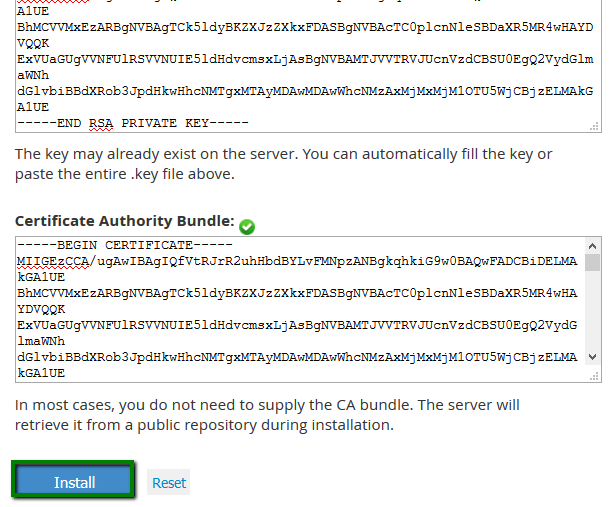
The third box, Certificate Authority Bundle, is for CA certificates received along with the domain certificate. Comodo often sends CA certificates in a zip file. If you have a *.ca-bundle file in your zip, paste its content into the box. If you have multiple CA certificates in different files, paste all of them into the Certificate Authority Bundle box.
Once all fields are filled, click on Install.
Step 4
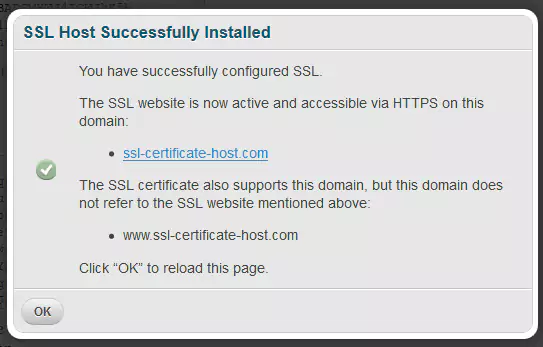
If the certificate is installed correctly, you should see the message: “You have successfully configured SSL. The SSL website is now active and accessible via HTTPS of this domain: *yourdomain.tld.
That’s it! Your certificate is installed. The website with SSL should be accessible via HTTPS within a few minutes.


