
Welcome to 1Byte’s blog, in this tutorial, 1Byte will guide you to register a domain name on 1Byte platform. If you don’t know the definition of a domain, read our post on what is a domain to understand better.
Prerequisites
Your need to register 1Byte account first
FURTHER READING: |
| 1. How To Host Any Domain With Free DNS On 1Byte Cloud Hosting |
| 2. How to Manage Your Domains and Sub-Domains on cPanel? |
| 3. What and How to Setup Redirect Domain? |
Step-by-Step to Register a Domain Name on 1Byte
1) Go to the 1Byte website
You can access directly to the homepage or navigate to the domain name page
2) Choose a name (domain name) for your website
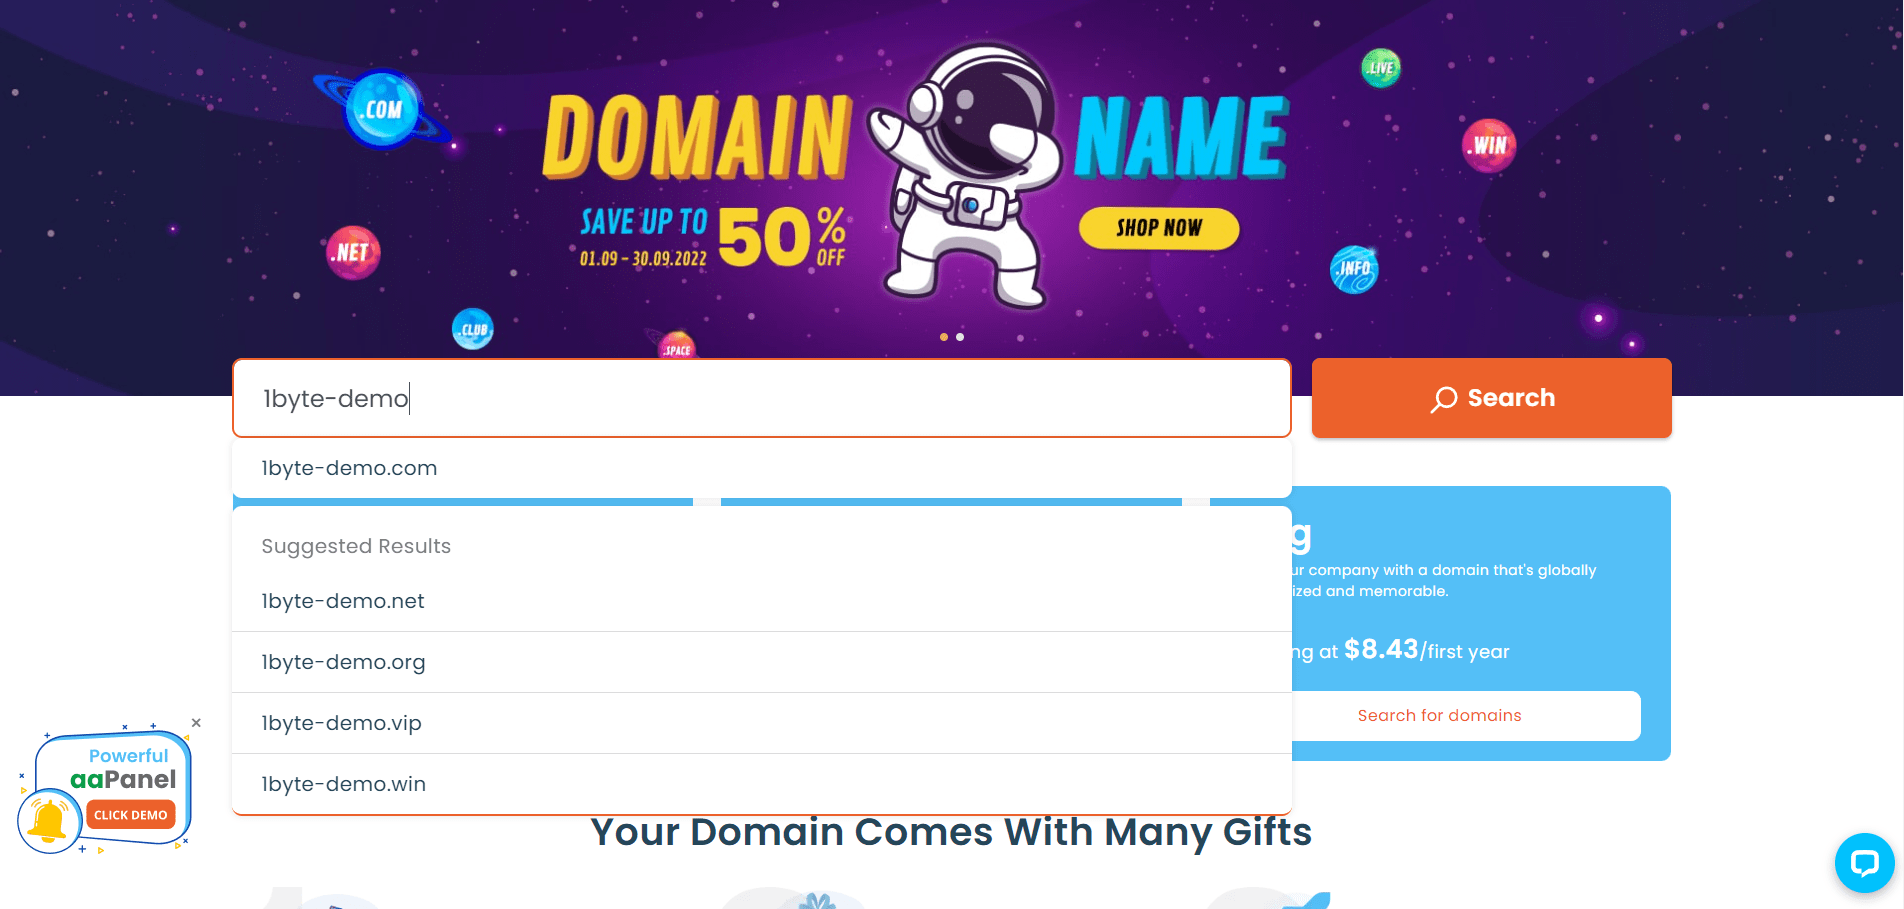
NOTE: When finding your domain name
- Do not put “www” (world wide web) in the search box. Just type any name that you wish
- You can type the extension of your domain name (TLD – Top Level Domain) or skip it, and the system will automatically suggest the extension for you
3) Add the domain to your cart
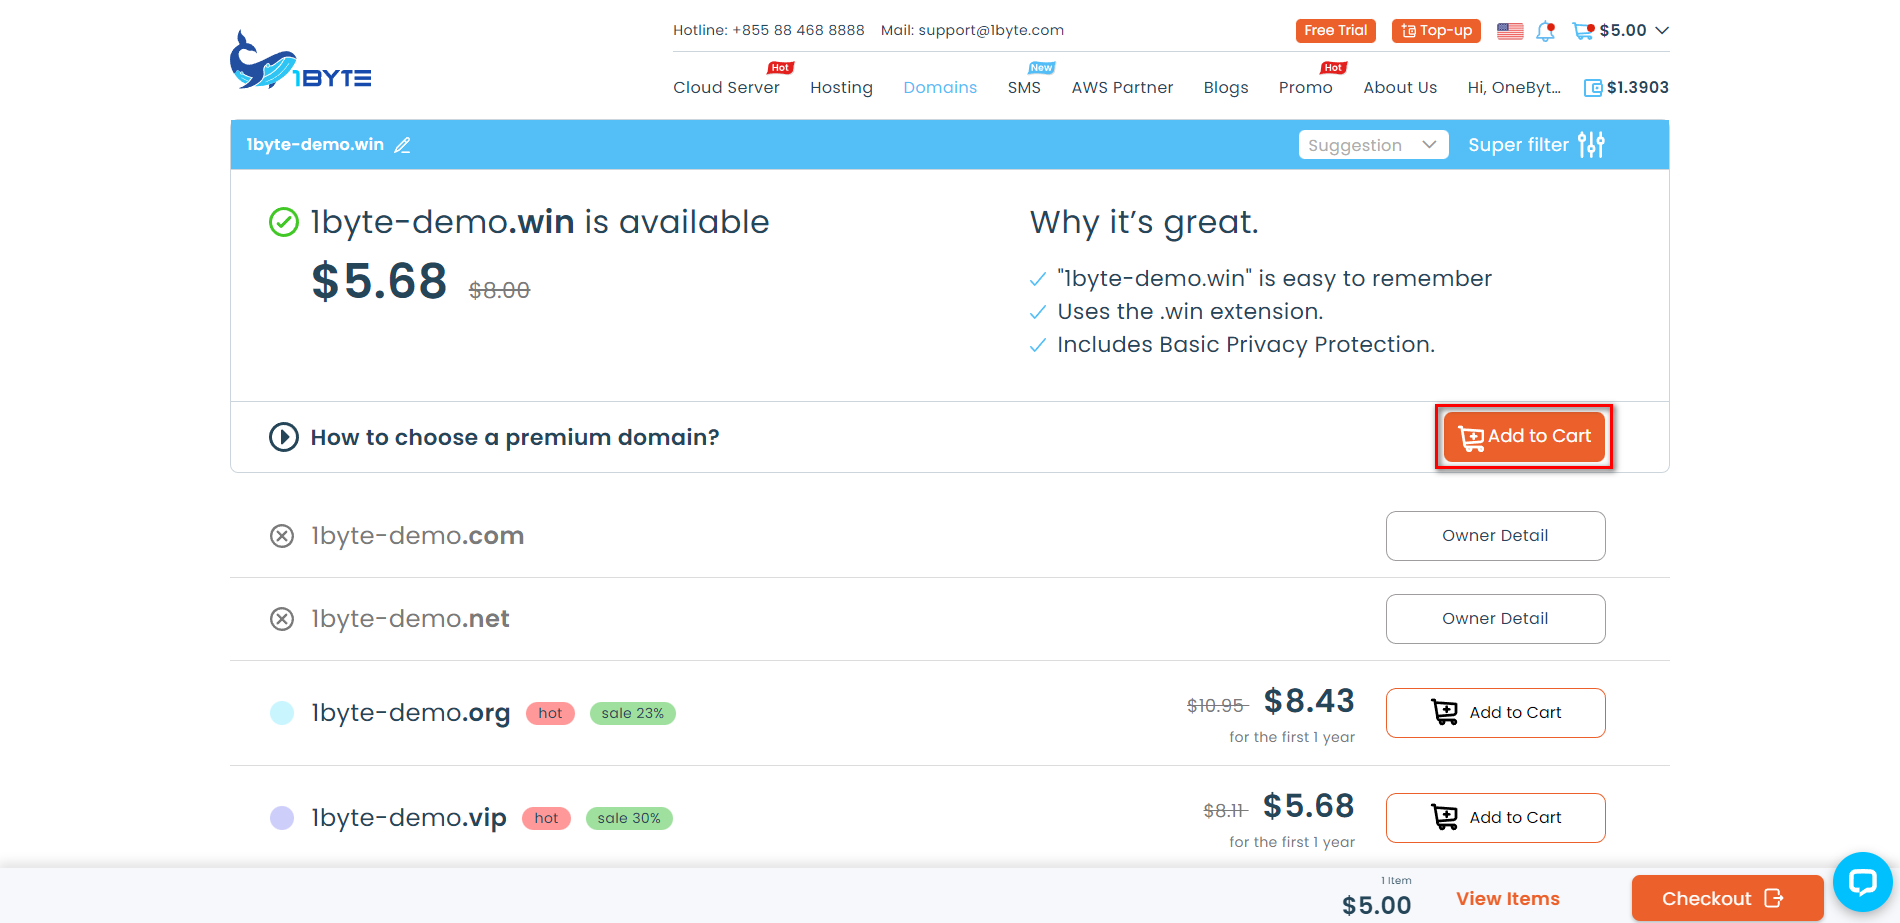
- Your domain name will be automatically added to your cart
- To see your cart. You can click on “View Items” at the bottom-right corner or click the “cart-icon” at the top-right corner of the page
4) Checkout your order
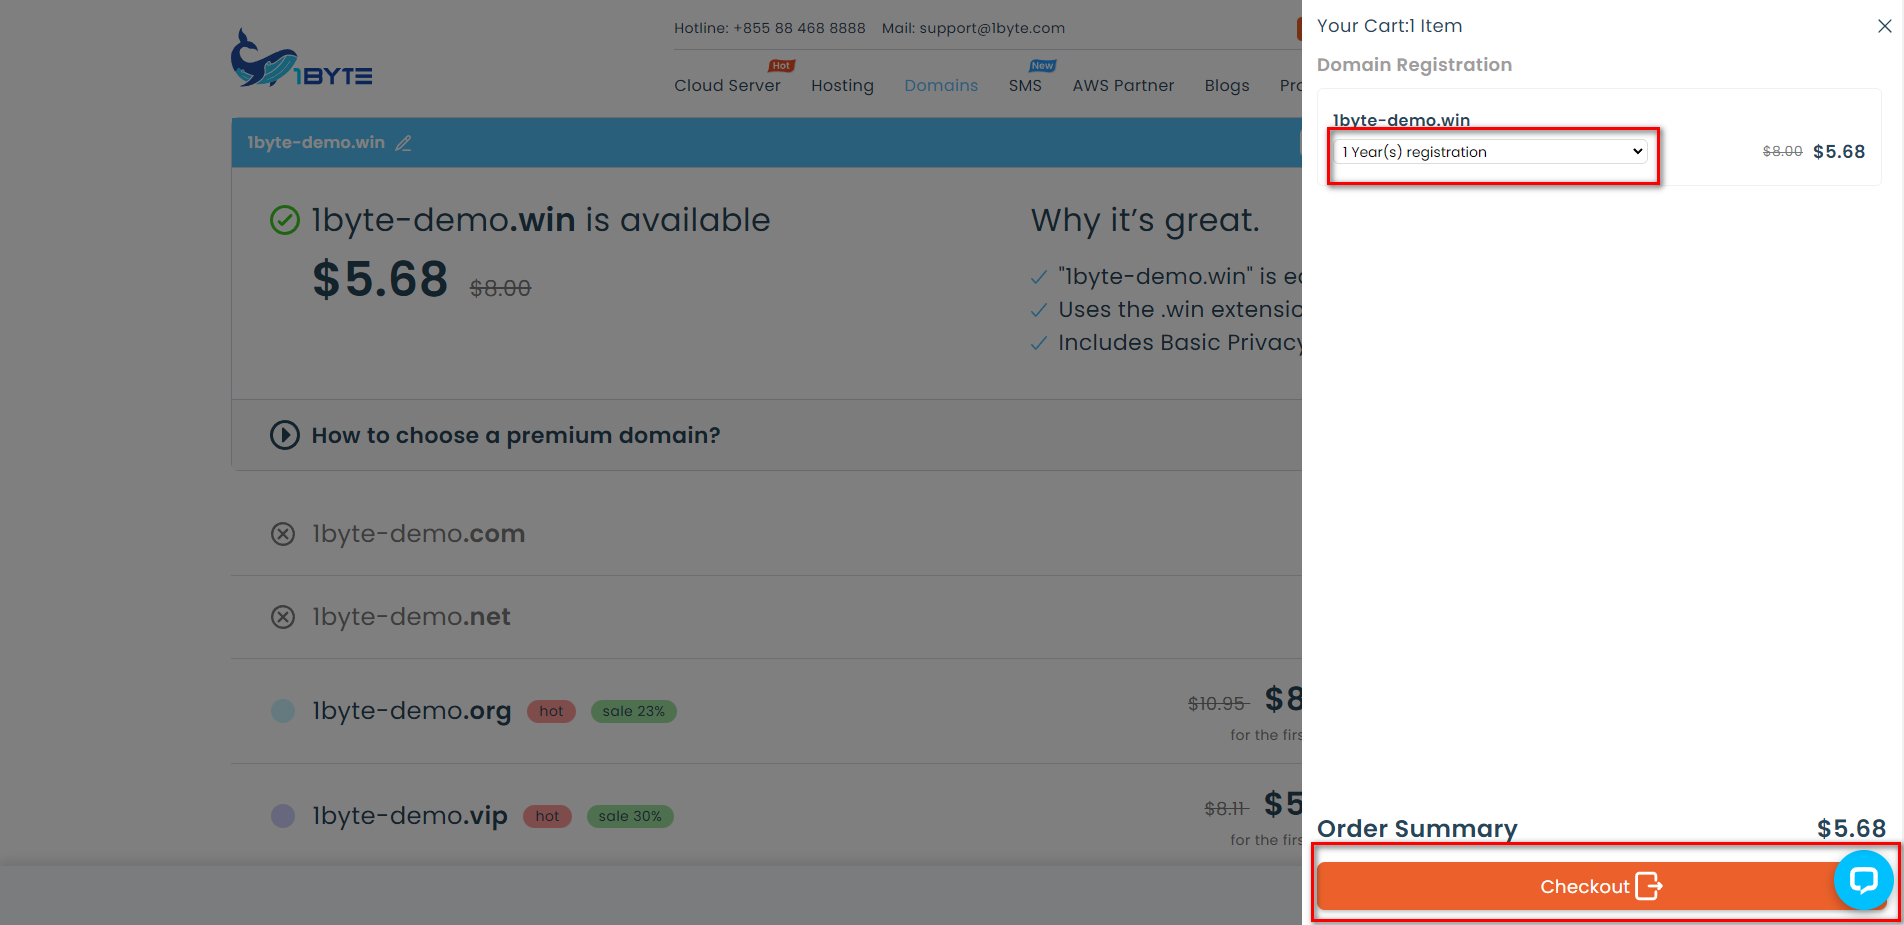
You can extend the usage year for this domain at this step
5) Check your Inquiry again

6) Choose a payment method
1Byte provides many payment methods for customers such as shown on the image above
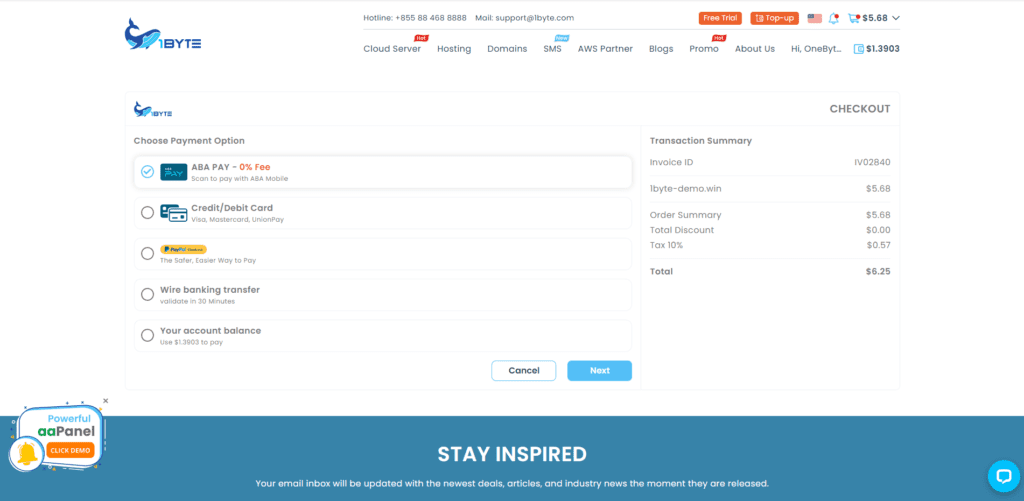
NOTE:
If you choose “Wire banking transfer“, You will have to wait longer than other payment methods because the 1Byte team needs to check whether your money comes into 1Byte’s account or not
The remaining payment methods will be processed automatically by the system. It’s very quick
7) Make payment
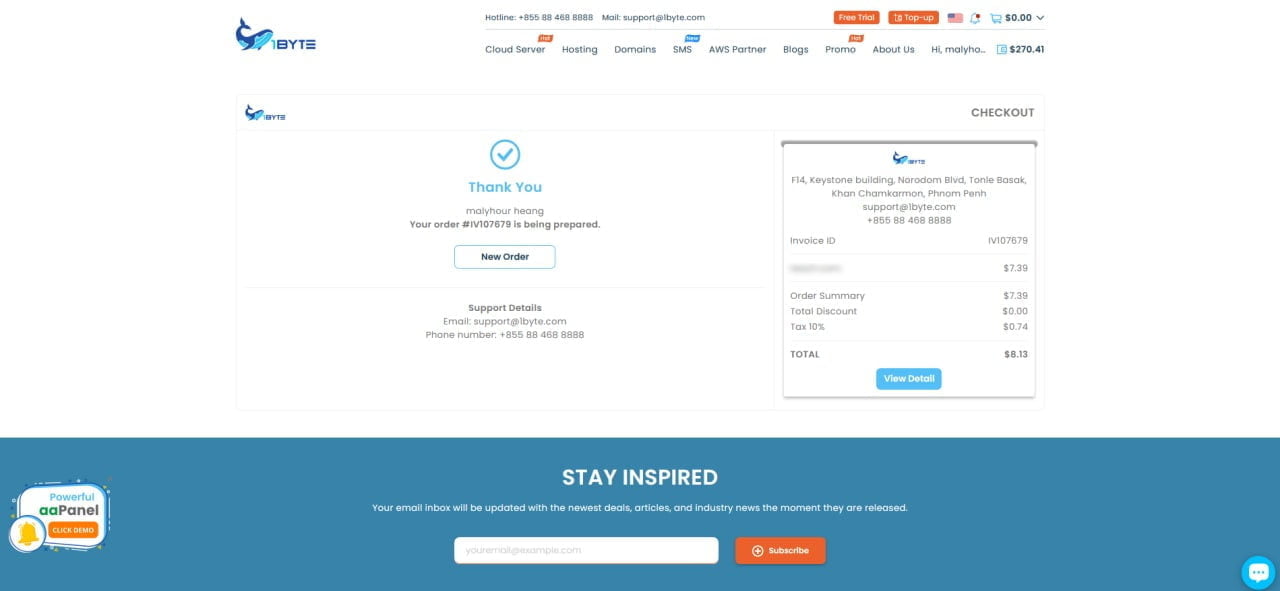
You can click “View Detail” to check your invoice. or access your “Dashboard” by doing as follow:
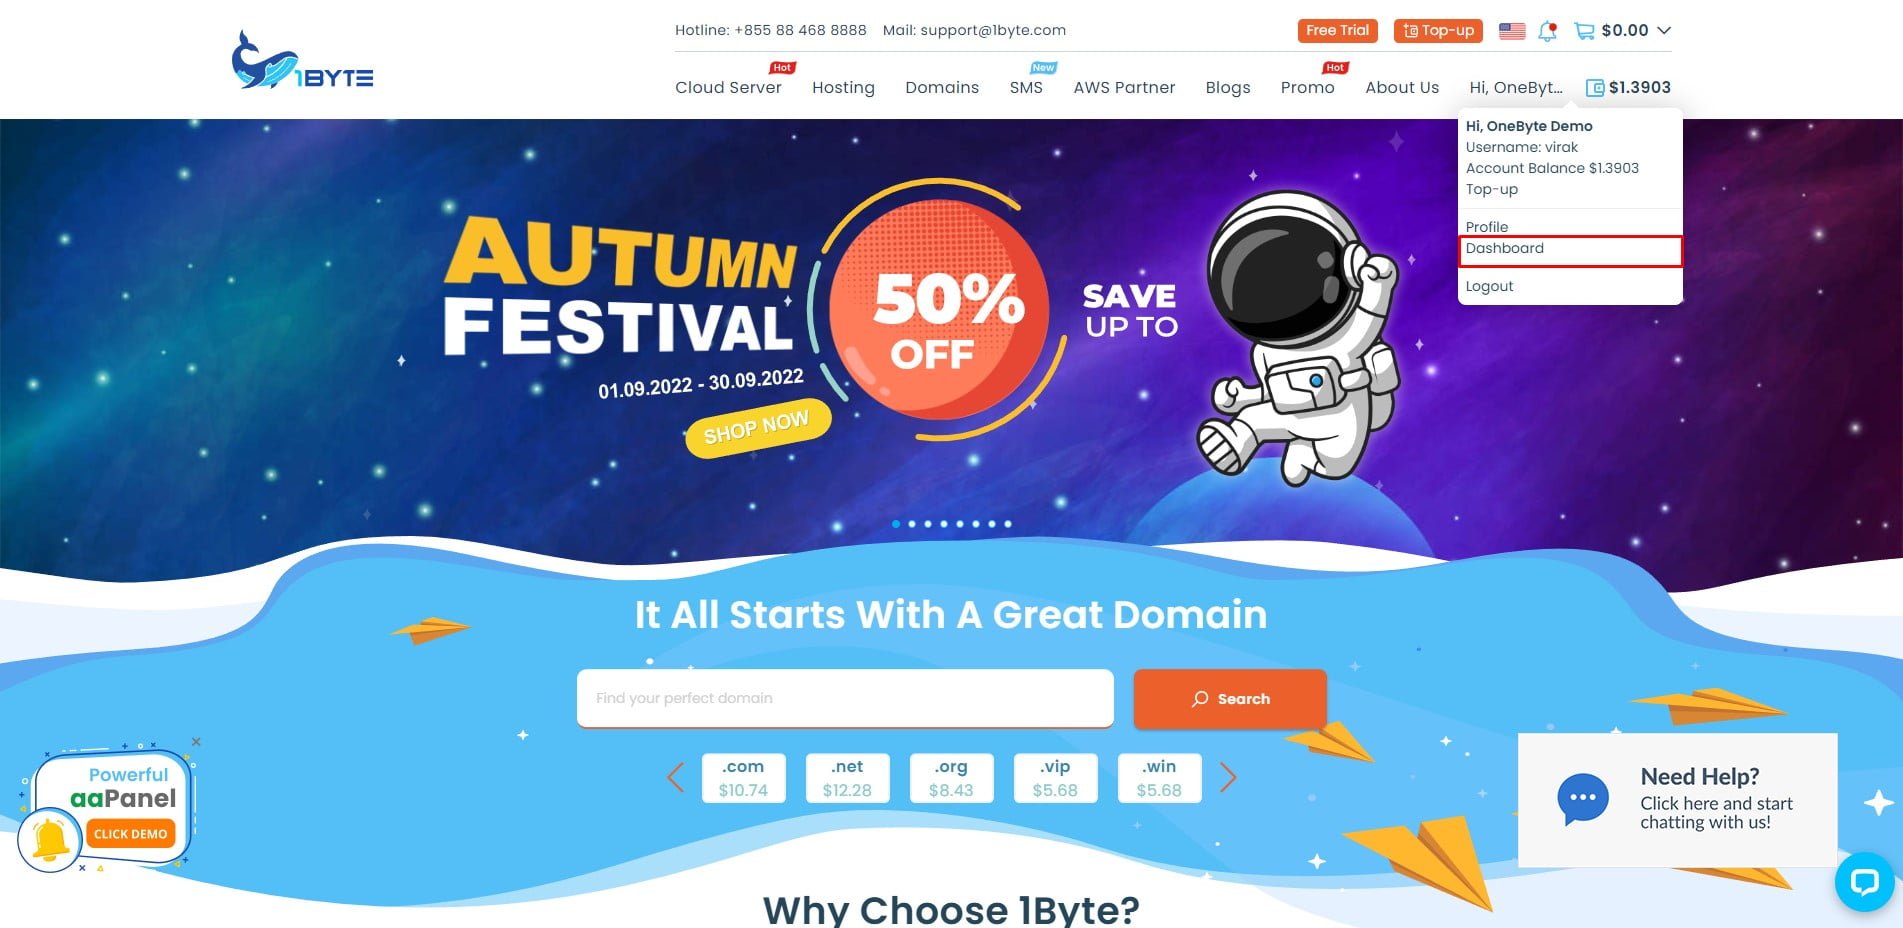
Go to Domain Because you just made a payment for a domain name, so you can check the status of the domain name by navigating to “Domain” in menu right-bar
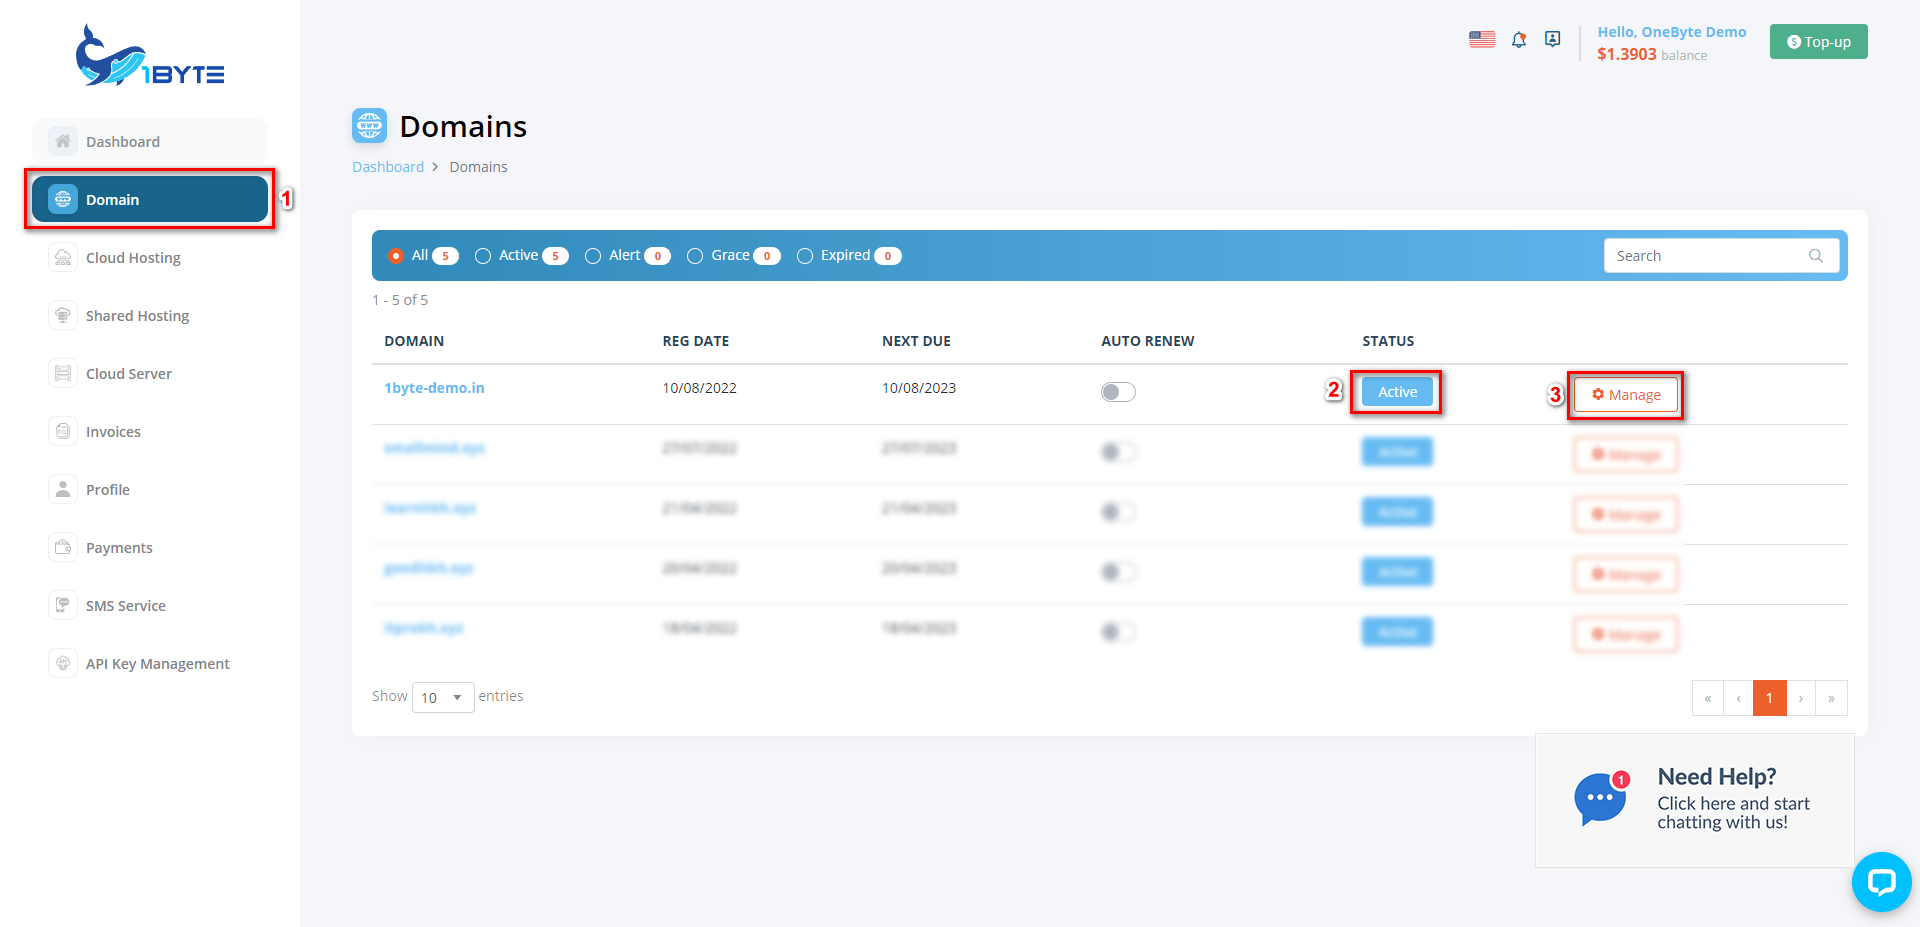
(2) Status Active → Your domain has been successfully registered and waiting to be used
(3) Manage → Is a place for you to configure domains, manage domains, …etc