
In this article, we will demonstrate how to host AnyDomain with Free DNS by utilizing 1Byte’s very own Cloud Hosting Services. We will do this by walking you through the steps involved in detail, along with offering a very thorough video guide to help you visualize. Your learning process will be assuredly accomplished in a methodical and sequential fashion.
Let’s get started first with some prerequisite knowledge.
Additional Knowledge
1. The Purpose of DNS Servers
By acting as a middleman between humans and computers, the Domain Name System (DNS) server mediates communication between the two. Below are some of its most popular benefits:
- You can use DNS servers to find websites by entering the domain name of the website rather than the IP address.
- They add an additional layer of security to your network.
- Conducting business via the internet would be almost impossible without DNS servers.
- If a website’s IP address changed, the DNS server would notice the change and promptly update its database, ensuring that users experienced no disturbance.
- Customers see substantially less downtime because DNS servers are so efficient at what they do.
FURTHER READING: |
| 1. WHOIS Service for Better Domain Privacy Protection |
| 2. How to Find the Contact of a Domain Owner? |
2. Why Use A 3rd-Party DNS Provider?
This form of usage is typically seen in extreme circumstances, such as when a consumer purchases a domain that is not owned by 1Byte, and the firm selling the domain does not supply a nameserver. It means that they only supply the domain name (for example, “domain.kh”: when a customer purchases “domain.kh,” the service provider only provides the domain name and nothing else).
As a result, clients are unable to point their domain names to an IP address provided by 1Byte Web Hosting. Therefore, for the client’s domain name to be useful, they must have a DNS to acquire this domain and be responsible for resolving this domain into a specific IP address (this IP address will belong to 1Byte’s Cloud Hosting).
Another example of this is when large organizations want to utilize DNS with their brand name rather than 1ByteDNS.
3. Why Not Use 1ByteDNS Instead of A 3rd-Party DNS Provider?
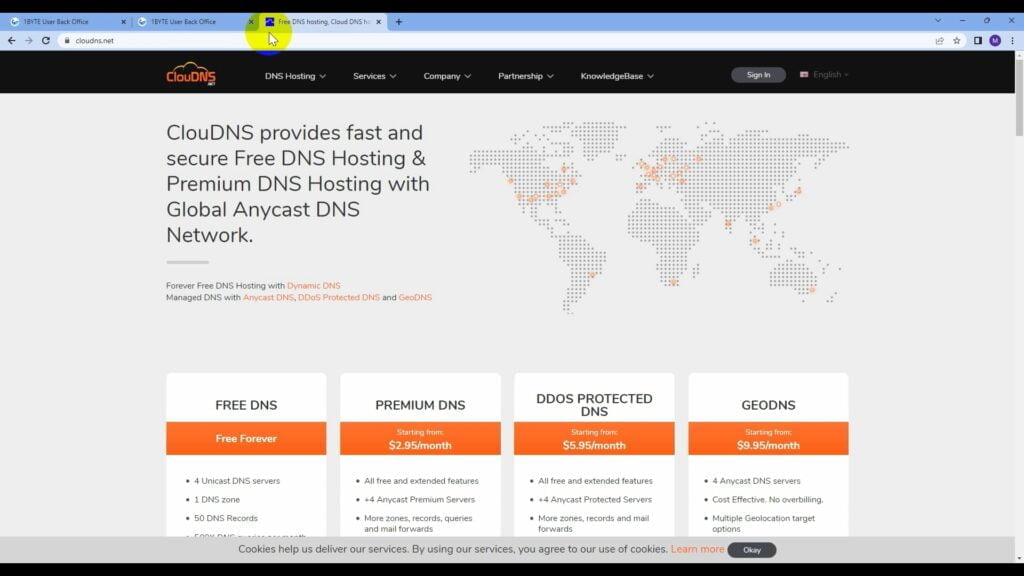
Only domains purchased via the 1byte website will be accepted and resolved by 1ByteDNS servers. 1ByteDNS will not accept domains that are not acquired for more than one byte. As a result, clients are unable to configure the nameserver (DNS) for the domain name and are compelled to use a DNS service offered by a third party if they purchase a domain from a third party. We recommend CloudDNS in this scenario.
How To Host Any Domain With Free DNS On 1Byte Cloud Hosting?
Step 1: Signing in to your 1Byte account and go to the User Dashboard
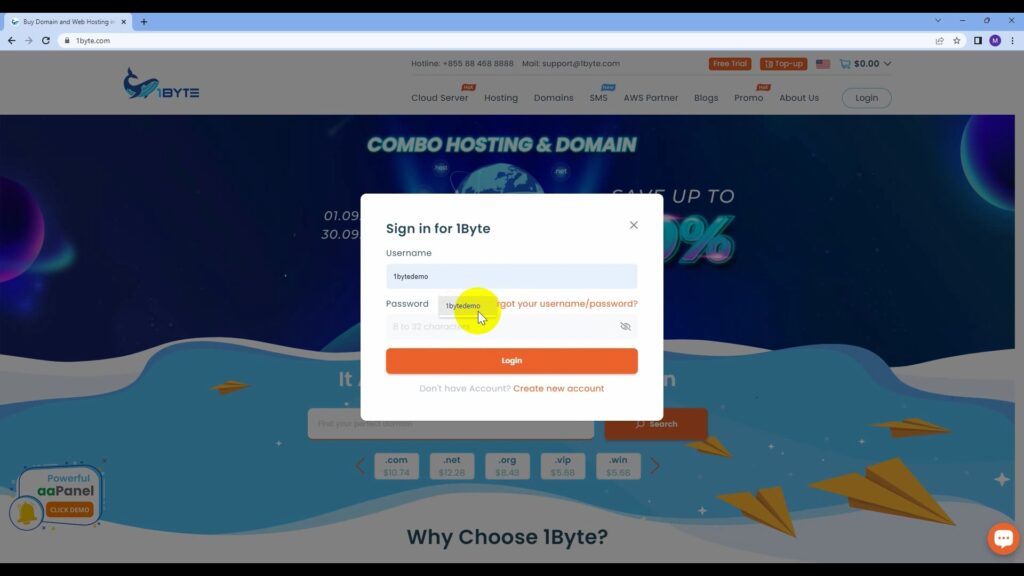
When you have finished successfully logging in to your 1Byte account, head on over to the User Dashboard section.
Step 2: Gathering information for this demonstration

As a demo, we will begin the process of hosting the domain name 1byte-demo.com on Cloud Hosting (IP address: 220.158.233.94) supplied by 1Byte. You have complete control over the domain name you want to utilize.
Note: The fact that ClouDNS Hosting has a track record of providing high-quality DNS services played a significant role in our decision to cooperate with them. As a result, the biggest advantage is that their DNS service is entirely free to use. We incurred no fees as a result of using it for this demonstration.
Step 3: Installing and setting up ClouDNS for your hosting and domain
3.1. Getting ClouDNS’s Nameservers
To begin, we must first decide which DNS server to use (nameserver). When necessary, these four name servers will handle the process of converting the domain name to an IP address. To get ClouDNS’s nameservers, go to the “DNS Hosting” section, click “Create Zone” and then select “Master Zone”’ from the pop-up menu. Finally, specify your domain name. All you have to do is wait for these nameservers to accept your domain after they have acknowledged it.
3.2. Input
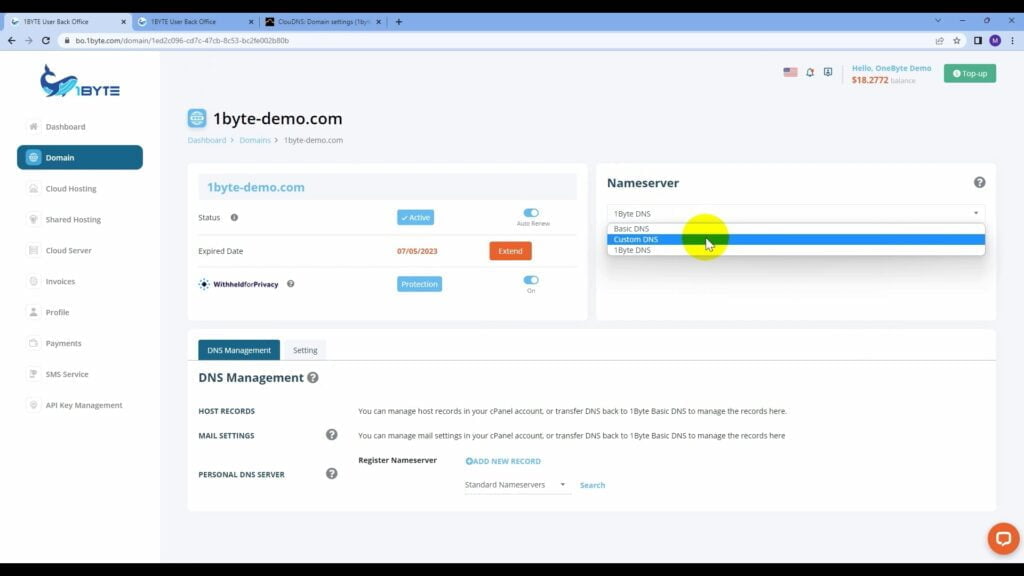
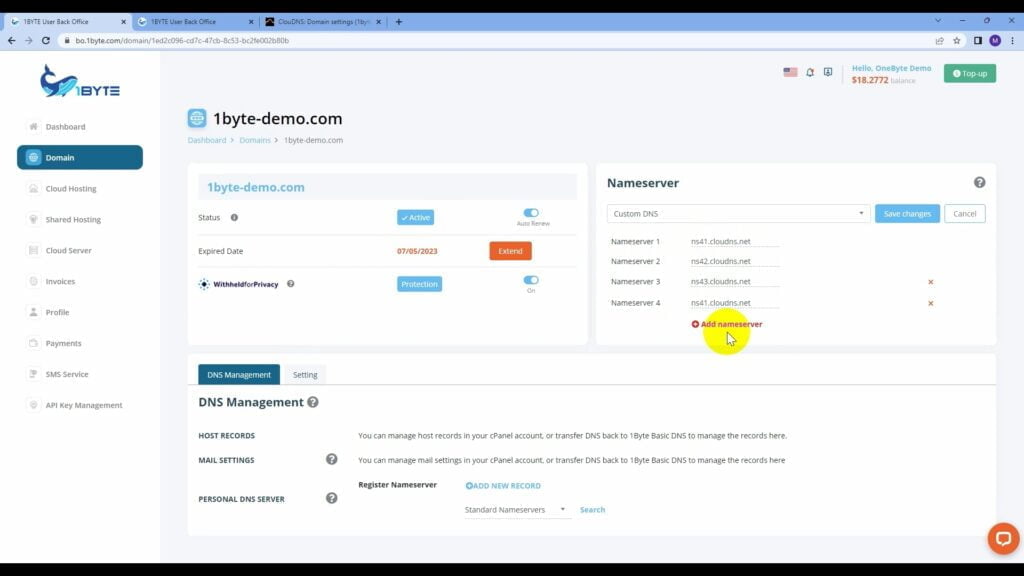
Once the relevant information for your domain name has been successfully updated, it is still not enough; you must also indicate that your domain will accept these four nameservers via 1Byte User Dashboard by switching nameservers from “1Byte DNS” to “Custom DNS”, and put the 4 nameservers of ClouDNS in the previous step in here.
3.3. Point To IP
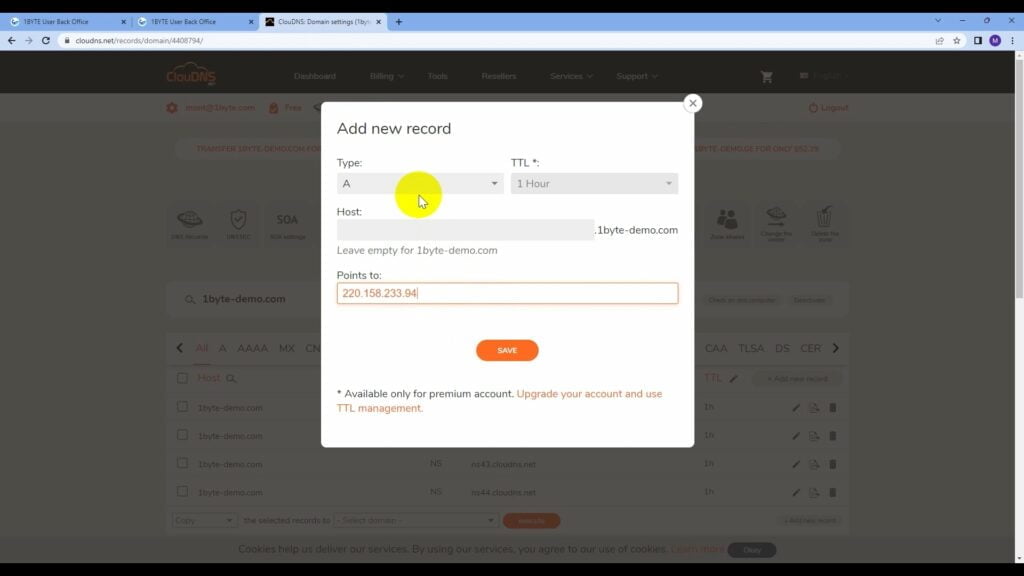
We have not, however, decided on an IP address that will act as the domain’s resolution and to whom it will belong. Let’s make sure these nameservers are aware that the IP address 220.158.233.94 will be utilized to resolve this domain by clicking “Add new record” at ClouDNS dashboard, choose “A Record”, leave the host “blank” and “www”, and point to 1Byte IP Hosting which is 220.158.233.94.
3.4. Review
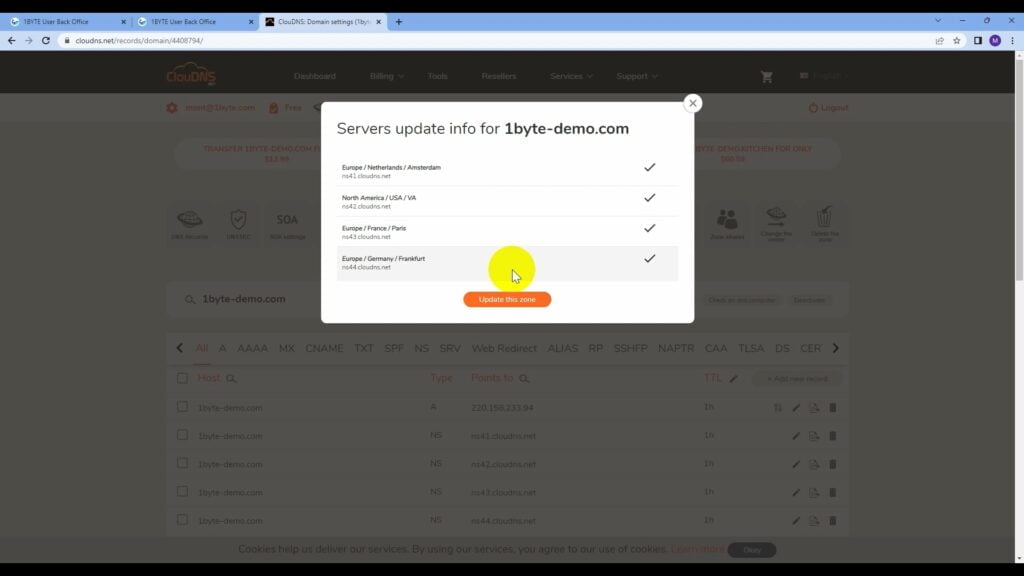
As is customary, we will not proceed until the process of upgrading these DNS records is completed. We’ll do a second check with the help of the DNSWatch application for complete assurance.
After it’s confirmed that there are no problems, everything will go exactly as planned. Your web browser will be able to discern which domains belong to you and which domains belong to others thanks to these nameservers. Check that all of the fields have the right information entered.
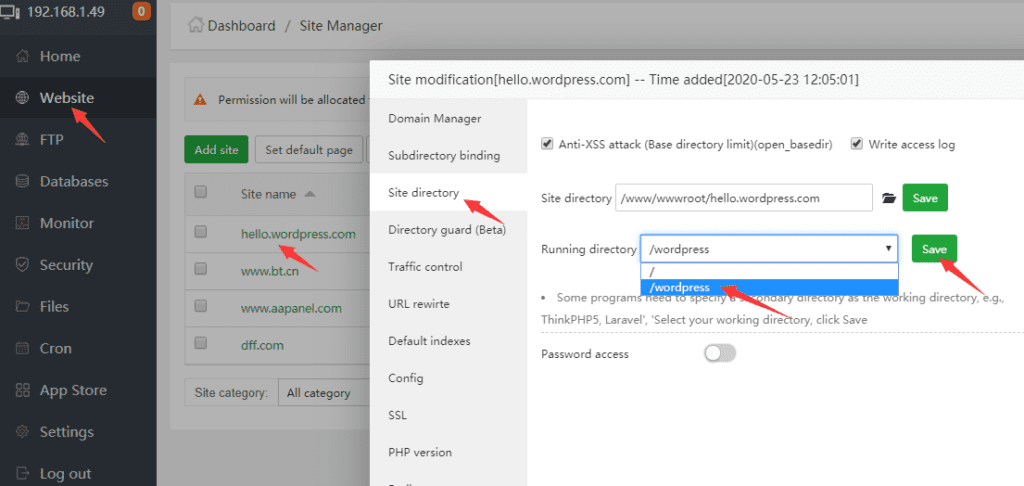
Step 4: WordPress installation based on this domain and 1Byte Cloud Hosting.
We are going to skip over this stage of the process. You can take a glance at this article or the video below for more specific details.
Video Walkthrough
Do you have any concept of how to put up a website utilizing WordPress via Cloud Hosting? If you haven’t done so already, please check out the link that’s been provided in the description for a thorough answer to said question.