

Our free Email Forwarding feature allows you to create personalized email addresses for a domain and forward emails to other email addresses of your choice. This service is available for all domains pointed to our Basic DNS and Custom DNS. It is possible to create up to 100 forwarding email addresses.
What are Redirect Emails?
This is an email forwarding service that does not allow creating fully-featured email accounts and send outgoing emails from [email protected], since it’s a virtual email address.

FURTHER READING: |
| 1. How to Register Domain Name on 1Byte? |
| 2. How To Host Any Domain With Free DNS On 1Byte Cloud Hosting |
| 3. How to Manage Your Domains and Sub-Domains on cPanel? |
How to setup Email Forwarding for your domain?
Step 1
To set email forwarding for your domain, first, log in to your 1Byte account, then go to account Dashboard, select Domain at the menu slide bar, finally click on the Manage button
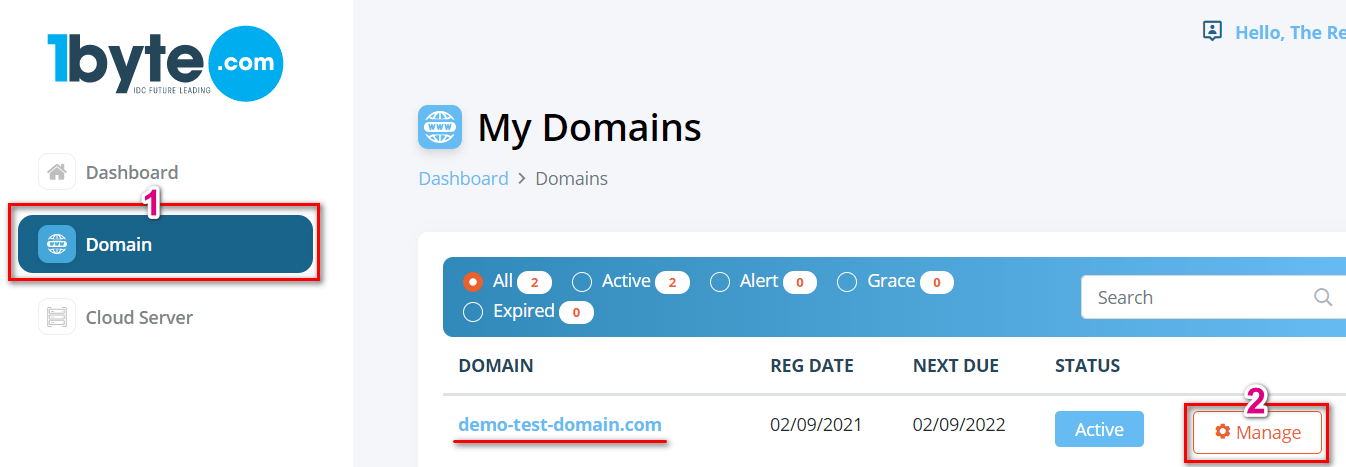
(In the picture above, 1Byte will use the domain demo-test-domain.com to redirect all emails from this domain to other email addresses)
Step 2
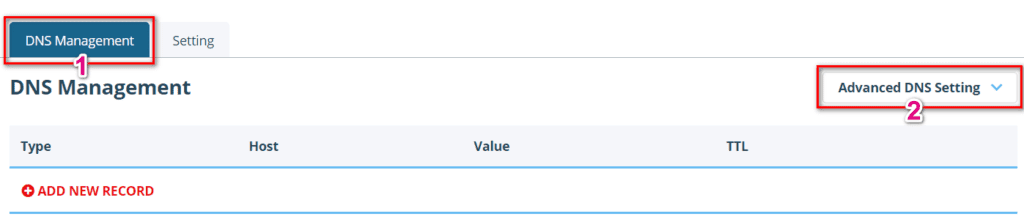
After you click on the Manage button, select the DNS Management tab, and click on Advanced DNS Setting
Step 3
Find the Mail Settings section, and select Email Forwarding from the drop-down menu. Everything will be set automatically, and you just need to click on the check sign symbol to Save all changes
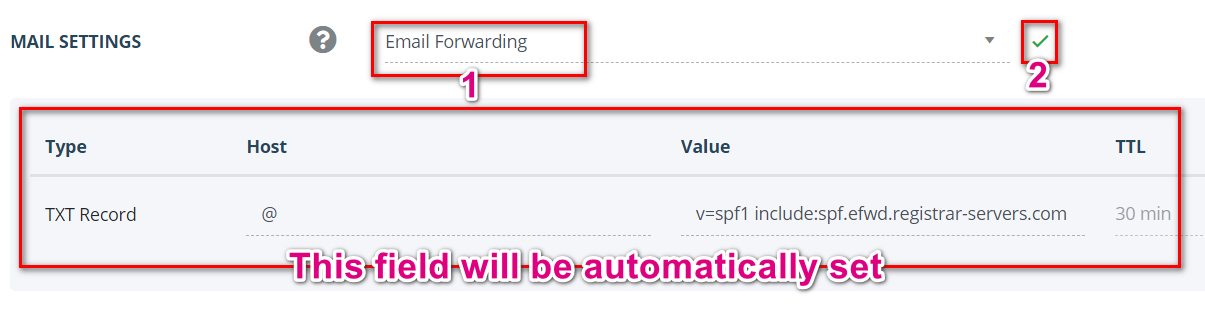
NOTE: The SPF record shown in the screenshot above is needed for free email forwarding to function, thus, it cannot be deleted.
Once MX records are set, you need to create your forwarding email addresses
Step 4
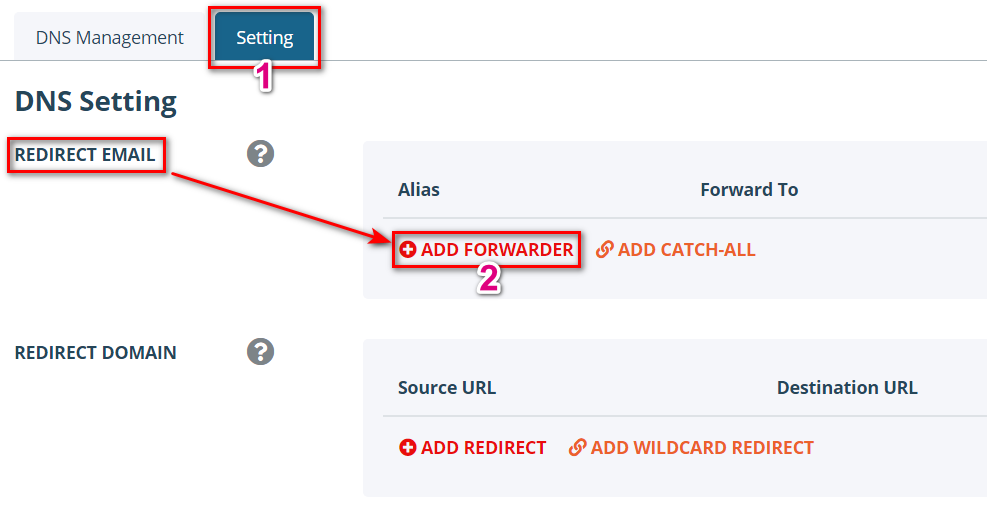
Switch back to the Setting tab and locate the Redirect Email section. Click on the Add Forwarder button
Step 5
Fill in both the Alias and Forward to fields with the corresponding information and click on the checkmark icon to save the changes.

Alias is the name of your forwarding mailbox. For example, if you are forwarding all emails sent to [email protected] to your destination email address, you will need to put admin in the Alias field (it is also possible to forward the same alias to several email addresses).
Please allow about an hour for newly created mailboxes to be completely set up on the forwarding mail server. After your settings have been activated, you will be able to test your mail service.
NOTE: Delivery of test emails sent from the same email address that is set as Forwarded to will most likely fail. Thus, please use another email address when testing the email forwarding service.
That’s it!