
The multiplayer, co-op and social aspects of V Rising make it a fantastic game to enjoy with others. Is a V Rising Dedicated Server something you and your friends would enjoy playing? From downloading and installing to configuring and hosting, 1Byte has you covered. Ultimately, you’ll be able to host your own games with your pals. You can read below for more details, or if you like a more visual guide, you can visit the video published on our YouTube channel regarding the subject.
How to Build V Rising Gaming Server on 1Byte’s Cloud Server
Step 1: Sign in to your 1Byte account and go to the Cloud Server section of the User Dashboard
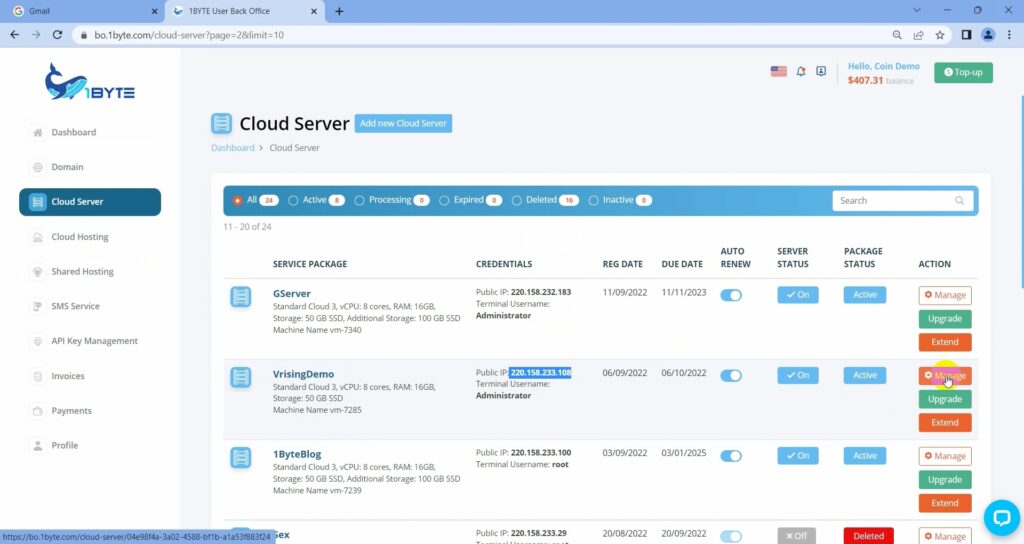
For the purposes of this example, we will set up a V-Rising gaming server on this Cloud Server (IP: 220.158.233.108). To connect to this cloud server, you must now use a desktop user interface. It is similar to the RDP.
Step 2: Go to the Steam website and select the Steam client by clicking the Download button
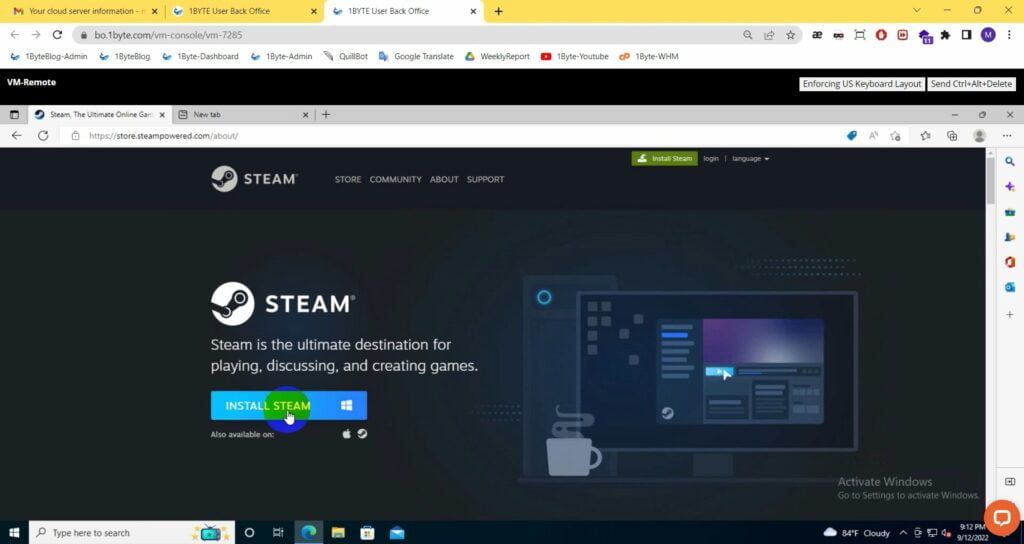
The following step is to run the Steam client on your Cloud Server and finish the installation. Please sign in to access your account. (If you don’t already have one, you may sign up for one here.)
FURTHER READING: |
1. What Is Cloud Security Management in Cloud? – All In One Guide |
2. The Best Cloud Backup Services for Business |
Step 3: Get a copy of the V-Rising video game (you can skip this step if you have done Steps 1 and 2)

This isn’t a game you can play for free. As a result, you will need to make a monetary investment.
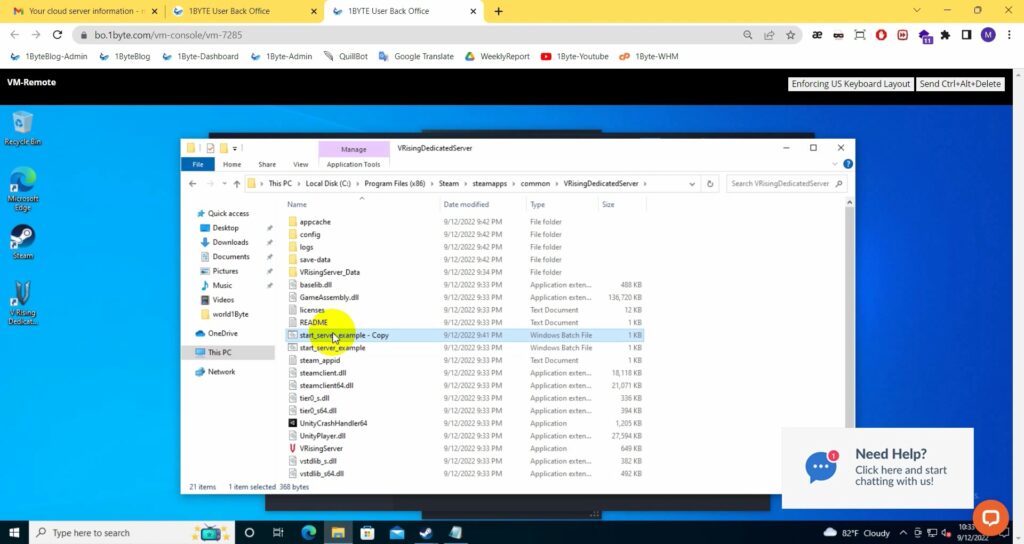
Step 4: Set up and configure the V-Rising Dedicated Server.
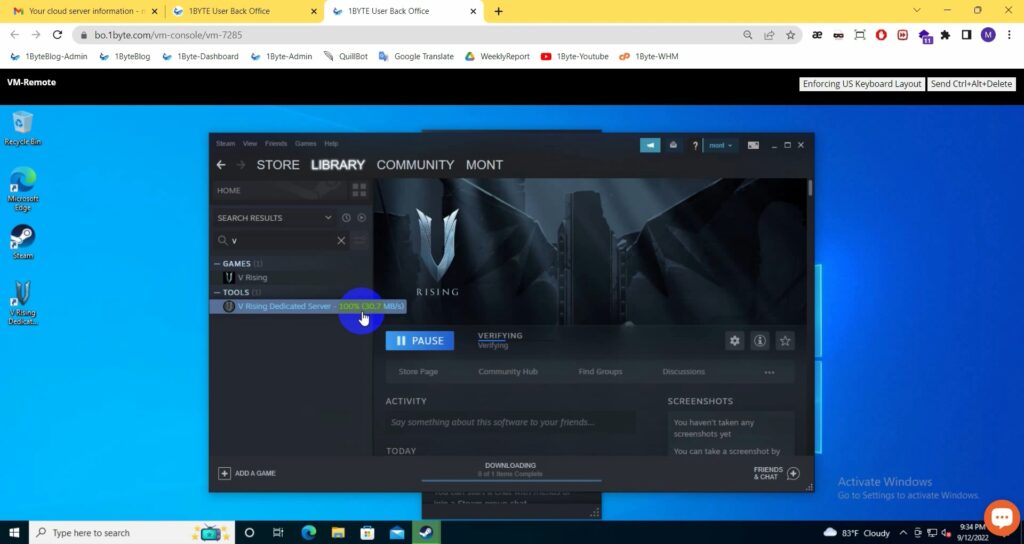
With the help of this server, you can build and personalize anything you want within V-Rising. We haven’t finished setting up our server yet, so don’t be in a rush to launch. All of your V-Rising game data and files will be saved in this directory as you play.
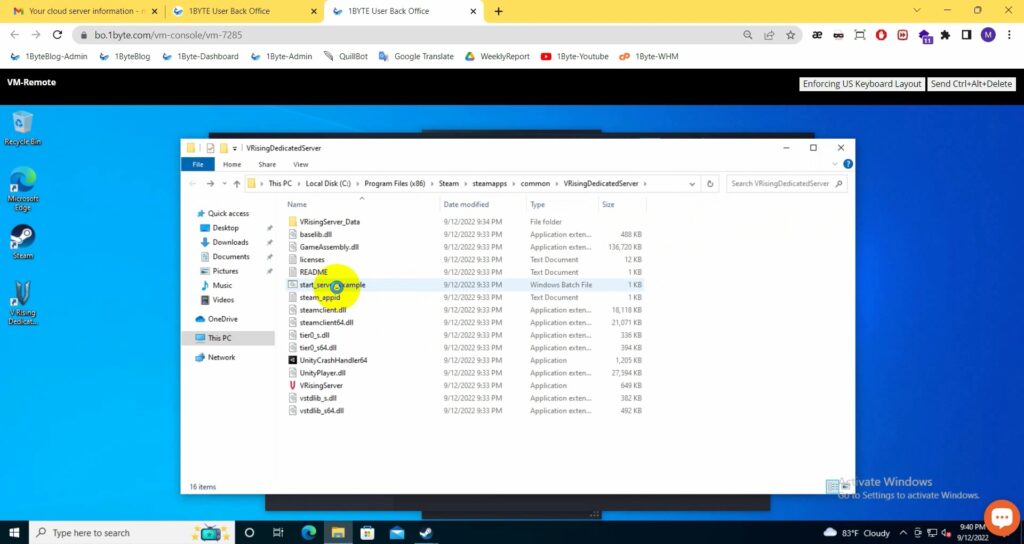
This is an example of a file used to launch the game server. As a result, the information in this file requires some updating on our part. We will make a duplicate so that if something goes wrong, we can always go back to the original. Let’s change your “serverName” to the name of this character who will appear in V-Rising. “saveName” is the name of a directory that contains all of the data related to the Save Game feature. Let’s run this file because that will create some of the basic folders such as the save game file, the log file, and other data, and so on.
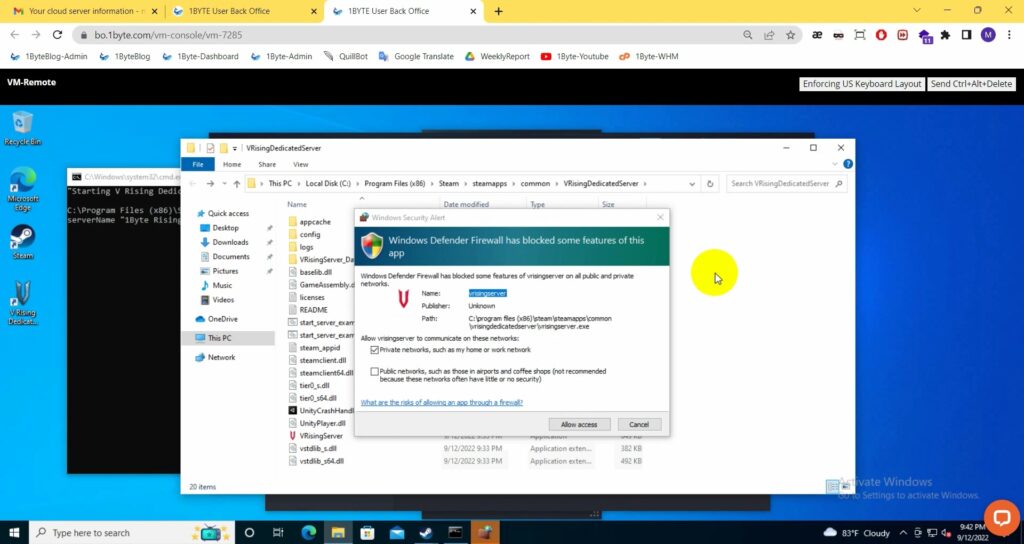
Please do not close this terminal just yet. Allow it to run until the Windows Firewall prompts you to stop. Make sure the “Allow access” box is checked. As can be seen, some new directories are being created, such as config, logs, save-data, and others.

You are now free to close this terminal till you receive these extra-directories. Now we must locate these two files and make the following changes on these two files:
1) ServerGameSettings.json
2) ServerHostSettings.json
The location where they are stored is as follows: …\VRisingServer_Data\StreamingAssets\Settings
Copy both of these files in your “saveName” folder and paste on this path: …\save-data\Saves\v1\word1Byte
If you recall from the previous stage, the “start_server_exapmple-Copy” file is what generates world1Byte. At this moment, we must make changes to the “ServerHostSettings.json” file.
In relation to the phrases “Name” and “SaveName”: Set as default. What you can do is change the password on your server to prevent it from being accessible by anyone and everyone. Remember to save your work before closing the file!
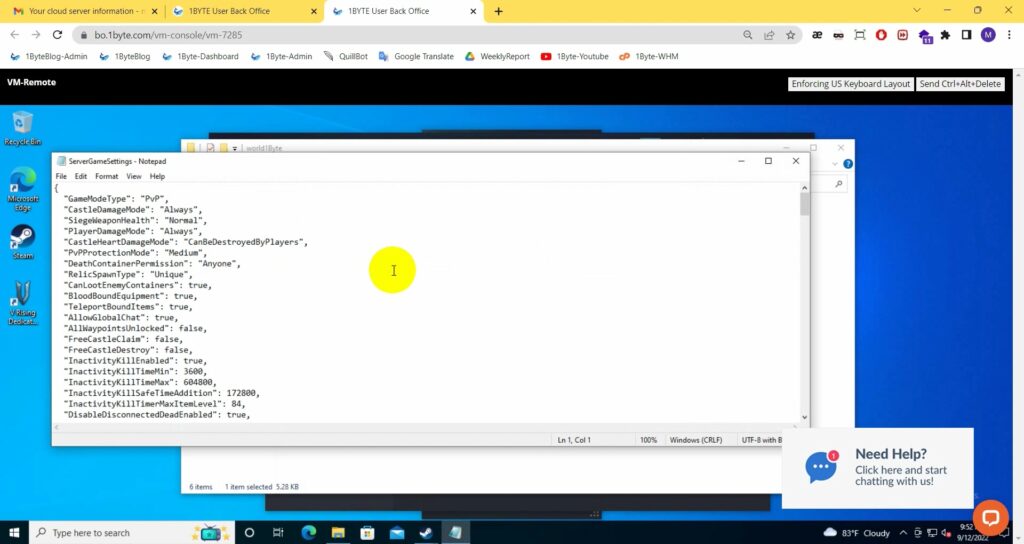
Following that, we must make some changes to the file called “ServerGameSettings.json”. The first step is to change the value of the “GameModeType” variable from “PvP” to “PvE.”” Next, change the “ClaimSize” field to “4” rather than “13”. After that, change the value of “CastleDamageMode” to “always” rather than “never”. Finally, change the value of the “CastleHeartDamgeMode” variable to “CanBeDestroyedOnlyWhenDecaying”.
There is no universal criteria for valuing these features. We do, however, recommend leaving them in their default form.
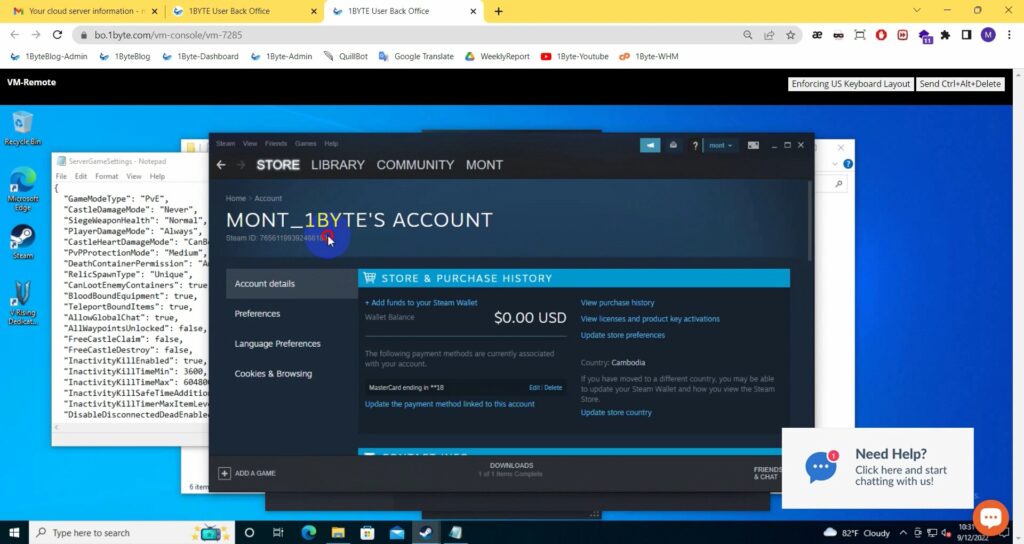
Following that, you will be asked to name the person who will administer this server in the following step. You will need to find your Stream ID in order to do so. Please keep in mind that the stream ID for your account is as follows. We will save some important information in a file so that we can readily access it in the future. Enter the Stream ID into the “adminlist” file to decide who will be the administrator of the stream. It is feasible for numerous users to operate as the server’s administrator at the same time. Simply type the Stream ID into this field. You can prevent a certain individual from accessing your server using Stream ID by utilizing the “banlist” file.
Step 5: Execute “start_server_sample”
Because we have recently made changes to our server, we must run this file in order to apply the new settings. It is critical to remember that running this file is the only way to bring your server online. If you choose to close this file, your server will be immediately pulled offline.
The following notes contain some information about V-Rising.
Step 6: Get the V-Rising game up and running
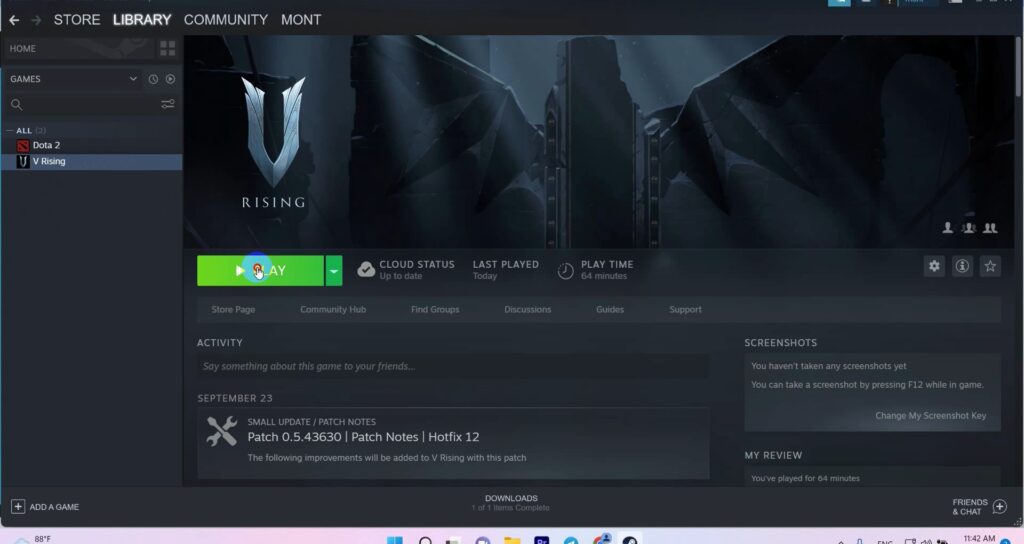
Keep in mind that you cannot actually use the server to play any of the games that it hosts. As a result, rather than playing V-Rising on Cloud Server, we’re going to play it on a computer. Because the server is home to users from all over the world, it is advised that “Online Play.” be selected. Now is a good moment to enter your password so that you can begin utilizing your own server.
In some cases, the name of your server is not visible in the dashboard. You will then be able to connect to your server using the cloud server’s IP address.
Step 7: Select the “Console” option and declare yourself the game’s “administrator”
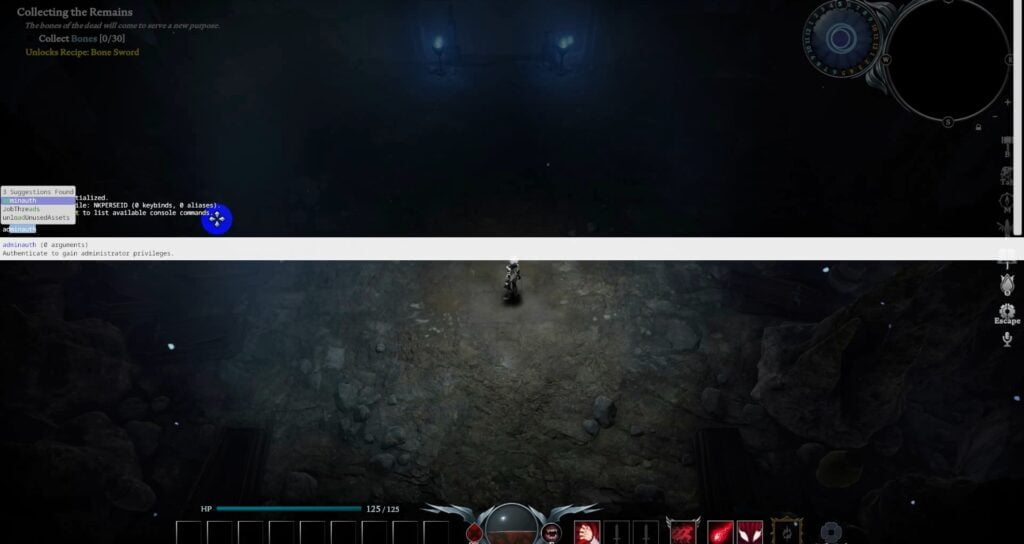
You have been elevated to the rank of “SuperAdmin”. You can now issue other commands to the game. Now is the time to enjoy the game with your friends and others from around the world.