

Hello ladies and gentlemen, 1Byte is back. As always, to be able to build a website using a certain framework. You need to do the following steps:
- Step 1: Install PrestaShop framework, necessary packages, and set up customizations on the BackEnd side to the Server (You’ve done this in Part 1)
- Step 2: Based on the components in step 1, install PrestaShop site through your browser (You are here, Part 2!)
- Step 3: Install SSL Certificate on your website
- Step 4: Customize the interface and manage PrestaShop to your liking ^^
Prerequisites
To do this Step 2, you need to read through and finished Part 1. This is a must and you have to have the following components:
- Domain Name
- Cloud Server
- PrestaShop framework is already installed on your Server
- A spirit of eagerness to learn new things
No More Small Talk, Let’s Hands On
In Part 1, you will be stopping here


But don’t worry too much because 1Byte is already here, I am always with you when you are in trouble
According to PrestaShop’s instructions, there are several things you need to fix.
→ Let’s go back to the Server side and use the Terminal Interface to fix it

1) Instal “Mbstring” PHP extension by running this command
sudo yum install php-mbstring -y

sudo systemctl restart httpd
2) Next is install “PHP Accelerator” to boost up your site
But hold on!!!…
I also read the document of PHP accelerator and this only works with PHP versions 4 and 5. While our PHP is version 7
→ Will skip this step. You see, I save you time again

Ok now, we just need to refresh our page, to check whether the Warning Message remains or not?
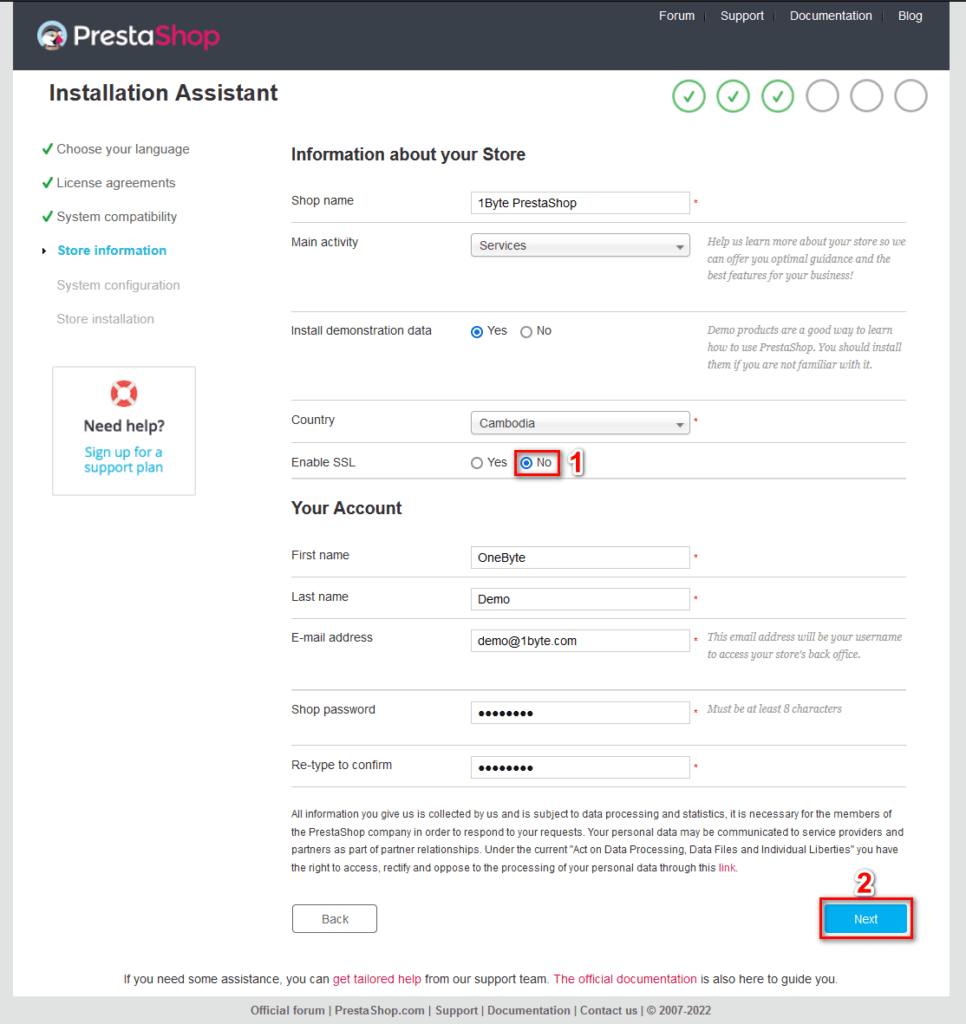
IMPORTANT NOTE 1:
- Please remember not to check Enable SSL with option YES
- Please check with options NO
- This is because If you choose the YES option, this will make your website inoperable for two reasons:
1) On the server side, we haven’t told the firewallcmd allowe https service yet, we just allowed http service
2) Up to now, our website has not installed SSL certificates
IMPORTANT NOTE 2:
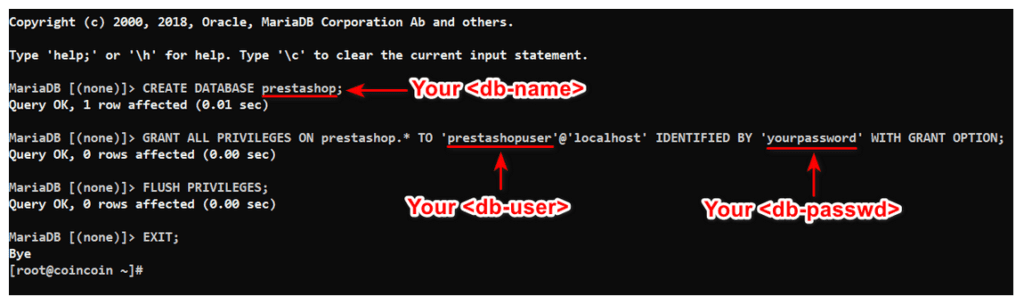
PrestaShop requests database information (which I already created in Part 1) in this phase.
Once everything is OK, move to the next section
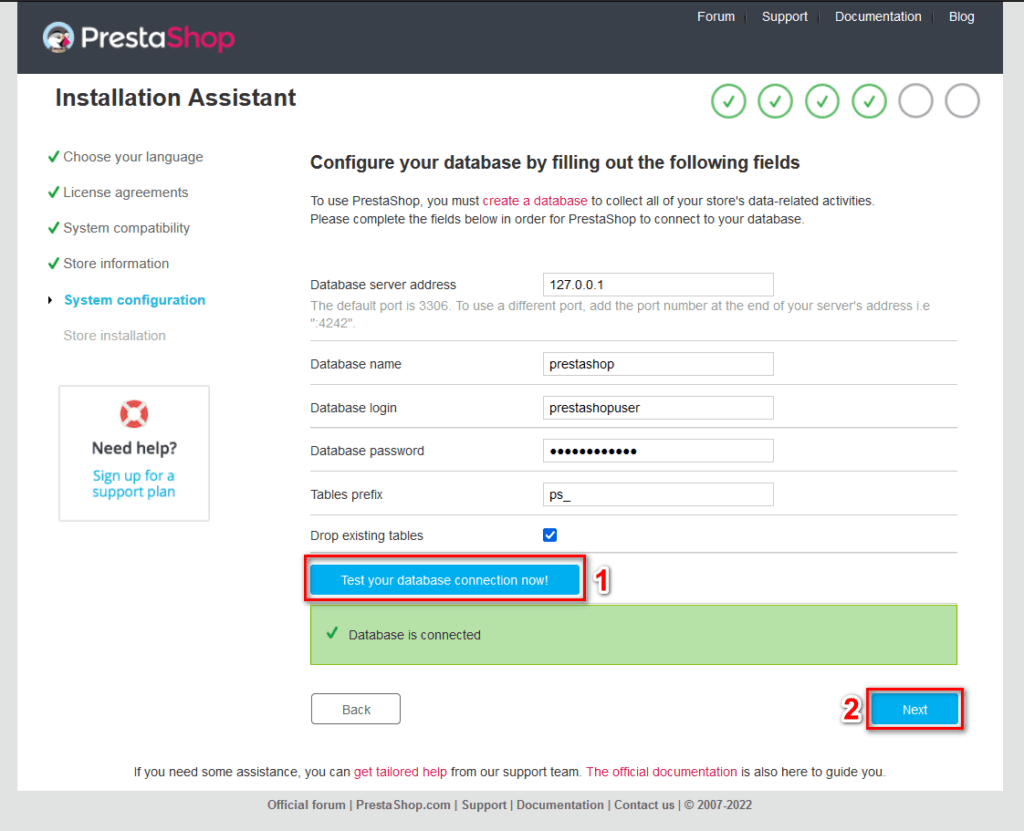
After provding the info to PrestaShop, check the connection to your database
- If everything goes well, a message like the one above will be shown.
- Then just click on Next button
- If PrestaShop cannot connect to the database, you need to check the information such as db_name, db_user and db_pass which was created at Part 1

(And now you just enjoy a cup of tea while the system automatically installs for you)
If you see this picture like me, congratulations, you have successfully installed PrestaShop framework using your browser
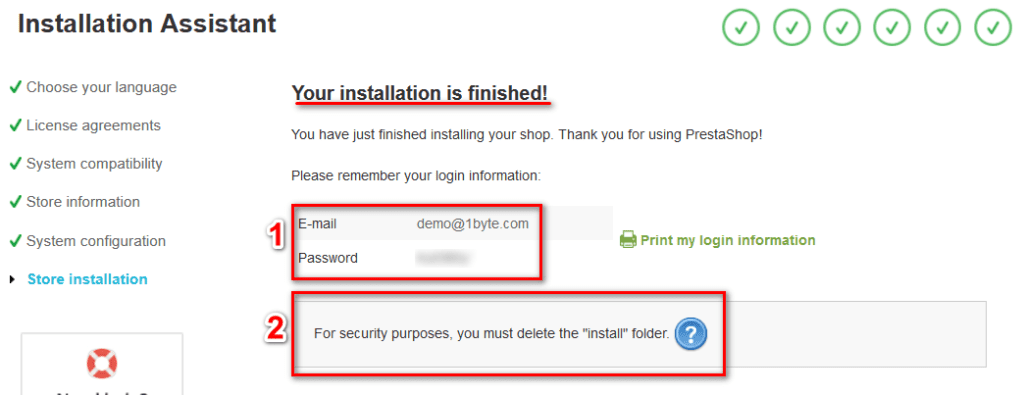
NOTE:
- The info of box (1) will be your credential to login in Admin Dashboard
- Ok la, let’s back to our terminal and do the following commands
#Navigate to prestashop directory and list all files
cd /var/www/html/prestashop/
ls
Why am I highlighting the whole directory named “admin”? I’ll leave it open for now, but in a bit, I’ll explain it to you below
#Remove the install directory
rm -rfv install/
IMPORTANT NOTE:
- Once the directory named “install” was completely deleted, the system will automatically change the folder name “admin” to “adminxxx“
- Why is that? because PrestaShop doesn’t want bad guys (hackers) to know the path to the admin dashboard page. Therefore, to prevent curious people from coming to the admin page, PrestaShop will rename this “admin” folder to “adminxxx“
To verify this, use this command again
#Verify the directory named "admin"
ls
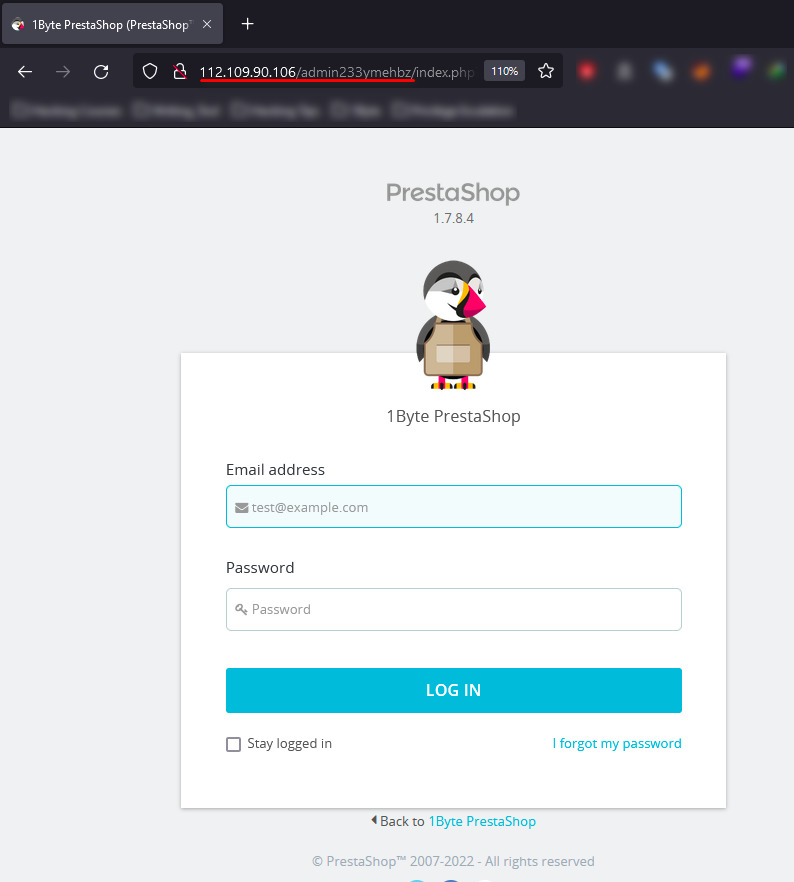
As you can see, the directory “admin” has been renamed to “admin233ymehbz“
This name will be completely different from yours.
So please check it:
→ I have already helped you get the answer to the question above
→ To connect to your admin dashboard you have to type in your URL as follow: http://<your-server-ip>/admin233ymehbz
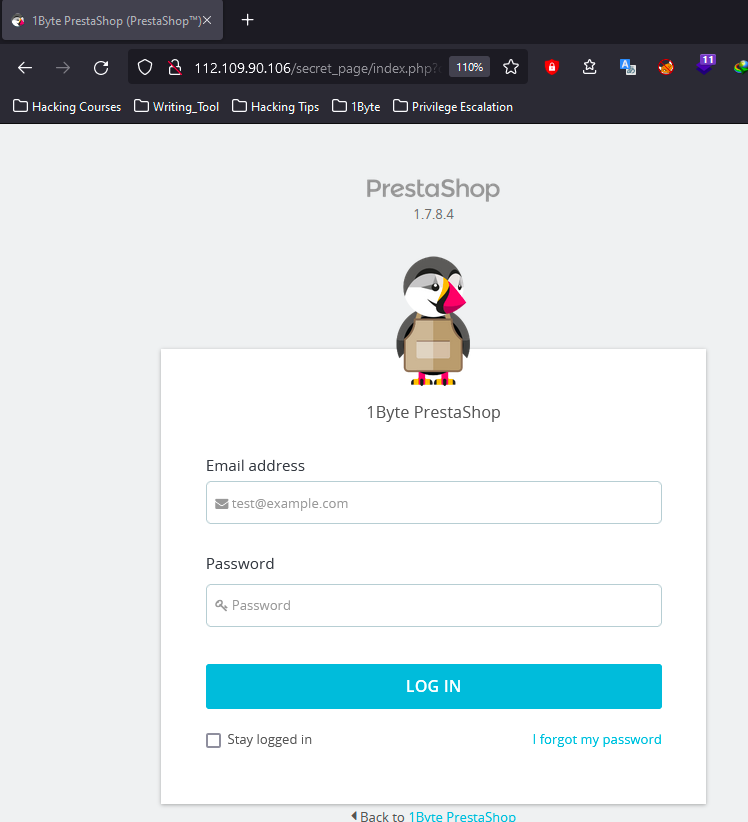
But with a name like that, it would be difficult to remember, right?
Therefore, we often rename this directory “adminxxx“ to a name that is easy to remember, but it’s hard to guess
#Rename "adminxxx" directory to a new name
mv admin233ymehbz/ secret_page/
ls
Let’s test again by navigating to http://<your-ip-server>/secret_page
Summarize
Up to the present time:
- You have successfully installed the PrestaShop framework on both Server and Browsers
- Your customers can connect to the homepage (FrontEnd)
- You can connect to the admin page
However, there is still an important factor that has not been implemented yet is to be able to install the SSL Certificate on your site. Because the article is too long, I will guide you to install SSL Certificate in Part 3 SEE YAAAA!