Table of Contents
Before, you may have had problems using email on aaPanel Cloud hosting to send emails, and the recipients may have received your emails in the spam folder. Now we will teach you how to avoid this problem, and your email recipients will have to feel confident that receiving your email is safe.
Prerequisites
- You’ll need a domain and hosting using aaPanel (ex: Cloud Hosting…) to get started.
- Please go to 1Byte to purchase one if you don’t already have one.
- Setup email server on aaPanel if you have not yet set it up you can check our blog by the Link
- You need to register an account with Send2go with the plan you need.
What Is aaPanel used for?
AaPanel is an open-source web hosting control panel substitute that offers a GUI interface and allows you to host many websites and configure complex server configurations.
Getting Started
Step 1: Set Up Domain Verified Senders
- Sign in to SendGrid. We already have registered the account at this point. Please register your account first if you haven’t yet.

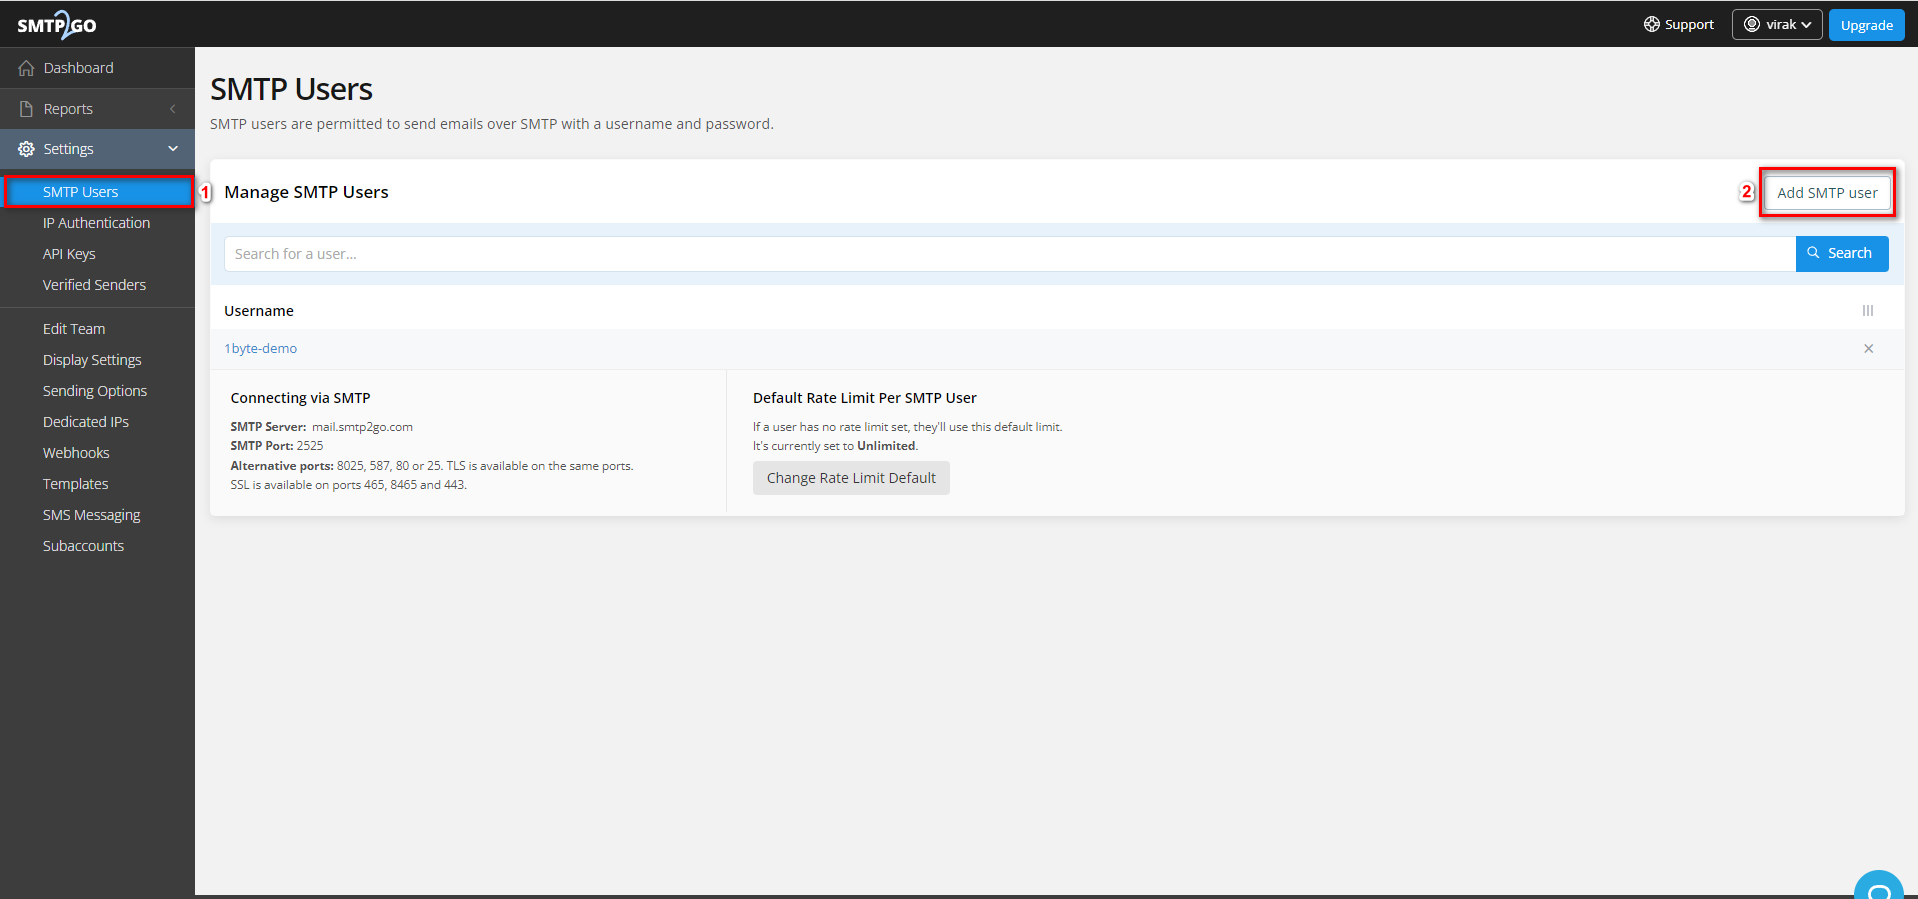
- Go to settings and click SMTP USER then click “Add SMTP user”
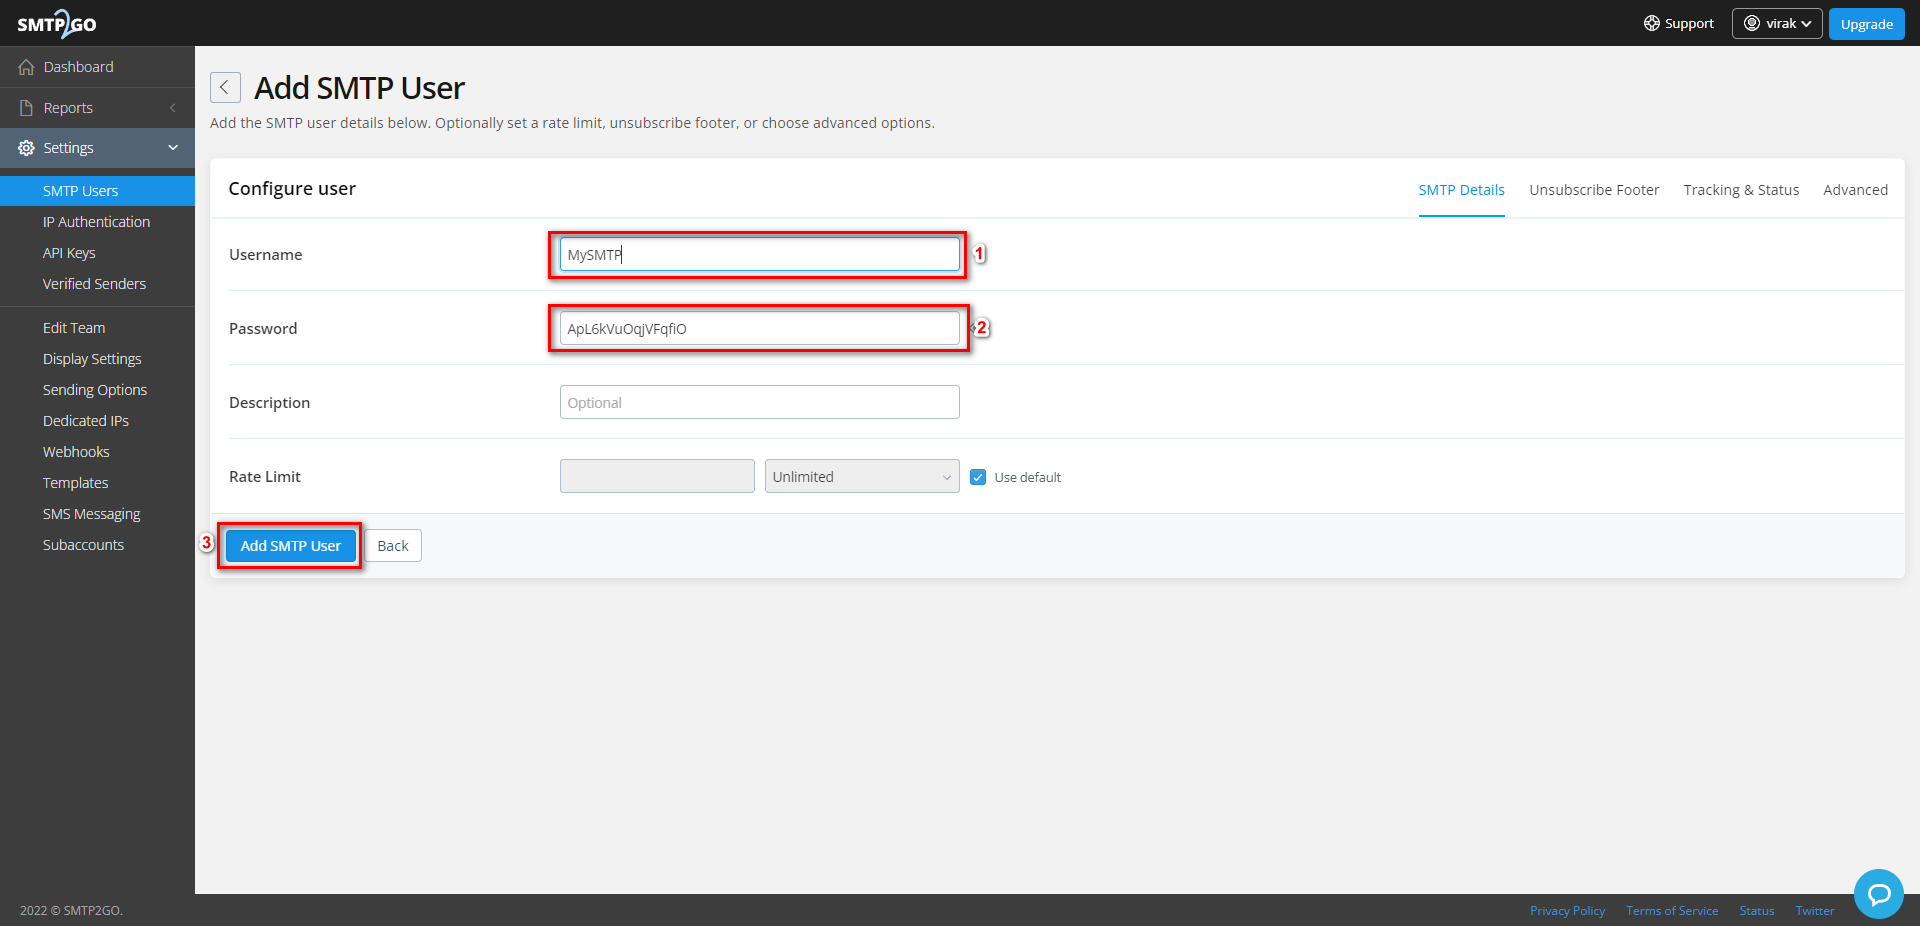
- input SMTP user and password and click “Add SMTP user
- After you create an SMTP user ready now add domain names to allow SMTP2GO to send emails from them
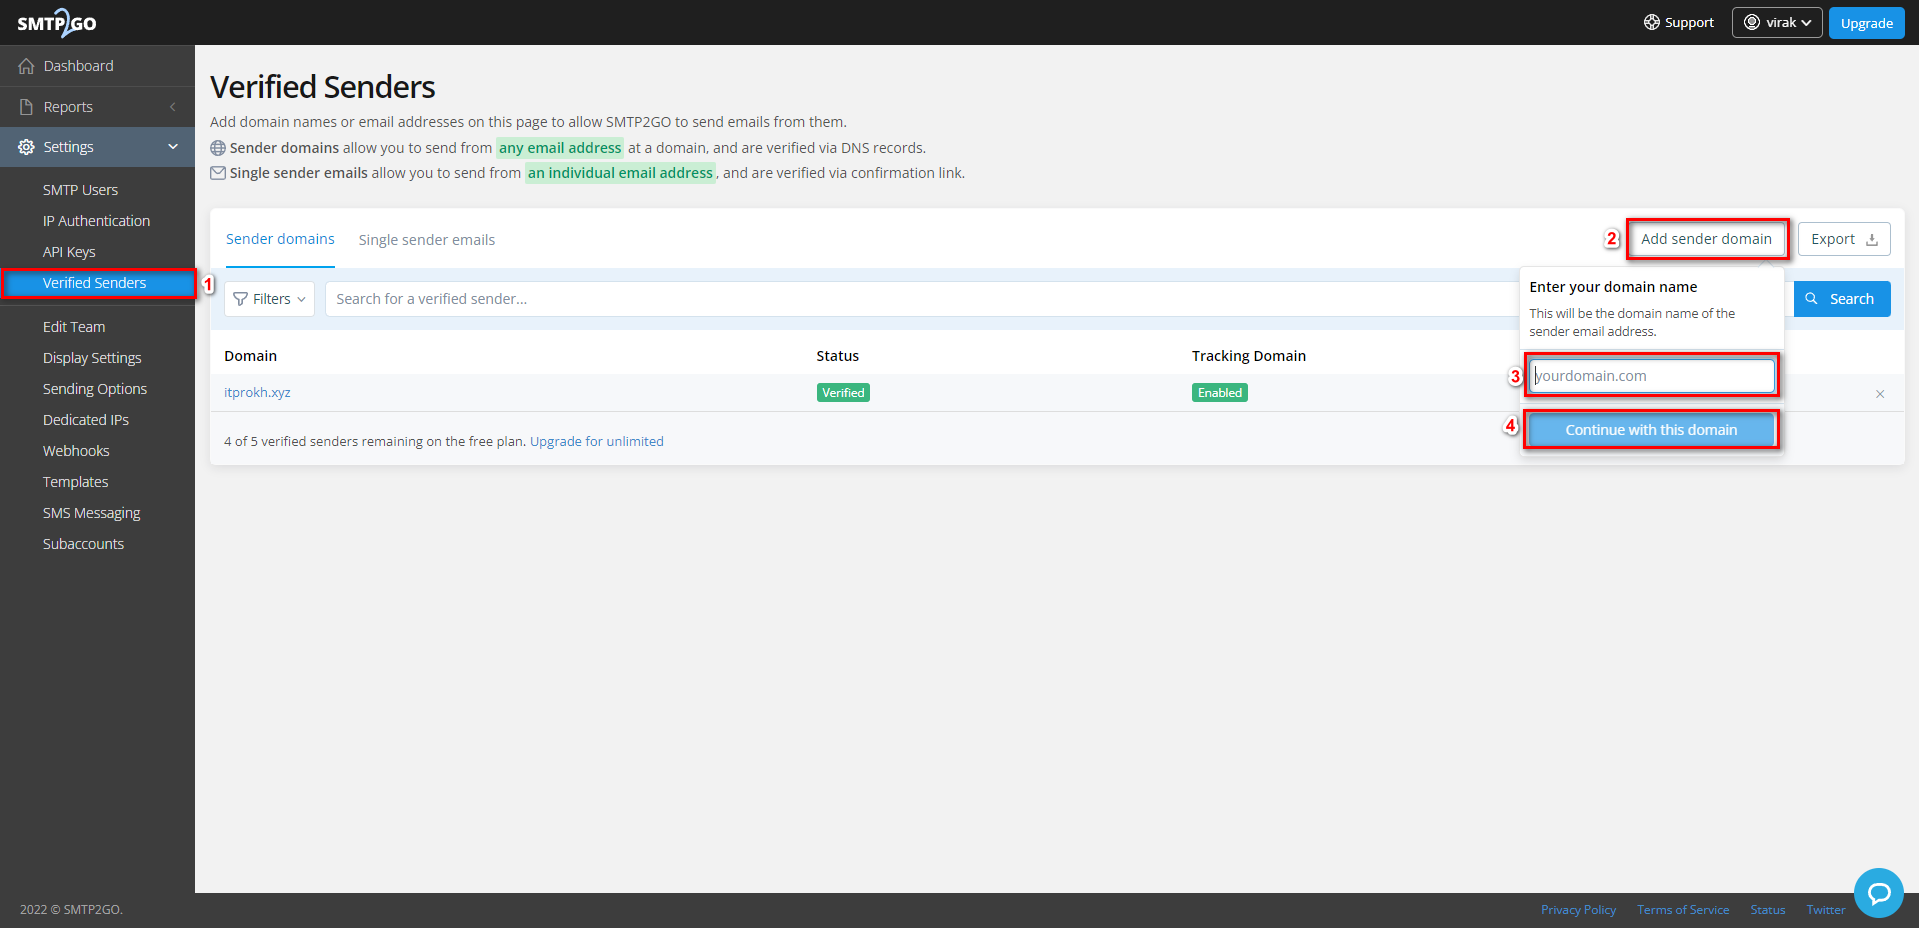
- So in this step, SMTP2GO will need you to add all of the records to your DNS section. So hold on to this step and go to step 2 to add the record before you click Verify
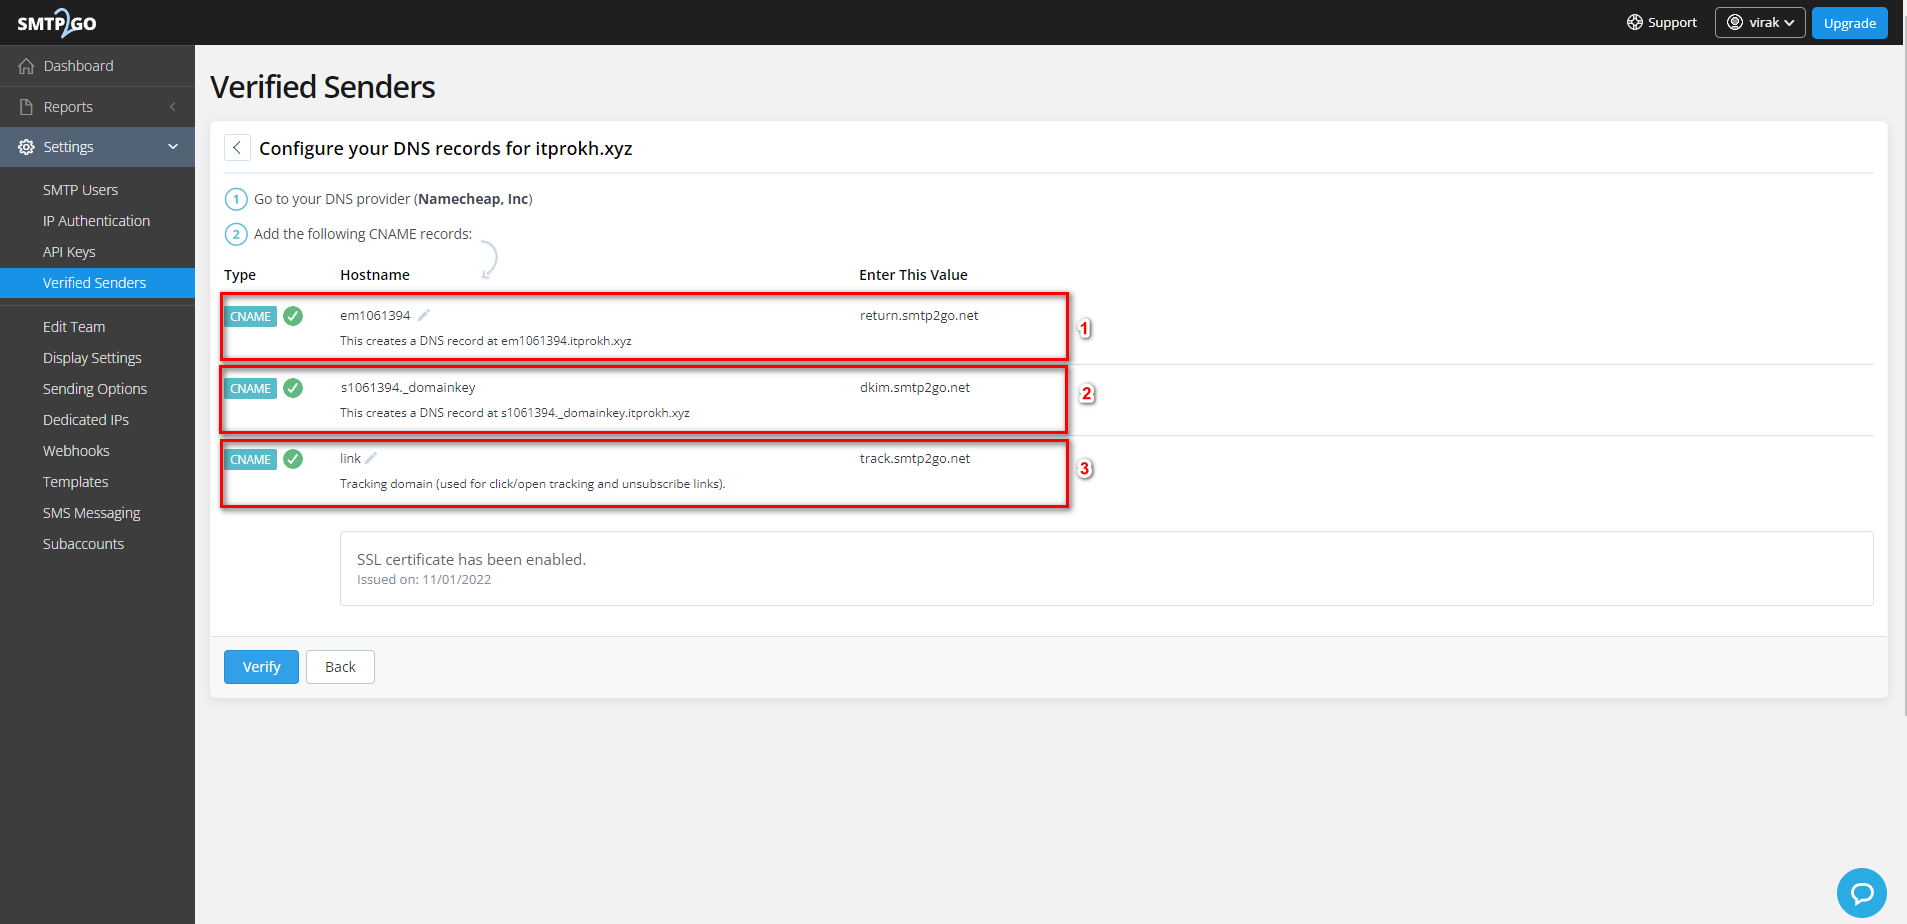
Step 2. Add CNAME Record
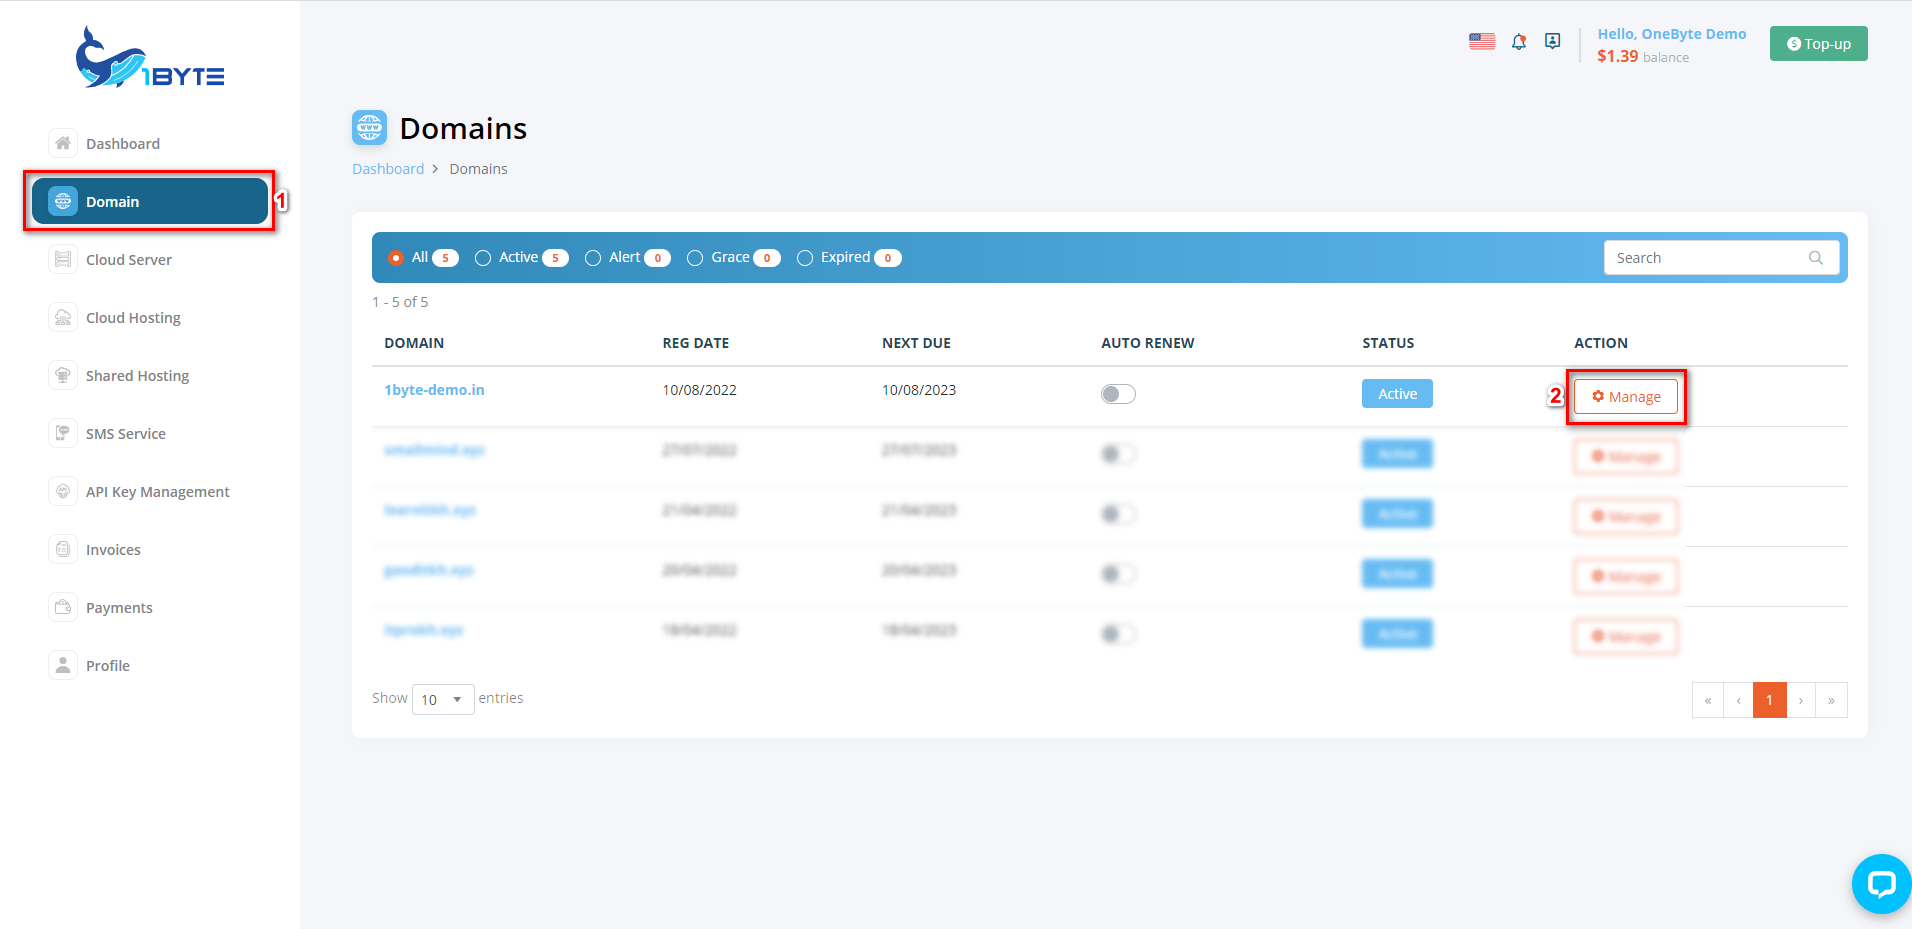
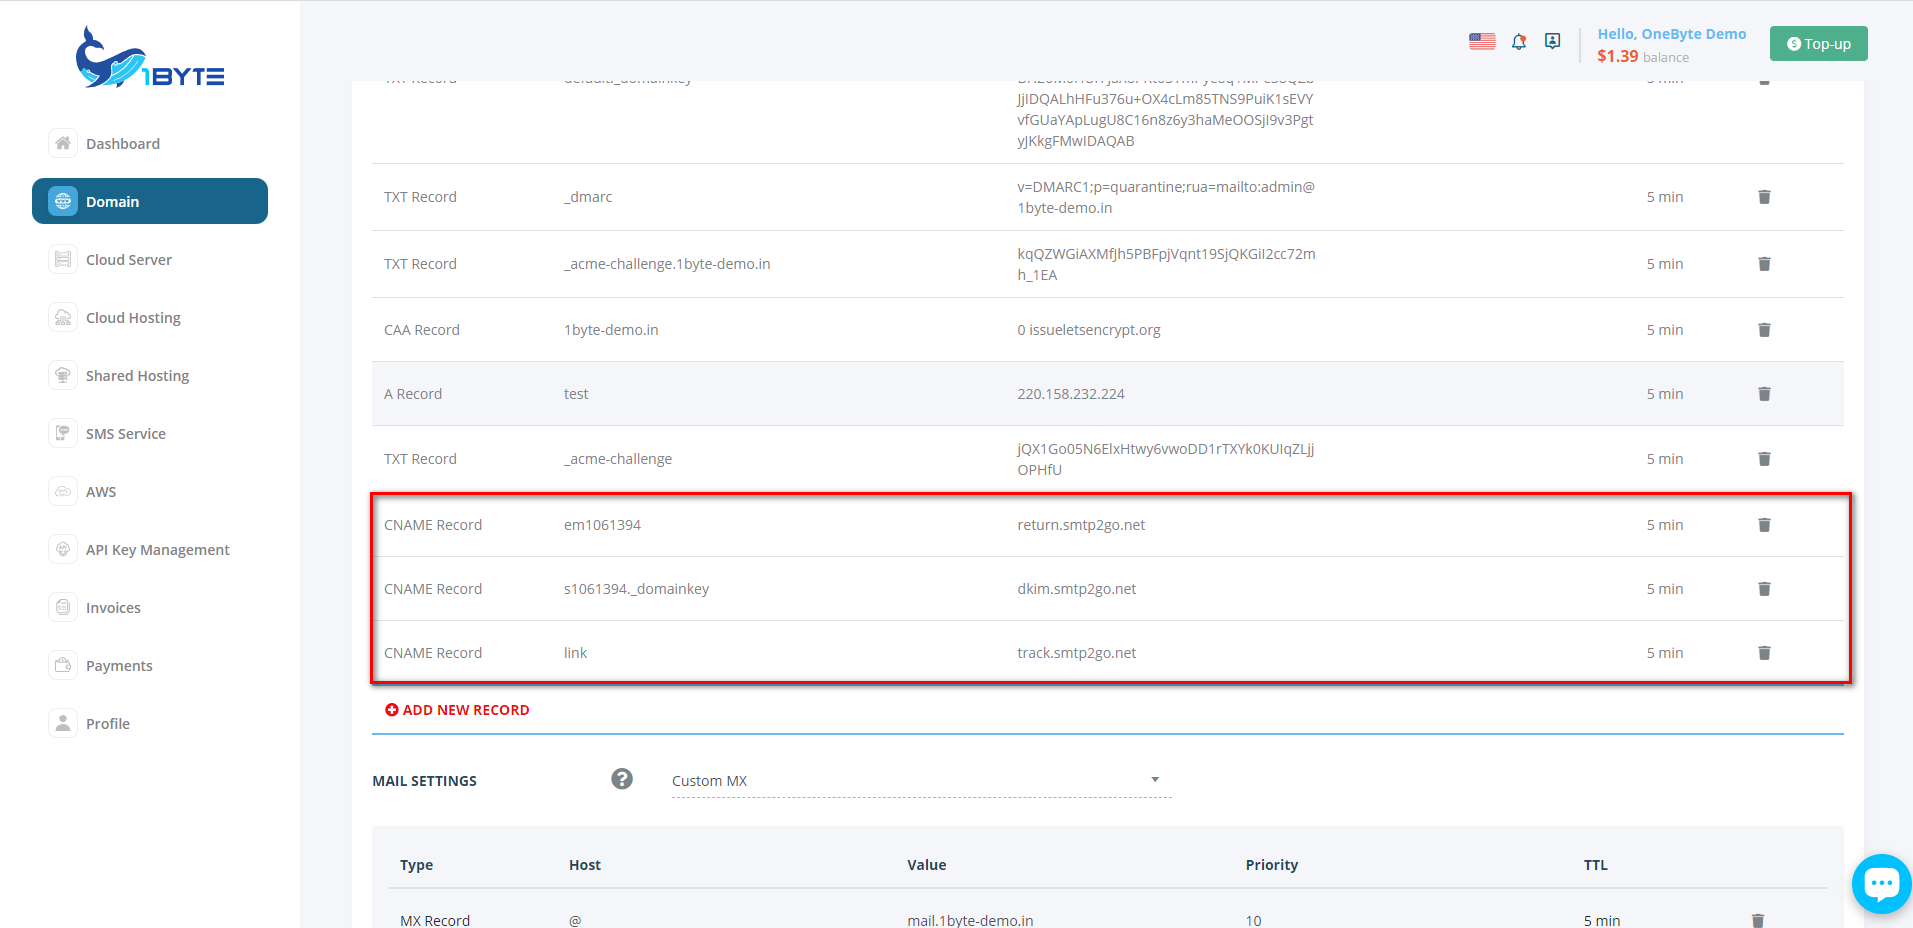
- Login to 1Byte account and go to the domain then click “Manage”
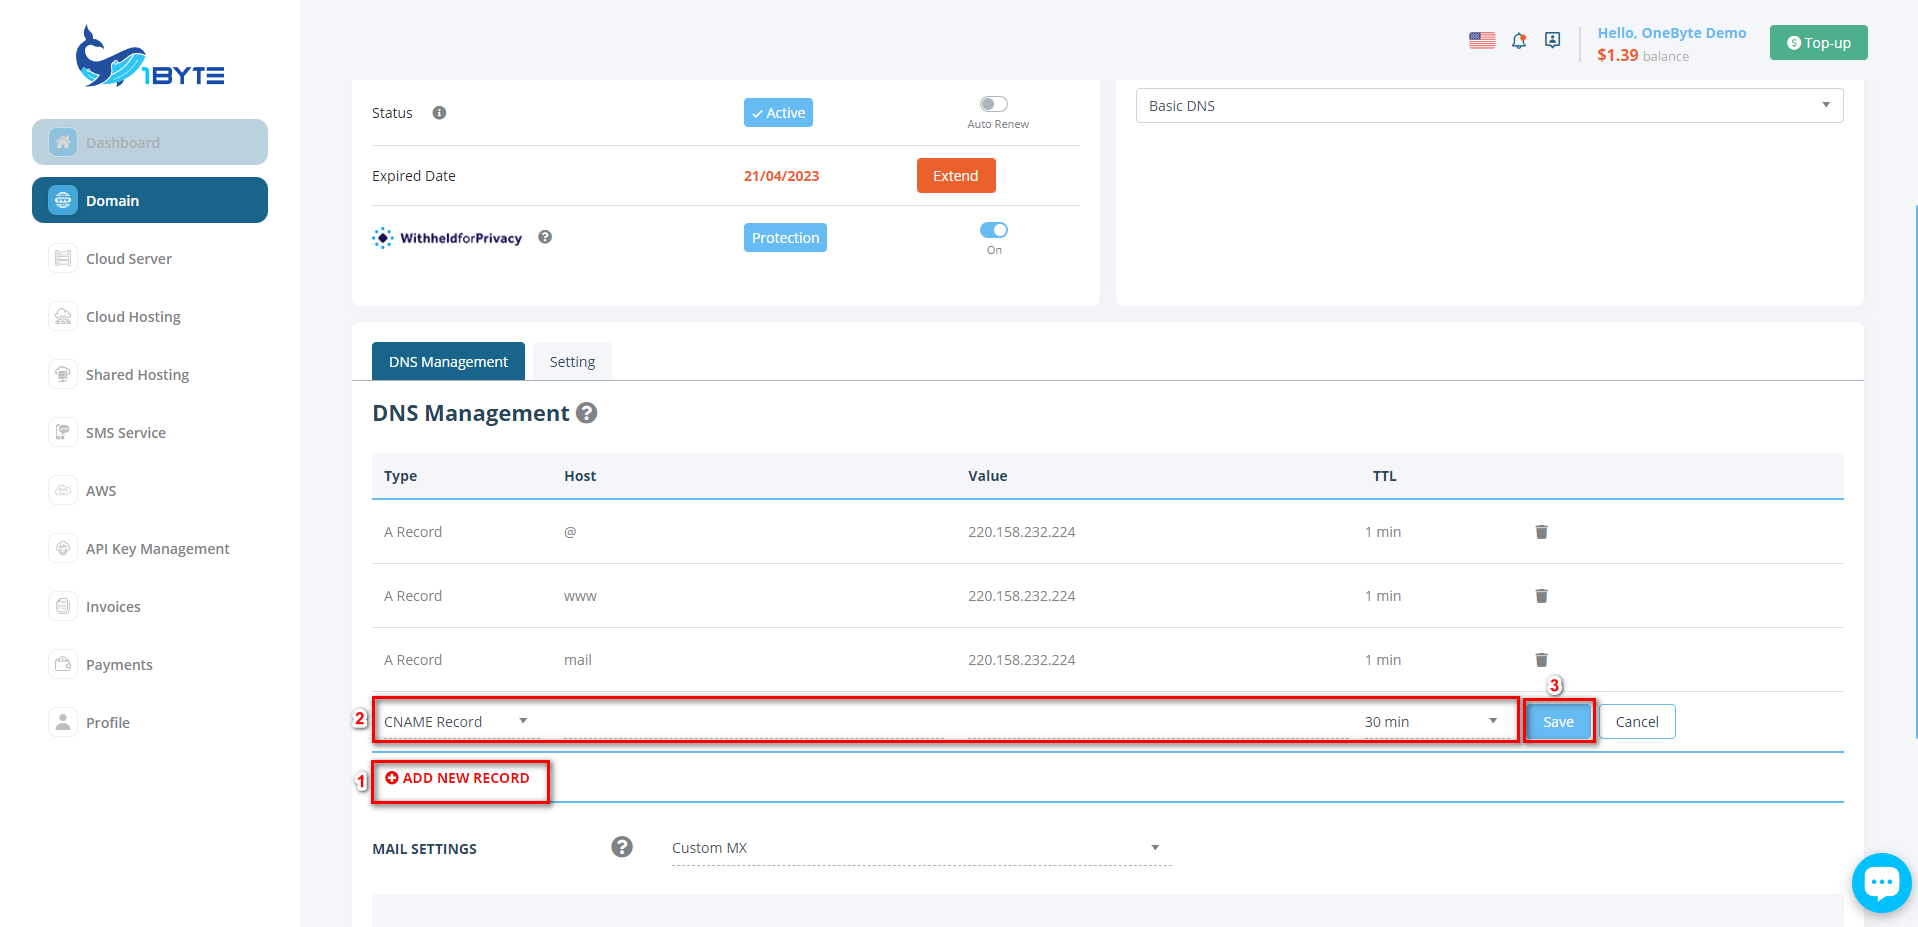
- Copy CNAME record from SMTP2GO and add to your DNS
- After adding the CNAME record it will look like the image below
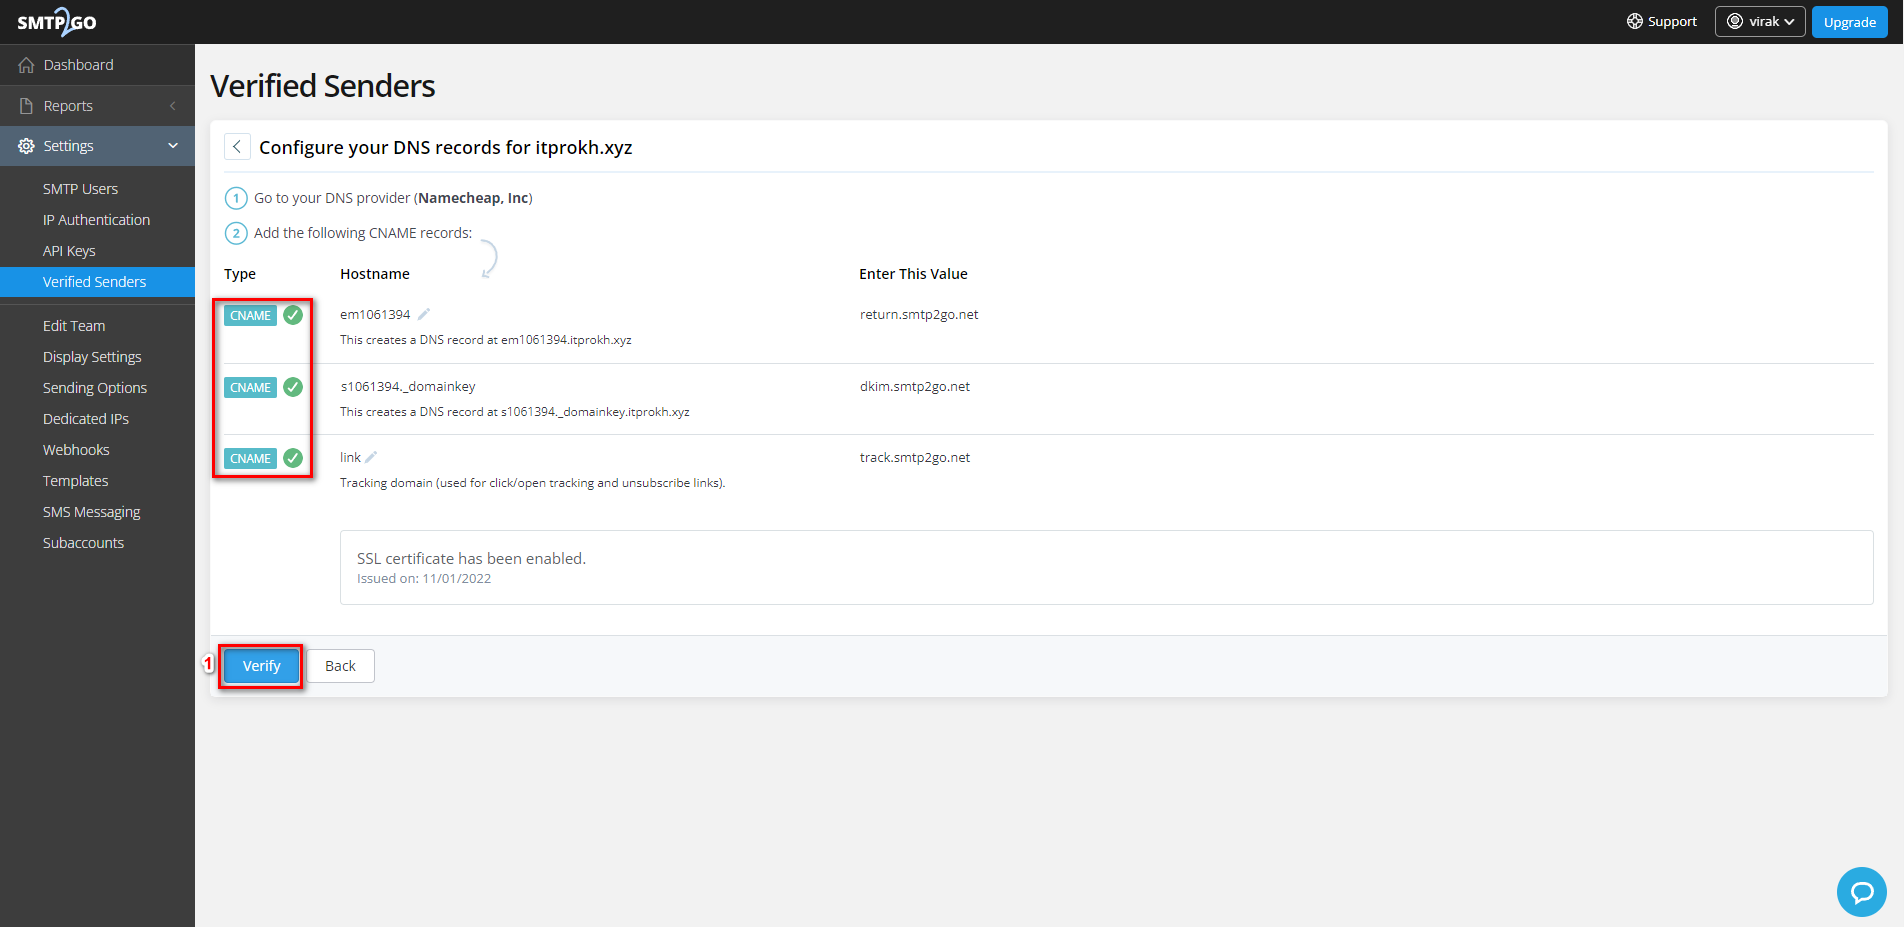
Step 3: Go Back to Verify the Domain Name on Smtp2go
- After you have done adding your DNS record please go back to step 1 and then click “Verify” you will see the green check which means your domain is verified
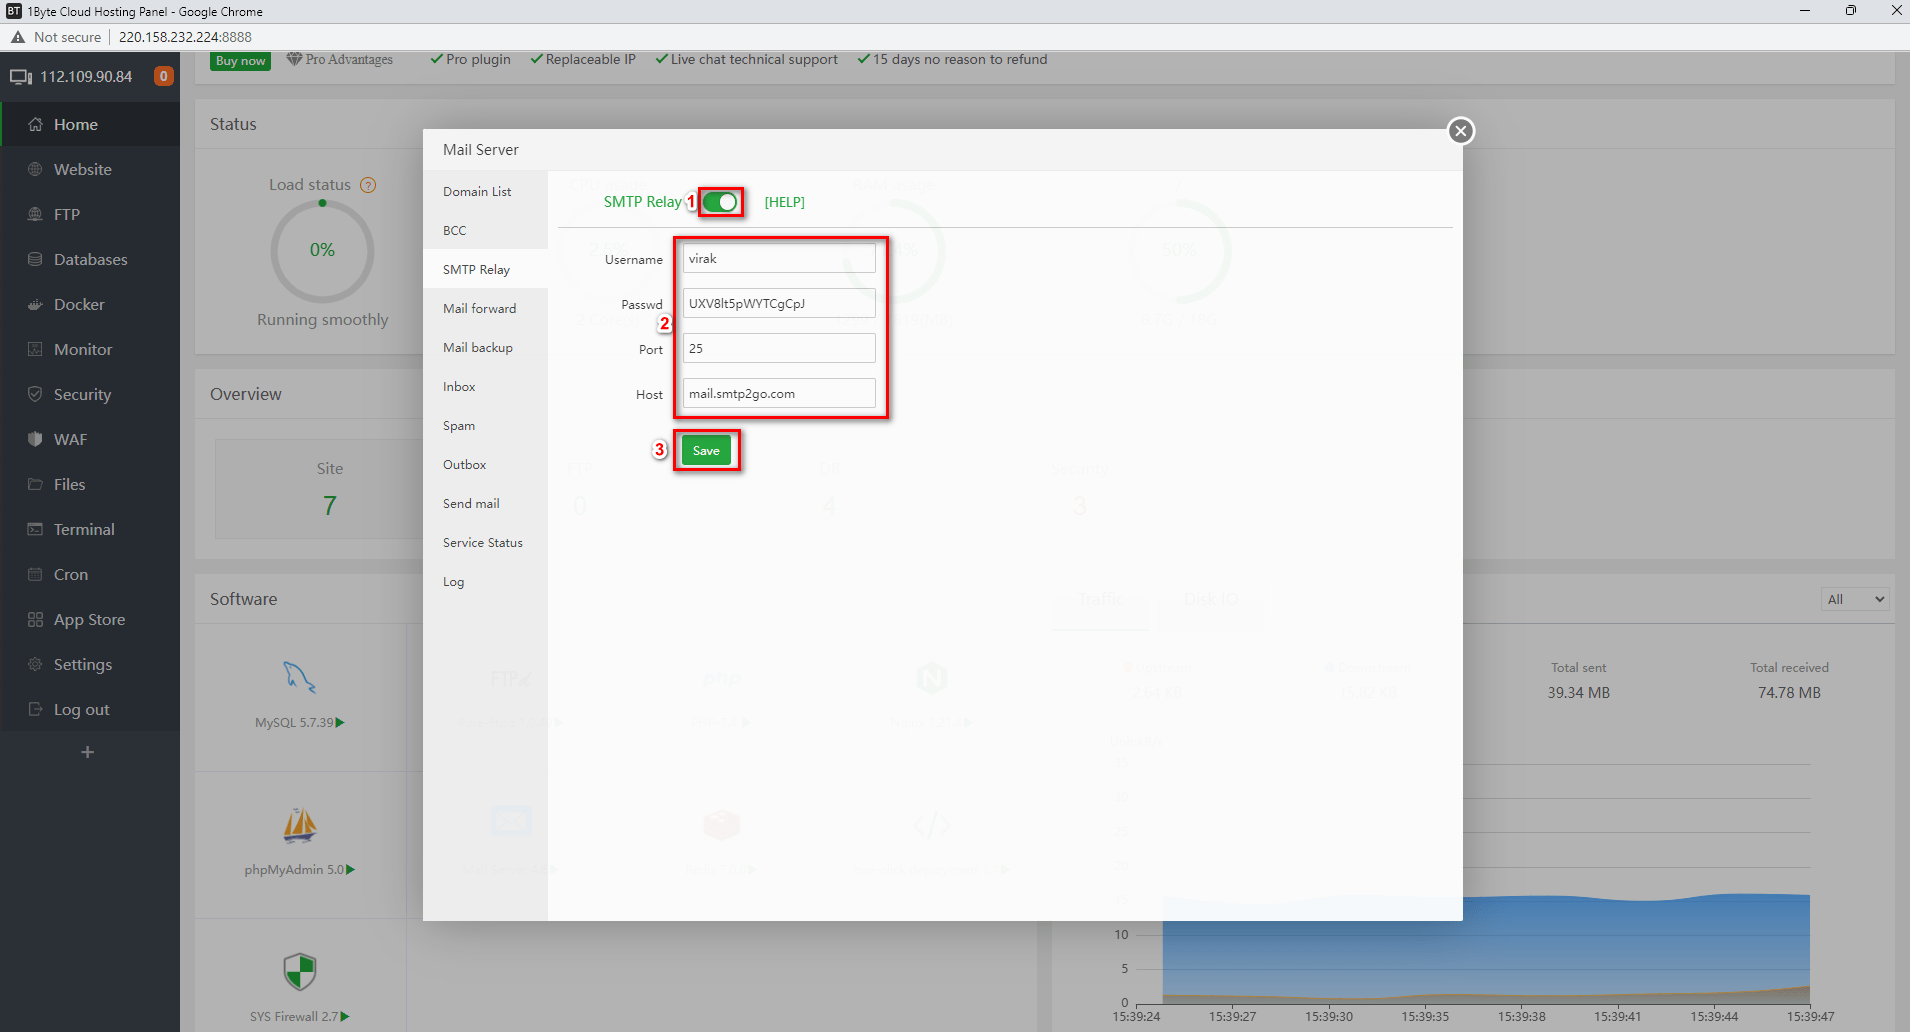
Step 4: Add Smtp User to Aapanel
- Go to your mail server again then click on SMTP Relay and turn it on after adding the SMTP username, password, and SMTP host, for the port number, use 25
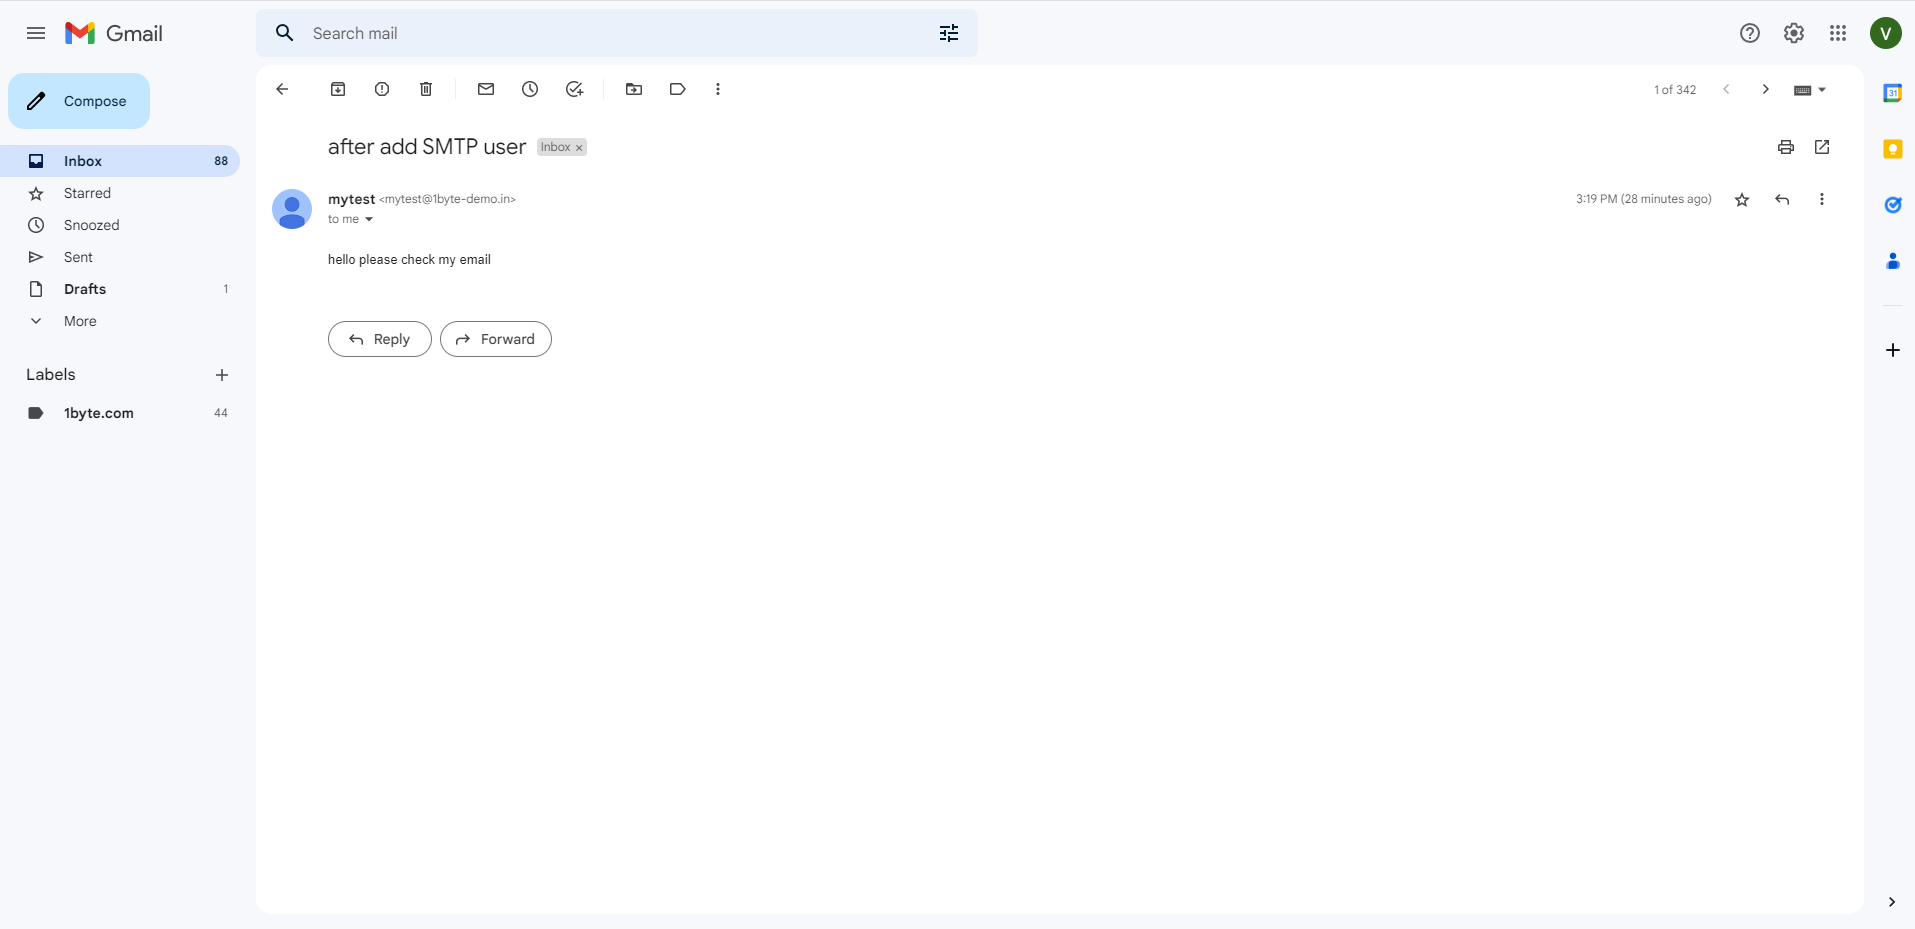
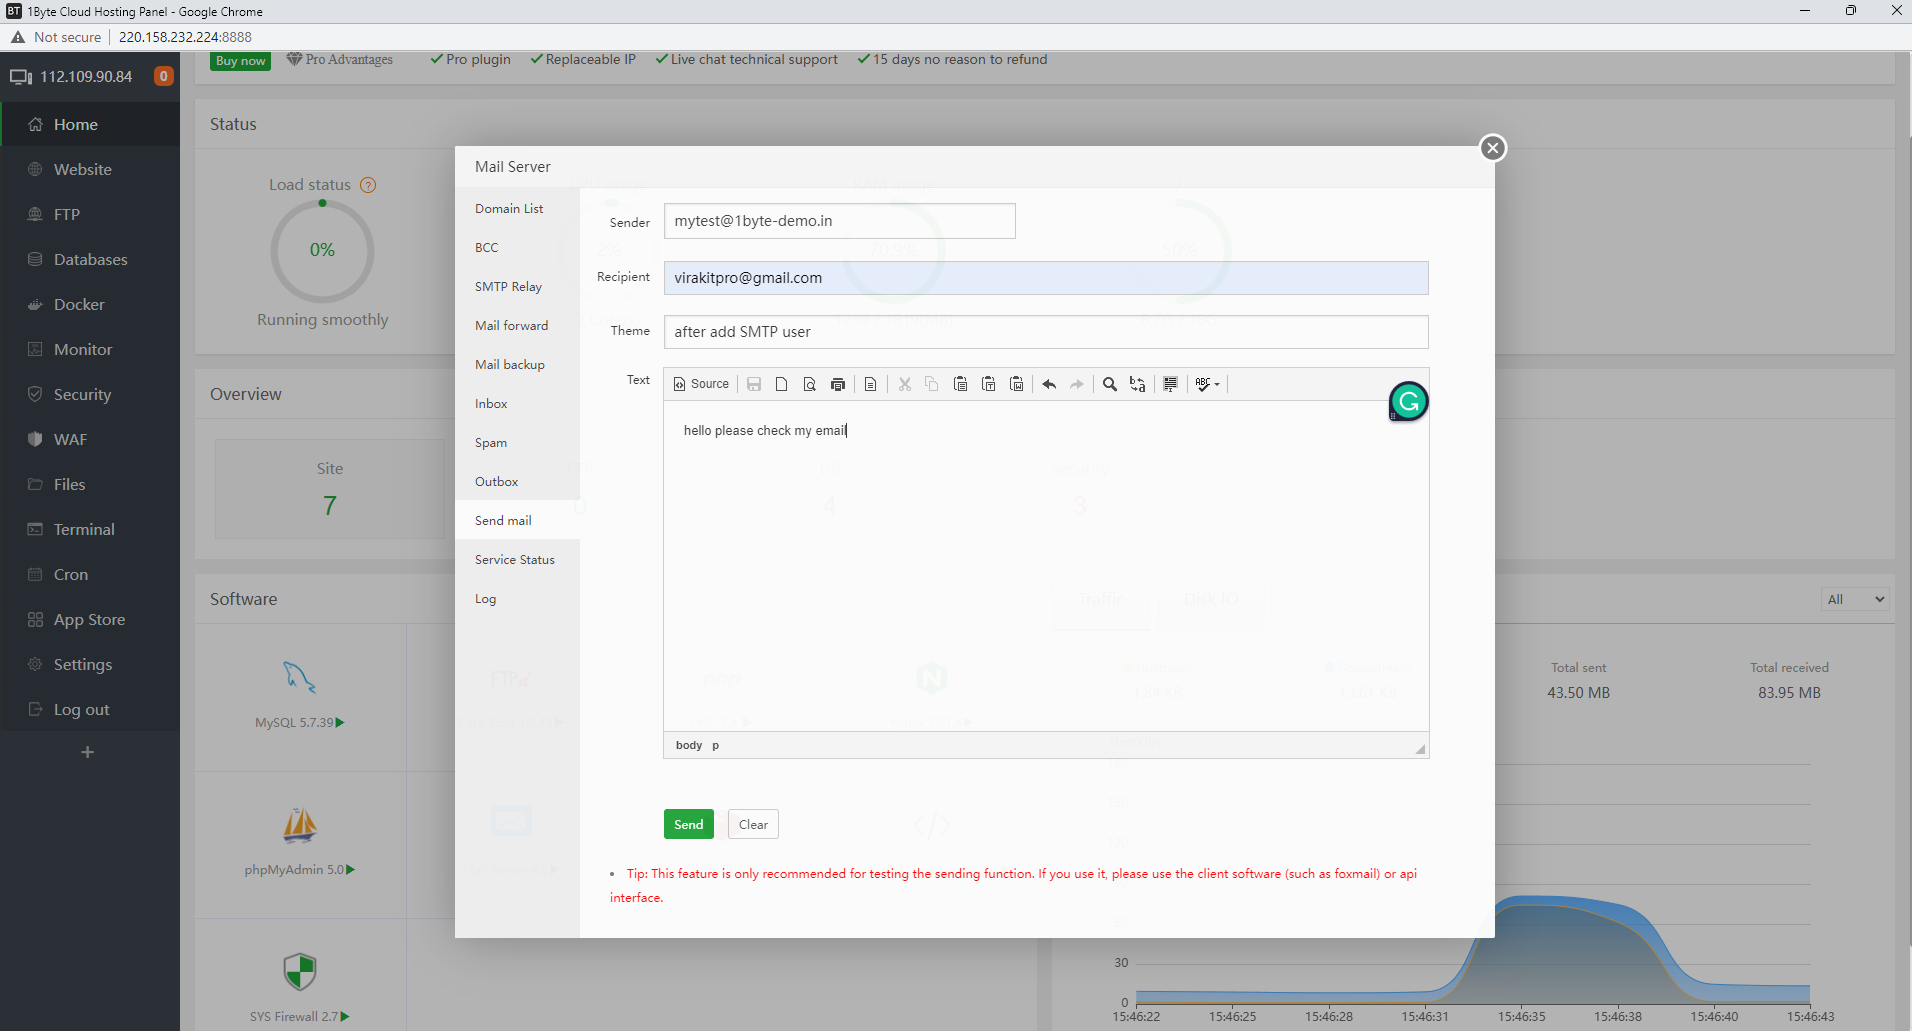
Step 5: Send a Test Email and Check the Result
- In this step, I already set up an email server if you are not yet please refer to this link
- You can try to send your email to other email domains like Gmail
- Congratulation your email not going to the spam folder anymore