ការធានាគេហទំព័ររបស់អ្នកគឺមានសារៈសំខាន់នៅក្នុងទិដ្ឋភាពឌីជីថលនាពេលបច្ចុប្បន្ននេះ ហើយទិដ្ឋភាពសំខាន់មួយនៃនេះគឺវិញ្ញាបនបត្រ SSL ។ អត្ថបទនេះពី XNUMXByte នឹងណែនាំអ្នកអំពីរបៀបបន្តវិញ្ញាបនបត្រ SSL ដែលជាដំណើរការដែលដើរតួនាទីយ៉ាងសំខាន់ក្នុងការបន្តវិញ្ញាបនបត្រ SSL របស់អ្នក និងធានាសុវត្ថិភាពគេហទំព័ររបស់អ្នក។ យើងនឹងណែនាំអ្នកឱ្យឆ្លងកាត់ជំហាននីមួយៗ ដោយធ្វើឱ្យវាសាមញ្ញ និងងាយស្រួលយល់។ ដូច្នេះ សូមចូលមើល និងស្វែងយល់ពីរបៀបរក្សាគេហទំព័ររបស់អ្នកឱ្យមានសុវត្ថិភាពដោយការគ្រប់គ្រងវិញ្ញាបនបត្រ SSL របស់អ្នកប្រកបដោយប្រសិទ្ធភាព។
ស្វែងយល់ពីការផុតកំណត់វិញ្ញាបនបត្រ SSL
វិញ្ញាបនបត្រ SSL គឺជាវិញ្ញាបនបត្រឌីជីថលដែលផ្តល់នូវស្រទាប់សុវត្ថិភាពរវាងគេហទំព័ររបស់អ្នក និងភ្ញៀវរបស់វា។ ពួកវាដំណើរការដោយការអ៊ិនគ្រីបទិន្នន័យដែលបានផ្ទេររវាងកម្មវិធីរុករកតាមអ៊ីនធឺណិតរបស់អ្នកប្រើ និងគេហទំព័ររបស់អ្នក ការពារវាពីការស្ទាក់ចាប់ដោយភាគីទីបីដែលមានគំនិតអាក្រក់។
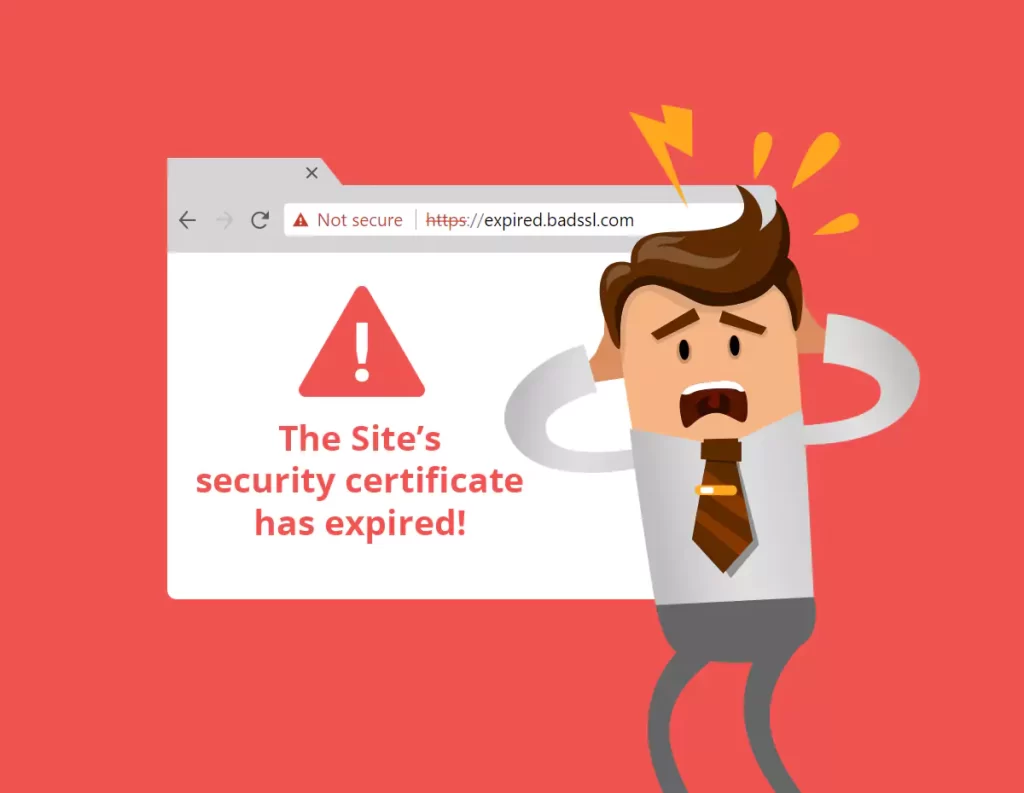
ទោះយ៉ាងណាក៏ដោយ វិញ្ញាបនបត្រ SSL មិនស្ថិតស្ថេរទេ។ ពួកវាមកជាមួយកាលបរិច្ឆេទផុតកំណត់ ជាធម្មតាពីមួយទៅពីរឆ្នាំគិតចាប់ពីថ្ងៃចេញ។ កាលបរិច្ឆេទផុតកំណត់នេះមិនគ្រាន់តែជាទម្រង់បែបបទទេ។ នៅពេលដែលវិញ្ញាបនបត្រ SSL ផុតកំណត់ វាមិនអាចផ្តល់ការអ៊ិនគ្រីបចាំបាច់សម្រាប់គេហទំព័ររបស់អ្នកទៀតទេ។ នេះអាចនាំឱ្យមានការព្រមានអំពីសុវត្ថិភាពត្រូវបានបង្ហាញដល់អ្នកទស្សនារបស់អ្នក ដែលអាចប៉ះពាល់ដល់កេរ្តិ៍ឈ្មោះគេហទំព័ររបស់អ្នក និងអាចជំរុញឱ្យមានការចរាចរឆ្ងាយ។

ហេតុផលដែលវិញ្ញាបនបត្រ SSL ផុតកំណត់គឺដើម្បីធានាសុវត្ថិភាពដែលកំពុងដំណើរការ។ ពិភពលោកនៃសន្តិសុខឌីជីថលគឺតែងតែមានការវិវឌ្ឍដោយមានការគំរាមកំហែងថ្មីៗបានលេចឡើង ហើយអ្វីដែលចាស់ត្រូវបានបន្សាប។ ការបន្តជាទៀងទាត់នៃវិញ្ញាបនបត្រ SSL អនុញ្ញាតឱ្យមានការអនុវត្តស្តង់ដារការអ៊ិនគ្រីបចុងក្រោយបំផុត ដោយធានាថាសុវត្ថិភាពគេហទំព័ររបស់អ្នកតែងតែទាន់សម័យ។
ជាងនេះទៅទៀត ដំណើរការបន្តផ្តល់ឱកាសមួយដើម្បីធ្វើសុពលភាពកម្មសិទ្ធិដែន និងព័ត៌មានលម្អិតអាជីវកម្មរបស់អ្នក។ នេះមានសារៈសំខាន់ព្រោះវាធានាថាវិញ្ញាបនបត្រ SSL នៅតែត្រូវបានប្រើប្រាស់ដោយអង្គភាពត្រឹមត្រូវ និងស្របច្បាប់។
ការដឹងពីរបៀបធ្វើឱ្យវិញ្ញាបនបត្រ SSL សកម្មគឺមានសារៈសំខាន់ក្នុងដំណើរការបន្ត។ ដំណើរការធ្វើឱ្យសកម្មពាក់ព័ន្ធនឹងការបង្កើតសំណើចុះហត្ថលេខាលើវិញ្ញាបនបត្រថ្មី (CSR) ដែលបន្ទាប់មកត្រូវបានប្រើដើម្បីចេញវិញ្ញាបនបត្រថ្មី។
វាមានសារៈសំខាន់ណាស់ក្នុងការតាមដានកាលបរិច្ឆេទផុតកំណត់នៃវិញ្ញាបនបត្រ SSL របស់អ្នក ហើយចាប់ផ្តើមដំណើរការបន្តឱ្យបានល្អប្រសើរជាមុន។ វិធីនេះ អ្នកអាចជៀសវាងបញ្ហាពេលទំនេរ ឬបញ្ហាសុវត្ថិភាពដែលទាក់ទងនឹងវិញ្ញាបនបត្រ SSL ដែលផុតកំណត់។ អ្នកផ្តល់សេវាភាគច្រើននឹងផ្ញើការរំលឹកនៅពេលដែលកាលបរិច្ឆេទផុតកំណត់ខិតជិត ប៉ុន្តែវាជាគំនិតល្អក្នុងការមានប្រព័ន្ធរំលឹកផ្ទាល់ខ្លួនរបស់អ្នកនៅនឹងកន្លែងផងដែរ។
4 ជំហានលើរបៀបបន្តវិញ្ញាបនបត្រ SSL
ការបន្តវិញ្ញាបនបត្រ SSL គឺជាកិច្ចការសំខាន់ដែលធានាសុវត្ថិភាពដែលកំពុងដំណើរការនៃគេហទំព័ររបស់អ្នក។ ដំណើរការនេះពាក់ព័ន្ធនឹងជំហានជាច្រើន រួមទាំងជំហានសំខាន់នៃការធ្វើឱ្យវិញ្ញាបនបត្រ SSL សកម្ម។ នៅក្នុងផ្នែកនេះ យើងនឹងណែនាំអ្នកតាមរយៈជំហានទាំងនេះយ៉ាងលម្អិត។ យើងមានបំណងផ្តល់នូវមគ្គុទ្ទេសក៍ដ៏ទូលំទូលាយ ប៉ុន្តែងាយយល់អំពីវិធីបន្ត និងធ្វើឱ្យវិញ្ញាបនបត្រ SSL របស់អ្នកសកម្ម។ ដោយធ្វើតាមជំហានទាំងនេះ អ្នកអាចរក្សាការជឿទុកចិត្តរបស់អ្នកចូលមើលគេហទំព័ររបស់អ្នក និងការពារគេហទំព័ររបស់អ្នកពីការគំរាមកំហែងផ្នែកសុវត្ថិភាពដែលអាចកើតមាន។ ចូរស្វែងយល់ពីដំណើរការនេះ ហើយរៀនពីរបៀបបន្តវិញ្ញាបនបត្រ SSL ប្រកបដោយប្រសិទ្ធភាព។
ជំហានទី 1៖ បង្កើតសំណើចុះហត្ថលេខាលើវិញ្ញាបនបត្រថ្មី (CSR)
ជំហានដំបូងក្នុងការបន្តវិញ្ញាបនបត្រ SSL របស់អ្នកគឺដើម្បីបង្កើតការស្នើសុំចុះហត្ថលេខាលើវិញ្ញាបនបត្រថ្មី ឬ CSR ។ នេះគឺជាប្លុកនៃអត្ថបទដែលបានអ៊ិនកូដដែលមានព័ត៌មានអំពីគេហទំព័ររបស់អ្នក និងស្ថាប័នរបស់អ្នក។ វាដូចជាកម្មវិធីផ្លូវការដែលអ្នកនឹងដាក់ជូនអាជ្ញាធរវិញ្ញាបនបត្រ (CA) នៅពេលអ្នកស្នើសុំវិញ្ញាបនបត្រថ្មី។
នេះជារបៀបបង្កើត CSR ថ្មី៖
- ចូលប្រើគណនី hosting របស់អ្នក៖ ចូលទៅគណនី web hosting របស់អ្នក ហើយចូលទៅកាន់ផ្នែកគ្រប់គ្រង SSL/TLS ។
- បង្កើត CSR ថ្មី៖ រកមើលជម្រើសដើម្បីបង្កើត CSR ថ្មី។ អ្នកនឹងត្រូវបញ្ចូលព័ត៌មានលម្អិតមួយចំនួនអំពីគេហទំព័ររបស់អ្នក និងស្ថាប័នរបស់អ្នក។ត្រូវប្រាកដថាព័ត៌មាននេះត្រឹមត្រូវ និងត្រូវគ្នានឹងព័ត៌មានលម្អិតនៅលើវិញ្ញាបនបត្រ SSL ដែលមានស្រាប់របស់អ្នក។
- រក្សាទុក CSR របស់អ្នក៖ នៅពេលដែលអ្នកបានបង្កើត CSR សូមរក្សាទុកវានៅកន្លែងដែលមានសុវត្ថិភាព។ អ្នកនឹងត្រូវបញ្ជូន CSR នេះទៅ CA នៅពេលអ្នកស្នើសុំវិញ្ញាបនបត្រ SSL ថ្មីរបស់អ្នក។
សូមចងចាំថា CSR គឺជាផ្នែកសំខាន់នៃដំណើរការអំពីរបៀបបន្តវិញ្ញាបនបត្រ SSL ។ នៅជំហានបន្ទាប់ យើងនឹងពិនិត្យមើលពីរបៀបប្រើប្រាស់ CSR នេះ ដើម្បីស្នើសុំវិញ្ញាបនបត្រ SSL ថ្មីពី CA របស់អ្នក។
ជំហានទី 2: ធ្វើឱ្យវិញ្ញាបនបត្រ SSL របស់អ្នកដំណើរការ
នៅពេលដែលអ្នកមាន CSR ថ្មីរបស់អ្នក ជំហានបន្ទាប់ក្នុងដំណើរការគឺដើម្បីធ្វើឱ្យវិញ្ញាបនបត្រ SSL របស់អ្នកសកម្ម។ នេះគឺជាកន្លែងដែលអ្នកស្នើសុំជាផ្លូវការនូវវិញ្ញាបនបត្រ SSL ថ្មីរបស់អ្នកពីអាជ្ញាធរវិញ្ញាបនបត្រ (CA) របស់អ្នក។ នេះជារបៀបធ្វើឱ្យវិញ្ញាបនបត្រ SSL ដំណើរការ៖
- ចូលទៅក្នុងគណនី CA របស់អ្នក៖ ចូលប្រើគណនីរបស់អ្នកនៅលើគេហទំព័ររបស់ CA ។ នេះជាកន្លែងដែលអ្នកបានទិញវិញ្ញាបនបត្រ SSL ដើមរបស់អ្នក។
- បញ្ចូល CSR របស់អ្នក៖ ស្វែងរកជម្រើសដើម្បីបន្តវិញ្ញាបនបត្រ SSL របស់អ្នក ហើយនៅពេលត្រូវបានសួរ សូមបញ្ចូល CSR ថ្មីដែលអ្នកបានបង្កើតក្នុងជំហានមុន។
- ផ្ទៀងផ្ទាត់ដែន និងព័ត៌មានលម្អិតអាជីវកម្មរបស់អ្នក៖ CA នឹងត្រូវផ្ទៀងផ្ទាត់ថាអ្នកនៅតែជាម្ចាស់ដែន ហើយព័ត៌មានលម្អិតអំពីអាជីវកម្មរបស់អ្នកត្រឹមត្រូវ។ អនុវត្តតាមការណែនាំរបស់ CA សម្រាប់ដំណើរការផ្ទៀងផ្ទាត់នេះ។
- បញ្ជាក់ និងបញ្ជូនសំណើរបស់អ្នក៖ នៅពេលដែលអ្វីៗត្រូវបានបំពេញ និងផ្ទៀងផ្ទាត់ បញ្ជាក់ព័ត៌មានលម្អិតរបស់អ្នក ហើយដាក់សំណើរបស់អ្នកសម្រាប់វិញ្ញាបនបត្រ SSL ថ្មី។
ដំណើរការរបស់ CA នីមួយៗអាចមានភាពខុសប្លែកគ្នាបន្តិចបន្តួច ដូច្នេះវាមានសារៈសំខាន់ណាស់ក្នុងការធ្វើតាមការណែនាំជាក់លាក់របស់ពួកគេ។ បន្ទាប់ពីសំណើរបស់អ្នកត្រូវបានដាក់ស្នើ CA នឹងដំណើរការវា ហើយចេញវិញ្ញាបនបត្រ SSL ថ្មីរបស់អ្នក។ នៅជំហានបន្ទាប់ យើងនឹងពិភាក្សាអំពីរបៀបធ្វើឱ្យវិញ្ញាបនបត្រ SSL របស់អ្នកមានសុពលភាព។
ជំហានទី 3៖ ធ្វើឱ្យវិញ្ញាបនបត្រ SSL របស់អ្នកមានសុពលភាព

បន្ទាប់ពីអ្នកបានបើកដំណើរការវិញ្ញាបនបត្រ SSL របស់អ្នក ជំហានបន្ទាប់គឺធ្វើឱ្យវាមានសុពលភាព។ នេះគឺជាជំហានដ៏សំខាន់មួយនៅក្នុងដំណើរការនៃរបៀបបន្តវិញ្ញាបនបត្រ SSL ព្រោះវាធានាថាវិញ្ញាបនបត្រត្រូវបានចេញយ៉ាងត្រឹមត្រូវ និងរួចរាល់ដើម្បីដំឡើងនៅលើគេហទំព័ររបស់អ្នក។
នេះជារបៀបធ្វើឱ្យវិញ្ញាបនបត្រ SSL របស់អ្នកមានសុពលភាព៖
- រង់ចាំការឆ្លើយតបរបស់ CA៖ បន្ទាប់ពីអ្នកបានដាក់បញ្ជូន CSR របស់អ្នក និងស្នើសុំវិញ្ញាបនបត្រ SSL របស់អ្នក CA នឹងដំណើរការសំណើរបស់អ្នក។ វាអាចចំណាយពេលពីពីរបីនាទីទៅពីរបីថ្ងៃ អាស្រ័យលើ CA ។
- អនុវត្តតាមដំណើរការផ្ទៀងផ្ទាត់របស់ CA៖ ជាធម្មតា CA នឹងផ្ញើអ៊ីមែលមកអ្នកជាមួយនឹងការណែនាំអំពីរបៀបធ្វើឱ្យវិញ្ញាបនបត្រ SSL របស់អ្នកមានសុពលភាព។ ជាធម្មតាវាពាក់ព័ន្ធនឹងការចុចតំណក្នុងអ៊ីមែល ហើយបញ្ជាក់ថាអ្នកបានស្នើសុំវិញ្ញាបនបត្រ។
- ពិនិត្យព័ត៌មានលម្អិតអំពីវិញ្ញាបនបត្រ៖ នៅពេលដែលវិញ្ញាបនបត្រ SSL របស់អ្នកមានសុពលភាព អ្នកគួរតែពិនិត្យមើលព័ត៌មានលម្អិតនៃវិញ្ញាបនបត្រ។ សូមប្រាកដថាព័ត៌មានទាំងអស់គឺត្រឹមត្រូវ រួមទាំងឈ្មោះដែន និងព័ត៌មានលម្អិតរបស់ក្រុមហ៊ុន។
- ទាញយកវិញ្ញាបនបត្រ SSL របស់អ្នក៖ បន្ទាប់ពីសុពលភាព អ្នកនឹងអាចទាញយកវិញ្ញាបនបត្រ SSL ថ្មីរបស់អ្នកពីគេហទំព័ររបស់ CA ។ ត្រូវប្រាកដថារក្សាឯកសារនេះឱ្យមានសុវត្ថិភាព ព្រោះអ្នកនឹងត្រូវការវានៅជំហានបន្ទាប់ នៅពេលអ្នកដំឡើងវិញ្ញាបនបត្រនៅលើគេហទំព័ររបស់អ្នក។
ជំហានទី 4: ដំឡើងវិញ្ញាបនបត្រ SSL ថ្មីរបស់អ្នក
ជំហានចុងក្រោយនៅក្នុងដំណើរការនៃរបៀបបន្តវិញ្ញាបនបត្រ SSL គឺត្រូវដំឡើងវិញ្ញាបនបត្រ SSL ថ្មីរបស់អ្នកនៅលើគេហទំព័ររបស់អ្នក។ នេះគឺជាជំហានដ៏សំខាន់មួយ ដោយសារវាអនុវត្តវិញ្ញាបនបត្រថ្មីទៅកាន់គេហទំព័ររបស់អ្នក ដោយធានាថាគេហទំព័ររបស់អ្នកមានសុវត្ថិភាព និងព័ត៌មានរបស់អ្នកទស្សនារបស់អ្នកត្រូវបានការពារ។
នេះជារបៀបដំឡើងវិញ្ញាបនបត្រ SSL ថ្មីរបស់អ្នក៖
- ចូលប្រើគណនី hosting របស់អ្នក៖ ចូលទៅគណនី web hosting របស់អ្នក ហើយចូលទៅកាន់ផ្នែកគ្រប់គ្រង SSL/TLS ។
- បង្ហោះវិញ្ញាបនបត្រ SSL ថ្មីរបស់អ្នក៖ ស្វែងរកជម្រើសដើម្បីដំឡើង ឬ hostting វិញ្ញាបនបត្រ SSL ថ្មី។ អ្នកនឹងត្រូវផ្ទុកឡើងឯកសារវិញ្ញាបនបត្រ SSL ដែលអ្នកបានទាញយកពីគេហទំព័ររបស់ CA ក្នុងជំហានមុន។
- ធ្វើបច្ចុប្បន្នភាពការកំណត់រចនាសម្ព័ន្ធគេហទំព័ររបស់អ្នក៖ អាស្រ័យលើម៉ាស៊ីនគេហទំព័រ និងវេទិកាគេហទំព័ររបស់អ្នក អ្នកប្រហែលជាត្រូវធ្វើបច្ចុប្បន្នភាពការកំណត់រចនាសម្ព័ន្ធគេហទំព័ររបស់អ្នក ដើម្បីប្រើវិញ្ញាបនបត្រ SSL ថ្មី។ ជាធម្មតាវាពាក់ព័ន្ធនឹងការជ្រើសរើសវិញ្ញាបនបត្រថ្មីនៅក្នុងការកំណត់ SSL នៃគេហទំព័ររបស់អ្នក។
- សាកល្បងគេហទំព័ររបស់អ្នក៖ បន្ទាប់ពីដំឡើងវិញ្ញាបនបត្រ SSL ថ្មី វាមានសារៈសំខាន់ណាស់ក្នុងការសាកល្បងគេហទំព័ររបស់អ្នក ដើម្បីប្រាកដថាវិញ្ញាបនបត្រដំណើរការត្រឹមត្រូវ។ អ្នកអាចធ្វើដូចនេះបានដោយចូលទៅកាន់គេហទំព័ររបស់អ្នក ហើយពិនិត្យមើលរូបតំណាងសោនៅក្នុងរបារអាសយដ្ឋាននៃកម្មវិធីរុករករបស់អ្នក។ ប្រសិនបើសោមានវត្តមាន និងចាក់សោ នោះវិញ្ញាបនបត្រ SSL ថ្មីរបស់អ្នកគឺសកម្ម និងដំណើរការបានត្រឹមត្រូវ។
បញ្ហាទូទៅ និងការដោះស្រាយបញ្ហា
ខណៈពេលដែលដំណើរការនៃរបៀបបន្តវិញ្ញាបនបត្រ SSL ជាទូទៅមានភាពសាមញ្ញ អ្នកអាចជួបប្រទះបញ្ហាមួយចំនួននៅតាមផ្លូវ។ នេះគឺជាបញ្ហាទូទៅមួយចំនួន និងដំណោះស្រាយរបស់ពួកគេ៖
- វិញ្ញាបនបត្រ SSL មិនត្រូវបានទទួលស្គាល់៖ ប្រសិនបើកម្មវិធីរុករកតាមអ៊ីនធឺណិតរបស់អ្នកមិនស្គាល់វិញ្ញាបនបត្រ SSL របស់អ្នកទេ វាអាចបណ្តាលមកពីការមិនស៊ីគ្នារវាងឈ្មោះដែននៅលើវិញ្ញាបនបត្រ និងឈ្មោះដែនពិតប្រាកដនៃគេហទំព័ររបស់អ្នក។ សូមប្រាកដថាឈ្មោះដែននៅលើវិញ្ញាបនបត្ររបស់អ្នកត្រូវគ្នានឹងឈ្មោះដែនគេហទំព័ររបស់អ្នក។
- វិញ្ញាបនបត្រ SSL ផុតកំណត់៖ ប្រសិនបើវិញ្ញាបនបត្រ SSL របស់អ្នកបានផុតកំណត់ អ្នកនឹងត្រូវបន្តវាឱ្យបានឆាប់តាមដែលអាចធ្វើទៅបាន ដើម្បីជៀសវាងការព្រមានអំពីសុវត្ថិភាពនៅលើគេហទំព័ររបស់អ្នក។ អនុវត្តតាមជំហានដែលមានចែងក្នុងការណែនាំនេះ ដើម្បីបន្ត និងធ្វើឱ្យវិញ្ញាបនបត្រ SSL របស់អ្នកសកម្ម។
- កំហុសក្នុងការដំឡើងវិញ្ញាបនបត្រ SSL៖ ប្រសិនបើអ្នកមានបញ្ហាក្នុងការដំឡើងវិញ្ញាបនបត្រ SSL របស់អ្នក វាអាចបណ្តាលមកពីការអនុញ្ញាតឯកសារមិនត្រឹមត្រូវ ផ្លូវឯកសារមិនត្រឹមត្រូវ ឬបញ្ហាជាមួយម៉ាស៊ីនគេហទំព័ររបស់អ្នក។ ពិនិត្យមើលដំណើរការដំឡើងរបស់អ្នក ហើយពិគ្រោះជាមួយក្រុមជំនួយរបស់ម្ចាស់គេហទំព័ររបស់អ្នក ប្រសិនបើចាំបាច់។
- កំហុសក្នុងសុពលភាពវិញ្ញាបនបត្រ SSL៖ ប្រសិនបើវិញ្ញាបនបត្រ SSL របស់អ្នកមិនមានសុពលភាព វាអាចបណ្តាលមកពីព័ត៌មានមិនត្រឹមត្រូវនៅក្នុង CSR របស់អ្នក ឬបញ្ហាជាមួយអាជ្ញាធរវិញ្ញាបនបត្ររបស់អ្នក។ ពិនិត្យមើលព័ត៌មាននៅក្នុង CSR របស់អ្នកម្តងទៀត ហើយទាក់ទង CA របស់អ្នកសម្រាប់ជំនួយប្រសិនបើចាំបាច់។
សន្និដ្ឋាន
នៅ 1Byte យើងយល់ពីសារៈសំខាន់នៃសុវត្ថិភាពគេហទំព័រ និងតួនាទីដែលវិញ្ញាបនបត្រ SSL ដើរតួក្នុងរឿងនេះ។ យើងសង្ឃឹមថាការណែនាំនេះអំពីរបៀបបន្តវិញ្ញាបនបត្រ SSL បានផ្តល់ឱ្យអ្នកនូវផ្លូវច្បាស់លាស់ក្នុងការបន្តវិញ្ញាបនបត្រ SSL របស់អ្នក និងធានាសុវត្ថិភាពគេហទំព័ររបស់អ្នក។ សូមចាំថា ការរក្សាវិញ្ញាបនបត្រ SSL របស់អ្នកឱ្យទាន់សម័យ មិនមែនគ្រាន់តែអំពីការរក្សាភាពជឿជាក់នៃគេហទំព័ររបស់អ្នកប៉ុណ្ណោះទេ ប៉ុន្តែថែមទាំងផ្តល់នូវបរិយាកាសសុវត្ថិភាពសម្រាប់អ្នកទស្សនារបស់អ្នកផងដែរ។ ប្រសិនបើអ្នកជួបប្រទះបញ្ហាណាមួយក្នុងអំឡុងពេលដំណើរការបន្ត សូមកុំស្ទាក់ស្ទើរក្នុងការទាក់ទងមកពួកយើង។ យើងនៅទីនេះដើម្បីជួយអ្នកក្នុងការរុករកទិដ្ឋភាពបច្ចេកទេសទាំងនេះ ដូច្នេះអ្នកអាចផ្តោតលើអ្វីដែលអ្នកធ្វើបានល្អបំផុត - ដំណើរការអាជីវកម្មរបស់អ្នក។ រក្សាសុវត្ថិភាពជាមួយ 1Byte!

