
CSR (ស្នើសុំចុះហត្ថលេខាលើវិញ្ញាបនប័ត្រ) លេខកូដត្រូវបានទាមទារ ធ្វើឱ្យវិញ្ញាបនបត្រ SSL សកម្មនៅក្នុងគណនី 1Byte របស់អ្នក។.
នេះជាជំហានបង្ហាញសម្រាប់អ្នកដើម្បីធ្វើវា៖
របៀបក្នុងការបង្កើត CSR ក្នុង ISPConfig
FURTHER READING: |
| 1. ការបង្កើត CSR នៅក្នុង IIS 8 & 10 |
| 2. ការបង្កើត CSR នៅក្នុង IIS7 |
| 3. ការបង្កើត CSR សម្រាប់សេវាកម្ម Google Cloud |
ជំហានទី 1
ចូលទៅកាន់ផ្ទាំងគ្រប់គ្រង ISPConfig តាមរយៈច្រក 8080. (e.g. http://yoursite.com:8080)
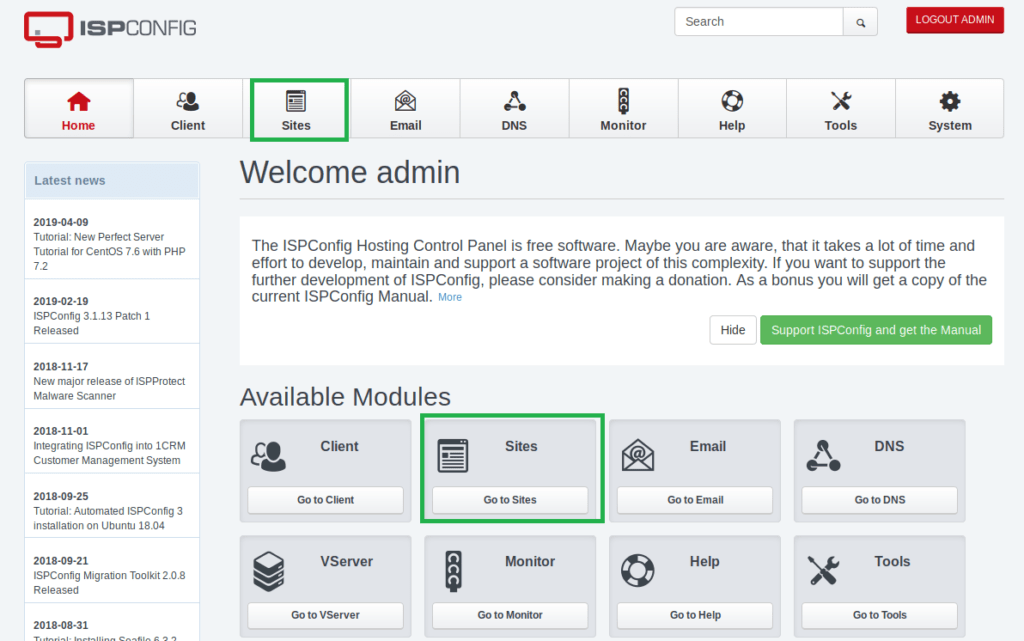
ជំហានទី 2
ចុច Sites នៅក្នុងម៉ឺនុយមេ។
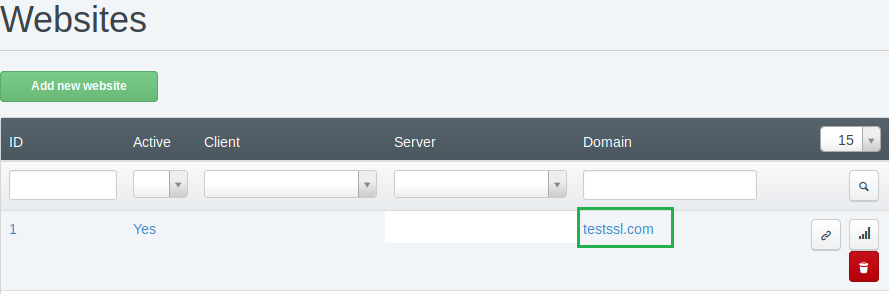
ជំហានទី 3
ចុចលើ domain ឈ្មោះដែលអ្នកចង់បង្កើតសម្រាប់ CSR។
ជំហានទី 4
ជ្រើសយក SSL ផ្ទាំង។
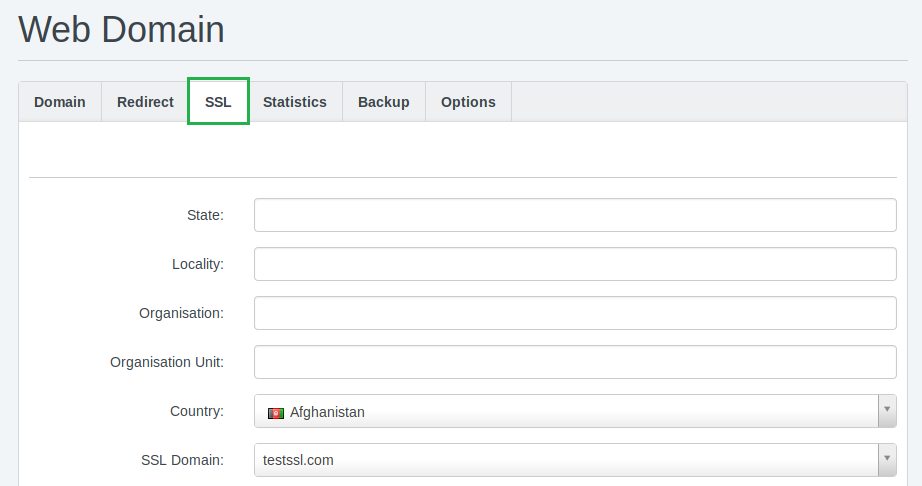
ជំហានទី 5
បំពេញក្នុងចន្លោះដោយប្រើការណែនាំនេះ៖
- រដ្ឋ (State) ៖ បំពេញឈ្មោះពេញនៃរដ្ឋឬតំបន់របស់អ្នក។
- តំបន់ (Locality) ៖ បំពេញឈ្មោះពេញនៃទីក្រុងឬតំបន់របស់អ្នក។
- អង្គការ (Organization) ៖ បំពេញឈ្មោះផ្លូវការដែលបានចុះឈ្មោះសម្រាប់អាជីវកម្មរបស់អ្នក។ ប្រសិនបើមិនបានចុះឈ្មោះ សូមវាយ "N/A"។ សម្រាប់អាជ្ញាប័ណ្ណ SSL ប្រភេទ Organization និង Extended Validation អ្នកនឹងត្រូវផ្ដល់ឯកសារផ្លូវការបន្ថែម ដើម្បីឱ្យអាជ្ញាធរបញ្ជាក់សក្ខីប័ត្រប្រកាស។
- អង្គភាព (Organization Unit) ៖ បំពេញឈ្មោះនៃផ្នែកឬនាយកដ្ឋានមួយក្នុងអង្គការដែលបានចុះឈ្មោះផ្លូវការ។ ប្រសិនបើមិនមាន សូមវាយ "N/A"។
- ប្រទេស (Country) ៖ ជ្រើសប្រទេសរបស់អ្នកពីបញ្ជីជ្រើស។
- ដែន SSL (SSL Domain) ៖ ជ្រើសថាតើអ្នកចង់រួមបញ្ចូលអនុដែន www ក្នុងវិញ្ញាបនបត្ររបស់អ្នកឬអត់។
ចំណាំ (Note)៖ ប្រសិនបើអ្នកប្រើវិញ្ញាបនបត្រសម្រាប់ដែនតែមួយ (Single-Domain Certificate) អនុដែន www និងដែនសំខាន់នឹងត្រូវបញ្ចូលដោយស្វ័យប្រវត្តិ។ ប្រសិនបើអ្នកមានវិញ្ញាបនបត្រប្រភេទ Wildcard សូមជ្រើសដែនដែលមានសញ្ញា * (asterisk) នៅខាងមុខ។ - SSL សកម្ម (SSL Action)៖ រមូរទៅក្រោម និងជ្រើសជម្រើសបង្កើត certificate ពីបញ្ជីជ្រើសនៅផ្នែកនេះ។
ចុច រក្សាទុក (Save).
ជំហានទី 6
ចូលទៅ គេហទំព័រ ។
ជំហានទី 7
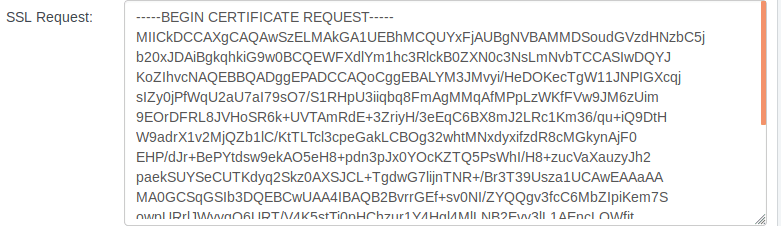
ចុចប៊ូតុង ផ្ទាំង SSLឥឡូវនេះ អ្នកនឹងឃើញថាកន្លែង សោ SSL, សំណើរ SSL (SSL Request), វិញ្ញាបនប័ត្រ SSL មានព័ត៌មាននៅក្នុងប្រអប់៖
- សំណើរ SSL (SSL Request) – នេះជាកូដ CSR របស់អ្នក។ សូមរក្សាទុកឲ្យបានសុវត្ថិភាព ព្រោះអ្នកនឹងត្រូវការវានៅពេលធ្វើឱ្យ SSL អ្នកសកម្ម។ កូដនេះចាប់ផ្តើម និងបញ្ចប់ដោយស្លាកខាងក្រោម៖ —–ចាប់ផ្តើមការស្នើសុំវិញ្ញាបនបត្រ—– និង —– បញ្ចប់ការស្នើសុំវិញ្ញាបនបត្រ—–.
- សោ SSL – នេះជាកូដសោឯកជន RSA របស់អ្នក។ វានឹងត្រូវរក្សាទុកដោយស្វ័យប្រវត្តិនៅក្នុងផ្ទាំងគ្រប់គ្រង ISPConfig ។ កូដនេះចាប់ផ្តើម និងបញ្ចប់ដោយស្លាកខាងក្រោម៖ —–ចាប់ផ្តើម សោឯកជន RSA—– និង —–បញ្ចប់ សោឯកជន RSA—–.
- វិញ្ញាបនប័ត្រ SSL – នេះជាព័ត៌មានលម្អិតអំពីវិញ្ញាបនបត្រ self-signed។ វាមិនចាំបាច់សម្រាប់ដំណើរការដំឡើង SSL ទេ។
ជំហានទី 8
ចម្លងមាតិកាទាំងអស់នៅក្នុង សំណើរ SSL (SSL Request) ៖
ជំហានទី 9
ចូលទៅកាន់គណនី 1Byte របស់អ្នក ហើយបន្តជាមួយ ជំហានធ្វើឱ្យសកម្មវិញ្ញាបនបត្រ SSL។.