តើធ្វើដូចម្តេចដើម្បីរក្សាអ៊ីមែលរបស់អ្នកចេញពីថតសារឥតបានការ- ការណែនាំសម្រាប់ aaPanel?

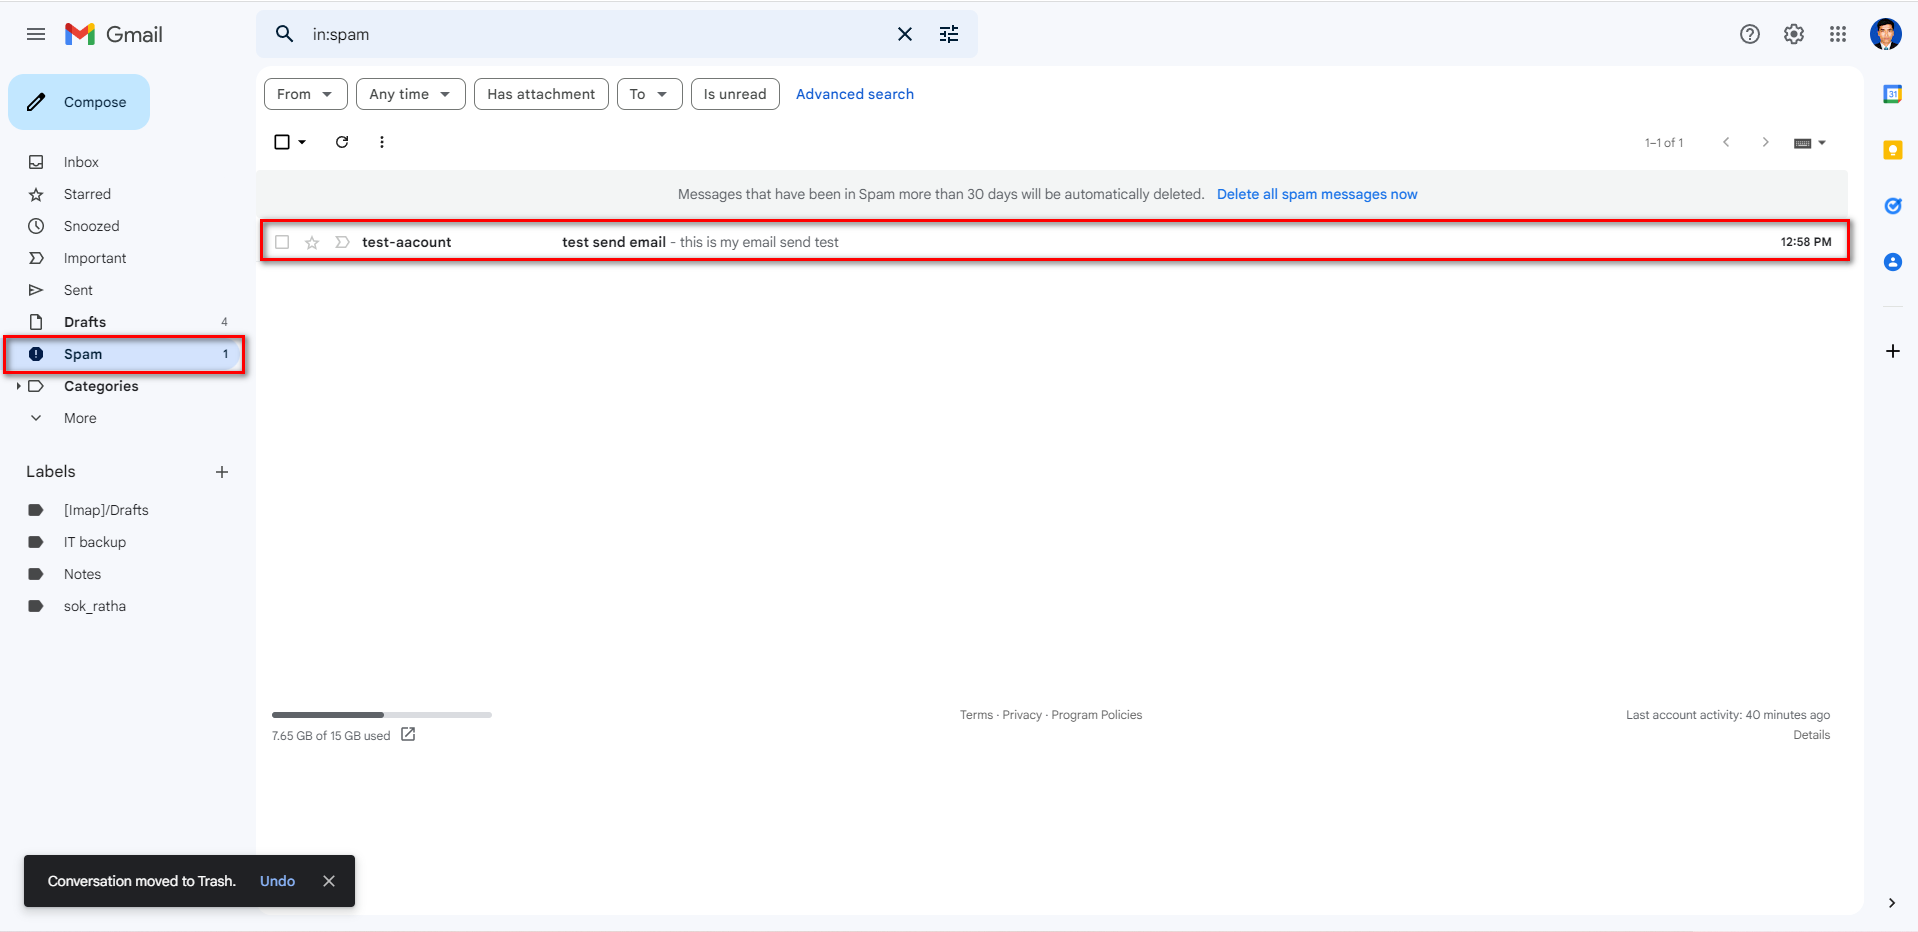
ពីមុន អ្នកប្រហែលជាមានបញ្ហាក្នុងការប្រើអ៊ីមែលនៅលើ aaPanel Cloud hosting ដើម្បីផ្ញើអ៊ីមែល ហើយអ្នកទទួលប្រហែលជាបានទទួលអ៊ីមែលរបស់អ្នកនៅក្នុងថតសារឥតបានការ។ ឥឡូវនេះ យើងនឹងបង្រៀនអ្នកពីរបៀបជៀសវាងបញ្ហានេះ ហើយអ្នកទទួលអ៊ីមែលរបស់អ្នកនឹងត្រូវមានអារម្មណ៍ជឿជាក់ថាការទទួលអ៊ីមែលរបស់អ្នកមានសុវត្ថិភាព។
តម្រូវការជាមុន
- អ្នកនឹងត្រូវការដែន និងបង្ហោះដោយប្រើ aaPanel (ឧ៖ Cloud Hosting …) ដើម្បីចាប់ផ្តើម។
- សូមទៅ 1Byte ដើម្បីទិញមួយ ប្រសិនបើអ្នកមិនទាន់មាន។
- ដំឡើងម៉ាស៊ីនមេអ៊ីមែលនៅលើ aaPanel ប្រសិនបើអ្នកមិនទាន់បានដំឡើងវាទេ អ្នកអាចពិនិត្យមើលប្លក់របស់យើងដោយ តំណភ្ជាប់
- អ្នកត្រូវចុះឈ្មោះគណនីជាមួយ Send2go ជាមួយនឹងគម្រោងដែលអ្នកត្រូវការ។
តើ aaPanel ប្រើសម្រាប់អ្វី?
AaPanel គឺជាការជំនួសផ្ទាំងគ្រប់គ្រងការបង្ហោះគេហទំព័របើកចំហដែលផ្តល់នូវចំណុចប្រទាក់ GUI និងអនុញ្ញាតឱ្យអ្នកធ្វើជាម្ចាស់ផ្ទះគេហទំព័រជាច្រើន និងកំណត់រចនាសម្ព័ន្ធម៉ាស៊ីនមេស្មុគស្មាញ។
ការចាប់ផ្តើម
ជំហានទី 1: ដំឡើងអ្នកផ្ញើដែលបានផ្ទៀងផ្ទាត់ដែន
- ចូល SendGrid ។ យើងបានចុះឈ្មោះគណនីរួចហើយនៅចំណុចនេះ។ សូមចុះឈ្មោះគណនីរបស់អ្នកជាមុន ប្រសិនបើអ្នកមិនទាន់មាន។

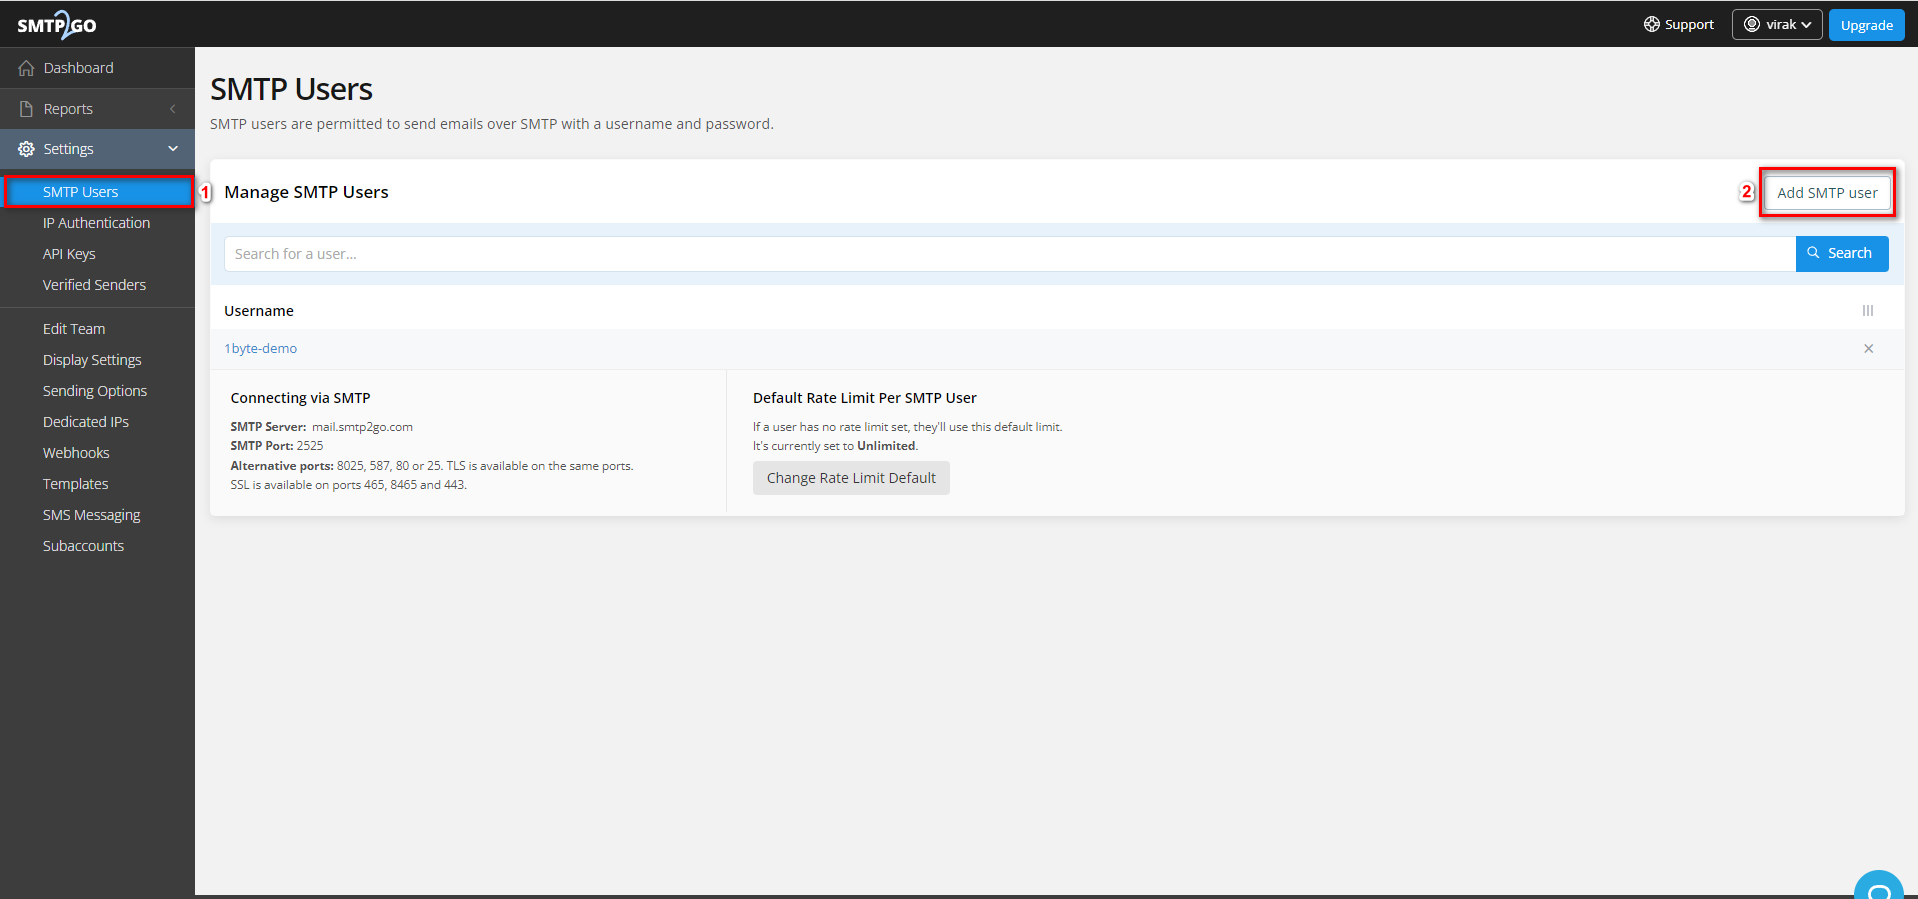
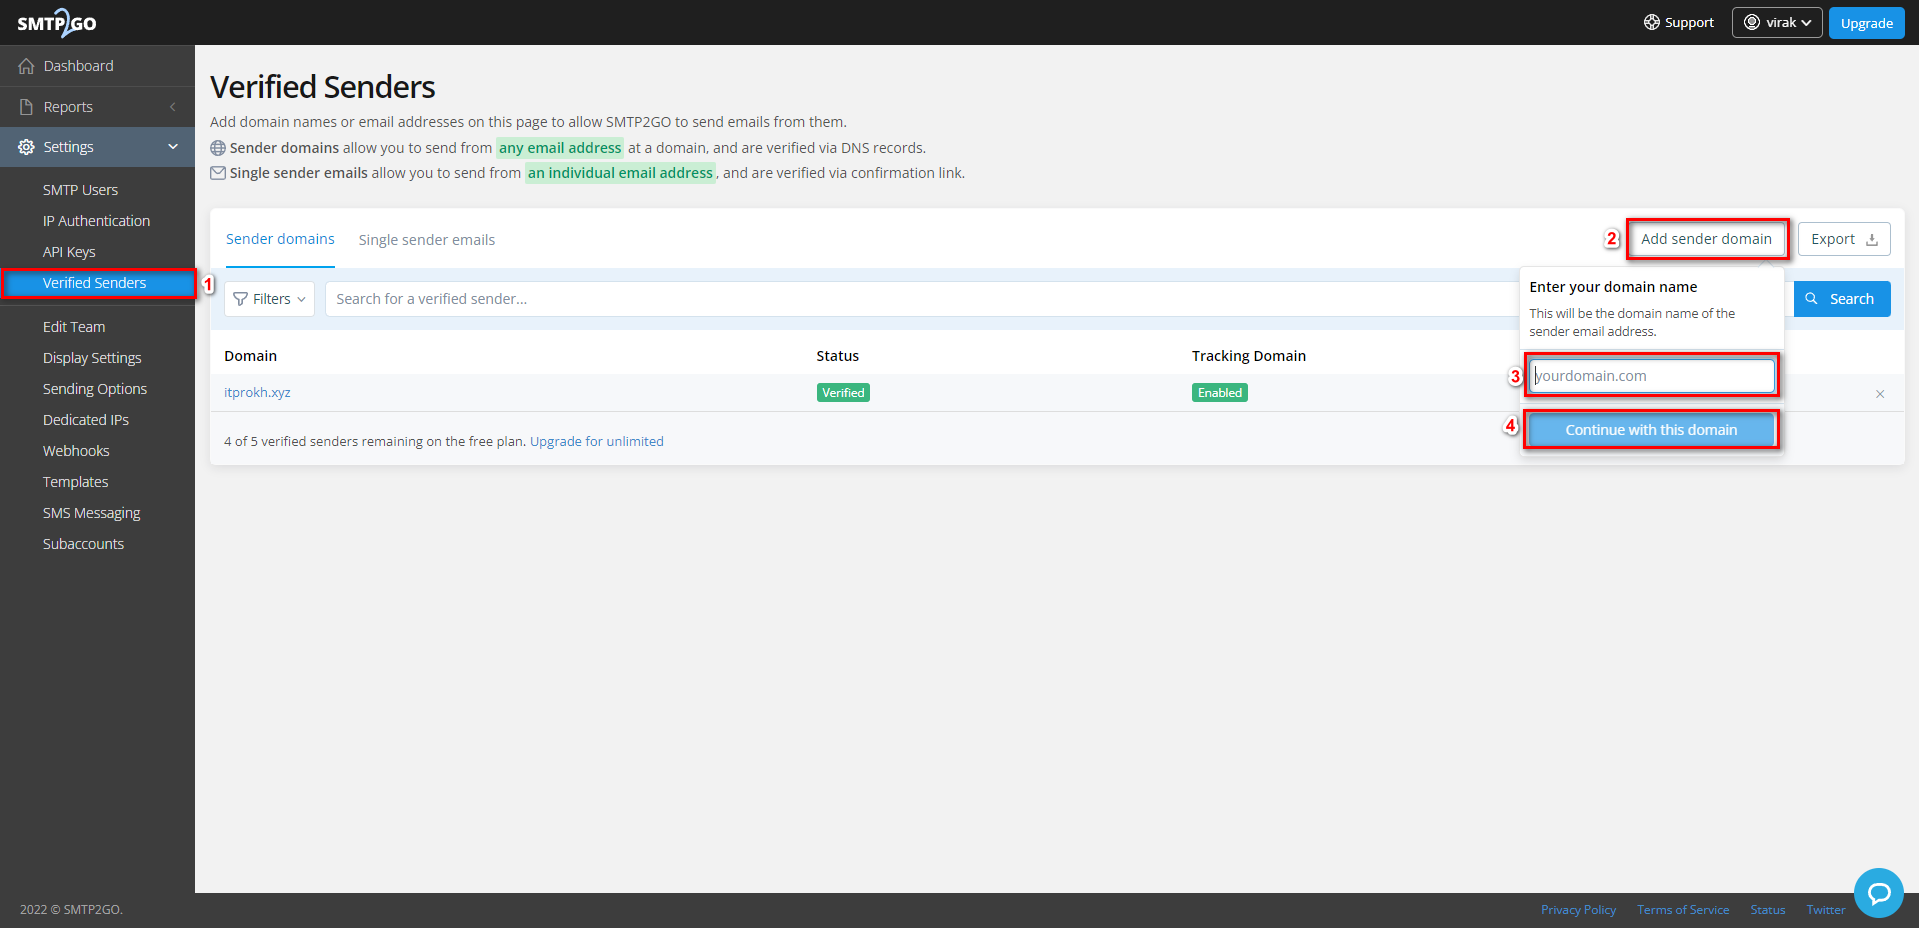
- ចូលទៅកាន់ការកំណត់ ហើយចុច SMTP USER បន្ទាប់មកចុច "Add SMTP user"
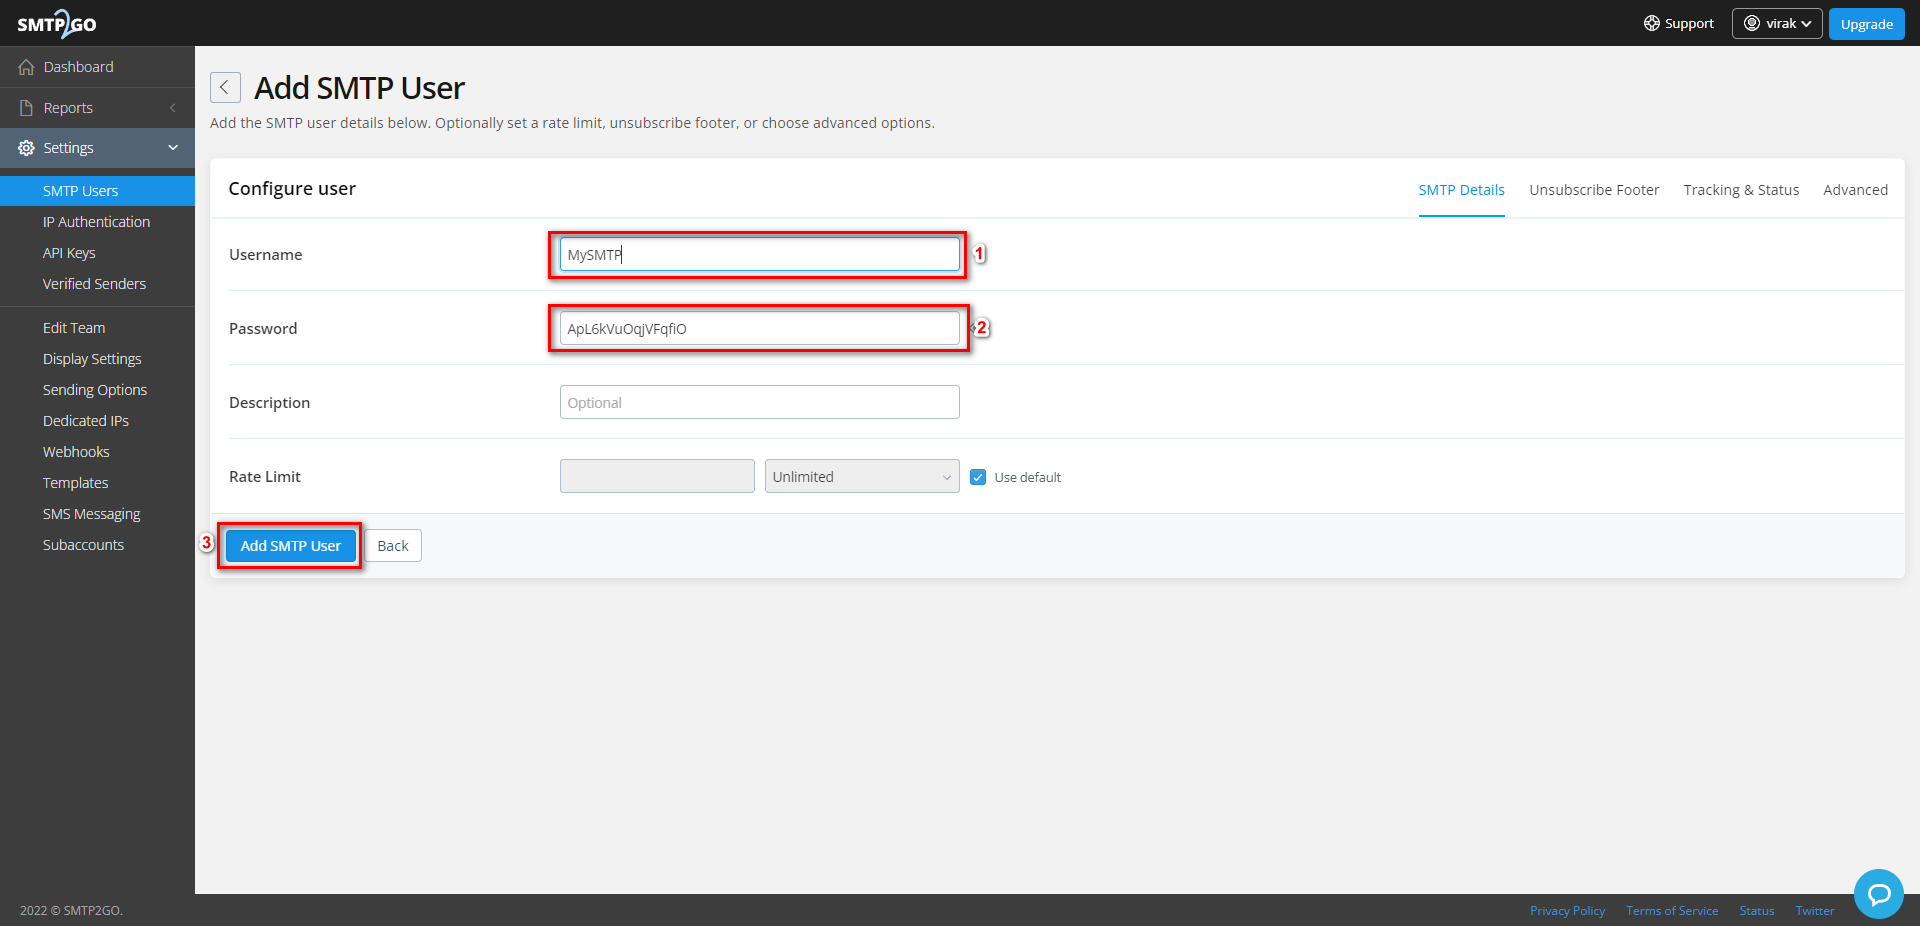
- បញ្ចូលអ្នកប្រើ SMTP និងពាក្យសម្ងាត់ហើយចុច "បន្ថែមអ្នកប្រើប្រាស់ SMTP
- After you create an SMTP user ready now add ឈ្មោះដែន names to allow SMTP2GO to send emails from them
- ដូច្នេះក្នុងជំហាននេះ SMTP2GO នឹងត្រូវការឱ្យអ្នកបន្ថែមកំណត់ត្រាទាំងអស់ទៅផ្នែក DNS របស់អ្នក។ ដូច្នេះសង្កត់លើជំហាននេះហើយចូលទៅជំហានទី 2 ដើម្បីបន្ថែមកំណត់ត្រាមុនពេលអ្នកចុចផ្ទៀងផ្ទាត់
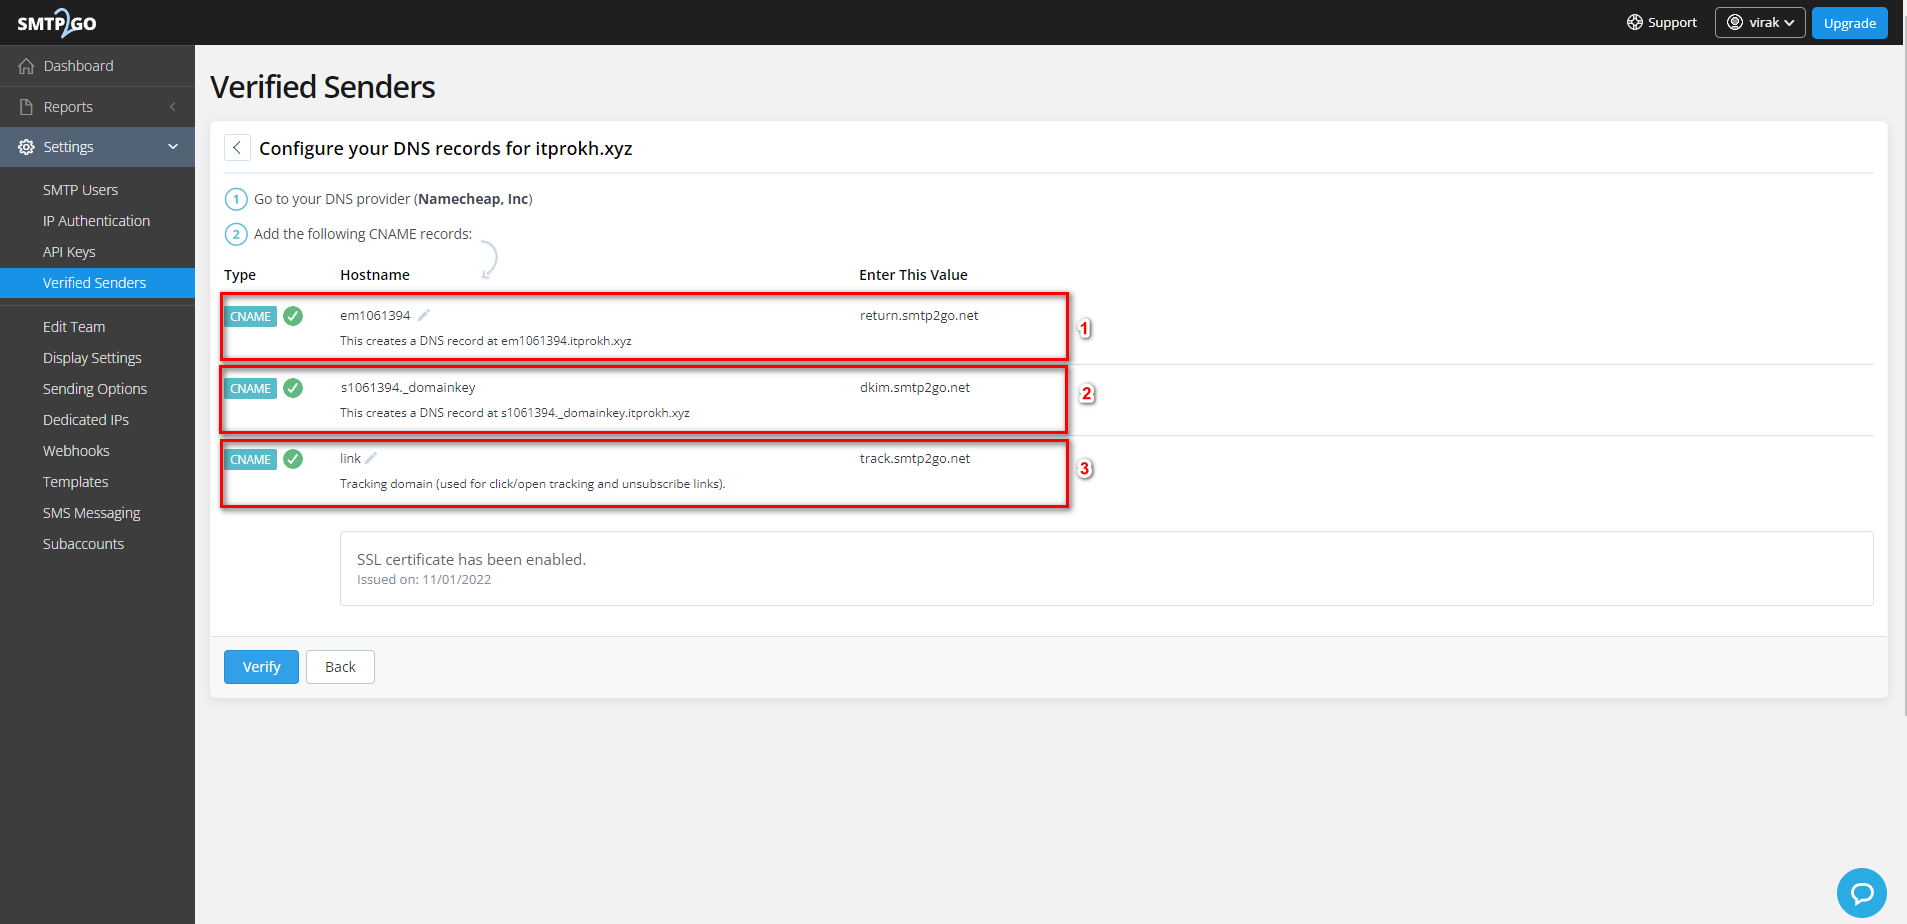
ជំហាន 2. បន្ថែម CNAME Record
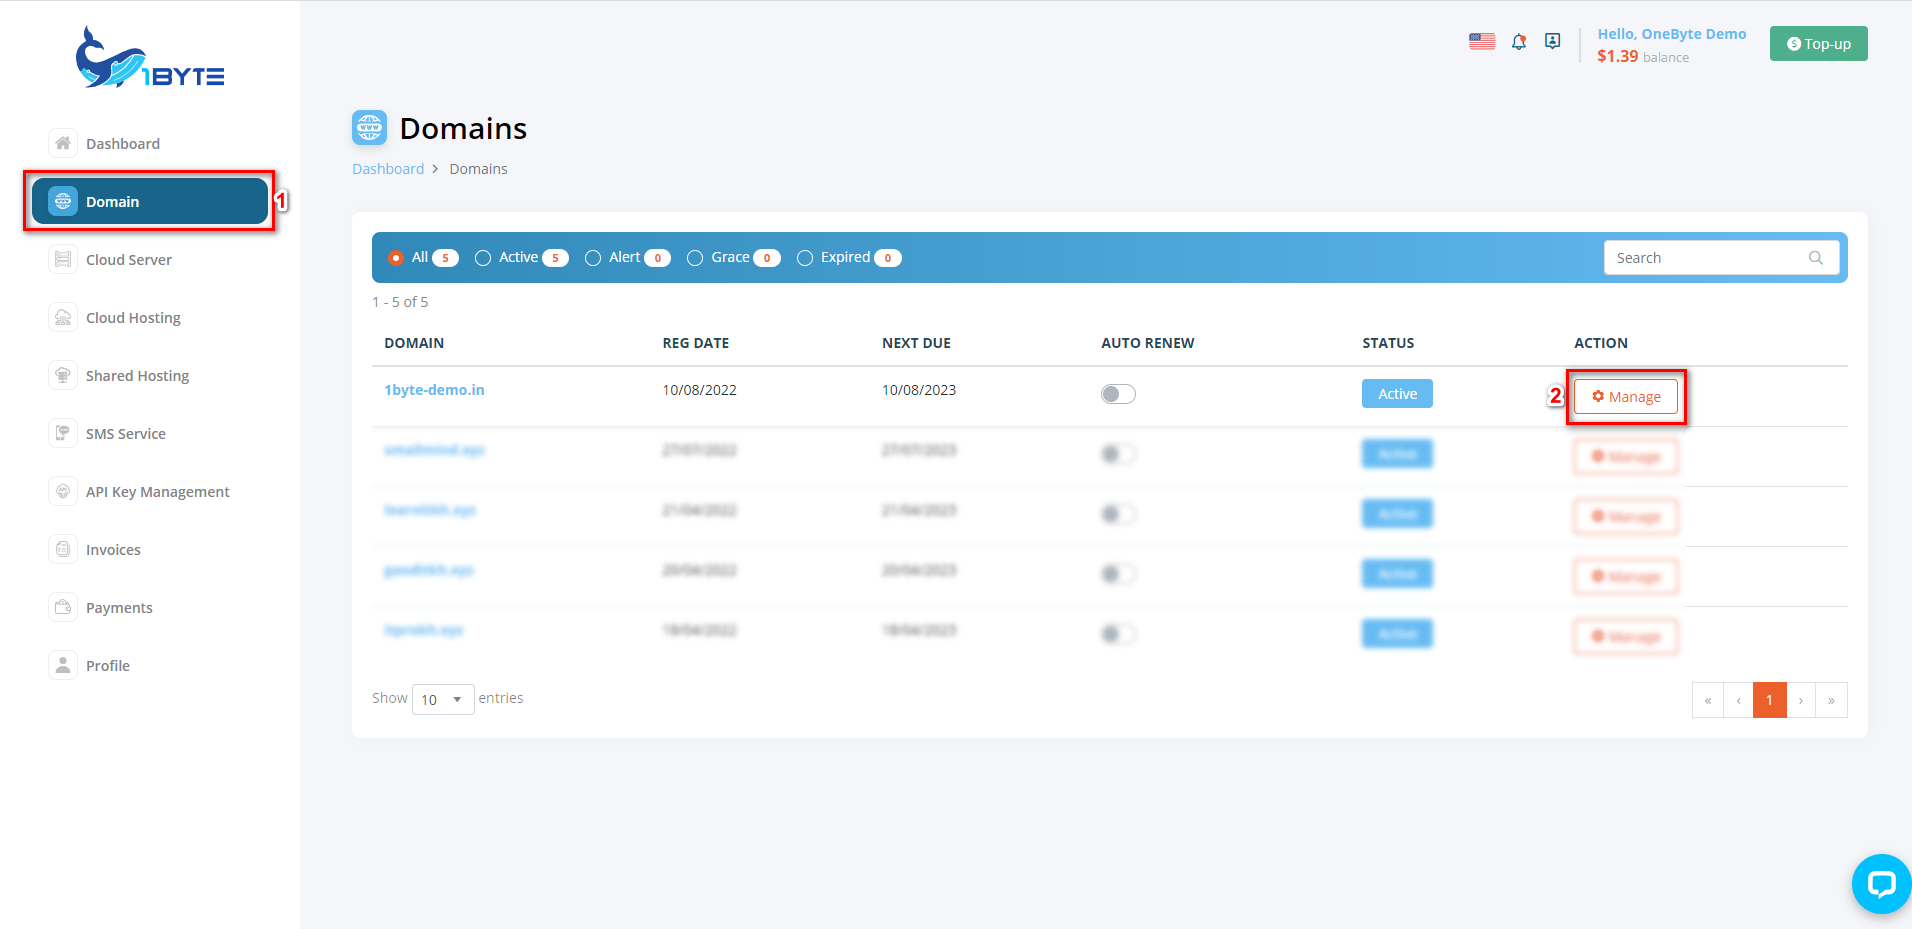
- ចូលទៅកាន់គណនី 1Byte ហើយចូលទៅកាន់ domain បន្ទាប់មកចុច "Manage"
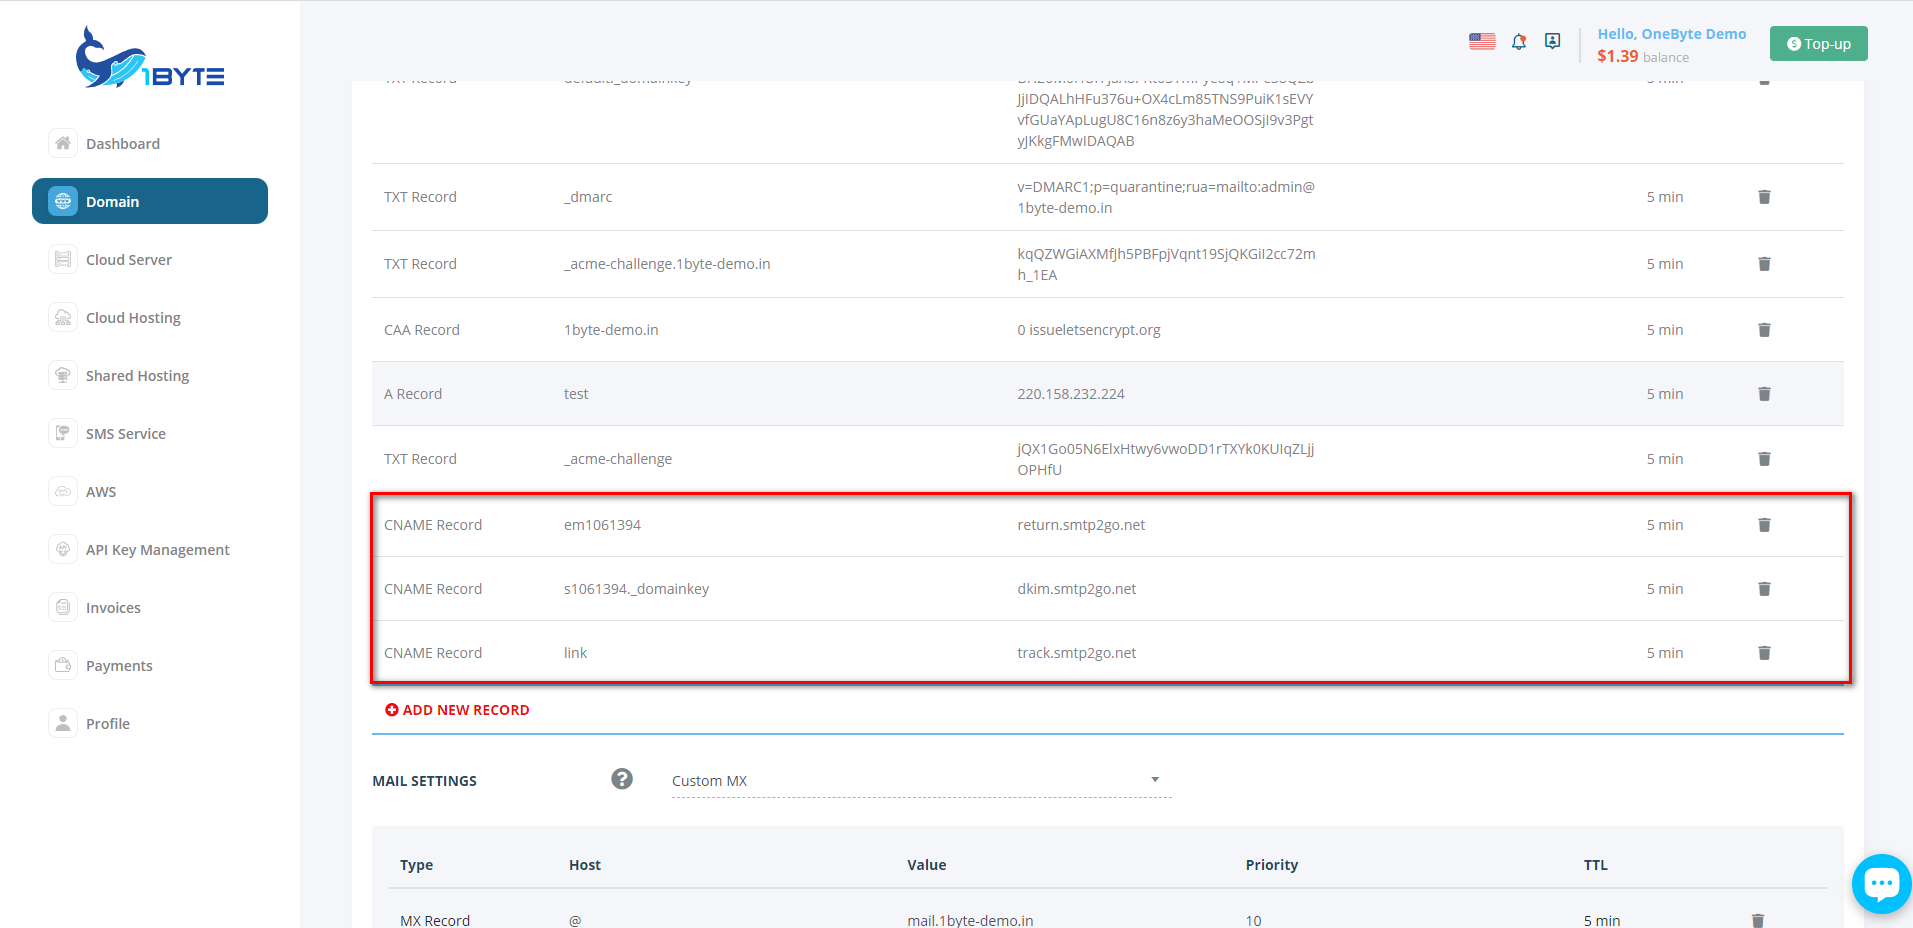
- ចម្លងកំណត់ត្រា CNAME ពី SMTP2GO ហើយបន្ថែមទៅ DNS របស់អ្នក។
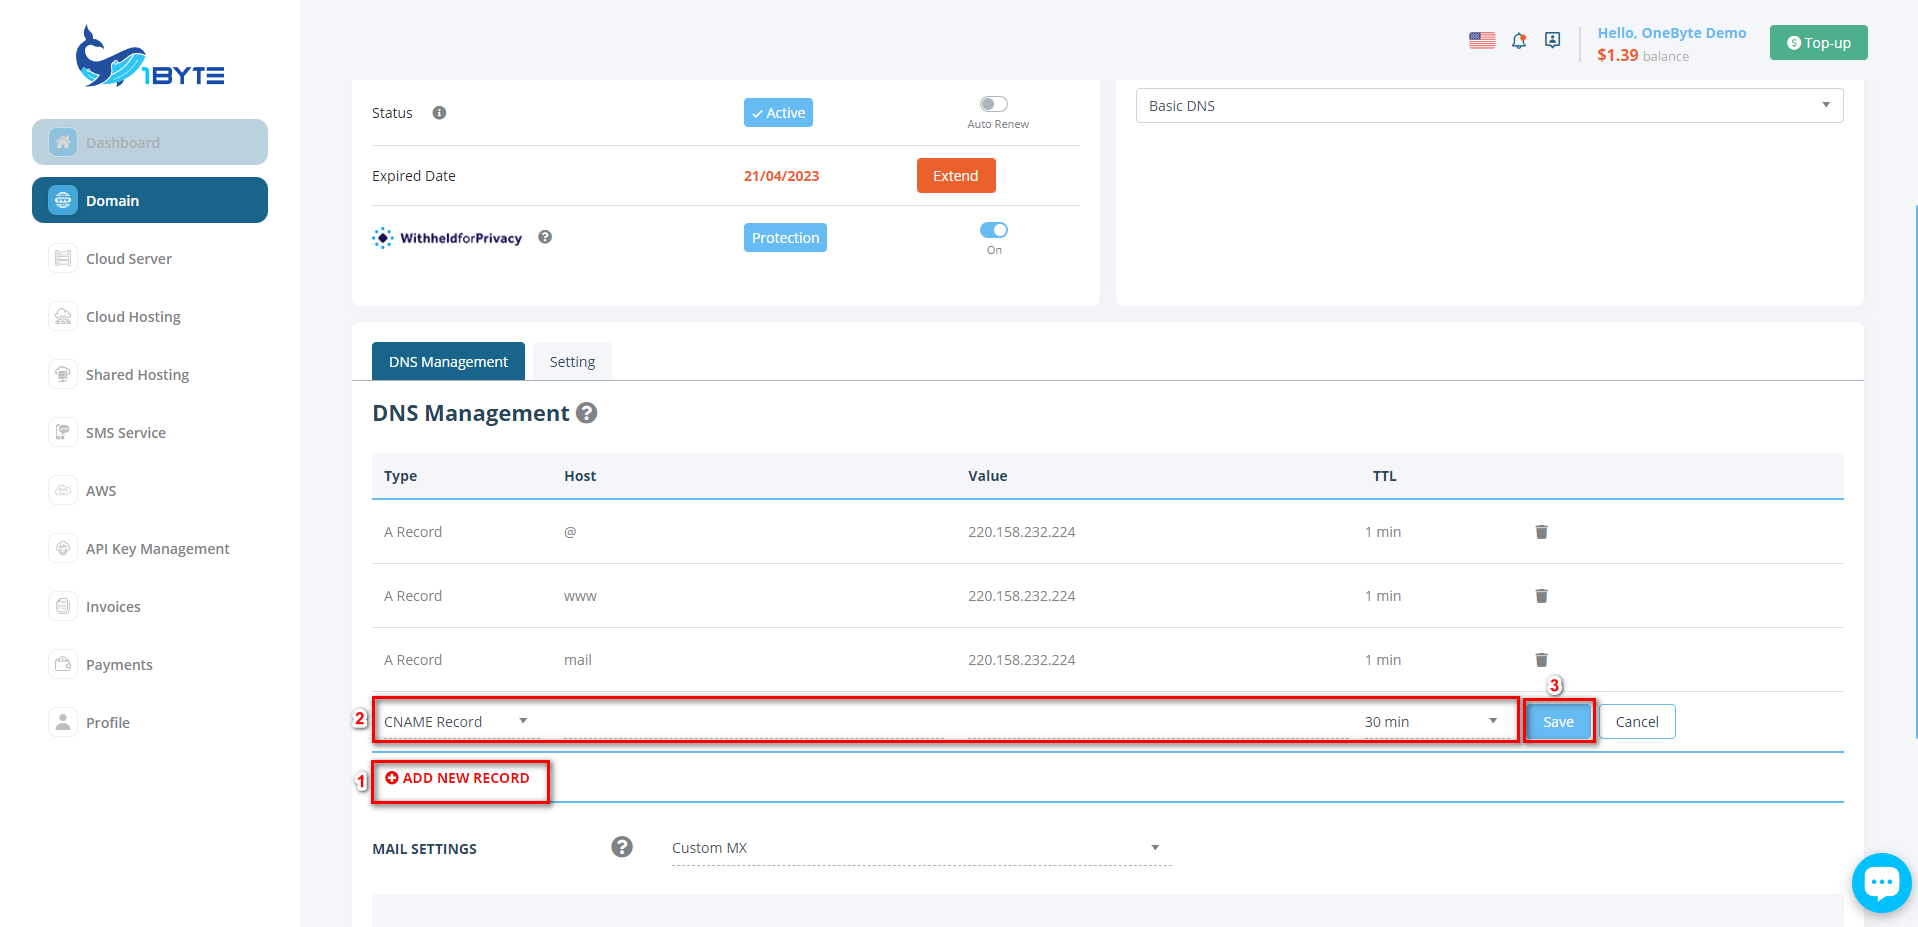
- បន្ទាប់ពីបន្ថែមកំណត់ត្រា CNAME វានឹងមើលទៅដូចរូបភាពខាងក្រោម
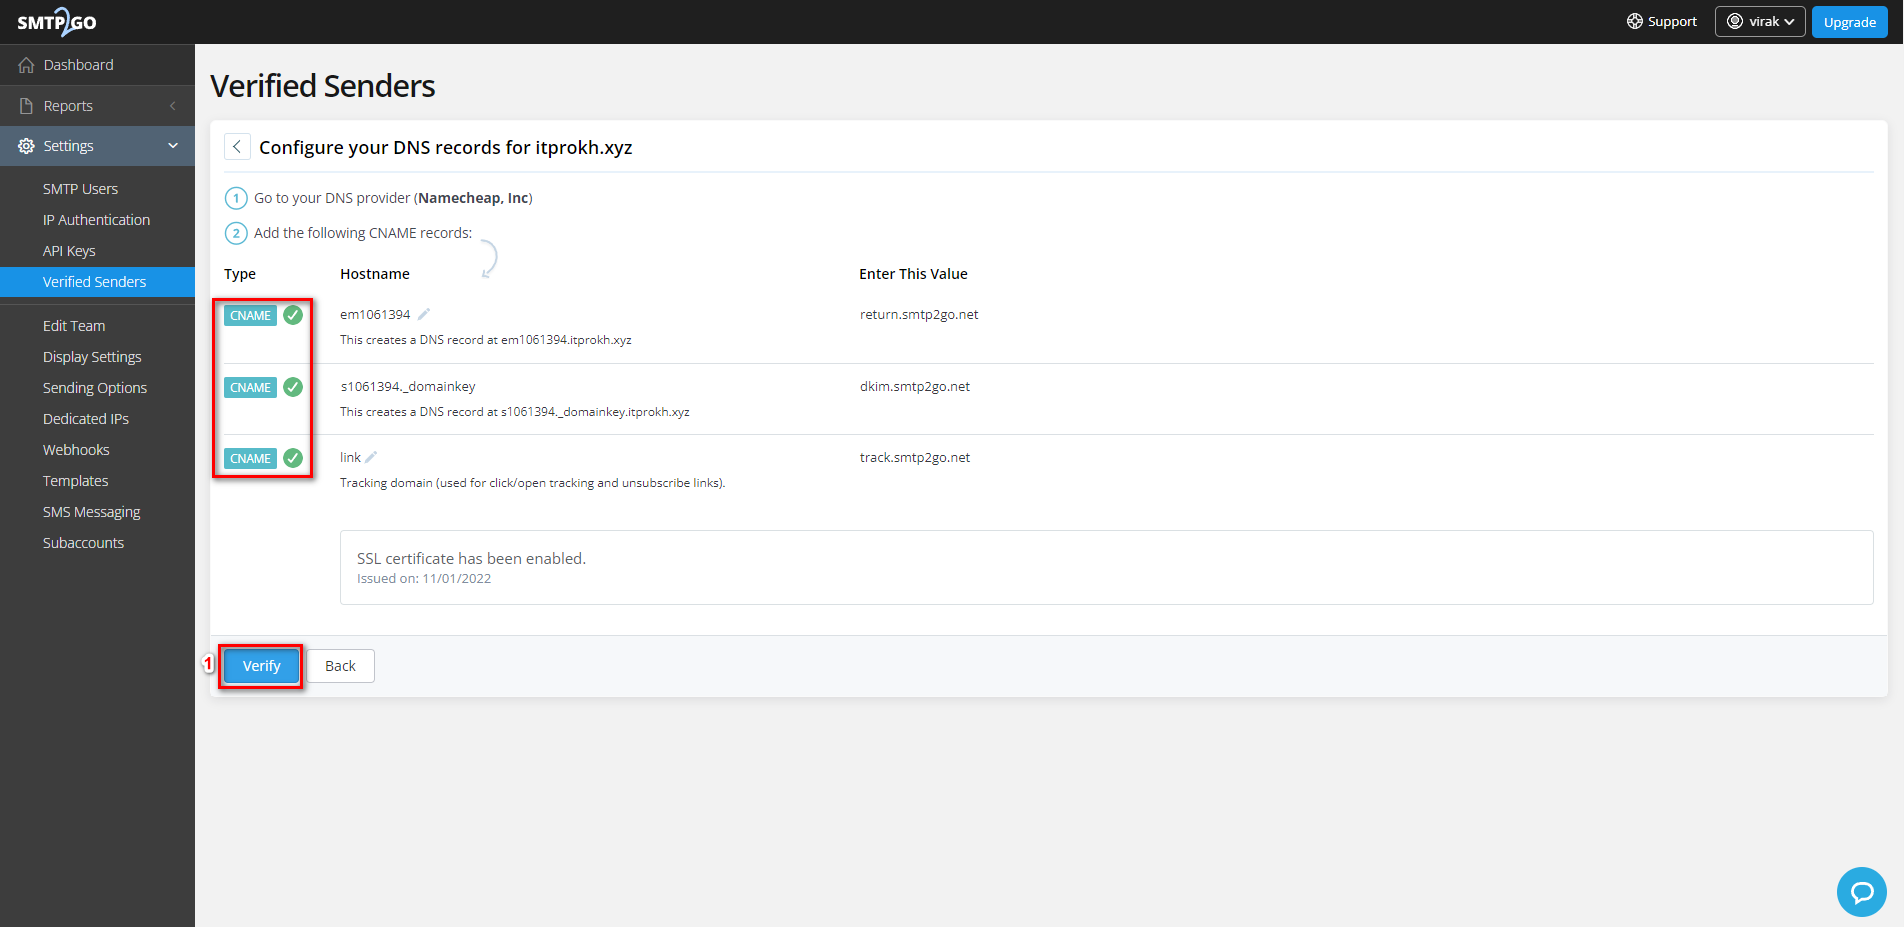
ជំហានទី 3: ត្រឡប់ទៅផ្ទៀងផ្ទាត់ឈ្មោះដែននៅលើ Smtp2go
- បន្ទាប់ពីអ្នកបានបញ្ចប់ការបន្ថែមរបស់អ្នក កំណត់ត្រា DNS please go back to step 1 and then click “Verify” you will see the green check which means your domain is verified
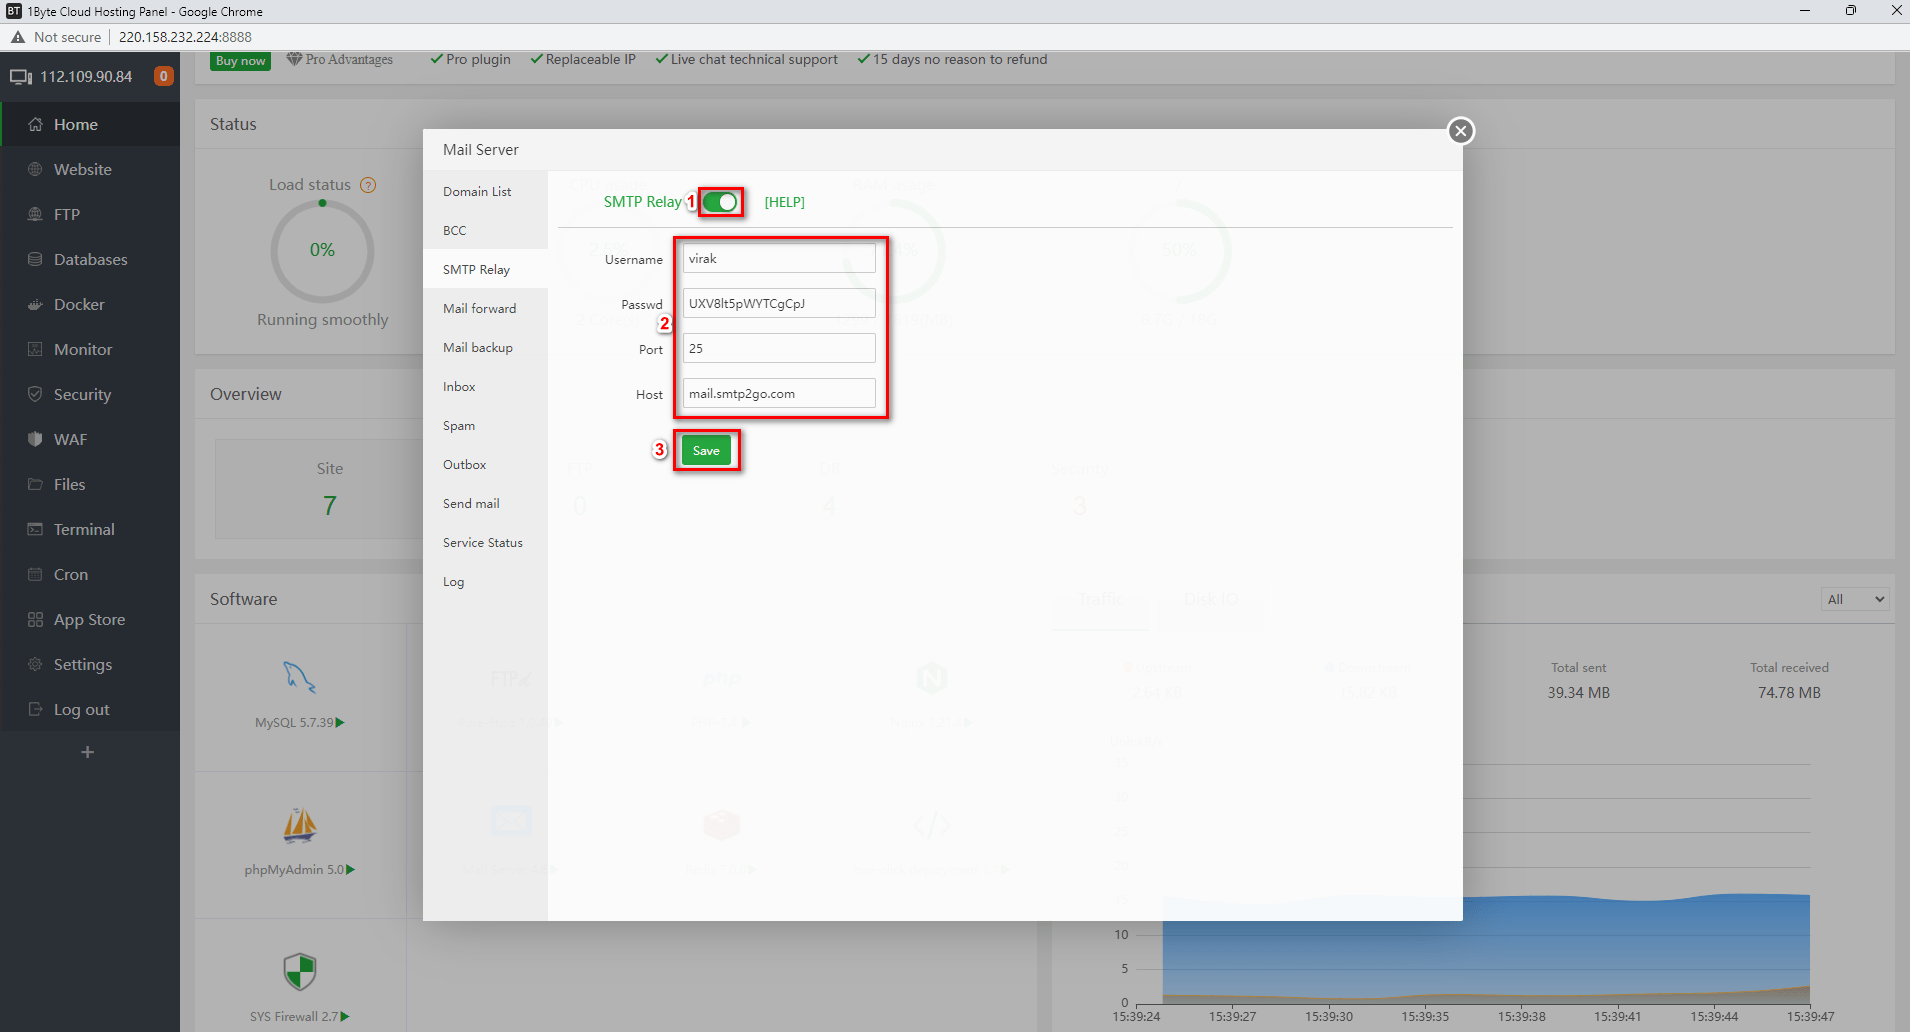
ជំហានទី 4: បន្ថែមអ្នកប្រើប្រាស់ Smtp ទៅ Aapanel
- ទៅកាន់ម៉ាស៊ីនមេរបស់អ្នកម្តងទៀត បន្ទាប់មកចុចលើ SMTP Relay ហើយបើកវាបន្ទាប់ពីបន្ថែមឈ្មោះអ្នកប្រើ SMTP ពាក្យសម្ងាត់ និងម៉ាស៊ីន SMTP សម្រាប់លេខច្រក សូមប្រើលេខ 25
ជំហានទី 5: ផ្ញើអ៊ីមែលសាកល្បង និងពិនិត្យមើលលទ្ធផល
- ក្នុងជំហាននេះ ខ្ញុំបានដំឡើងម៉ាស៊ីនបម្រើអ៊ីមែលរួចហើយ ប្រសិនបើអ្នកមិនទាន់មាន សូមយោងទៅលើចំណុចនេះ។ តំណភ្ជាប់នេះ
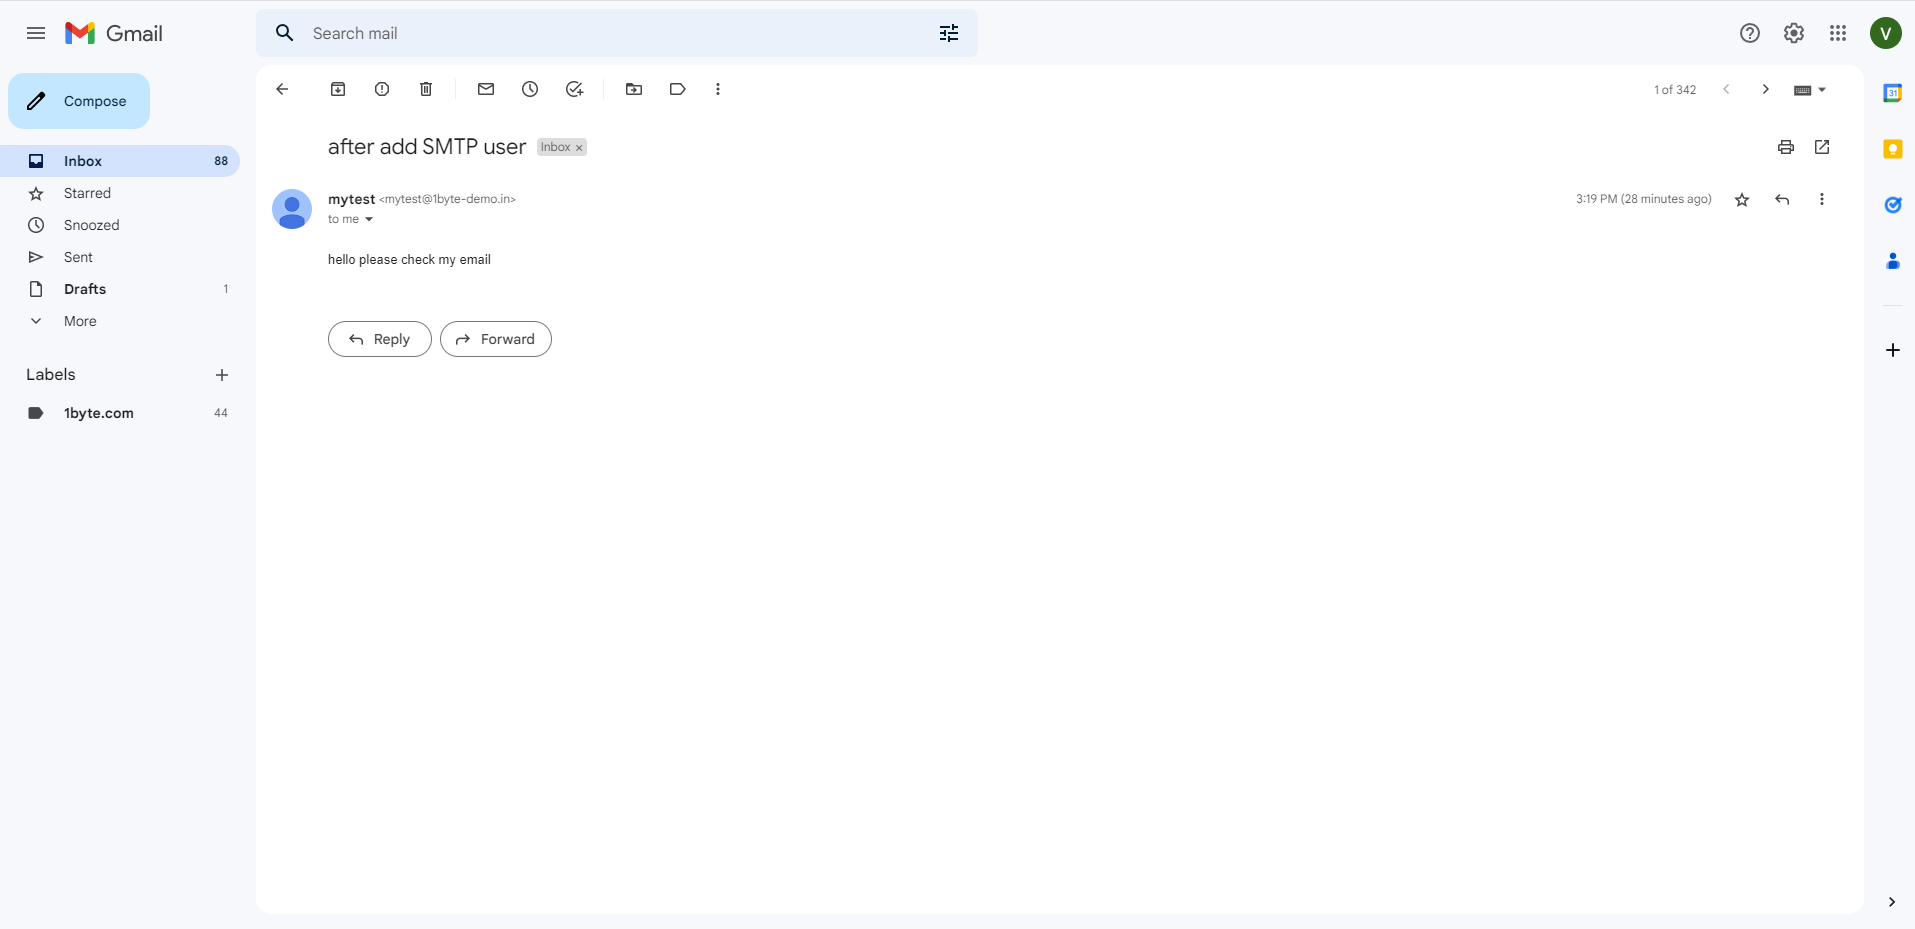
- អ្នកអាចព្យាយាមផ្ញើអ៊ីមែលរបស់អ្នកទៅកាន់ដែនអ៊ីមែលផ្សេងទៀតដូចជា Gmail ជាដើម។
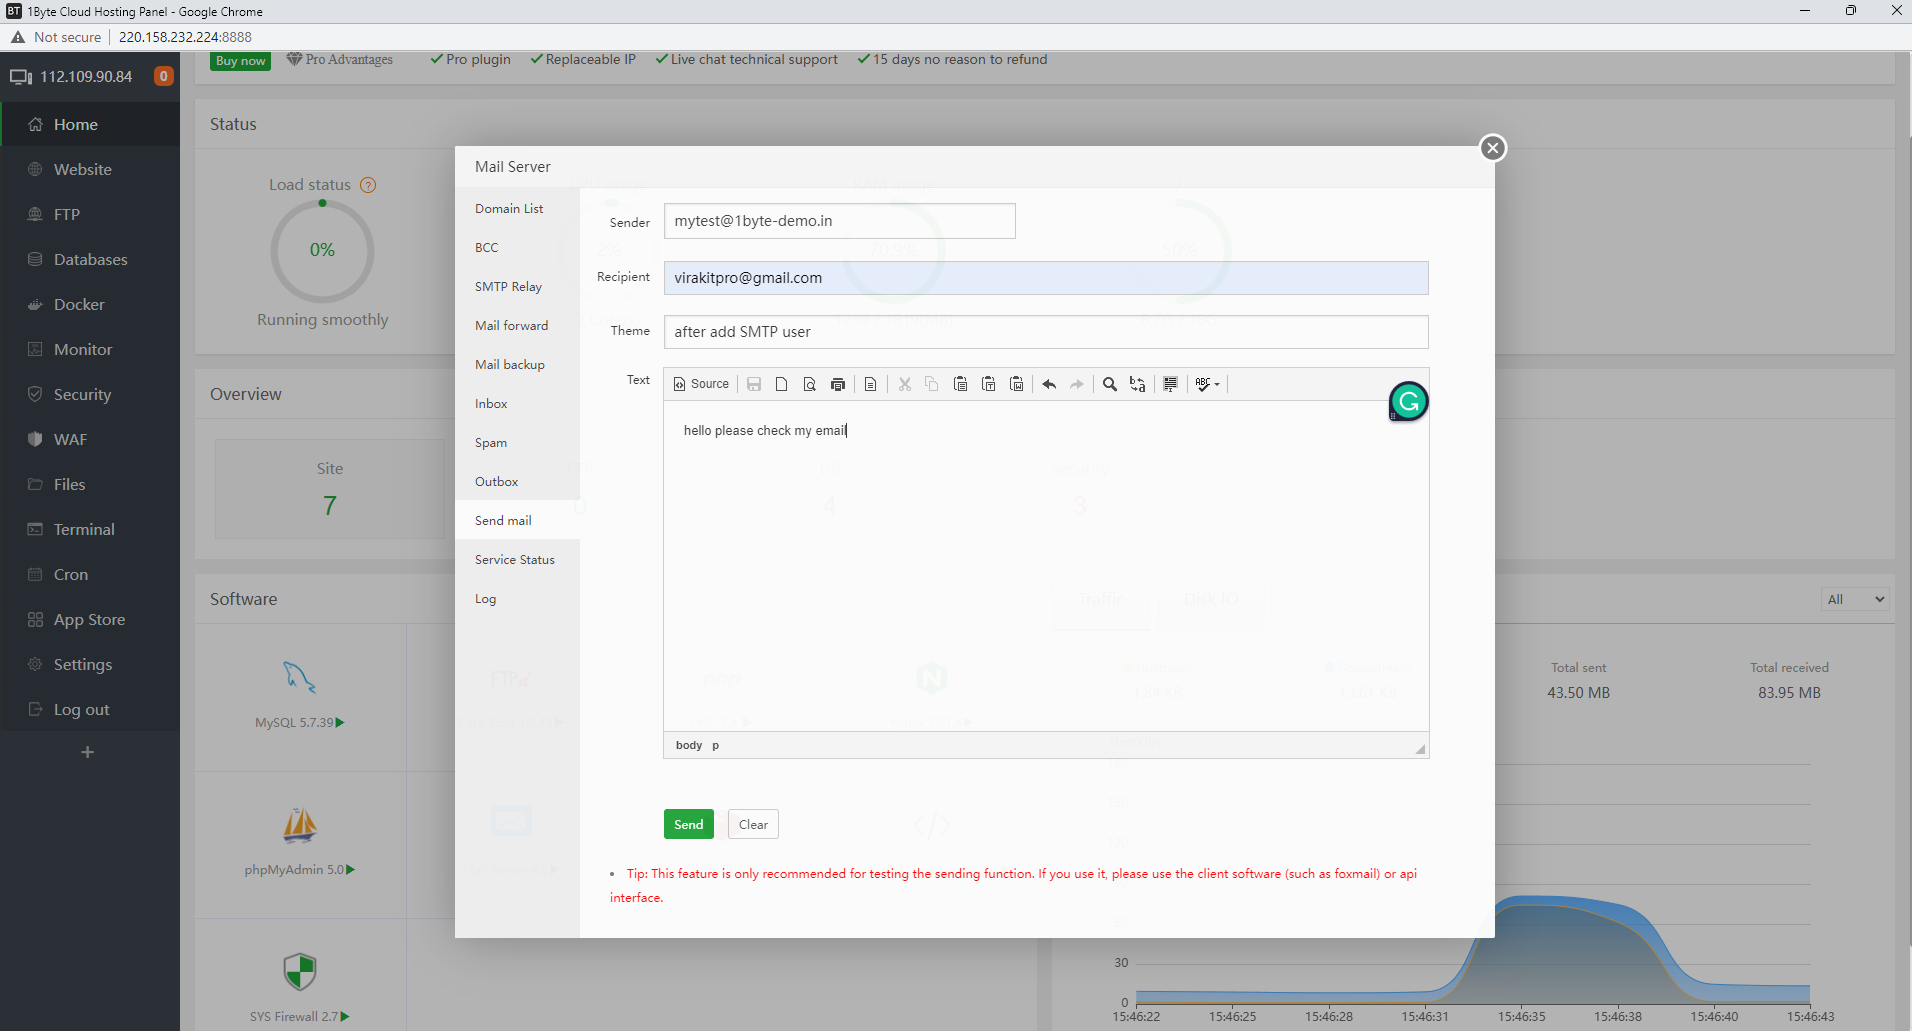
- សូមអបអរសាទរអ៊ីមែលរបស់អ្នកមិនចូលទៅកាន់ថតសារឥតបានការទៀតទេ